Nothing ruins a great ride faster than squeezing your brake lever and feeling no stopping power. Whether you just pulled your bicycle out of winter storage or noticed a concerning squeak during your last commute, keeping your stopping system in peak condition is vital for your safety.
Many new riders feel intimidated by bicycle maintenance and rush straight to the local repair shop. However, learning how to adjust caliper bike brakes is a highly rewarding skill that takes only a few simple tools and a bit of patience. You do not need a mechanical engineering degree to master this process. By understanding the basic mechanics of cable tension and pad alignment, you can transform a sluggish stopping mechanism into a crisp, responsive system. This guide will walk you through every necessary action to get your bicycle stopping smoothly and safely.
Why Proper Brake Adjustment Matters for Campers and Outdoors Enthusiasts
Heading out into the wilderness with your bicycle offers an incredible sense of freedom. Campers and outdoor beginners often rely on their bikes to navigate dirt paths, fetch supplies from the camp store, or explore scenic trails. When you carry extra gear like a heavy backpack, camping stove, or a loaded pannier rack, your bicycle carries significantly more momentum. That added weight requires maximum stopping power to keep you safe on unpredictable gravel paths or steep campground descents.
Knowing how to handle your own mechanical tweaks gives you tremendous peace of mind. You will never have to end an adventure early just because a brake cable stretched out or a pad rubbed against your tire. Mastering this basic maintenance task ensures you remain completely self-reliant in remote areas. You can confidently tackle steep hills and sudden obstacles, knowing your stopping system will respond perfectly the moment you squeeze the levers.
Tools and Materials You’ll Need
Before you start turning bolts, you need to gather the right equipment. Having everything within arm’s reach prevents frustration and keeps your focus on the mechanical task at hand. You probably already own most of these basic items in a standard home toolkit.
Here are the essentials you will need:
- A set of metric Allen wrenches (specifically 4mm and 5mm sizes)
- A clean microfiber cloth or rag to wipe away dirt and grime
- Isopropyl alcohol to clean your metal wheel rims
- A reliable work stand to hold the bicycle off the ground (this is an optional item for convenience, but it makes the job significantly easier)
- A small flashlight to clearly see the gap between the rubber pads and the metal rim
9 Step-by-Step Guide on How to Adjust Caliper Bike Brakes
Step 1 – Assess the Brake Pad Alignment
Start by placing your bicycle in a stable position, either in a work stand or leaning securely against a wall. Spin the wheel gently and watch closely where the rubber pads meet the metal rim. You want to listen for any scraping sounds that indicate uneven rubbing. Look at the vertical alignment of the rubber.
The pads should strike the flat braking track of the metal rim dead center. If the rubber sits too high, it will eventually rub against the rubber tire, causing a dangerous blowout. If it sits too low, it will slip off the rim entirely and fail to stop the bicycle. Take a mental note of which side is misaligned so you know exactly where to focus your attention during the adjustment process.
Step 2 – Clean the Wheel Rims and Rubber Pads
A surprising amount of stopping trouble comes from invisible layers of dirt, grease, and road oils. Take your clean microfiber cloth and apply a generous splash of isopropyl alcohol. Firmly rub the cloth around the entire metallic braking surface of the wheel rim. You will likely see thick black residue transferring onto your rag.
Next, wipe down the surface of the rubber brake pads. Cleaning these surfaces ensures you get true feedback while you figure out how to adjust caliper bike brakes properly. Without clean surfaces, you might overtighten the cables to compensate for slippery grease. You should feel the rubber grip the metal much more effectively once the built-up grime is completely gone.
Step 3 – Loosen the Cable Pinch Bolt
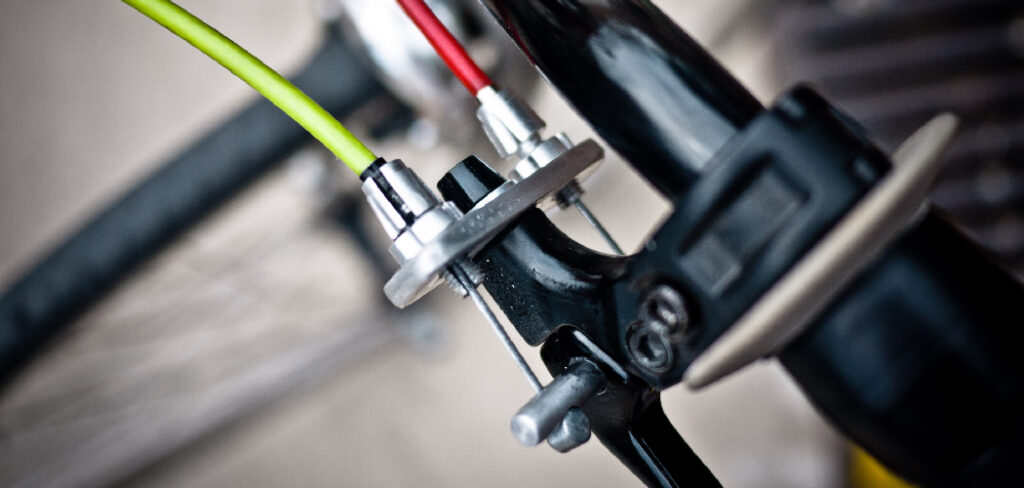
Locate the main cable anchor bolt on the side of the metal caliper arm. This bolt clamps down on the braided steel wire that runs up to your handlebars. Take your 5mm Allen wrench and turn it counterclockwise just enough to free the metal cable. You do not need to remove the bolt entirely.
Once loosened, the caliper arms will spring outward, completely away from the wheel rim. This releases all the tension in the system, giving you a fresh slate to work with. You will feel the steel cable slide loosely through the metal clamp. Let the wire hang freely for a moment while you prepare to reset the system tension from the ground up.
Step 4 – Reset the Barrel Adjuster
Follow the steel cable up to the point where it meets the brake lever on your handlebars. You will see a small, textured metal or plastic cylinder called the barrel adjuster. This tiny component handles micro-adjustments in cable tension. Turn the barrel adjuster completely clockwise until it sits flush against the lever housing. Once it stops moving, turn it counterclockwise exactly one full rotation. Setting the barrel adjuster to this near-bottom position gives you plenty of room to fine-tune the tension later on. You will feel a subtle click or resistance as you turn the textured cylinder. This proactive step saves you from having to undo the main anchor bolt if the wire stretches slightly over time.
Step 5 – Squeeze the Caliper Arms Together
Move back down to the wheel and grip both metal arms of the brake mechanism with one hand. Squeeze them firmly together until the rubber pads make solid contact with the metal rim. You want to press them tight enough that the wheel cannot move, but not so tight that you strain your fingers.
While holding the metal arms firmly against the rim, use your free hand to pull the steel cable taut. Pull the braided wire firmly downward, ensuring there is no slack hiding in the housing up by the handlebars. You should feel the wire pull straight and tight against the metal anchor plate. Maintain this firm grip on both the arms and the cable.
Step 6 – Tighten the Main Pinch Bolt
While holding the metal arms and the pulled cable in place, grab your 5mm Allen wrench again. Guide the braided steel wire under the metal washer of the pinch bolt. Turn the wrench clockwise to clamp the bolt down hard onto the wire. You need to apply significant force here, as this single bolt handles all the stopping pressure when you ride.
Once the bolt is secure, let go of the metal caliper arms. They will spring open slightly, creating a tiny gap between the rubber pads and the wheel rim. This natural spring action creates the baseline clearance you need for the wheel to spin freely without unwanted friction.
Step 7 – Fine-Tune the Pad Clearance
Now you must address the final spacing. Spin the wheel again and look closely at the gap between the rubber and the metal. The ideal distance is about two millimeters on each side. If the rubber sits too far away, your lever will pull all the way to the handlebar before stopping the bike. To fix this, twist the barrel adjuster by your handlebars counterclockwise to pull the cable tighter.
This is the crucial moment where understanding how to adjust caliper bike brakes pays off, as you dial in the perfect lever feel. Keep spinning the wheel and listening for quiet, frictionless movement. Watch the gap shrink or expand as you turn the textured cylinder, stopping when the spacing looks visually even.
Step 8 – Center the Brake Caliper
Sometimes the entire metal housing shifts to one side, causing one rubber pad to drag while the other hovers far away. Look at the top of the metal caliper assembly where it attaches to the bicycle frame. You will find a small centering screw, usually requiring a 4mm Allen wrench or a small Phillips screwdriver.
Turning this screw adjusts the spring tension on either side of the mechanism. Turn it clockwise in tiny, quarter-turn increments to pull the metal assembly away from the rubbing side. Squeeze the handlebar lever a few times after every tiny turn to let the spring settle. Watch closely as the mechanism visibly shifts into a perfectly balanced, central position over the spinning tire.
Step 9 – Perform a Rolling Brake Check
Your final action requires testing the system under real-world pressure. Take the bicycle down from the stand or move it away from the wall. Walk beside the bike and push it forward at a moderate walking pace. Squeeze the lever sharply. The bicycle should jerk to an immediate, solid halt, and the lever should stop moving when it is roughly parallel to your handlebar grips.
The lever should feel firm and springy, never mushy or loose. If the lever touches your fingers on the handlebar grip, you need to pull more cable through the pinch bolt. A crisp, responsive snap back to the resting position tells you the tension and alignment are perfectly locked in.
Common Mistakes When Fixing Your Stopping System
Many beginners accidentally twist the braided steel cable when tightening the main anchor bolt, which causes the wire to fray and eventually snap. You must guide the wire straight through the metal clamp groove and hold it flat while turning your wrench. Another frequent error involves ignoring the condition of the rubber brake pads themselves. You cannot fix bad braking by simply pulling the cable tighter if the rubber pads are completely worn down past their indicator lines. Pushing worn rubber against metal only damages your rims and provides terrible stopping power.
Beginners also frequently misalign the rubber pads, allowing them to hang slightly over the bottom edge of the metal rim. As the rubber wears down over time, this creates a dangerous lip that can suddenly lock the wheel while riding. Furthermore, some riders forget to reset the barrel adjuster before starting the whole process. If you leave the barrel adjuster twisted all the way out, you will have absolutely no room to make future micro-adjustments as the fresh steel cable naturally stretches during your first few rides. Taking the time to observe these details prevents frustrating mechanical failures down the road.
Expert Tips
Professional mechanics always seat the brake cable housing before making their final adjustments. After you pull the cable tight and lock the anchor bolt, squeeze the brake lever on the handlebars as hard as you possibly can five or six times. This aggressive pulling forces the steel cable to fully settle into all the metal caps and plastic housings along the frame. You will often notice the cable feels slightly looser after doing this. Simply loosen the pinch bolt, pull the slack out one more time, and retighten it.
Additionally, pay attention to the angle of the brake pad. Experts often angle the front edge of the rubber pad so it touches the rim just a millimeter before the back edge. This tiny angle prevents the high-pitched squealing noise that plagues many bicycles.
Frequently Asked Questions
Why do my bicycle brakes squeak loudly when I stop?
Squeaking usually happens because dirt, oil, or grease has contaminated the rubber pads or the metallic wheel rim. It can also occur when the rubber pad strikes the rim completely flat. Cleaning both surfaces with isopropyl alcohol often eliminates the noise entirely. If cleaning fails, tweaking the pad angle slightly forward usually stops the vibration causing the sound.
How often should I replace my rubber brake pads?
You should replace the rubber components whenever you can no longer see the small grooves cut into the pad surface. These grooves act as wear indicators and channel water away during rain. If the rubber feels hardened, brittle, or looks shiny and glazed over, you need new pads immediately regardless of the remaining thickness.
What should I do if my brake lever touches the handlebar?
When your lever pulls completely flat against the handlebar grip, your steel tension cable has stretched out entirely. You must turn the barrel adjuster counterclockwise to increase the tension. If the barrel adjuster is already turned all the way out, you must loosen the main anchor bolt and pull more steel wire manually.
Can I use regular household grease to lubricate my brake cables?
You should never use heavy household grease on internal braided wires. Thick grease attracts dust, sand, and dirt, which quickly turns into a gritty paste that ruins cable movement. Instead, apply a very light bicycle-specific Teflon lubricant, or use a dry silicone spray to keep the steel wires sliding smoothly inside their plastic housing.
Why does only one side of my caliper move when I pull the lever?
This happens when the internal spring tension becomes severely unbalanced, pulling the entire metal assembly to one side. You can fix this by turning the small centering screw located on the top or side of the metal arms. Adjusting this screw balances the spring pressure and forces both arms to move simultaneously.
Conclusion
Taking charge of your bicycle maintenance empowers you to ride further, safer, and with complete confidence. You no longer have to tolerate sluggish stopping power, loud squealing noises, or levers that feel dangerously mushy. The process simply requires cleaning your components, managing the steel cable tension, and ensuring the rubber pads strike the metal rim squarely. Every time you turn a barrel adjuster or align a pad, you build a deeper understanding of how your machine actually works.
Now that you understand exactly how to adjust caliper bike brakes, you can tackle this crucial maintenance task in your own garage in just a few minutes. You are fully equipped to prepare your bicycle for anything from a neighborhood commute to a rugged weekend camping trip. Grab your Allen wrenches, put your bicycle in a stable spot, and give your stopping system the quick tune-up it deserves. Your hands will feel the difference on the very next ride.

About Caleb
Caleb Merritt is a Virginia-based outdoor writer and gear analyst who has spent over a decade sleeping on the ground, crossing mountain passes, and obsessively shaving grams off his pack weight. He holds a Bachelor of Science in Environmental Science from James Madison University, where he also served as president of the university’s outdoor recreation club. After graduating, he spent three years as a wilderness educator with a backcountry youth program in the Shenandoah Valley — teaching Leave No Trace ethics, backcountry navigation, and campcraft — before moving into full-time writing in 2018.
His work focuses on one core belief: the best gear is the gear you understand. Whether he’s doing a side-by-side weight comparison of ultralight shelters or writing a beginner’s guide to building a sub-20-lb base weight kit, Caleb writes with the same directness you’d expect from a trusted trail partner. He has logged more than 4,000 miles across iconic routes including the John Muir Trail, the Wind River Range, Vermont’s Long Trail, and the Collegiate Peaks Loop in Colorado.
Areas of Expertise
- Ultralight backpacking systems and base weight optimization
- Tent, tarp, and shelter testing across three-season and shoulder-season conditions
- Sleeping bag and quilt temperature rating verification
- Backpacking nutrition, meal planning, and calorie-per-ounce analysis
- Leave No Trace principles and wilderness ethics
- Campfire safety, bear country protocols, and water treatment methods
- Gear care, repair, and long-term durability assessment
Education
James Madison University — B.S. in Environmental Science, 2015
During his time at JMU, Caleb served as President of the Outdoor Recreation Club, where he planned and led more than 30 backcountry trips annually across the Blue Ridge Mountains and Appalachian Trail corridor. The role sharpened his ability to assess gear performance under real conditions, manage group safety in remote environments, and develop the kind of practical trail knowledge that no classroom can teach.
Professional Experience
Gear Writer & Senior Contributor — [campeox.com]
Produces in-depth gear reviews, buyer’s guides, and how-to content across backpacking, camping, and ultralight hiking categories. Tests all gear in real field conditions before publishing recommendations.
Wilderness Educator & Trip Leader — Shenandoah Backcountry Youth Program — 2015–2018 Led multi-day backcountry expeditions for teens and young adults throughout Shenandoah National Park and George Washington National Forest. Taught LNT principles, orienteering, first aid awareness, and campcraft fundamentals.
Outdoor Recreation Club President — James Madison University — 2013–2015 Organized and led university-sponsored hiking, backpacking, and camping trips in the Blue Ridge Mountains and Appalachian Trail corridor. Managed club budget, safety protocols, and trip logistics for a membership of 120+ students.
Editorial Standards
Every piece of gear Caleb recommends has been personally tested in the field — not just unboxed and described. His review process includes a minimum of two overnight trips per shelter, a full-season evaluation for sleep systems, and side-by-side comparisons wherever possible. He does not accept payment for positive reviews. Affiliate relationships, where they exist, are always disclosed in accordance with FTC guidelines.
All factual claims about gear specifications, trail distances, and safety recommendations are cross-referenced against manufacturer data sheets and established sources such as the Leave No Trace Center for Outdoor Ethics and the American Hiking Society before publication.