Feeling a spongy response when you squeeze your brake levers usually means your bike needs some maintenance. Riding with worn stopping components compromises your safety and diminishes your control on steep descents. Fortunately, maintaining your braking system does not require a trip to the local bike shop or an expensive mechanic bill. You can master this essential maintenance task right in your own garage with a few basic hand tools.
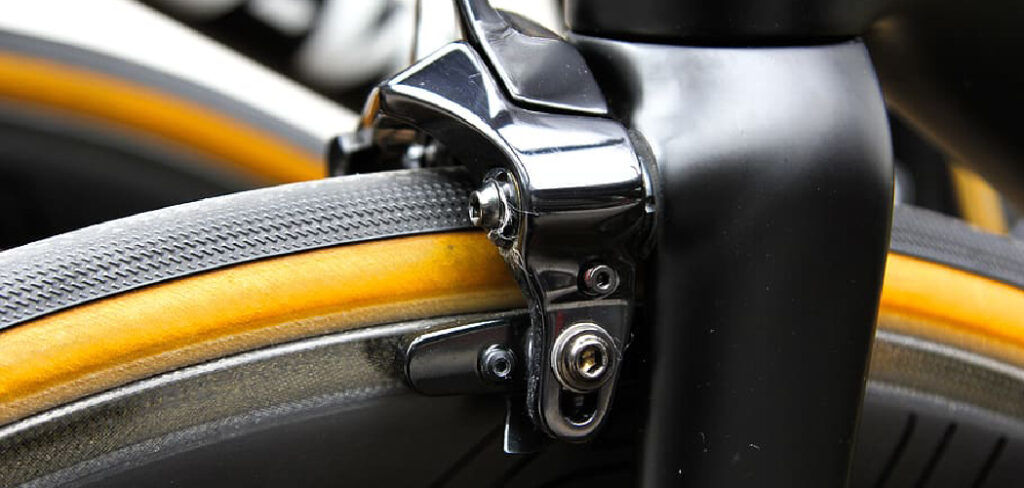
Understanding how to change bicycle brake pads empowers you to keep your rig running smoothly and safely. We designed this comprehensive resource to walk you through the entire replacement process from start to finish. This guide will provide clear instructions and practical advice to help you tackle your first brake service with absolute confidence.
Why Learning to Replace Brake Pads Matters
Outdoor enthusiasts and campers frequently rely on bicycles to navigate expansive trails and remote terrain. Operating a bike heavily loaded with camping gear puts immense friction and thermal stress on your braking system. When you carry extra weight down unpredictable gravel paths, you need maximum stopping power to avoid hazards. Ignoring worn friction material often leads to severe rotor damage, turning a simple fix into a costly repair.
Mastering this basic mechanical skill gives you peace of mind during long backcountry excursions. You never want to find yourself miles away from civilization with failing stoppers. Learning this procedure ensures you remain self-sufficient and capable of handling minor repairs at your campsite. Taking control of your bike maintenance ultimately guarantees a safer, more enjoyable outdoor adventure.
Tools and Materials You’ll Need
Before dismantling your calipers, you must gather the correct equipment for the job. Having the right gear organized on your workbench prevents frustration and keeps the process moving smoothly. You only need a handful of items to complete this project successfully.
- New replacement pads compatible with your specific caliper model
- A clean set of metric Allen wrenches (hex keys)
- Needle-nose pliers for removing retaining cotter pins
- Isopropyl alcohol for cleaning surfaces
- Clean, lint-free shop rags or microfiber cloths
- A flathead screwdriver or dedicated piston press tool
- A pair of disposable nitrile gloves (optional, but highly recommended for keeping skin oils off the new friction surfaces)
Gathering these supplies beforehand ensures you can focus entirely on the mechanical task without constantly searching for missing equipment.
8 Step-by-Step Guide on How to Change Bicycle Brake Pads
Step 1 – Remove the Wheel
Begin the process of learning how to change bicycle brake pads by securing your bike in a sturdy repair stand. Elevating the frame keeps the bike stable and brings the calipers right to your eye level. If you do not own a repair stand, flip the bicycle upside down and rest it carefully on the handlebars and saddle.
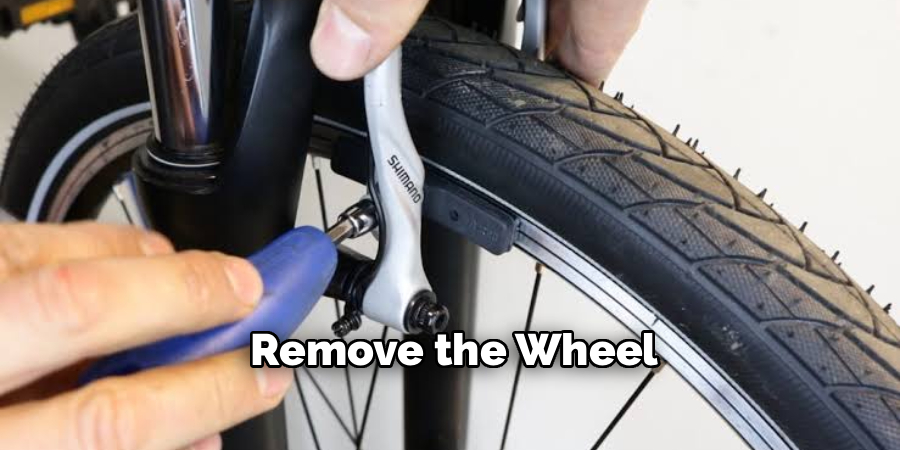
Release the quick-release skewer or unthread the thru-axle to free the wheel from the frame dropouts. Carefully slide the wheel downward and out of the fork or rear triangle. Place the wheel safely aside where the delicate rotor will not get bent or contaminated. Giving yourself a clear, unobstructed view of the caliper housing makes the entire extraction process significantly easier.
Step 2 – Remove the Retaining Pin
Locate the small security pin or bolt holding the old pads inside the caliper body. Most modern disc systems use either a threaded hex bolt or a split cotter pin to secure these components. If your system uses a threaded pin, insert the correct metric Allen wrench and turn it counterclockwise.
If you see a metal cotter pin, grab your needle-nose pliers and bend the straight end until it aligns with the hole. Pull the pin straight out of the caliper housing and set it in a safe spot. Losing this tiny retaining clip happens often, so placing it in a magnetic parts tray prevents unnecessary headaches later. You now have the clearance required to extract the worn friction components.
Step 3 – Extract the Worn Components
Pinch the exposed tabs of the old brake pads firmly between your thumb and index finger. Pull them straight out through the top opening of the caliper housing. The two pads and their central metal tension spring should slide out together as a single unit.
Sometimes road grime and brake dust create slight resistance, so pulling with a gentle wiggling motion helps dislodge them. Take a moment to inspect the remaining friction material on the extracted plates. If the material measures thinner than a dime, you definitely made the right choice to replace them today. Keep the old set nearby temporarily so you can compare their shape to your fresh replacements, ensuring you purchased the exact matching profile.
Step 4 – Clean the Caliper Housing
Brake dust and environmental debris accumulate heavily inside the caliper body over months of riding. You must clean this cavity thoroughly before installing fresh components to guarantee optimal performance. Dampen a clean, lint-free shop rag with a generous splash of isopropyl alcohol.
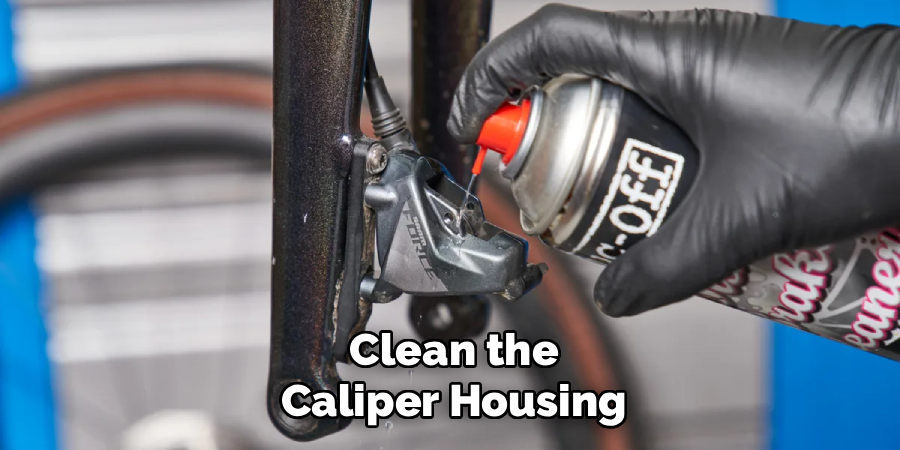
Thread the moistened rag through the empty caliper slot, flossing it back and forth to wipe away the dark, powdery residue. Avoid using harsh chemical degreasers or automotive brake cleaners, as these liquids can degrade the delicate rubber seals surrounding the pistons. A spotless internal environment prevents terrible squealing noises and ensures the new moving parts slide freely. Take your time wiping down the interior walls until the rag comes out completely clean.
Step 5 – Push the Pistons Back
As your old pads wore down, the hydraulic pistons slowly advanced outward to compensate for the lost material. You must press these pistons back into their bores to create enough physical space for the thicker new pads. Take your flathead screwdriver or dedicated piston press and gently pry the ceramic or steel pistons inward.
Work carefully and apply even pressure to avoid cracking the fragile piston edges. You want them completely flush with the interior caliper wall. If you accidentally spill a drop of hydraulic fluid during this step, wipe it away immediately with rubbing alcohol. Achieving a fully retracted position guarantees the fresh friction material will not rub aggressively against your rotor once you reinstall the wheel.
Step 6 – Prepare and Insert the New Pads
Put on your disposable nitrile gloves before handling the new replacement pieces. The natural oils present on human skin easily contaminate porous friction material, which ruins stopping power and causes loud squealing. Sandwich the fresh metal tension spring cleanly between the two new pad plates.
Pinch the entire assembly tightly together so the spring locks into place. Slide the assembled unit straight down into the top slot of the caliper housing. You should feel a distinct physical click when the holes align properly with the retaining pin slot. Visually inspect the alignment by shining a flashlight through the side of the caliper. The central gap must remain completely clear to accommodate the metal rotor.
Step 7 – Reinstall the Retaining Pin
Slide the retaining bolt or cotter pin back through the caliper housing, passing it directly through the holes of both pads and the tension spring. If you are using a threaded hex bolt, tighten it down snugly with your Allen wrench, but do not overtighten it. If your system relies on a split cotter pin, push it completely through the assembly.
Use your needle-nose pliers to bend the longer prong outward, effectively locking the pin in place so it cannot vibrate loose on rough trails. Double-check your handiwork to verify the entire assembly feels secure and seated correctly. This tiny fastener plays a massive role in your safety, so taking five extra seconds to verify its stability is crucial.
Step 8 – Mount the Wheel and Bed the Brakes
Carefully guide your wheel back into the frame, ensuring the metal rotor slides smoothly between the fresh pads. Tighten your thru-axle or quick-release skewer securely. You have successfully finished the main mechanical steps of how to change bicycle brake pads, but you must complete the bedding process.
Ride your bike on a flat, safe surface and pedal up to a moderate jogging speed. Squeeze the levers firmly to slow down to a walking pace, but do not come to a complete stop. Repeat this rolling deceleration process ten to fifteen times. This deliberate friction transfers a microscopic layer of pad material onto the rotor. Proper bedding guarantees maximum stopping power and prevents annoying vibrations on your future rides.
Common Mistakes When Changing Brake Pads
First-time mechanics often ruin their new friction material by touching the porous surface with bare hands. Natural skin oils, residual chain lube, and greasy fingerprints permanently contaminate the compound. You must hold the replacements exclusively by their metal backing plates to avoid destroying their stopping capabilities. Another frequent error involves failing to push the hydraulic pistons far enough back into the caliper body before inserting the new components. When you skip this crucial retraction phase, the thicker new material sits too close together, causing severe rubbing against the rotor and making the wheel impossible to turn.
Riders also frequently neglect to clean the inside of the caliper housing, leaving a thick layer of abrasive brake dust. This gritty residue eventually works its way onto the fresh surfaces, creating terrible squealing noises and accelerating premature wear. Many beginners also completely skip the bedding-in process after finishing the mechanical installation. Hitting a steep downhill trail immediately with fresh pads results in glazed, hard surfaces that offer terrible stopping power. Taking the time to perform controlled, rolling stops correctly seasons the rotor and ensures the system operates at its absolute highest potential.
Expert Tips
Always inspect your metal rotors for deep gouges or heat discoloration whenever you swap out your friction components. A heavily worn or warped rotor will rapidly destroy your fresh pads and diminish your overall braking performance. Mechanics recommend replacing the rotor entirely if the metal thickness falls below the manufacturer’s minimum specification, which is usually stamped directly on the steel arm.
Keep a dedicated bottle of isopropyl alcohol and fresh shop rags exclusively for your braking system. Never use the same rag you wiped your greasy chain with to clean your calipers. Cross-contamination remains the absolute biggest enemy of optimal stopping power. Finally, track your mileage and routinely inspect your calipers with a flashlight every few months. Catching excessive wear early prevents the metal backing plates from grinding directly into your expensive rotors.
Frequently Asked Questions
How often should I replace my bicycle brake pads?
You should generally replace these components every five hundred to one thousand miles, depending on your riding style and terrain. Aggressive mountain bikers riding in wet, muddy conditions wear through friction material significantly faster than casual road cyclists. Inspect the material thickness regularly and swap them out once less than a millimeter remains.
Can I use automotive brake cleaner on my bike?
You should absolutely avoid using automotive brake cleaners on your bicycle calipers. These industrial chemicals contain harsh solvents designed for car parts and will quickly destroy the delicate rubber seals inside your hydraulic system. Always stick to high-quality isopropyl alcohol, which cleans effectively without melting the specialized synthetic gaskets.
Why do my new brakes squeal so loudly?
Loud squealing almost always indicates chemical contamination on the friction surface or a completely unbedded rotor. If you accidentally touched the material with oily fingers, the porous surface absorbed that grease. Squealing also occurs if you skipped the critical bedding process, preventing the necessary material transfer between the pad and the steel rotor.
Do I need to bleed my hydraulic lines when swapping pads?
Replacing the friction material does not require you to bleed the hydraulic fluid lines. Pushing the pistons back into the housing simply displaces the existing fluid upward into the master cylinder reservoir. You only need to bleed the system if the brake levers feel excessively spongy or if they pull all the way to the handlebars.
What is the difference between resin and metallic compounds?
Resin compounds offer quieter operation and an excellent initial bite, making them perfect for casual riding and dry conditions. Metallic compounds handle extreme heat much better and last significantly longer in wet, gritty environments. You must ensure your specific metal rotor is compatible with metallic compounds before installing them on your rig.
Conclusion
Taking charge of your own bike maintenance saves you substantial money and builds incredible mechanical confidence. You no longer have to endure weeks of waiting for your local repair shop to finish a simple fifteen-minute task. By gathering the right tools, maintaining a clean workspace, and methodically following each instruction, you ensure your stopping system functions flawlessly.
Remembering to properly clean the calipers and patiently bed the new material guarantees a quiet, powerful ride on your next outdoor adventure. Knowing exactly how to change bicycle brake pads transforms a daunting mechanical chore into a quick, rewarding weekend project. Do not let the fear of hydraulic systems or tiny retaining pins stop you from optimizing your rig. Grab your metric hex wrenches, put your bike in the stand, and give your braking system the precise care it deserves. With fresh stopping power at your fingertips, you can confidently tackle steeper descents and push your riding limits safely.

About Caleb
Caleb Merritt is a Virginia-based outdoor writer and gear analyst who has spent over a decade sleeping on the ground, crossing mountain passes, and obsessively shaving grams off his pack weight. He holds a Bachelor of Science in Environmental Science from James Madison University, where he also served as president of the university’s outdoor recreation club. After graduating, he spent three years as a wilderness educator with a backcountry youth program in the Shenandoah Valley — teaching Leave No Trace ethics, backcountry navigation, and campcraft — before moving into full-time writing in 2018.
His work focuses on one core belief: the best gear is the gear you understand. Whether he’s doing a side-by-side weight comparison of ultralight shelters or writing a beginner’s guide to building a sub-20-lb base weight kit, Caleb writes with the same directness you’d expect from a trusted trail partner. He has logged more than 4,000 miles across iconic routes including the John Muir Trail, the Wind River Range, Vermont’s Long Trail, and the Collegiate Peaks Loop in Colorado.
Areas of Expertise
- Ultralight backpacking systems and base weight optimization
- Tent, tarp, and shelter testing across three-season and shoulder-season conditions
- Sleeping bag and quilt temperature rating verification
- Backpacking nutrition, meal planning, and calorie-per-ounce analysis
- Leave No Trace principles and wilderness ethics
- Campfire safety, bear country protocols, and water treatment methods
- Gear care, repair, and long-term durability assessment
Education
James Madison University — B.S. in Environmental Science, 2015
During his time at JMU, Caleb served as President of the Outdoor Recreation Club, where he planned and led more than 30 backcountry trips annually across the Blue Ridge Mountains and Appalachian Trail corridor. The role sharpened his ability to assess gear performance under real conditions, manage group safety in remote environments, and develop the kind of practical trail knowledge that no classroom can teach.
Professional Experience
Gear Writer & Senior Contributor — [campeox.com]
Produces in-depth gear reviews, buyer’s guides, and how-to content across backpacking, camping, and ultralight hiking categories. Tests all gear in real field conditions before publishing recommendations.
Wilderness Educator & Trip Leader — Shenandoah Backcountry Youth Program — 2015–2018 Led multi-day backcountry expeditions for teens and young adults throughout Shenandoah National Park and George Washington National Forest. Taught LNT principles, orienteering, first aid awareness, and campcraft fundamentals.
Outdoor Recreation Club President — James Madison University — 2013–2015 Organized and led university-sponsored hiking, backpacking, and camping trips in the Blue Ridge Mountains and Appalachian Trail corridor. Managed club budget, safety protocols, and trip logistics for a membership of 120+ students.
Editorial Standards
Every piece of gear Caleb recommends has been personally tested in the field — not just unboxed and described. His review process includes a minimum of two overnight trips per shelter, a full-season evaluation for sleep systems, and side-by-side comparisons wherever possible. He does not accept payment for positive reviews. Affiliate relationships, where they exist, are always disclosed in accordance with FTC guidelines.
All factual claims about gear specifications, trail distances, and safety recommendations are cross-referenced against manufacturer data sheets and established sources such as the Leave No Trace Center for Outdoor Ethics and the American Hiking Society before publication.