Sore, wobbly knees can turn a beautiful trail into a slog. If you’ve ever felt that nagging ache on a long descent, you already know how much your knees carry you through a hike. Learning how to wrap a knee for hiking gives you a simple, affordable way to add support, boost stability, and keep small aches from becoming big problems.
The good news? You don’t need medical training or fancy gear. With a little practice and the right technique, you can wrap your own knee in a few minutes flat. This guide walks you through everything, step by step, so you can hit the trail feeling steady, confident, and ready for the miles ahead.
Why Learning to Support Your Knee Matters for Hikers
Your knees take a beating on the trail. Every step downhill sends force through the joint, and rough, uneven ground only adds to the strain. For campers and outdoor beginners, that pressure can lead to swelling, soreness, or worse if you’re not careful.
A good compression wrap does a few helpful things. It adds gentle joint support, improves blood flow, and reminds you to move with better form. That extra stability can make a real difference on steep climbs and long descents.
Wrapping your knee also builds confidence. When you trust your body, you relax, move smoothly, and enjoy the scenery instead of worrying about every step. It’s a small skill that pays off on every adventure you take.
Tools and Materials You’ll Need
Gathering the right supplies takes just a minute. Most of these items are cheap, lightweight, and easy to pack in your daypack.
- Elastic compression bandage (an ACE-style wrap, 3 to 4 inches wide)
- Metal clips or wrap fasteners to secure the end
- Athletic tape for added hold on tricky spots
- Kinesiology tape if you prefer a flexible, breathable option
- Scissors to trim tape cleanly
- A clean cloth or towel to wipe sweat and dirt off your skin first
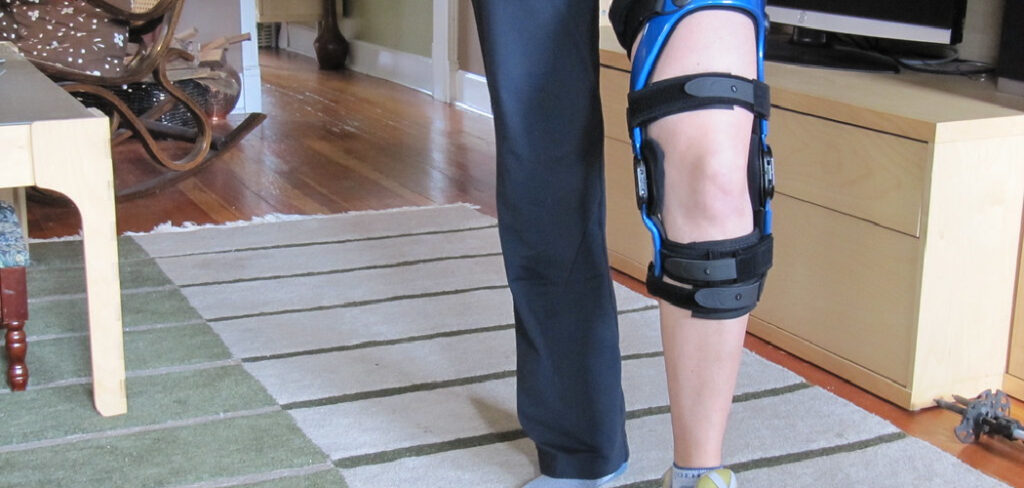
- Knee sleeve or knee brace (optional) for extra support on demanding hikes
Keep these packed together in a small pouch so you’re never caught off guard mid-trail. A tidy kit means faster fixes and less fumbling when your knee needs help.
7 Step-by-Step Guide on How to Wrap a Knee for Hiking
Follow these steps in order, and take your time the first few tries. Learning how to wrap a knee for hiking becomes second nature once you’ve done it a couple of times.
Step 1 – Clean and Prepare the Area
Start with a clean, dry knee. Wipe away sweat, dust, and trail grime with your cloth so the bandage grips properly and stays put.
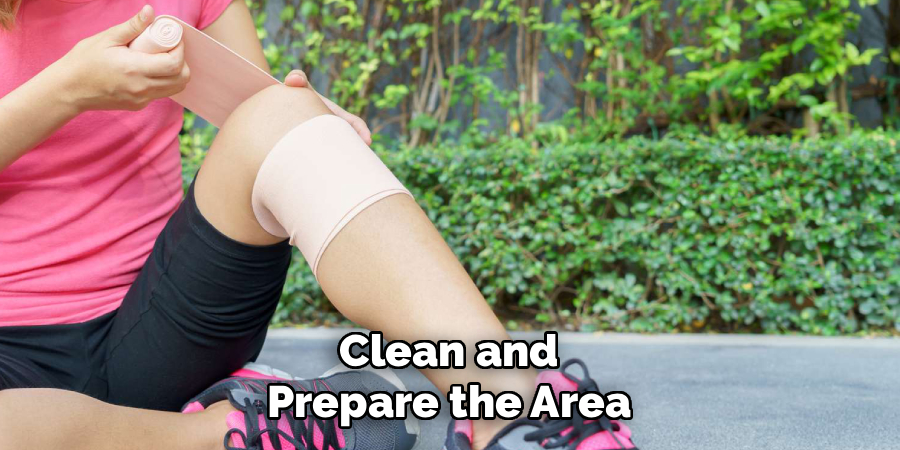
Sit down on a rock, log, or your pack, and stretch your leg out in front of you. Keep the knee slightly bent, around a 15-degree angle. This relaxed position matches how your leg moves while walking, so the wrap won’t feel too tight when you stand.
Check your skin for cuts or blisters before you begin. Covering an open wound with a tight bandage can trap bacteria and slow healing. A clean start makes every following step easier and far more comfortable.
Step 2 – Anchor the Bandage Below the Knee
Grab your elastic compression bandage and place the loose end just below your kneecap, on the top of your shin. Hold it in place with one hand.
Wrap around your leg once, keeping the tension firm but not painful. You should feel snug support, not throbbing pressure. If your toes tingle or go numb, you’ve pulled too tight.
This first loop acts as your anchor. A solid base here keeps the whole wrap from sliding down as you hike. Press the bandage flat against your skin, smoothing out any wrinkles, so it sits evenly before you move upward toward the joint.
Step 3 – Begin the Figure-Eight Pattern
Now comes the technique that gives you the best knee support: the figure-eight. Bring the bandage diagonally up and across the front of your knee, crossing just above the kneecap.
Loop it around the back of your thigh, then bring it down and across again, forming an X over the front of the joint. This crisscross pattern cradles your kneecap and holds it steady from multiple angles.
Keep each pass smooth and even. The figure-eight spreads pressure around the whole joint instead of squeezing one spot. As you work, the wrap should start to feel like a supportive hug around your knee, firm and reassuring with every turn.
Step 4 – Build Overlapping Layers
Continue the figure-eight, overlapping each new pass about halfway over the last one. This overlap creates a firm, even layer of compression that won’t gap or bunch up as you move.
Work your way slowly, keeping steady tension throughout. Two or three full figure-eights usually give plenty of trail hiking support without feeling bulky under your pants.
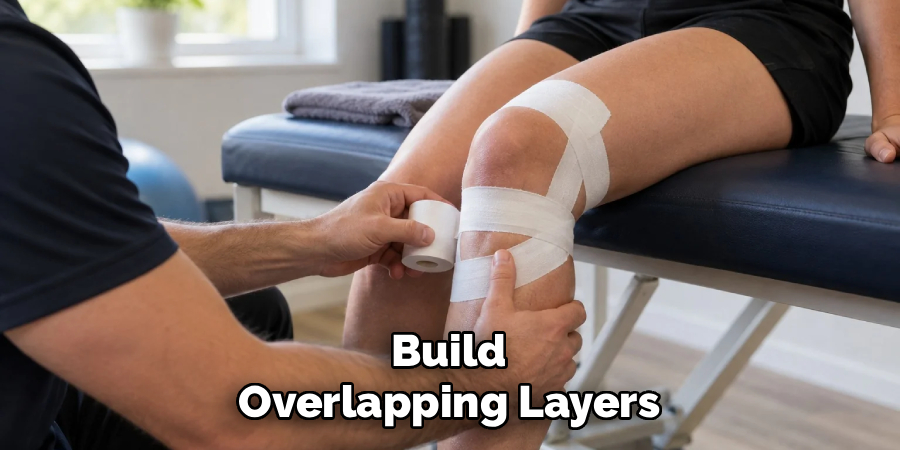
Pay attention to how your knee feels as the layers build. It should feel stable and cushioned, never squeezed or cut off. Practicing how to wrap a knee for hiking teaches you to read this balance quickly, so you get reliable support without restricting your natural stride on the trail.
Step 5 – Cover the Kneecap Gently
As you layer, make sure the bandage lightly covers your kneecap without pressing directly on top of it. A little breathing room here keeps the joint mobile while still guarding it.
Some hikers leave a small window over the kneecap for comfort. Do what feels best for your knee, and adjust as you go.
The goal is protection with freedom of movement. Your leg needs to bend naturally with each step, so avoid wrapping the front so tightly that your stride shortens. A gentle covering shields the sensitive area while letting you climb, descend, and scramble over roots without stiffness slowing you down.
Step 6 – Secure the End Firmly
Once you’ve built your layers, finish with a straight wrap around the top of your knee to lock everything in place. Tuck the loose end under a previous layer, or fasten it with metal clips or fasteners.
For extra hold, add a strip of athletic tape over the end. This stops the bandage from unrolling when you’re deep into a rugged climb.
Give the whole wrap a quick tug test. It should stay firmly in place without shifting. A secure finish means you won’t have to stop and re-wrap every mile, letting you focus on the trail instead of fiddling with slipping bandages.
Step 7 – Test Your Range of Motion
Before you shoulder your pack, stand up and test the wrap. Bend your knee, take a few steps, and do a shallow squat.
You should feel supported but not stuck. If the bandage pinches, cuts off circulation, or limits your bend too much, loosen it and try again. A well-wrapped knee lets you walk naturally with a comforting sense of stability.
Walk around for a minute to let the wrap settle against your skin. Small adjustments now save you discomfort later. When your knee feels secure and your movement stays smooth, you’re ready to hit the trail with confidence.
Common Mistakes Hikers Make When Wrapping a Knee
Even simple skills come with pitfalls, and a few small errors can undo all your careful work. The most common mistake is wrapping too tightly. A super-tight bandage cuts off circulation, leaving your foot cold, tingly, or numb. Support should feel snug, not suffocating, so always leave room to slip a finger under the edge.
Another frequent slip-up is starting the wrap on a fully straight leg. When you lock your knee out and then bend it later, the bandage digs in and restricts movement. Keep that slight bend from the very first loop instead.
Many beginners also skip the anchor step, jumping straight into the figure-eight. Without a solid base below the knee, the whole wrap slides down within a mile. Take the time to set that foundation.
Finally, plenty of hikers forget to check their skin and clean the area first. Wrapping over sweat, dirt, or an open blister leads to slipping, chafing, and irritation. A quick wipe-down protects your skin and helps everything stay put through hours of trail hiking.
Expert Tips
Practice at home before your trip. Wrapping your knee in your living room, calm and unhurried, builds muscle memory so you can do it fast on the trail.
Pack a spare bandage. They stretch out, get sweaty, and sometimes tear on rough terrain, so a backup keeps you covered.
Consider pairing your wrap with a lightweight knee sleeve for tough descents. The two work together to boost stability and manage swelling.
Listen to your body. A wrap supports your knee, but it won’t fix an injury. If pain sharpens or swelling grows, stop, rest, and reassess. Adjust your wrap during breaks, since your leg swells slightly as you hike and yesterday’s perfect tension may feel tight today.
Frequently Asked Questions
How tight should a knee wrap be for hiking?
Your wrap should feel snug and supportive, but never painful. A good test is sliding one finger under the edge of the bandage. If you can, the tension is about right. Watch for tingling, numbness, or coldness in your foot, since those signs mean you’ve wrapped too tight and need to loosen it.
Can I use kinesiology tape instead of an elastic bandage?
Yes, kinesiology tape is a great flexible option. It moves with your skin, breathes well, and stays put through sweat and long miles. However, it offers lighter compression than an elastic bandage. For gentle joint support, tape works well. For firmer stability on steep, rugged descents, an elastic compression wrap usually delivers stronger results.
Should I wrap my knee before or during a hike?
Wrap your knee before you start walking, while your leg is fresh and rested. This gives you steady support from the very first step and helps prevent soreness before it begins. Check the wrap during breaks and re-adjust if it slips or feels tight, since your knee can swell slightly over a long day.
Will wrapping my knee replace a proper knee brace?
Not entirely. A wrap adds compression and mild support, which suits general trail hiking and minor aches. A knee brace offers more rigid, targeted stability for known injuries or weak joints. If you have a diagnosed condition, follow your doctor’s advice. Many hikers combine both a wrap and a brace for extra reassurance on hard climbs.
How often should I re-wrap my knee on a long hike?
Check your wrap every couple of hours or during rest stops. Bandages loosen as you move, and your knee swells over the day, so tension changes constantly. Re-wrap whenever it slides down, bunches up, or starts feeling too tight. A quick two-minute adjustment keeps your support reliable and your skin comfortable mile after mile.
Conclusion
Your knees deserve some care, and now you have the skills to give it to them. Knowing how to wrap a knee for hiking means you can add real support, ease everyday trail strain, and keep small aches from cutting your adventure short. From cleaning the area to locking in that final figure-eight, each step builds toward a wrap that feels secure and moves with you.
Remember the basics: keep a slight bend, anchor below the knee, layer with even tension, and always test your range of motion before you go. Practice at home a few times, and the whole routine will take just minutes.
Don’t let stiff or sore joints hold you back from the views you’ve been dreaming about. With a simple bandage and a little know-how, you can hike farther, feel steadier, and enjoy every step. Pack your kit, wrap with confidence, and get out on that trail. The mountains are waiting for you.

About Caleb
Caleb Merritt is a Virginia-based outdoor writer and gear analyst who has spent over a decade sleeping on the ground, crossing mountain passes, and obsessively shaving grams off his pack weight. He holds a Bachelor of Science in Environmental Science from James Madison University, where he also served as president of the university’s outdoor recreation club. After graduating, he spent three years as a wilderness educator with a backcountry youth program in the Shenandoah Valley — teaching Leave No Trace ethics, backcountry navigation, and campcraft — before moving into full-time writing in 2018.
His work focuses on one core belief: the best gear is the gear you understand. Whether he’s doing a side-by-side weight comparison of ultralight shelters or writing a beginner’s guide to building a sub-20-lb base weight kit, Caleb writes with the same directness you’d expect from a trusted trail partner. He has logged more than 4,000 miles across iconic routes including the John Muir Trail, the Wind River Range, Vermont’s Long Trail, and the Collegiate Peaks Loop in Colorado.
Areas of Expertise
- Ultralight backpacking systems and base weight optimization
- Tent, tarp, and shelter testing across three-season and shoulder-season conditions
- Sleeping bag and quilt temperature rating verification
- Backpacking nutrition, meal planning, and calorie-per-ounce analysis
- Leave No Trace principles and wilderness ethics
- Campfire safety, bear country protocols, and water treatment methods
- Gear care, repair, and long-term durability assessment
Education
James Madison University — B.S. in Environmental Science, 2015
During his time at JMU, Caleb served as President of the Outdoor Recreation Club, where he planned and led more than 30 backcountry trips annually across the Blue Ridge Mountains and Appalachian Trail corridor. The role sharpened his ability to assess gear performance under real conditions, manage group safety in remote environments, and develop the kind of practical trail knowledge that no classroom can teach.
Professional Experience
Gear Writer & Senior Contributor — [campeox.com]
Produces in-depth gear reviews, buyer’s guides, and how-to content across backpacking, camping, and ultralight hiking categories. Tests all gear in real field conditions before publishing recommendations.
Wilderness Educator & Trip Leader — Shenandoah Backcountry Youth Program — 2015–2018 Led multi-day backcountry expeditions for teens and young adults throughout Shenandoah National Park and George Washington National Forest. Taught LNT principles, orienteering, first aid awareness, and campcraft fundamentals.
Outdoor Recreation Club President — James Madison University — 2013–2015 Organized and led university-sponsored hiking, backpacking, and camping trips in the Blue Ridge Mountains and Appalachian Trail corridor. Managed club budget, safety protocols, and trip logistics for a membership of 120+ students.
Editorial Standards
Every piece of gear Caleb recommends has been personally tested in the field — not just unboxed and described. His review process includes a minimum of two overnight trips per shelter, a full-season evaluation for sleep systems, and side-by-side comparisons wherever possible. He does not accept payment for positive reviews. Affiliate relationships, where they exist, are always disclosed in accordance with FTC guidelines.
All factual claims about gear specifications, trail distances, and safety recommendations are cross-referenced against manufacturer data sheets and established sources such as the Leave No Trace Center for Outdoor Ethics and the American Hiking Society before publication.