Getting ready for a big outdoor adventure is incredibly exciting, but the gear selection process can quickly feel overwhelming for beginners. One of the most important decisions you will make is selecting the right bag to carry your essential gear. Learning exactly how to choose a backpack can mean the difference between an unforgettable journey and a painful, frustrating slog.
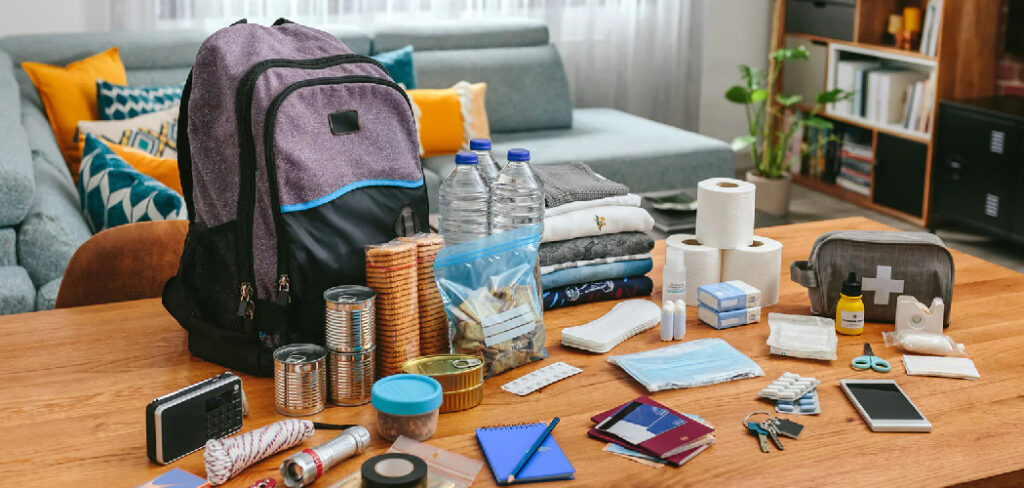
Whether you are planning a weekend camping trip, a cross-country train ride, or a simple overnight hike, your pack serves as your mobile home base. It needs to hold your sleeping gear, clothing, food, and water while remaining comfortable against your body. We created this comprehensive guide to help you navigate the endless options on the market. We will walk you through everything from capacity and frame types to the critical importance of torso length, ensuring you hit the trail with absolute confidence.
Why Knowing Your Pack Matters So Much
Choosing the wrong gear for a trip usually leads to quick regret, but wearing an ill-fitting pack will actively ruin your travel experience. When you carry weight improperly, you put severe strain on your shoulders, back, and hips. This leads to physical fatigue, painful blisters, and potential muscle strain that can cut your vacation short.
A properly fitted bag transfers the majority of its load to your strong leg muscles through the hip belt, keeping your shoulders completely free from excessive downward pressure. Furthermore, buying a pack suited for your specific trip style prevents you from overpacking or leaving vital equipment behind. Traveling with a minimalist daypack on a week-long camping trip forces you to abandon necessary supplies, while bringing a massive expedition bag on a short weekend getaway adds unnecessary bulk and weight. Finding the right balance ensures maximum comfort, safety, and enjoyment on your journey.
8 Step-by-Step Guide on How to Choose a Backpack
Step 1: Determine Your Trip Length and Capacity Need
The very first thing you must evaluate is the average duration of your upcoming trips. Backpack capacity is measured in liters, and this volume directly dictates how much gear you can comfortably carry. For a simple day trip or overnight stay, a smaller bag holding between twenty and thirty liters usually provides plenty of room for extra layers and snacks. If you plan to camp for two to three days, you will want to look at models holding between thirty and fifty liters to accommodate a sleeping bag and tent. For extended trips lasting several days to a week, you need a substantial pack featuring fifty to eighty liters of internal storage volume.
Step 2: Decide on the Right Frame Type
Modern packs generally come with three main support structures, and you need to pick the one that matches your cargo weight. Internal frame backpacks represent the standard choice for most modern campers and travelers because they hug your body closely and keep your center of gravity stable on uneven terrain. External frame models, while looking a bit traditional, offer excellent ventilation and allow you to lash heavy, irregular gear to the outside bars. Finally, frameless bags offer the ultimate lightweight experience for minimalists, but you must keep your total weight extremely low. You should generally stick to internal frames unless you have a highly specialized travel requirement.
Step 3: Learn How to Choose a Backpack Based on Torso Length
Many beginners mistakenly believe that their height determines their pack size, but the true measurement you need is your torso length. To find this crucial number, you need a friend and a flexible measuring tape. Have them measure from the bony bump at the base of your neck, known as the C7 vertebra, straight down your spine to the top of your hip bones, called the iliac crest. Most quality gear manufacturers size their products based on this specific distance. Matching this measurement ensures the shoulder straps rest comfortably while the hip belt sits exactly where it needs to carry the heavy load.
Step 4: Examine the Hip Belt Padding and Support
The hip belt is arguably the most critical component of your entire carrying system, as it should support roughly eighty percent of your total cargo weight. When you try on different models, pay close attention to the thickness and stiffness of the foam padding around the waist area. The belt should wrap securely around your hip bones, sitting centered right over your iliac crest rather than resting around your soft stomach area. You want firm, supportive foam that will not compress completely under pressure. A flimsy belt will inevitably slip down as you walk, shifting painful weight onto your shoulders and completely defeating the purpose of a good suspension system.
Step 5: Review the Pocket Configuration and Accessibility
Think carefully about how you naturally organize your belongings while traveling or camping. Some bags feature a simple top-loading design consisting of one massive internal cavern, which works great for stuffing gear but makes retrieving items at the bottom highly frustrating. You might prefer a panel-loading design that unzips entirely like a standard suitcase, offering brilliant visibility and immediate access to everything you packed. Look for helpful exterior additions like deep mesh side pockets for your water bottles, a spacious front stash pocket for a wet rain jacket, and tiny zippered hip belt pockets to store your phone, trail mix, or lip balm.
Step 6: Master How to Choose a Backpack for Weather Protection
Weather changes rapidly outdoors, so you must evaluate the water resistance of your potential new gear. Most standard travel bags use nylon or polyester fabrics treated with a durable water-repellent coating. This handles light drizzles perfectly fine, but it will eventually soak through during a heavy downpour and ruin your sleeping bag. To solve this problem, many manufacturers include a built-in rain cover tucked away in a dedicated hidden pocket. If the model you love lacks an integrated cover, you must purchase a separate aftermarket one to keep your expensive gear dry. Always prioritize weather protection when heading into unpredictable alpine environments.
Step 7: Evaluate the Total Empty Weight
Beginners often ignore the base weight of the bag itself, focusing only on the gear they plan to put inside. However, thick fabrics, heavy metal zippers, and robust suspension frames can quickly add several pounds to your back before you even pack a single pair of socks. You want to strike a delicate balance between impressive durability and overall lightness. A massive expedition pack might weigh over five pounds empty, while specialized ultralight models weigh less than two pounds. Lighter materials often sacrifice some abrasion resistance, so consider how rough you plan to be with your equipment before making your final selection.
Step 8: Complete the Final Weighted Comfort Test
Never buy a pack without thoroughly testing it under a realistic load. When you visit a local gear shop, ask the staff to fill the bag with heavy sandbags or typical camping supplies to mimic your actual trail weight. Put the bag on, tighten the hip belt first, adjust the shoulder straps, and finally clip the sternum strap across your chest. Walk around the store for at least fifteen minutes, practicing stepping up onto benches and bending down to tie your shoes. Notice any immediate pinching, rubbing, or restricted movement, as these tiny annoyances will multiply into intense pain after walking ten miles.
Frequently Asked Questions (FAQ)
What Is the Best Way to Clean My Dirty Pack?
Cleaning your outdoor gear correctly extends its lifespan significantly. Never put your bag in a washing machine, as the agitator can destroy the internal frame and rip the shoulder straps.
- Empty all pockets completely and shake out debris.
- Submerge the bag in a bathtub filled with lukewarm water and mild, non-detergent soap.
- Scrub dirty spots gently with a soft sponge.
- Rinse thoroughly and hang it outside in the shade to air dry completely.
Can I Take a Camping Pack on an Airplane as a Carry-On?
You can bring certain bags on an airplane, but it completely depends on the total liter capacity and the specific airline’s size limits.
- Bags ranging from twenty to forty liters generally fit well in overhead bins.
- Internal frames must not exceed the airline’s vertical height limit.
- Make sure all external straps are tucked away to prevent them from catching on security belts.
- Anything larger than forty-five liters will almost certainly need to be checked.
What Are Load Lifter Straps and How Do I Use Them?
Load lifters are the small adjustable straps connecting the very top of your shoulder straps to the main body of the bag. They prevent the cargo from pulling backward away from your body.
- Tighten them so they form a forty-five-degree angle toward the top of the pack.
- They should bring the weight closer to your back for better balance.
- Do not over-tighten them, or you will cause neck strain.
How Should I Pack the Inside for the Best Balance?
Proper weight distribution makes your journey significantly more comfortable and keeps your footing stable on rocky terrain.
- Place your lightest items, like your sleeping bag, at the very bottom.
- Pack your heaviest items, such as your tent, cooking gear, and food, right in the middle, close to your spine.
- Keep medium-weight clothing around the top and perimeter to stabilize the heavy core.
- Keep frequently needed snacks and rain gear easily accessible on the very top.
Are Women-Specific Packs Actually Different from Men’s Packs?
Yes, women-specific models offer distinct engineering differences designed to fit different biological shapes comfortably.
- They generally feature shorter torso lengths.
- The shoulder straps often curve differently to avoid compressing the chest area.
- The hip belts are specially angled and contoured to rest better on slightly wider hip bones.
- Anyone with a smaller frame, regardless of gender, might find these specialized designs much more comfortable.
Conclusion
Finding the right gear requires careful consideration, patience, and a bit of practical testing. By understanding your specific capacity needs, measuring your torso accurately, and evaluating critical features like pocket access and weather resistance, you can confidently invest in a piece of equipment that will serve you for years. Remember that comfort always trumps aesthetic appeal, and a properly fitted hip belt is your greatest ally on the trail.
Now that you know exactly how to choose a backpack, it is time to take action. Visit your local outdoor retailer, measure your torso length, and start trying on different models with weighted bags inside. Your next great camping adventure awaits, and you are entirely prepared to carry everything you need comfortably and safely.

About Caleb
Caleb Merritt is a Virginia-based outdoor writer and gear analyst who has spent over a decade sleeping on the ground, crossing mountain passes, and obsessively shaving grams off his pack weight. He holds a Bachelor of Science in Environmental Science from James Madison University, where he also served as president of the university’s outdoor recreation club. After graduating, he spent three years as a wilderness educator with a backcountry youth program in the Shenandoah Valley — teaching Leave No Trace ethics, backcountry navigation, and campcraft — before moving into full-time writing in 2018.
His work focuses on one core belief: the best gear is the gear you understand. Whether he’s doing a side-by-side weight comparison of ultralight shelters or writing a beginner’s guide to building a sub-20-lb base weight kit, Caleb writes with the same directness you’d expect from a trusted trail partner. He has logged more than 4,000 miles across iconic routes including the John Muir Trail, the Wind River Range, Vermont’s Long Trail, and the Collegiate Peaks Loop in Colorado.
Areas of Expertise
- Ultralight backpacking systems and base weight optimization
- Tent, tarp, and shelter testing across three-season and shoulder-season conditions
- Sleeping bag and quilt temperature rating verification
- Backpacking nutrition, meal planning, and calorie-per-ounce analysis
- Leave No Trace principles and wilderness ethics
- Campfire safety, bear country protocols, and water treatment methods
- Gear care, repair, and long-term durability assessment
Education
James Madison University — B.S. in Environmental Science, 2015
During his time at JMU, Caleb served as President of the Outdoor Recreation Club, where he planned and led more than 30 backcountry trips annually across the Blue Ridge Mountains and Appalachian Trail corridor. The role sharpened his ability to assess gear performance under real conditions, manage group safety in remote environments, and develop the kind of practical trail knowledge that no classroom can teach.
Professional Experience
Gear Writer & Senior Contributor — [campeox.com]
Produces in-depth gear reviews, buyer’s guides, and how-to content across backpacking, camping, and ultralight hiking categories. Tests all gear in real field conditions before publishing recommendations.
Wilderness Educator & Trip Leader — Shenandoah Backcountry Youth Program — 2015–2018 Led multi-day backcountry expeditions for teens and young adults throughout Shenandoah National Park and George Washington National Forest. Taught LNT principles, orienteering, first aid awareness, and campcraft fundamentals.
Outdoor Recreation Club President — James Madison University — 2013–2015 Organized and led university-sponsored hiking, backpacking, and camping trips in the Blue Ridge Mountains and Appalachian Trail corridor. Managed club budget, safety protocols, and trip logistics for a membership of 120+ students.
Editorial Standards
Every piece of gear Caleb recommends has been personally tested in the field — not just unboxed and described. His review process includes a minimum of two overnight trips per shelter, a full-season evaluation for sleep systems, and side-by-side comparisons wherever possible. He does not accept payment for positive reviews. Affiliate relationships, where they exist, are always disclosed in accordance with FTC guidelines.
All factual claims about gear specifications, trail distances, and safety recommendations are cross-referenced against manufacturer data sheets and established sources such as the Leave No Trace Center for Outdoor Ethics and the American Hiking Society before publication.