Getting out on the water should be a relaxing experience, but for many beginners, the hardest part happens before you even start paddling. If you are staring down at your boat and wondering how to get in a kayak from a dock without tipping over, you are not alone. It looks tricky, and the fear of an unexpected swim is completely normal.
However, boarding your vessel from a wooden platform is actually quite simple once you know the proper technique. By focusing on balance, weight distribution, and a few basic safety rules, you can transition smoothly from land to water. This guide will walk you through the process, ensuring your next outdoor adventure starts with confidence and a dry pair of clothes. Let us dive into the details.
Why You Need a Solid Dock Launch Strategy
Launching from a shoreline is usually straightforward since you can simply wade into the shallow water. However, boarding from an elevated structure presents a unique set of challenges that require a bit more preparation. The height difference between the wooden planks and your seat changes your center of gravity, making the boat feel unstable. A solid entry strategy prevents sudden rocking, protects your gear from falling overboard, and keeps you safe from accidental slips.
Understanding this process is essential for anyone who plans to explore lakes or coastal waters, as platforms are the most common launch points at public parks and marinas. Mastering this skill gives you the freedom to paddle anywhere, transforming a stressful boarding process into a quick, routine habit. Once you understand the physical mechanics behind stabilizing the hull, you will never second-guess your launch again.
7 Step-by-Step Guide: How to Get in a Kayak From a Dock
Step 1: Gather Your Gear and Check Your Surroundings
Before you even think about stepping into the boat, you need to prepare your equipment. Place your paddle, life jacket, and any waterproof bags on the wooden boards right next to where you plan to launch. You never want to be scrambling for gear while trying to balance in a floating vessel. Take a moment to check the water conditions and look out for boat wakes or strong currents that might push you around. Having everything organized on the platform ensures you can focus entirely on your physical movements. You should also go ahead and put your life jacket on right now. Being fully prepared removes distractions, helping you maintain the laser focus needed for a smooth and dry entry.
Step 2: Position Your Boat Parallel to the Platform
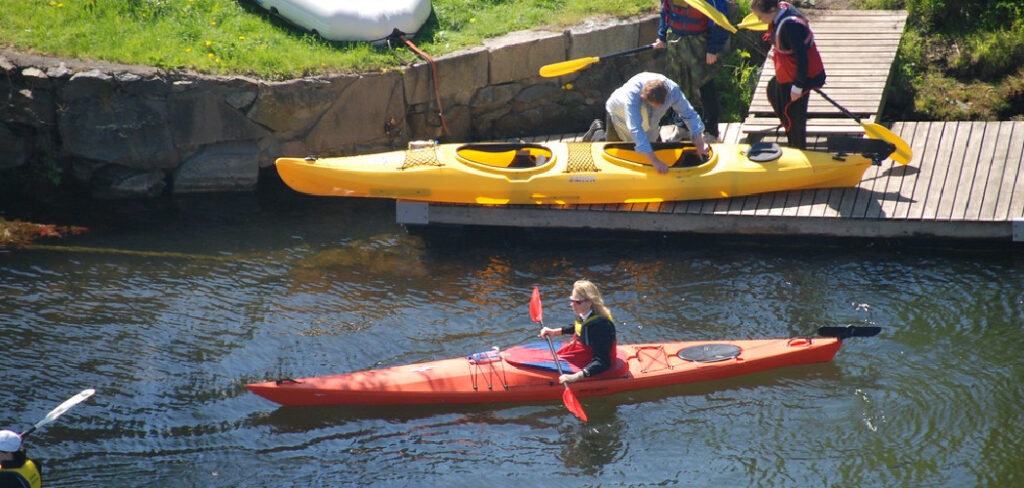
The angle of your vessel plays a massive role in your stability. Lower your boat gently into the water and align it so it sits perfectly parallel to the edge of the boards. You want the side of the hull resting directly against the wood. This parallel placement limits the side-to-side rocking motion that usually causes beginners to capsize. Hold onto the edge of the cockpit or grab a nearby cleat to keep the boat from drifting away. You want the vessel to feel like a temporary extension of the solid structure you are standing on. Keeping it snug against the edge builds a secure foundation for your entry, ensuring it will not float away when you shift your weight.
Step 3: Secure Your Paddle Across the Cockpit
Your paddle is not just a tool for moving through the water; it is also an excellent stabilizing aid during boarding. Lay the shaft horizontally across the deck of your boat, just behind the seat. One blade should rest firmly on the wooden platform, while the other extends outward over the water. This acts as an outrigger, creating a makeshift bridge between the solid ground and your floating vessel. When you press down on the shaft, you effectively lock the boat to the edge. This simple trick provides incredible stability and significantly reduces the wobble factor. Just remember to keep a firm grip on the shaft so it does not slide away while you prepare for the next physical movement.
Step 4: Lower Yourself Close to the Boards
Standing high up and trying to step down directly into the seat is a recipe for a cold swim. To maintain a low center of gravity, crouch down or sit directly on the edge of the wood, facing the side of your vessel. Sitting down brings your body weight closer to the water level, which drastically improves your overall balance. By reducing the height of your drop, you give yourself much more control over the transition. Place your feet flat on the wood or dangle them gently over the edge toward the cockpit. Taking this low, seated posture is the absolute safest way to begin the actual transfer of your body weight into the floating cabin.
Step 5: Place Your First Foot Inside the Cockpit
Now it is time to make contact with the boat. Fully learning how to get in a kayak from a dock requires careful, deliberate movements. Take your foot closest to the bow and step it gently into the exact center of the cockpit floor. Never step on the seat or the sides of the hull, as this will immediately tip the boat away from you. Keep your weight completely shifted back onto the solid platform for now. The foot inside the boat is just a placeholder to test the stability and establish your position. Keep a firm grip on the paddle behind you, maintaining pressure on the shaft resting on the wood to keep everything locked securely in place.
Step 6: Shift Your Weight and Bring the Second Foot In
With one foot centered and your hands gripping the paddle shaft, gently slide your bottom off the edge of the wood. You want to transfer your weight smoothly onto your hands and that single centered foot. Once your body is hovering over the center of the boat, bring your second foot in and place it right next to the first one. Keep your knees bent and stay low to the deck. Avoid any sudden, jerky motions. The goal is to move fluidly, almost like you are gliding from the platform into the vessel. Keeping your weight centered over the keel prevents the boat from rolling outward, ensuring you stay completely dry during the transfer.
Step 7: Lower Yourself Gently Into the Seat
You are almost there. With both feet firmly planted in the center of the hull and your weight supported by your arms, slowly lower your hips down into the seat. Keep your core tight and your movements controlled until you are fully seated. Once you are comfortable, you can release the grip you had on the platform edge. Now, bring your paddle off the wood and into your lap. You have successfully completed the process of how to get in a kayak from a dock and are ready to paddle away. Take a deep breath, adjust your foot pegs if necessary, and push off gently. You are now fully prepared to enjoy a wonderful day out on the water.
Frequently Asked Questions (FAQ)
What Should I Do if the Water Level Is Much Lower Than the Platform?
When facing a significant height drop, sitting on the edge is mandatory. You can use the paddle-bridge method, but you may need to lean heavier on the solid platform to avoid tipping. For extreme drops:
- Use a helper to steady the boat from above.
- Lower your feet first while lying on your stomach.
- Find a lower launch point if possible.
Can I Board a Sit-on-Top Model the Same Way?
Yes, the general principles are identical. Sit-on-top models are generally wider and more stable, making the transition slightly easier. Keep the boat parallel, use your paddle for stability, and step directly into the centerline of the hull. Because there is no enclosed cockpit, you have a bit more freedom to swing your legs over the side once you are seated.
How Do I Keep the Boat From Drifting Away While Boarding?
The easiest way to prevent drifting is by maintaining three points of contact. Keep one hand on the wooden edge, use the paddle bridge technique, or hold onto a mooring cleat. You can also tie a loose line to a post while you step in, quickly untying it once you are securely seated and balanced in the water.
Should I Wear My Shoes While Getting In?
It is always highly recommended to wear water shoes or sport sandals with good grip. Bare feet can easily slip on wet wooden boards or smooth plastic hulls. Footwear provides essential traction when stepping into the center of the hull. Look for shoes that drain well and dry quickly, as they will keep you comfortable throughout your trip.
Is It Safe to Launch Alone as a Beginner?
Launching alone is safe once you understand the core mechanics of balance and weight transfer. However, if it is your very first time, having a friend hold the bow or stern line adds immense stability and peace of mind. As you practice these techniques, your confidence will grow, allowing you to easily handle solo launches on future trips.
Conclusion
Stepping off solid ground and into a small, floating vessel can feel intimidating at first. However, mastering this skill opens up endless opportunities for travel, camping, and exploring beautiful waterways. By keeping your boat parallel, utilizing the paddle bridge technique, and maintaining a low center of gravity, you eliminate the most common risks associated with boarding. Always remember to take your time, center your weight, and avoid rushing the process. Now that you understand how to get in a kayak from a dock, it is time to grab your gear and head to the nearest lake or marina. Embrace the adventure, trust your technique, and enjoy the incredible serenity that comes with paddling. The water is waiting for you!

About Caleb
Caleb Merritt is a Virginia-based outdoor writer and gear analyst who has spent over a decade sleeping on the ground, crossing mountain passes, and obsessively shaving grams off his pack weight. He holds a Bachelor of Science in Environmental Science from James Madison University, where he also served as president of the university’s outdoor recreation club. After graduating, he spent three years as a wilderness educator with a backcountry youth program in the Shenandoah Valley — teaching Leave No Trace ethics, backcountry navigation, and campcraft — before moving into full-time writing in 2018.
His work focuses on one core belief: the best gear is the gear you understand. Whether he’s doing a side-by-side weight comparison of ultralight shelters or writing a beginner’s guide to building a sub-20-lb base weight kit, Caleb writes with the same directness you’d expect from a trusted trail partner. He has logged more than 4,000 miles across iconic routes including the John Muir Trail, the Wind River Range, Vermont’s Long Trail, and the Collegiate Peaks Loop in Colorado.
Areas of Expertise
- Ultralight backpacking systems and base weight optimization
- Tent, tarp, and shelter testing across three-season and shoulder-season conditions
- Sleeping bag and quilt temperature rating verification
- Backpacking nutrition, meal planning, and calorie-per-ounce analysis
- Leave No Trace principles and wilderness ethics
- Campfire safety, bear country protocols, and water treatment methods
- Gear care, repair, and long-term durability assessment
Education
James Madison University — B.S. in Environmental Science, 2015
During his time at JMU, Caleb served as President of the Outdoor Recreation Club, where he planned and led more than 30 backcountry trips annually across the Blue Ridge Mountains and Appalachian Trail corridor. The role sharpened his ability to assess gear performance under real conditions, manage group safety in remote environments, and develop the kind of practical trail knowledge that no classroom can teach.
Professional Experience
Gear Writer & Senior Contributor — [campeox.com]
Produces in-depth gear reviews, buyer’s guides, and how-to content across backpacking, camping, and ultralight hiking categories. Tests all gear in real field conditions before publishing recommendations.
Wilderness Educator & Trip Leader — Shenandoah Backcountry Youth Program — 2015–2018 Led multi-day backcountry expeditions for teens and young adults throughout Shenandoah National Park and George Washington National Forest. Taught LNT principles, orienteering, first aid awareness, and campcraft fundamentals.
Outdoor Recreation Club President — James Madison University — 2013–2015 Organized and led university-sponsored hiking, backpacking, and camping trips in the Blue Ridge Mountains and Appalachian Trail corridor. Managed club budget, safety protocols, and trip logistics for a membership of 120+ students.
Editorial Standards
Every piece of gear Caleb recommends has been personally tested in the field — not just unboxed and described. His review process includes a minimum of two overnight trips per shelter, a full-season evaluation for sleep systems, and side-by-side comparisons wherever possible. He does not accept payment for positive reviews. Affiliate relationships, where they exist, are always disclosed in accordance with FTC guidelines.
All factual claims about gear specifications, trail distances, and safety recommendations are cross-referenced against manufacturer data sheets and established sources such as the Leave No Trace Center for Outdoor Ethics and the American Hiking Society before publication.