Getting outside and exploring a rugged trail brings a sense of pure freedom, but painful feet can ruin the experience entirely. Blisters, bruised toes, and twisted ankles turn a beautiful day in nature into a miserable trek back to the car. Your footwear serves as your most important piece of gear, acting as the foundation for your entire adventure.
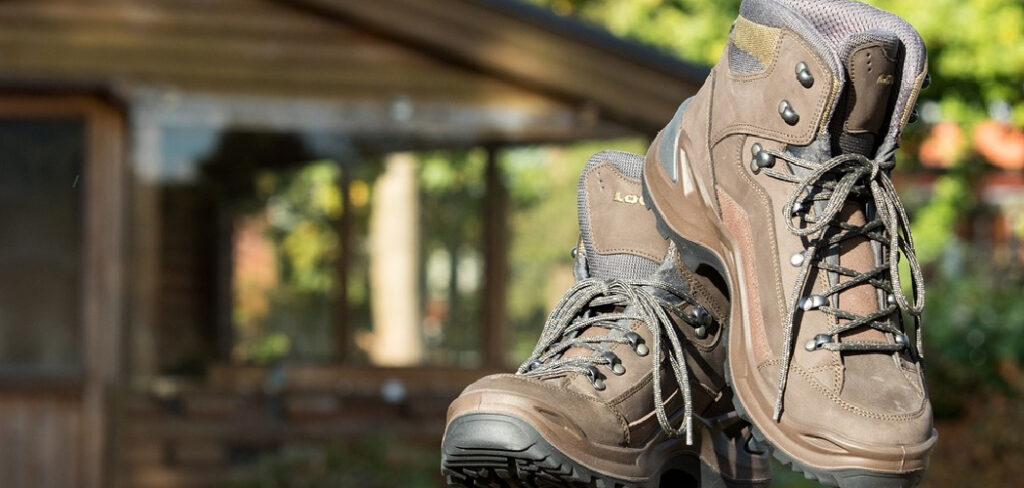
Many beginners feel overwhelmed by the sheer number of options on a footwear wall. The fabrics, cuts, stiffness levels, and traction patterns all serve specific purposes for different outdoor environments. Understanding how to choose hiking boots changes everything about your time outdoors. You gain confidence, comfort, and protection against unpredictable terrain. This guide exists to walk you step-by-step through evaluating your needs, inspecting boot components, and finding the perfect fit for your next outdoor journey.
Why Learning How to Choose Hiking Boots Matters
Campers, backpackers, and weekend trail walkers all rely on their feet to carry them safely through nature. Picking out footwear might seem like a simple matching game of size and style, but trail environments demand specific performance from your gear. Properly fitted footwear supports your body weight plus whatever load you carry in your pack. This support reduces fatigue in your calves, knees, and lower back over long miles.
Understanding the differences between boot components allows you to match your footwear exactly to the conditions you face. A waterproof, stiff-soled boot protects you during off-trail mountain scrambling but feels heavy and hot on a flat, dry dirt path. Gaining this knowledge prevents you from wasting money on the wrong gear. You keep your feet comfortable, stay safe from preventable trail injuries, and enjoy the scenery instead of focusing on foot pain.
Tools and Materials You’ll Need
Before heading to the outdoor store or shopping online, gather a few specific items to ensure you get an accurate fit. Having these materials ready makes the sizing process much more effective.
- Trail socks: Bring the exact thickness of socks you plan to wear on your hikes, preferably made of merino wool or a synthetic blend.
- Orthotics or custom insoles: If you use special inserts for arch support, you must test them inside the new footwear.
- A heavy backpack: Most outdoor stores provide weighted packs, but bringing your own loaded pack helps you test how the footwear handles your specific trail weight.
- Measuring device: Use a Brannock device at the store to measure your foot length, width, and arch length.
- Optional item: A notebook or smartphone notes app proves helpful for tracking which brands and sizes felt best during your testing process.
10 Step-by-Step Guide on How to Choose Hiking Boots
Step 1 – Understand Your Hiking Terrain
Evaluate exactly where you plan to hike most frequently. Your typical environment dictates the type of footwear you need to buy. Smooth, well-maintained dirt paths require very little ankle support or sole stiffness. You can easily navigate these friendly trails in light, flexible footwear that feels similar to a running shoe.
Rocky, uneven terrains demand something significantly sturdier. Roots, loose gravel, and steep inclines put pressure on your ankles and the bottoms of your feet. You need thicker outsoles and stronger upper materials to protect yourself from jagged rocks and debris. Backpacking off-trail through muddy or snowy environments requires the maximum level of support and weather protection available. Be honest with yourself about your actual hiking habits rather than buying for an extreme expedition you might never take.
Step 2 – Determine the Right Boot Cut
Footwear comes in three primary cuts, each serving a distinct purpose for your ankles. Low-cut models stop below the ankle bone and provide maximum flexibility. These work perfectly for lightweight day hikes on predictable, well-groomed trails. You stay nimble, and your feet remain cooler during hot weather.
Mid-cut models sit just over the ankle bone. They offer a great balance between flexibility and support, wrapping your ankle to prevent rolled joints on moderately rugged paths. This cut keeps out stray pebbles and dirt effectively. High-cut models wrap significantly above the ankle. If you carry a heavy pack or hike over treacherous, off-trail terrain, you need this maximum support. Learning how to choose hiking boots requires matching this cut precisely to your expected backpack weight and trail difficulty.
Step 3 – Evaluate the Midsole Material
The midsole provides the cushioning and shock absorption that protects your joints from the hard ground. You cannot see the midsole easily, but you definitely feel it working. Ethylene-vinyl acetate (EVA) offers a soft, cushy feel right out of the box. Manufacturers use varying densities of EVA to provide firmer support where needed, keeping the boot relatively lightweight.
Polyurethane (PU) feels much firmer and heavier than EVA. It provides robust durability and maintains its shape under heavy loads. Backpackers carrying heavy gear usually prefer PU midsoles because they do not compress and flatten out over long miles. Bend the footwear in your hands to test the midsole stiffness. A stiffer midsole protects your foot from wrapping around rocks, reducing foot fatigue on long, jagged trails.
Step 4 – Inspect the Outsole and Traction
Turn the footwear over and look closely at the rubber bottom, known as the outsole. The rubber compounds and lug patterns determine how well you grip the earth. Lugs are the raised bumps that dig into mud, dirt, and gravel. Deep, widely spaced lugs shed mud easily and provide excellent traction on loose terrain.
Shallow, tightly spaced lugs work better on smooth rock surfaces, offering more surface area contact. Pay attention to the heel brake zone at the back of the outsole. A sharply defined heel breast reduces your chance of sliding during steep descents. Softer rubber grips wet rocks securely but wears down faster over time. Harder rubber lasts longer and handles heavy miles well but might feel slightly slick on wet, smooth surfaces.
Step 5 – Choose the Right Upper Material
The upper materials dictate breathability, weight, and water resistance. Full-grain leather offers extreme durability and excellent water resistance. It handles abrasive environments beautifully but requires significant time to break in and feels quite heavy. Synthetics like nylon and polyester mesh weigh much less and breathe wonderfully in hot weather. They require almost zero break-in time, though they wear out faster than leather.
Split-grain leather combines with nylon mesh to offer a balance of breathability and moderate durability. Many uppers feature waterproof membranes to keep your feet completely dry when crossing streams or hiking in the rain. Remember that waterproof membranes also trap heat inside. If you hike exclusively in dry, hot deserts, skip the waterproofing to keep your feet cool and comfortable.
Step 6 – Measure Your Feet Late in the Day
Your feet swell significantly as you walk, stand, and go about your daily activities. This swelling mimics exactly what happens during a long hike. Always measure your feet and try on footwear late in the afternoon or evening. A boot that fits perfectly at eight in the morning will likely feel tight and restrictive by three in the afternoon on a mountain trail.
Visit a professional fitter who uses a proper measuring device. Have them check your overall foot length, your foot width, and your arch length. Many people wear the wrong size simply because they rely on their standard street shoe size. Outdoor footwear sizing varies wildly between brands. Knowing your exact measurements helps you pull the right sizes from the start.
Step 7 – Wear the Right Socks While Trying Them On
Socks change the volume of your foot drastically. Never try on trail footwear wearing thin dress socks or standard cotton gym socks. Bring the exact hiking socks you intend to wear on your outdoor trips. Merino wool or synthetic blends provide cushioning, wick moisture away from your skin, and regulate temperature beautifully.
Slide your foot into the boot wearing these specific socks. Pay attention to any tight spots or areas where the fabric bunches up. If you plan to wear liner socks under your thick wool socks for blister prevention, wear both layers during the fitting. The right socks simulate real trail conditions and ensure you leave enough interior volume for your feet to stay comfortable all day.
Step 8 – Check for Proper Toe Room and Heel Hold
Lace the footwear up snugly from bottom to top. Stand up and pay attention to how your heel feels in the back cup. Your heel should remain locked firmly in place. If it lifts or slides up and down when you take a step, you will develop terrible blisters on the trail. Understanding how to choose hiking boots means prioritizing this secure heel lock above all else.
Next, check the space in the front. Wiggle your toes freely. You need roughly a thumb’s width of space between your longest toe and the front of the boot. Your toes should never bump the front material when walking on flat ground. Tight toe boxes cause black toenails and severe pain during long downhill sections of your hike.
Step 9 – Walk Up and Down an Incline
Walking on a flat, carpeted store floor tells you very little about trail performance. You must test the footwear on an incline. Most dedicated outdoor stores provide a ramp or artificial rock pile specifically for this purpose. Walk up the incline naturally. Your heel should stay firmly anchored without lifting.
Turn around and walk down the incline, stomping slightly to simulate downhill braking. Your foot should remain stable in the middle of the boot. If your foot slides forward and your toes smash into the front toe cap, you need a different size or a different lacing technique. A secure fit on a steep descent proves vital for keeping your toenails healthy and your footing secure.
Step 10 – Break Them In Before Your Big Hike
Never take brand new footwear straight from the box to a ten-mile wilderness trek. You must break them in gradually to allow the materials to soften and conform to your specific foot shape. Start by wearing them around your house for a few hours at a time. Pay attention to any hot spots or pressure points that develop.
Progress to running errands or walking around your neighborhood on paved sidewalks. Finally, take them on a short, easy dirt trail near your home. Carry your loaded backpack to test how the footwear supports the extra weight. Taking these gradual steps softens stiff leather and trains your feet, ensuring total comfort when you finally tackle your primary outdoor goal.
Common Mistakes When Choosing Hiking Boots
Buying footwear based solely on aesthetics stands out as the most frequent mistake beginners make. Choosing a boot because you love the color or the rugged look often results in purchasing footwear completely unsuited for your actual foot shape or trail conditions. You must prioritize fit and function over style entirely.
Another major error involves buying footwear slightly too small. Many people feel tempted to buy their exact street shoe size, forgetting that feet swell dramatically during physical exertion and downhill descents push the foot forward. Failing to leave adequate room in the toe box inevitably leads to painful pressure and damaged toenails. Buying too large poses just as much risk, causing heel slip and severe friction blisters.
Finally, ignoring the importance of socks ruins an otherwise perfect fit. Trying on rugged trail footwear with thin, everyday cotton socks creates a false sense of volume. When you later put on thick wool hiking socks, the boot feels agonizingly tight. Furthermore, cotton traps moisture against your skin, guaranteeing blisters regardless of how well the footwear fits. You must recreate your actual trail conditions during the fitting process, combining the right socks with the right boot to secure a successful fit.
Expert Tips
Professional boot fitters always recommend replacing the factory insoles immediately. Most manufacturers include flimsy, flat foam inserts that offer zero arch support. Purchasing quality aftermarket insoles tailored to your specific arch height dramatically improves comfort and reduces fatigue in your knees and lower back.
Take the time to learn different lacing techniques. A simple heel-lock lacing method secures a slipping heel, while window lacing relieves pressure over high insteps. Adjusting your laces mid-hike changes the volume of the boot, accommodating foot swelling and preventing hot spots. Keep your toenails trimmed short and straight across before every hike. Even the perfectly sized toe box will cause immense pain if long toenails constantly strike the front of the boot during steep descents.
Frequently Asked Questions
Do I really need waterproof hiking boots?
You only need waterproof footwear if you frequently hike in rainy environments, cross shallow streams, or trek through snow. Waterproof membranes trap heat and moisture inside the shoe. If you hike primarily in dry, hot, or desert climates, choose highly breathable, non-waterproof models to keep your feet cool and prevent excessive sweating.
How long do hiking boots normally last?
Most quality trail footwear lasts between 500 and 1,000 miles of active use. Lightweight synthetic models wear out closer to the 500-mile mark. Heavy-duty, full-grain leather boots easily surpass 1,000 miles if properly cleaned and conditioned. Replace your footwear when the outsole lugs wear flat or the midsole loses its cushioning and feels compressed.
Should my hiking boots feel tight or loose?
They should feel snug around your midfoot and heel, locking your foot in place without pinching or restricting blood flow. Your heel must not slip up and down. Conversely, the toe box needs to feel roomy. You must be able to wiggle your toes freely and have space in front to prevent toe-bang on descents.
How can I stop blisters from forming?
Prevent blisters by ensuring a perfect fit and breaking your footwear in gradually before taking long trips. Always wear moisture-wicking merino wool or synthetic socks, completely avoiding cotton. Apply friction-reducing balms or proactive moleskin patches to known hot spots on your feet before you start walking. Address any slight rubbing immediately on the trail.
Can I run in hiking boots?
Running in heavy trail footwear places severe strain on your joints. The stiff midsoles and heavy upper materials restrict the natural flex of your foot during a running stride. If you want to move fast on trails, purchase dedicated trail running shoes instead. They provide aggressive traction while maintaining the flexibility required for a running gait.
Conclusion
Finding the right footwear transforms your outdoor experience from a painful chore into a joyful adventure. Taking the time to evaluate your typical terrain, understand different cuts, and inspect the outsoles puts you far ahead of the average beginner. You now know that measuring your feet late in the day, wearing appropriate wool socks, and testing on inclines guarantees a precise fit. Never rush the process or settle for pressure points.
Learning how to choose hiking boots empowers you to tackle steep mountainsides and dense forest paths with complete confidence. Your feet carry you to the most beautiful places on earth, so give them the protection and support they deserve. Head to your local outdoor store, implement these steps, and test a variety of brands. Once you lace up that perfect pair, break them in thoroughly, pack your gear, and step confidently onto your next great trail.

About Caleb
Caleb Merritt is a Virginia-based outdoor writer and gear analyst who has spent over a decade sleeping on the ground, crossing mountain passes, and obsessively shaving grams off his pack weight. He holds a Bachelor of Science in Environmental Science from James Madison University, where he also served as president of the university’s outdoor recreation club. After graduating, he spent three years as a wilderness educator with a backcountry youth program in the Shenandoah Valley — teaching Leave No Trace ethics, backcountry navigation, and campcraft — before moving into full-time writing in 2018.
His work focuses on one core belief: the best gear is the gear you understand. Whether he’s doing a side-by-side weight comparison of ultralight shelters or writing a beginner’s guide to building a sub-20-lb base weight kit, Caleb writes with the same directness you’d expect from a trusted trail partner. He has logged more than 4,000 miles across iconic routes including the John Muir Trail, the Wind River Range, Vermont’s Long Trail, and the Collegiate Peaks Loop in Colorado.
Areas of Expertise
- Ultralight backpacking systems and base weight optimization
- Tent, tarp, and shelter testing across three-season and shoulder-season conditions
- Sleeping bag and quilt temperature rating verification
- Backpacking nutrition, meal planning, and calorie-per-ounce analysis
- Leave No Trace principles and wilderness ethics
- Campfire safety, bear country protocols, and water treatment methods
- Gear care, repair, and long-term durability assessment
Education
James Madison University — B.S. in Environmental Science, 2015
During his time at JMU, Caleb served as President of the Outdoor Recreation Club, where he planned and led more than 30 backcountry trips annually across the Blue Ridge Mountains and Appalachian Trail corridor. The role sharpened his ability to assess gear performance under real conditions, manage group safety in remote environments, and develop the kind of practical trail knowledge that no classroom can teach.
Professional Experience
Gear Writer & Senior Contributor — [campeox.com]
Produces in-depth gear reviews, buyer’s guides, and how-to content across backpacking, camping, and ultralight hiking categories. Tests all gear in real field conditions before publishing recommendations.
Wilderness Educator & Trip Leader — Shenandoah Backcountry Youth Program — 2015–2018 Led multi-day backcountry expeditions for teens and young adults throughout Shenandoah National Park and George Washington National Forest. Taught LNT principles, orienteering, first aid awareness, and campcraft fundamentals.
Outdoor Recreation Club President — James Madison University — 2013–2015 Organized and led university-sponsored hiking, backpacking, and camping trips in the Blue Ridge Mountains and Appalachian Trail corridor. Managed club budget, safety protocols, and trip logistics for a membership of 120+ students.
Editorial Standards
Every piece of gear Caleb recommends has been personally tested in the field — not just unboxed and described. His review process includes a minimum of two overnight trips per shelter, a full-season evaluation for sleep systems, and side-by-side comparisons wherever possible. He does not accept payment for positive reviews. Affiliate relationships, where they exist, are always disclosed in accordance with FTC guidelines.
All factual claims about gear specifications, trail distances, and safety recommendations are cross-referenced against manufacturer data sheets and established sources such as the Leave No Trace Center for Outdoor Ethics and the American Hiking Society before publication.