

Building a personal training space is one of the most exciting projects you can take on as an outdoor enthusiast. If you want to improve your grip strength, practice your footwork, or just have fun at home, learning how to make a climbing wall opens up an entirely new level of convenience. You no longer have to worry about gym hours, commute times, or crowded bouldering caves. Instead, you get a custom setup tailored exactly to your abilities and goals.
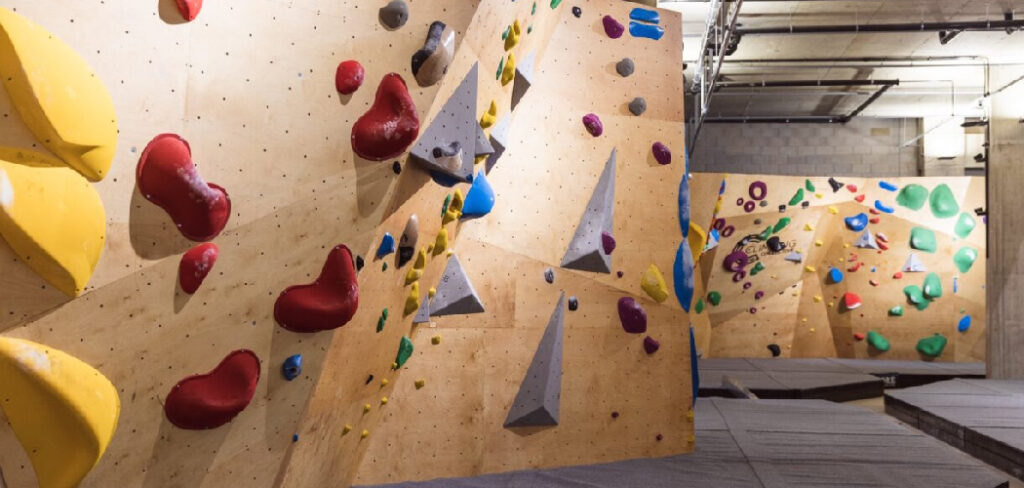
Creating this structure might sound complex, but it essentially comes down to basic carpentry, proper planning, and an understanding of hardware. Anyone with a drill, a saw, and a bit of patience can tackle this project over a single weekend. This comprehensive guide provides step-by-step instructions to help you build a safe, sturdy, and enjoyable indoor bouldering surface.
Why Learning to Build a Wall Matters
Understanding the mechanics behind your own training equipment makes you a better, more resourceful outdoor enthusiast. When you design and construct your own practice area, you learn exactly how different angles affect body tension and muscle engagement. Campers, hikers, and novice boulderers gain a massive advantage by practicing specific movements before touching real rock.
Familiarity with construction also translates to better safety awareness. You begin to understand load distribution, hardware limits, and structural integrity. This knowledge gives you peace of mind when you trust your weight to bolts and anchors outdoors. Furthermore, having a personal setup means you can train consistently regardless of the weather. Rain or shine, your training regimen remains uninterrupted, allowing you to build the vital forearm endurance and core strength required for demanding outdoor adventures.
Tools and Materials
Gathering the right supplies beforehand ensures your project moves smoothly from start to finish. You want to focus on high-quality structural timber and reliable hardware to keep everything secure. Avoid skimping on the plywood, as this takes the brunt of your body weight and dynamic movement.
Here is what you need to pick up from the hardware store:
- Three-quarter-inch thick ACX or sanded plywood sheets
- Two-by-four and two-by-six framing lumber
- Three-eighths-inch screw-in or hammer-in T-nuts
- Framing screws or galvanized nails
- Wood glue and construction adhesive
- A circular saw or table saw
- A power drill with various wood drill bits
- A tape measure, chalk line, and framing square
- Safety glasses and hearing protection
- An impact driver (optional, but highly recommended for driving heavy framing screws quickly)
7 Step-by-Step Guide on How to Make a Climbing Wall
Step 1 – Plan the Space and Angle
Before cutting any wood, you must evaluate the area where your structure will live. Measure the ceiling height, the available floor width, and the depth of the room. You must account for the swing of your body and the placement of safety mats beneath you. A completely vertical surface is great for pure beginners, but an overhang of fifteen to thirty degrees builds significantly more upper body strength.
Clear the room and use a tape measure and masking tape to mark exactly where the framing will sit on the floor and against the existing room studs. Ensure you locate the ceiling joists and wall studs with a reliable stud finder. You will anchor the entire heavy assembly into these existing structural points. Careful measurement now prevents disastrous alignment issues later when you try to lift heavy panels into place.
Step 2 – Build the Structural Frame
The skeleton of your project dictates its ultimate strength and durability. Using your two-by-four or two-by-six lumber, construct a sturdy frame similar to how a house is framed. Cut your vertical studs to length and attach them to a top and bottom plate, spacing each vertical stud exactly sixteen inches apart on center.
Apply construction adhesive between the joints and use heavy-duty framing screws to lock the boards tightly together. If you chose an overhanging design, you must secure horizontal joists that tie back into your primary house studs. Listen to the solid thud as you drill the screws home, feeling the timber bite together securely. This framework must bear dynamic, moving weight without flexing or creaking. Take your time to ensure the framework is perfectly square and rigidly attached to the structural supports of your room.
Step 3 – Cut the Plywood Panels
Once the frame is locked in place, turn your attention to the three-quarter-inch plywood sheets. These panels form the surface you will actually touch and interact with daily. Measure the dimensions of your framework and mark your plywood using a straight edge and a chalk line.
Set up your circular saw with a sharp, clean-cutting blade to prevent the wood edges from splintering. Wear your safety glasses as you push the saw through the thick timber, maintaining a slow, steady pace for a perfectly straight line. If your design features corners or kickboards, measure those angles carefully before making the cut. Sand down any rough edges along the cuts so you do not catch splinters later. Lay the freshly cut panels flat on the ground so they are ready for the drilling process.
Step 4 – Drill the T-Nut Holes
Your plastic or resin grips need secure anchor points, which requires drilling a massive grid of holes across your plywood panels. This is a critical moment when learning how to make a climbing wall, as the hole pattern dictates your future route varieties. Use a tape measure to mark a grid, spacing the holes about six to eight inches apart in a staggered, diamond pattern.
Equip your power drill with a sharp seven-sixteenths-inch spade bit or Forstner bit. Place a scrap piece of wood beneath your panel to prevent the drill bit from tearing out the back of the plywood as it punches through. Push down firmly, feeling the drill chew through the fibers, and clear away the sawdust frequently. Consistent spacing provides maximum flexibility for setting new and challenging routes as your skills naturally progress.
Step 5 – Install the T-Nuts Securely
With the grid fully drilled, flip the plywood panels over to expose the back side. You will now install the T-nuts into every single hole. If you purchased hammer-in T-nuts, place the threaded barrel into the hole and strike the flat flange with a heavy hammer until the prongs bite deeply and sit flush with the wood.
If you chose screw-in T-nuts, use your drill to drive the small retaining screws into the wood, securing the nut tightly. This repetitive task takes time, but doing it right is vital. A loose or crooked T-nut will strip or pop out when you tighten a heavy bolt into it later. Run your hand over the back of the panel to ensure every piece of hardware is perfectly flush. A smooth, secure backing ensures long-term reliability for your handholds.
Step 6 – Attach the Plywood to the Frame
This step requires heavy lifting, so grab a friend to help you maneuver the prepared panels. Lift the first sheet of plywood and align it perfectly with the bottom edge of your wooden framework. The side with the T-nut flanges must face the framing, while the smooth, clean side faces outward toward the room.
Drive two-inch deck screws through the plywood and directly into the vertical studs behind it. Space your screws about every six to eight inches along every stud to prevent the panel from flexing or bowing under your body weight. The drill will whine as it sinks the screws slightly below the surface of the wood. Make sure none of your screws accidentally intersect with the T-nuts hidden behind the panel. Once the first panel is rigidly attached, stack the next panel above it and repeat the process.
Step 7 – Route the Holds and Set the Routes
The final step in understanding how to make a climbing wall is the most creative and rewarding part of the entire process. Open your boxes of grips and sort them by size, shape, and style. Grab your Allen wrench and begin bolting the grips into your pre-installed T-nuts.
Start by securing large, positive jugs near the bottom to create comfortable starting positions for your hands and feet. Gradually add smaller crimps, slopers, and pinches as you move higher up the panels. Tighten the bolts firmly, but do not overtighten, as you risk cracking the plastic resin. Stand back and look at the blank canvas you have transformed. Step onto the surface, feel the texture of the grips against your skin, and test the flow of the movements. Adjust the placement until the routes feel natural, challenging, and incredibly fun to navigate.
Common Mistakes
One of the most frequent errors beginners make is using thin, inadequate materials. Choosing half-inch plywood instead of three-quarter-inch wood leads to a dangerous surface that flexes, groans, and eventually cracks under dynamic loads. Always invest in thicker, structural-grade timber for safety. Another major oversight is neglecting the spacing of the framing studs. If studs are placed further than sixteen inches apart, the panels will bow inward when you pull on the grips, compromising the entire structure and loosening the hardware over time.
Many builders also fail to map out the T-nut grid accurately. Placing holes in a random scatter rather than a measured, staggered grid drastically limits your route-setting options. Furthermore, people often accidentally drill their grid directly over the spots where the vertical studs sit. When this happens, you cannot thread a bolt into the T-nut because the stud blocks the back of the hole. Finally, skipping fall zone safety is a critical mistake. People spend all their budget on lumber and grips, forgetting to secure thick, high-quality crash pads for the floor beneath the structure. Without proper padding, the risk of ankle and knee injuries skyrockets.
Expert Tips
To dramatically improve the lifespan and feel of your home setup, consider applying a textured coating to the plywood before installing the grips. Mixing fine silica sand into durable floor paint creates a gritty, friction-heavy surface that mimics real rock and allows you to smear your climbing shoes directly on the wood. This simple step adds aesthetic value and vastly expands your footwork options.
When purchasing grips, focus heavily on buying an abundance of comfortable foot jibs. Beginners often buy massive jugs for their hands but run out of places to put their feet. Having a dense array of foot options lets you create highly technical routes in a small space. Additionally, color-code your routes using small strips of tape beneath the grips. This makes it much easier to track specific circuits and train pure endurance without getting confused about which grip to grab next.
Frequently Asked Questions
How much does a home bouldering wall cost?
The final price depends heavily on the dimensions and the quality of the materials you select. Generally, you should expect to spend between five hundred and one thousand dollars for the lumber, hardware, and an initial set of grips. Expanding the structure or purchasing premium polyurethane shapes will quickly push the budget higher. Always factor in the cost of high-quality crash pads as well.
What kind of wood should I use for a bouldering wall?
You must use high-quality, three-quarter-inch thick plywood for the face panels. ACX grade plywood is highly recommended because it has one smooth, sanded side and is structurally rated for heavy weight. For the framing, standard two-by-four or two-by-six dimensional lumber from any local hardware store works perfectly, provided the boards are straight and free of massive knots.
Can I build a bouldering wall outside?
Yes, you can absolutely build this structure outdoors in a backyard. However, you must use pressure-treated lumber for the framing and marine-grade plywood for the panels to withstand rain and humidity. You also need to purchase stainless steel hardware and weather-resistant grips to prevent rust and rapid deterioration. Building outdoors requires a tarp or roof covering to protect the wood from direct sun and snow.
Do I need a permit to construct a residential wall?
If you are building a freestanding structure in your backyard, you might need a local building permit depending on your city’s zoning laws and height restrictions. If you are building it inside your garage or a spare bedroom, permits are rarely required because it is considered temporary indoor equipment. Always double-check with your local municipality just to be safe.
How thick should the crash pads be?
Safety should be your primary concern when setting up your training area. Your floor padding should be at least six to eight inches thick, utilizing dual-density foam to absorb heavy impacts. Dragging old mattresses onto the floor is not recommended, as they do not provide the stiff, localized support needed to protect your ankles during a sudden, awkward drop from the top of the panels.
Conclusion
Taking the initiative to build your own personal training ground is a massively rewarding endeavor that pays dividends for your physical fitness. Now that you know exactly how to make a climbing wall, you can transform a dusty garage or an empty spare room into a highly functional gym. The initial effort of measuring, cutting, and drilling translates directly into endless hours of convenient, focused practice.
Remember to prioritize safety at every stage, from selecting thick plywood and sturdy framing to investing in reliable hardware and adequate floor padding. Do not rush the construction process. Take pride in measuring twice, driving your screws firmly, and setting a grid that allows for maximum route creativity. Once the dust settles and the final grip is bolted into place, you will have a beautiful, durable setup ready for years of heavy use. Put on your shoes, chalk up your hands, and enjoy the incredible satisfaction of training on a structure you built from scratch.

About Caleb
Caleb Merritt is a Virginia-based outdoor writer and gear analyst who has spent over a decade sleeping on the ground, crossing mountain passes, and obsessively shaving grams off his pack weight. He holds a Bachelor of Science in Environmental Science from James Madison University, where he also served as president of the university’s outdoor recreation club. After graduating, he spent three years as a wilderness educator with a backcountry youth program in the Shenandoah Valley — teaching Leave No Trace ethics, backcountry navigation, and campcraft — before moving into full-time writing in 2018.
His work focuses on one core belief: the best gear is the gear you understand. Whether he’s doing a side-by-side weight comparison of ultralight shelters or writing a beginner’s guide to building a sub-20-lb base weight kit, Caleb writes with the same directness you’d expect from a trusted trail partner. He has logged more than 4,000 miles across iconic routes including the John Muir Trail, the Wind River Range, Vermont’s Long Trail, and the Collegiate Peaks Loop in Colorado.
Areas of Expertise
- Ultralight backpacking systems and base weight optimization
- Tent, tarp, and shelter testing across three-season and shoulder-season conditions
- Sleeping bag and quilt temperature rating verification
- Backpacking nutrition, meal planning, and calorie-per-ounce analysis
- Leave No Trace principles and wilderness ethics
- Campfire safety, bear country protocols, and water treatment methods
- Gear care, repair, and long-term durability assessment
Education
James Madison University — B.S. in Environmental Science, 2015
During his time at JMU, Caleb served as President of the Outdoor Recreation Club, where he planned and led more than 30 backcountry trips annually across the Blue Ridge Mountains and Appalachian Trail corridor. The role sharpened his ability to assess gear performance under real conditions, manage group safety in remote environments, and develop the kind of practical trail knowledge that no classroom can teach.
Professional Experience
Gear Writer & Senior Contributor — [campeox.com]
Produces in-depth gear reviews, buyer’s guides, and how-to content across backpacking, camping, and ultralight hiking categories. Tests all gear in real field conditions before publishing recommendations.
Wilderness Educator & Trip Leader — Shenandoah Backcountry Youth Program — 2015–2018 Led multi-day backcountry expeditions for teens and young adults throughout Shenandoah National Park and George Washington National Forest. Taught LNT principles, orienteering, first aid awareness, and campcraft fundamentals.
Outdoor Recreation Club President — James Madison University — 2013–2015 Organized and led university-sponsored hiking, backpacking, and camping trips in the Blue Ridge Mountains and Appalachian Trail corridor. Managed club budget, safety protocols, and trip logistics for a membership of 120+ students.
Editorial Standards
Every piece of gear Caleb recommends has been personally tested in the field — not just unboxed and described. His review process includes a minimum of two overnight trips per shelter, a full-season evaluation for sleep systems, and side-by-side comparisons wherever possible. He does not accept payment for positive reviews. Affiliate relationships, where they exist, are always disclosed in accordance with FTC guidelines.
All factual claims about gear specifications, trail distances, and safety recommendations are cross-referenced against manufacturer data sheets and established sources such as the Leave No Trace Center for Outdoor Ethics and the American Hiking Society before publication.




