

Rain, snow, or a jam-packed schedule can keep you off the trails for weeks. But your fitness doesn’t have to fade while you wait for perfect weather. A treadmill sitting in your gym or spare room can become one of the best tools for building real trail readiness.

If you’ve never used a machine to prepare for the outdoors, learning how to train for hiking on treadmill might sound a little strange at first. It’s actually simple, effective, and surprisingly close to the real thing. You can build strong legs, steady cardio endurance, and the climbing power long trails demand, all indoors. This guide walks first-time hikers through everything they need to turn treadmill sessions into genuine trail conditioning.
Why Treadmill Training Matters for Hikers
Trails are unpredictable. The weather turns, daylight runs short, and sometimes life just gets busy. A treadmill removes those barriers and lets you train on your own schedule, no matter what’s happening outside.
More importantly, treadmill incline training targets the exact muscles hiking demands. When you crank up the incline, your calves, glutes, and hamstrings work the same way they do on a steep mountain path. That builds hiking fitness you can feel the moment you hit real terrain.
For beginners and campers especially, this control is a gift. You can dial in precise grades, track your progress, and safely push your limits. You’ll arrive at the trailhead with stronger legs and better cardio endurance, ready to enjoy the climb instead of dreading it.
Tools and Materials You’ll Need
Before your first session, gather a few basics that will make your training realistic and comfortable.
- A treadmill with adjustable incline — ideally one that reaches at least 12 to 15 percent grade
- Sturdy hiking boots or trail shoes — the same pair you plan to wear outdoors
- Moisture-wicking socks — to keep blisters away during longer walks
- A loaded backpack — filled with water, books, or sandbags to mimic trail weight
- A water bottle — to practice steady hydration on the move
- Comfortable, breathable clothing — indoor sessions get sweaty fast
- A towel — for wiping down during intense incline work
- A heart rate monitor (optional) — handy for tracking effort and improving cardio endurance
Training with the gear you’ll actually use makes the whole experience far more useful.
8 Step-by-Step Guide on How to Train for Hiking on Treadmill
Step 1 – Warm Up With Flat, Easy Walking
Every good session starts gently. Begin with five to ten minutes of flat walking at a comfortable pace to wake up your muscles and raise your heart rate slowly.
Keep the incline at zero and let your body settle into a rhythm. Feel your joints loosen and your breathing deepen as blood flows to your legs.
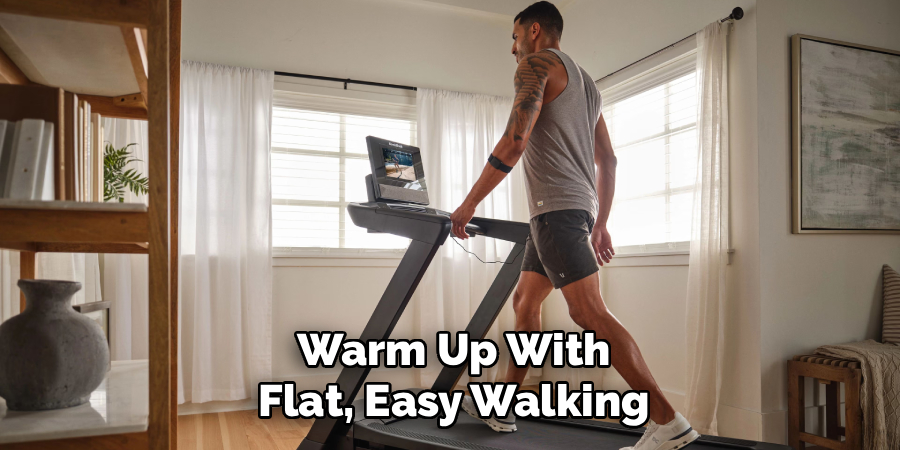
This gradual start protects you from strains and prepares your muscles for the harder work ahead. Skipping it invites tight calves and sore knees later. Learning how to train for hiking on treadmill begins with respecting this simple routine, because a warm body performs better and recovers faster than a cold one pushed too hard too soon.
Step 2 – Build Your Base Cardio Endurance
Before tackling steep grades, spend a couple of weeks strengthening your heart and lungs on gentle inclines. Set the grade around three to five percent and walk at a steady, conversational pace.
Aim for 30 to 45 minutes, three or four times a week. You should be working, but still able to talk in short sentences without gasping.
Notice how your breathing steadies as the weeks pass and the same pace starts feeling easier. That growing ease is your cardio endurance improving. This foundation carries you through long trail days, so give it time to develop before you chase the tougher climbs waiting in the next steps.
Step 3 – Increase the Incline Gradually
Now comes the heart of treadmill incline training. Slowly raise the grade to mimic the climbs you’ll face on real trails.
Add a percent or two each week rather than jumping straight to the steepest setting. Start around six percent, then work toward ten, twelve, and beyond as your legs adapt.
Feel your calves and glutes engage as the belt tilts upward. Your posture shifts, your steps shorten, and your lungs work harder. This is exactly what a mountain ascent demands. Building incline tolerance gradually keeps injuries away and lets your muscles grow strong enough to handle the relentless uphill sections that define most memorable hikes.
Step 4 – Add a Loaded Pack
Real hiking means carrying weight, so your training should too. Loaded pack walking teaches your shoulders, hips, and back to handle the gear you’ll haul on the trail.
Start light, around 10 percent of your body weight. Adjust the straps until the load sits on your hips rather than digging into your shoulders.

Walk at a moderate incline and pay attention to how the weight changes your balance. Feel the pack press against your spine and notice your core tighten to keep you steady. Each week, add a little more weight. This is where knowing how to train for hiking on treadmill truly pays off, because your body adapts to the load long before you reach the trailhead.
Step 5 – Practice Downhill Control
Climbing gets attention, but descending punishes unprepared legs. Since most treadmills don’t tilt downward, you’ll simulate the effort differently.
Lower the incline to flat and slightly increase your speed, focusing on short, controlled steps that absorb impact. Engage your core and keep your knees soft rather than locked.
You can also practice slow, deliberate walking to strengthen the muscles that brake your body on steep drops. Feel your quads working to control each step instead of letting momentum take over. Training this control now saves your knees later, when a long, rocky descent tests every bit of leg strength and coordination you’ve built.
Step 6 – Vary Your Speed and Grade
Real trails never stay the same, so your workouts shouldn’t either. Mix up your sessions with intervals that change both speed and incline.
Try walking fast on a moderate grade for three minutes, then slowing on a steep grade for two. Repeat the cycle for 20 to 30 minutes.
This variety mirrors the rolling ups and downs of actual terrain and sharpens your trail conditioning in ways steady walking never can. Feel your effort rise and fall as the machine shifts beneath you. Your body learns to recover quickly and adapt on the fly, exactly the skill you’ll need when a trail throws surprise climbs your way.
Step 7 – Extend Your Session Length
Endurance for multi-hour hikes comes from time on your feet. Once your fitness improves, stretch your longest weekly session to build lasting stamina.
Aim to gradually reach 60 to 90 minutes of continuous walking, incline included. Add no more than ten percent to your duration each week to avoid overuse.
Bring water and sip regularly, just as you would outdoors. Feel your legs settle into that steady, meditative rhythm that long walks create. These extended sessions teach your body to keep moving even after the early energy fades, preparing you for the fatigue that naturally builds across a full day on the trail.
Step 8 – Cool Down and Stretch
Finish every workout with care. Lower the incline to flat and walk slowly for five minutes to bring your heart rate down gently.
Then stretch the muscles you just worked. Focus on your calves, hamstrings, quads, and hip flexors, holding each stretch for 20 to 30 seconds.
Feel the tension release as your breathing slows and your body relaxes. This cooldown speeds recovery, reduces next-day soreness, and keeps your muscles flexible for the sessions ahead. Skipping it leaves you stiff and more prone to injury. A few minutes of stretching now keeps your training consistent and your body ready for the real adventure.
Common Mistakes Beginners Make
Even motivated hikers fall into predictable traps, and spotting them early saves you weeks of frustration.
The biggest error is ignoring the incline. Many beginners walk on flat settings and assume they’re preparing for the mountains. Flat walking builds some fitness, but it won’t ready your calves and glutes for steep climbs. Use the incline generously, because that grade is what makes treadmill training so valuable for hikers.
Another common mistake is holding onto the handrails. Gripping the bars lets your arms carry weight your legs should manage, which lowers the effort and reduces your leg strength gains. Let go, swing your arms naturally, and let your body do the real work.
Many people also train without their pack. Walking unloaded feels far easier than hiking with gear, so leaving the weight behind leaves you underprepared. Add a loaded pack once your base fitness allows.
Finally, beginners often rush their progress, adding steep grades and long sessions too quickly. Their joints rebel with aches and burnout. Build up gradually, and your body will reward your patience with steady, injury-free improvement.
Expert Tips
Break in your boots during treadmill sessions, not on the trail. Walking indoors in the exact footwear and socks you’ll hike in lets your feet adapt and reveals hot spots before they become blisters miles from your car.
Watch a nature documentary or listen to a podcast during long incline walks. The distraction helps time fly and keeps you consistent when motivation dips.
Track your workouts in a simple log, noting incline, duration, pack weight, and how you felt. Small, steady gains beat occasional heroic efforts, and seeing your progress on paper keeps you motivated. Consistency, not intensity, builds the lasting hiking fitness that carries you comfortably through a full day on the trail.
Frequently Asked Questions
Can a treadmill really prepare me for real hiking?
Yes, especially when you use the incline. Steep grades work the same climbing muscles that mountain trails demand, building strong calves, glutes, and cardio endurance. While a treadmill can’t perfectly replicate rocky, uneven terrain, it develops the strength and stamina that transfer directly to the trail. Pair it with occasional outdoor walks for the best results.
What incline should I use to simulate hiking?
Start around three to five percent while building your base, then gradually work up to ten or fifteen percent as your legs strengthen. Steep mountain trails often exceed these grades, so higher settings help most. Increase slowly, adding just a percent or two each week, to protect your joints and let your muscles adapt safely.
How often should I train on the treadmill?
Aim for three to five sessions per week, mixing base cardio days with harder incline and interval workouts. Include at least one or two rest days so your body recovers and grows stronger. Consistency matters more than intensity, so choose a routine you can maintain steadily over several weeks rather than exhausting yourself early.
Should I use a weighted pack every session?
No, introduce the pack gradually and not every workout. Build your base cardio endurance first, then add a light load once your fitness improves. Start with about ten percent of your body weight and increase slowly. Using the pack on two or three sessions weekly is plenty to prepare your shoulders, hips, and back for the trail.
Is it bad to hold the treadmill handrails?
Yes, holding the rails reduces your workout’s effectiveness. Your arms end up supporting weight your legs should carry, which lowers the effort and limits your leg strength gains. It also encourages poor posture. Let go, keep your torso upright, and swing your arms naturally. If you can’t manage without gripping, lower the incline until you can walk unassisted.
Conclusion
Bad weather and busy days no longer have to stall your trail dreams. With a treadmill, an adjustable incline, and a bit of consistency, you can build genuine hiking strength right at home. By warming up properly, growing your cardio endurance, climbing steeper grades, and adding loaded pack walking, you prepare your body for the real demands of the trail. Add downhill control, varied intervals, and longer sessions, and you’ll reach the trailhead genuinely ready.
Remember that patience wins every time. Small, steady gains stack into real power over the weeks. Avoid the common mistakes, let go of those handrails, and trust your progress even when motivation dips.
Now you understand how to train for hiking on treadmill, and your next adventure is closer than you think. Step onto that machine today, set the incline, and take the first stride toward stronger legs and bigger summits. Every session indoors brings you one step nearer to standing tall on the trail, confident and ready for whatever the mountains offer.

About Caleb
Caleb Merritt is a Virginia-based outdoor writer and gear analyst who has spent over a decade sleeping on the ground, crossing mountain passes, and obsessively shaving grams off his pack weight. He holds a Bachelor of Science in Environmental Science from James Madison University, where he also served as president of the university’s outdoor recreation club. After graduating, he spent three years as a wilderness educator with a backcountry youth program in the Shenandoah Valley — teaching Leave No Trace ethics, backcountry navigation, and campcraft — before moving into full-time writing in 2018.
His work focuses on one core belief: the best gear is the gear you understand. Whether he’s doing a side-by-side weight comparison of ultralight shelters or writing a beginner’s guide to building a sub-20-lb base weight kit, Caleb writes with the same directness you’d expect from a trusted trail partner. He has logged more than 4,000 miles across iconic routes including the John Muir Trail, the Wind River Range, Vermont’s Long Trail, and the Collegiate Peaks Loop in Colorado.
Areas of Expertise
- Ultralight backpacking systems and base weight optimization
- Tent, tarp, and shelter testing across three-season and shoulder-season conditions
- Sleeping bag and quilt temperature rating verification
- Backpacking nutrition, meal planning, and calorie-per-ounce analysis
- Leave No Trace principles and wilderness ethics
- Campfire safety, bear country protocols, and water treatment methods
- Gear care, repair, and long-term durability assessment
Education
James Madison University — B.S. in Environmental Science, 2015
During his time at JMU, Caleb served as President of the Outdoor Recreation Club, where he planned and led more than 30 backcountry trips annually across the Blue Ridge Mountains and Appalachian Trail corridor. The role sharpened his ability to assess gear performance under real conditions, manage group safety in remote environments, and develop the kind of practical trail knowledge that no classroom can teach.
Professional Experience
Gear Writer & Senior Contributor — [campeox.com]
Produces in-depth gear reviews, buyer’s guides, and how-to content across backpacking, camping, and ultralight hiking categories. Tests all gear in real field conditions before publishing recommendations.
Wilderness Educator & Trip Leader — Shenandoah Backcountry Youth Program — 2015–2018 Led multi-day backcountry expeditions for teens and young adults throughout Shenandoah National Park and George Washington National Forest. Taught LNT principles, orienteering, first aid awareness, and campcraft fundamentals.
Outdoor Recreation Club President — James Madison University — 2013–2015 Organized and led university-sponsored hiking, backpacking, and camping trips in the Blue Ridge Mountains and Appalachian Trail corridor. Managed club budget, safety protocols, and trip logistics for a membership of 120+ students.
Editorial Standards
Every piece of gear Caleb recommends has been personally tested in the field — not just unboxed and described. His review process includes a minimum of two overnight trips per shelter, a full-season evaluation for sleep systems, and side-by-side comparisons wherever possible. He does not accept payment for positive reviews. Affiliate relationships, where they exist, are always disclosed in accordance with FTC guidelines.
All factual claims about gear specifications, trail distances, and safety recommendations are cross-referenced against manufacturer data sheets and established sources such as the Leave No Trace Center for Outdoor Ethics and the American Hiking Society before publication.




