Stepping onto the snow for the first few times brings a rush of excitement and a touch of nervous energy. You feel the crisp mountain air on your face and hear the distinct crunch of fresh snow beneath your boots. Moving from those awkward first glides to smooth, confident runs takes patience and focused practice. Many beginners hit a plateau where they feel stuck relying on basic moves to get down the mountain safely.
If you find yourself wondering how to improve skiing technique, you are in the exact right place to take your skills to the next level. Small adjustments to your stance, weight distribution, and vision can completely transform your experience on the slopes. This guide exists to break down the essential movements and habits you need to build absolute confidence on the mountain.
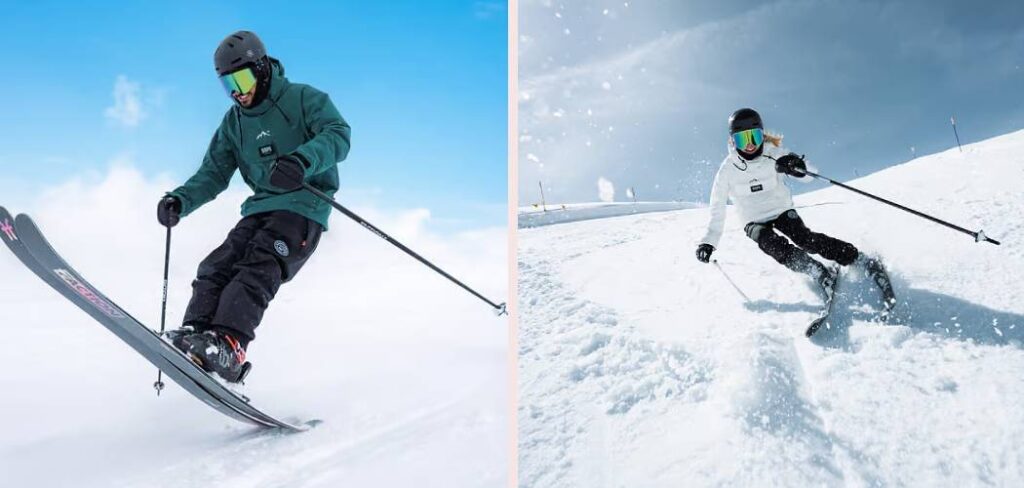
Why Mastering Your Slope Skills Matters
Learning to control your movements on the snow unlocks an entirely new way to experience the outdoors. For winter campers, hikers, and outdoor enthusiasts, mastering these skills turns daunting mountains into your personal playground. Efficient movement means you spend less energy fighting the mountain and more energy enjoying the stunning alpine views around you.
When you refine your movements, you drastically reduce your risk of injury. A solid foundation protects your knees and back from the heavy impacts of awkward falls or sudden stops. You will also find that proper mechanics keep your legs fresh throughout a long day of exploring. As your confidence grows, you gain the freedom to explore diverse terrains, from groomed trails to untouched powder, opening up a lifetime of winter adventures.
Tools and Materials You’ll Need
Before you head to the lift, making sure you have the right gear is crucial for a successful day of progression. Proper equipment supports your body and responds accurately to your movements.
- Properly fitted boots: Your boots are your steering wheel; they must fit snugly without causing pain.
- Skis suited for your skill level: Choose all-mountain skis with a forgiving flex pattern designed for beginners and intermediates.
- Ski poles: Ensure they are the correct length. Your elbows should sit at a ninety-degree angle when holding them planted in the snow.
- Helmet: Always protect your head with a certified snow sports helmet.
- Moisture-wicking base layers: Keep your core warm and dry to prevent muscle stiffness.
- Waterproof gloves and outerwear: Staying warm and dry keeps your focus on your movements.
- Boot warmers (optional): These convenient devices keep your feet toasty on freezing days, maintaining crucial feeling in your toes for better control.
Step-by-Step Guide on How to Improve Skiing Technique
Step 1 – Find Your Balanced Athletic Stance
The foundation of every good turn begins with your fundamental stance. You want to feel your shins pressing firmly against the front tongues of your boots. Bend your ankles, knees, and hips slightly to create a springy, athletic posture. Keep your feet roughly hip-width apart to provide a stable base of support.
Hold your hands forward and slightly out to the sides, as if you are reading a large map. This forward hand position pulls your center of mass forward, keeping you balanced over the center of your skis. When you stand up too straight, your weight shifts to your heels, making it incredibly difficult to turn. Practice this stance while standing still on flat snow until it feels entirely natural.
Step 2 – Master the Art of Edge Control
Understanding how to use the metal edges of your skis separates beginners from advanced riders. To grip the snow, you need to roll your ankles and knees toward the hill. This movement tilts the ski so the sharp edge digs into the snowpack. Start by traversing across a gentle slope and practicing rolling your knees uphill to feel the skis bite into the snow.
To release the edge and slide, simply flatten your skis against the snow. Knowing how to engage and release your edges fluidly dictates your speed and direction. Feel the vibration of the ice underfoot when your edges catch, and notice the smooth sensation when you let them ride flat.
Step 3 – Keep Your Upper Body Quiet
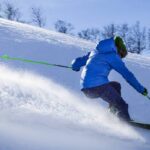
Many new skiers try to turn their skis by throwing their shoulders and torso aggressively into the turn. This excessive upper body movement actually throws you off balance and reduces your control. Your upper body should remain remarkably still, facing squarely down the mountain.
All the turning power must originate from your legs and feet. Imagine your waist is a swivel chair; your legs twist underneath while your chest remains pointed downhill. By keeping your torso quiet and facing the fall line, you maintain optimal balance. This separation of the upper and lower body is a key milestone for anyone discovering how to improve skiing technique on steeper terrain.
Step 4 – Look Ahead Down the Fall Line
Your body naturally follows your eyes, making your line of sight critical for smooth navigation. Staring down at your ski tips pulls your weight backward and limits your reaction time. Keep your chin up and focus your vision twenty to thirty feet ahead of you.
Scan the slope for upcoming bumps, ice patches, or other skiers. By looking ahead, your brain subconsciously prepares your muscles for the terrain changes before you even reach them. You will find that your turns become rounder and your transitions smoother simply by shifting your gaze down the mountain. Cultivate this habit early, and your confidence will soar.
Step 5 – Pole Plant with Purpose
Ski poles do much more than just help you push across flat sections of snow. A well-timed pole plant acts as a metronome for your turns, setting a rhythm that keeps your movements fluid. As you prepare to turn, reach forward and lightly tap the snow with the tip of your downhill pole.
This simple tap provides a brief moment of stability and signals your body that it is time to shift weight and change direction. Do not lean heavily onto the pole; it is merely a timing device. A crisp, deliberate pole plant helps keep your hands forward and your weight correctly distributed over your toes.
Step 6 – Shift Your Weight Correctly
Transferring your weight from one foot to the other is the engine that drives your turns. During a turn, the majority of your body weight must rest on your outside ski. If you are turning to the left, your right ski is the outside ski, and it should carry your weight.
Press your foot firmly into the snow, feeling the pressure build under your sole as you carve through the arc. Your inside leg should remain relatively light, simply guiding the turn. Beginners often lean into the mountain and place weight on the inside ski, which causes sliding and loss of control. Commit your weight to the outside leg for powerful, confident turns.
Step 7 – Navigate Varied Terrain Carefully
Groomed runs are excellent for practicing, but mountains offer a wide variety of snow conditions. When you encounter chopped up snow or small bumps, you must rely on your athletic stance to absorb the impact. Keep your lower joints loose and responsive, acting like the suspension system of a car.
Let your legs retract as you ride over a bump, and extend them as you slide down the other side. Keep your core tight and your hands driving forward to maintain your balance. Feeling the texture of the snow change beneath your boots requires you to stay alert and continuously adjust your edge pressure.
Step 8 – Practice Linked Parallel Turns
Moving away from the wedge shape and bringing your skis parallel is a major goal for progression. Start your turn with a slight wedge to initiate the direction change, but actively steer your inside ski to match the outside ski as you finish the arc.
Focus on steering both feet simultaneously. It helps to practice on very gentle slopes, focusing on the feeling of both skis sliding side-by-side. As you get more comfortable, work on starting the turn with both skis parallel. This creates a much smoother ride and greatly reduces the strain on your knee joints as you pick up speed.
Step 9 – Control Your Speed with Turn Shape
The shape of your turn is your primary braking system on the mountain. Instead of relying solely on skidding to stop, use the mountain’s natural slope to check your speed. Finish every turn completely by bringing your skis across the hill, perpendicular to the fall line.
A round, C-shaped turn naturally slows you down as you travel across the slope rather than straight down it. Rushing the end of a turn leads to a Z-shape, which causes you to accelerate uncontrollably. Take your time, feel the edges carve a full arc, and let the terrain do the work of managing your momentum.
Step 10 – Learn to Read the Snow Conditions
Snow changes rapidly throughout the day based on sunlight, temperature, and skier traffic. Knowing how to improve skiing technique involves adapting to these changing elements. Crisp morning corduroy requires sharp edge engagement, while afternoon slush demands a softer, more centered approach.
Look for shadows on the snow which might hide patches of hard ice. Listen to the sound your skis make; a loud scraping noise indicates ice, telling you to ease off your edges and ride flat for a moment. Soft, silent snow means you can press deeply into your turns. Paying attention to these sensory cues makes you a highly adaptable and skilled rider.
Common Mistakes When Refining Your Form
One of the most frequent errors beginners make is leaning back in their boots. When you get nervous, human instinct tells you to pull away from the slope, shifting your weight onto your heels. This removes all the pressure from the front of your skis, making it nearly impossible to steer. You must fight this instinct and actively press your shins into the front of your boots to maintain control.
Another major mistake is rotating the shoulders and hips to force a turn. Twisting your whole body to the side throws your weight off the downhill ski and causes you to lose balance. Your upper body should always face down the mountain, while only your legs do the twisting.
Many new riders also forget to plant their poles, letting their arms drop to their sides. Dropped hands pull your center of gravity backward and make your upper body rigid. Keep your hands up and forward, and use those poles to establish a reliable rhythm. Overcoming these natural tendencies requires focused, deliberate practice on easy terrain until the correct movements become muscle memory.
Expert Tips
Professional instructors often tell their students to imagine holding a tray of drinks while navigating down the slope. This visualization forces you to keep your hands forward and your upper body perfectly level and quiet. Any sudden jerking movements with your torso would spill the imaginary drinks.
Another great professional strategy involves exaggerating your movements during practice. If you struggle with getting enough weight on your outside ski, try physically lifting your inside ski off the snow entirely while making a turn. This extreme drill forces your body to commit completely to the outside edge. Always record a video of yourself if possible. What you feel you are doing often differs wildly from what your body is actually doing. Watching a short video helps you quickly identify and fix alignment issues.
Frequently Asked Questions
What is the fastest way to progress as a beginner?
Taking professional lessons from a certified instructor provides the most efficient path to progression. Instructors can immediately identify flaws in your stance and provide specific drills to correct them. Consistent practice on consecutive days also helps build vital muscle memory much faster than spacing out your trips over several weeks.
Why do my legs get so tired after just a few runs?
Fatigue usually stems from fighting the mountain rather than flowing with it. Leaning back in your boots forces your thigh muscles to work overtime to keep you upright. Relaxing into a proper athletic stance and allowing your skeletal structure to support your weight will significantly reduce muscle strain and fatigue.
How do I stop being afraid of steep slopes?
Fear comes from a lack of speed control. To conquer steep terrain, focus entirely on the shape of your turns rather than the pitch of the hill. By finishing every single turn across the hill until you naturally slow down, you prove to your brain that you are in total command of your speed.
Should I buy my own boots or rent them?
Purchasing your own boots is the best investment you can make for your progression on the mountain. Rental boots are often packed out and offer poor support, making it difficult to transfer energy to the skis. Custom-fitted boots provide exact responsiveness, dramatically accelerating your ability to learn proper edge control.
How do I deal with icy patches on the trail?
When you spot ice, resist the urge to panic and aggressively dig your edges in, as this will cause you to slide out. Instead, lower your center of gravity slightly, keep your skis relatively flat, and ride smoothly over the patch. Wait until you hit soft snow again before attempting to make a sharp turn.
Conclusion
Building confidence on the snow is a rewarding journey that requires both patience and a willingness to step outside your comfort zone. By focusing on a balanced athletic stance, committing your weight to the outside ski, and keeping your upper body quiet, you lay the groundwork for smooth, parallel turns. Remember to look ahead, use your poles to maintain rhythm, and shape your turns to naturally manage your speed down the mountain.
Do not let common mistakes like leaning backward or dropping your hands stall your progress. Every time you ride, pick just one specific movement to focus on until it feels like second nature. Progress happens in small, deliberate steps rather than overnight leaps. Now that you understand how to improve skiing technique, it is time to hit the slopes and put these mechanics to the test. Embrace the learning process, enjoy the fresh mountain air, and celebrate every smooth, carving turn you make.

About Caleb
Caleb Merritt is a Virginia-based outdoor writer and gear analyst who has spent over a decade sleeping on the ground, crossing mountain passes, and obsessively shaving grams off his pack weight. He holds a Bachelor of Science in Environmental Science from James Madison University, where he also served as president of the university’s outdoor recreation club. After graduating, he spent three years as a wilderness educator with a backcountry youth program in the Shenandoah Valley — teaching Leave No Trace ethics, backcountry navigation, and campcraft — before moving into full-time writing in 2018.
His work focuses on one core belief: the best gear is the gear you understand. Whether he’s doing a side-by-side weight comparison of ultralight shelters or writing a beginner’s guide to building a sub-20-lb base weight kit, Caleb writes with the same directness you’d expect from a trusted trail partner. He has logged more than 4,000 miles across iconic routes including the John Muir Trail, the Wind River Range, Vermont’s Long Trail, and the Collegiate Peaks Loop in Colorado.
Areas of Expertise
- Ultralight backpacking systems and base weight optimization
- Tent, tarp, and shelter testing across three-season and shoulder-season conditions
- Sleeping bag and quilt temperature rating verification
- Backpacking nutrition, meal planning, and calorie-per-ounce analysis
- Leave No Trace principles and wilderness ethics
- Campfire safety, bear country protocols, and water treatment methods
- Gear care, repair, and long-term durability assessment
Education
James Madison University — B.S. in Environmental Science, 2015
During his time at JMU, Caleb served as President of the Outdoor Recreation Club, where he planned and led more than 30 backcountry trips annually across the Blue Ridge Mountains and Appalachian Trail corridor. The role sharpened his ability to assess gear performance under real conditions, manage group safety in remote environments, and develop the kind of practical trail knowledge that no classroom can teach.
Professional Experience
Gear Writer & Senior Contributor — [campeox.com]
Produces in-depth gear reviews, buyer’s guides, and how-to content across backpacking, camping, and ultralight hiking categories. Tests all gear in real field conditions before publishing recommendations.
Wilderness Educator & Trip Leader — Shenandoah Backcountry Youth Program — 2015–2018 Led multi-day backcountry expeditions for teens and young adults throughout Shenandoah National Park and George Washington National Forest. Taught LNT principles, orienteering, first aid awareness, and campcraft fundamentals.
Outdoor Recreation Club President — James Madison University — 2013–2015 Organized and led university-sponsored hiking, backpacking, and camping trips in the Blue Ridge Mountains and Appalachian Trail corridor. Managed club budget, safety protocols, and trip logistics for a membership of 120+ students.
Editorial Standards
Every piece of gear Caleb recommends has been personally tested in the field — not just unboxed and described. His review process includes a minimum of two overnight trips per shelter, a full-season evaluation for sleep systems, and side-by-side comparisons wherever possible. He does not accept payment for positive reviews. Affiliate relationships, where they exist, are always disclosed in accordance with FTC guidelines.
All factual claims about gear specifications, trail distances, and safety recommendations are cross-referenced against manufacturer data sheets and established sources such as the Leave No Trace Center for Outdoor Ethics and the American Hiking Society before publication.