

Finding stubborn brown flakes on your beloved bicycle can feel entirely discouraging before a big ride. Weather exposure, damp storage spaces, and unexpected rain showers often leave unpleasant marks on metal frames and chains. You do not need to panic or rush out to buy an expensive replacement frame when you notice these unappealing patches.
Learning how to get rust off a bike is a straightforward process that anyone can master with common household items. You likely already possess everything you need in your kitchen cabinets right now. Treating metal degradation early prevents long-term structural damage and restores your ride to its original shiny condition.
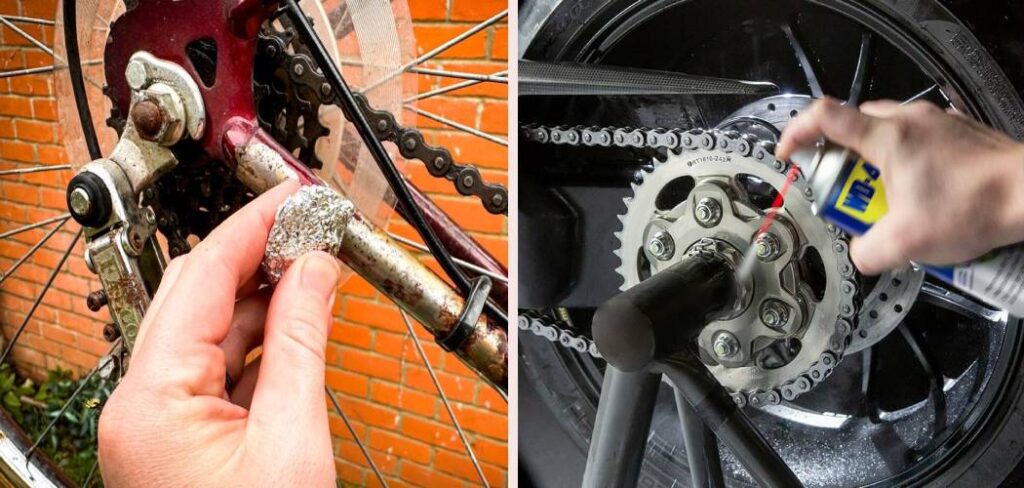
By following a few simple methods, you can salvage your components and extend their lifespan significantly. This guide aims to provide you with an easy, step-by-step approach to safely restoring your bicycle’s metal surfaces to their former glory.
Why Removing Bike Rust Helps Outdoor Beginners
Venturing into the great outdoors brings immense joy, but it also exposes your gear to harsh elements. Campers and outdoor beginners often rely on their bicycles for quick transportation around large campsites or exploring nearby trails. A well-maintained bicycle ensures you spend your weekends actually riding instead of dealing with mechanical failures far from home.
Leaving corrosion unchecked compromises the strength of your metal parts over time. A weak chain or brittle gears can snap during a steep climb, turning a fun camping excursion into a frustrating hike back to base. Addressing oxidation immediately keeps your equipment reliable and safe for rugged adventures.
Understanding basic maintenance also builds your confidence as an outdoor enthusiast. You become more self-reliant when you know exactly how to care for your gear without needing a professional mechanic. Mastering this skill gives you peace of mind during every wilderness excursion.
Tools and Materials You Will Need
Before you begin the restoration process, gather your supplies in a well-ventilated workspace. Having everything within reach makes the job much smoother and prevents you from walking away mid-task.
You will need the following essentials to tackle the job effectively:
- Baking soda to act as a gentle abrasive cleaner.
- White vinegar for breaking down stubborn oxidation.
- A small bowl or container for mixing your cleaning solutions.
- Several clean microfiber cloths or soft shop rags.
- An old toothbrush or a soft-bristled scrub brush.
- Mild dish soap for initial surface cleaning.
- A bucket of warm water to rinse away debris.
- Bicycle-specific chain lubricant to protect moving parts.
- Rust inhibitor spray (this is an optional item, but highly recommended for long-term convenience and protection).
9 Step-by-Step Guide on How To Get Rust Off A Bike
Step 1 – Assess the Extent of the Damage
Start by placing your bicycle in a well-lit area so you can inspect every inch of the frame and components. Look closely at the chain, the handlebars, the spokes, and around the bottom bracket. You need to distinguish between light surface discoloration and deep, structural flaking that might compromise safety.
Run your fingers gently over the affected spots to feel the texture of the metal. Surface oxidation feels slightly rough like fine sandpaper, while deep damage will feel pitted and jagged. Identifying the severity of the problem helps you decide how much time and effort the restoration will require.
Taking a few reference photos before you start is also a great idea. This allows you to track your progress and ensures you do not miss any hidden spots under the saddle or behind the pedals.
Step 2 – Clean the Surface Dirt First
You must remove all loose dirt, grease, and grime before treating the underlying oxidation. Fill a bucket with warm water and add a few generous squirts of mild dish soap to create a sudsy solution. Dip a clean microfiber cloth into the soapy water and wipe down the entire frame carefully.
If you are figuring out how to get rust off a bike for the very first time, remember that preparation dictates your overall success. Scrubbing dirt into the metal will only cause ugly scratches on your paint job. Pay special attention to the areas surrounding the corrosion, as grime loves to hide in these textured pockets.
Once the frame is clean, rinse it thoroughly with fresh water and dry it completely using a separate cloth. The metal must be entirely dry before you apply any specific treatments.
Step 3 – Mix the Baking Soda Paste
Baking soda is a brilliant, non-toxic abrasive that safely lifts discoloration without destroying the surrounding paint. Grab your small container and pour in about half a cup of dry baking soda. Add warm water one tablespoon at a time while stirring the mixture constantly with a spoon.
You are aiming for a thick, spreadable consistency that resembles toothpaste or heavy frosting. If the mixture turns out too runny, it will drip right off the frame before it can do its job. If it is too dry, it will crumble and fall to the floor when you try to apply it.
Adjust the ratio of baking soda to water until you achieve the perfect sticky texture. This homemade paste remains one of the safest and most effective household remedies for delicate bicycle components.
Step 4 – Apply the Paste to the Metal
Use your fingers or a small spatula to scoop up the baking soda paste. Smear a generous layer directly over the affected areas, making sure to coat the rough spots entirely. Do not be afraid to lay it on thick, as the active ingredients need direct contact with the oxidation to work properly.
Press the paste firmly into awkward crevices, especially around bolts and suspension joints. An old toothbrush works perfectly for pushing the mixture into the tight links of your chain. Ensure that every single brown speck is completely hidden beneath your white cleaning paste.
Work methodically from the front tire to the back tire so you do not accidentally skip over any hidden spots. Taking your time during application guarantees a much more uniform and impressive final result.
Step 5 – Let the Treatment Work
Patience is incredibly important during this phase of the restoration project. The baking soda needs adequate time to chemically react with the oxidation and lift it away from the healthy metal beneath. Leave the thick paste sitting on the frame for at least fifteen to twenty minutes undisturbed.
During this waiting period, the mixture gently breaks the bond between the corrosion and your bicycle parts. You might notice the bright white paste slowly turning a dull brown or orange color as it pulls impurities outward. This color change is a great sign that the gentle chemical process is working exactly as intended.
Resist the urge to start scrubbing too early. Giving the paste enough time to do the heavy lifting saves you from exhausting manual labor later on. Use this break to prepare your scrubbing brushes and fresh rinsing water.
Step 6 – Scrub the Affected Areas Gently
Once the waiting period is over, grab your soft-bristled brush or an old toothbrush to begin the manual removal. Press the bristles into the dried paste and scrub using tight, circular motions. Apply firm but controlled pressure to lift the loosened flakes without scratching the healthy chrome or paint beneath.
You will see the dark, gritty residue breaking away from the shiny metal as you agitate the surface. Focus your energy on the worst patches first, letting the brush bristles dig deep into the tiny pits and grooves. If you are cleaning delicate areas like the gears, use a lighter touch to avoid bending any sensitive components.
Keep a dry rag handy to periodically wipe away the slurry so you can check your progress. If a spot remains heavily discolored, simply apply a little more pressure and continue buffing the area.
Step 7 – Wipe Away the Residue Completely
After thoroughly scrubbing every coated section, you must remove all traces of the baking soda paste. Take a clean, damp microfiber cloth and wipe the frame from top to bottom. The abrasive mixture can leave a chalky film behind if you do not clear it off entirely.
Rinse your cloth frequently in a bucket of fresh water to avoid smearing the gritty residue back onto the clean metal. For tight spaces around the brake calipers, use a damp cotton swab to pull the remaining paste out of the crevices. The metal should start looking significantly brighter and smoother at this stage.
Make sure to dry the area completely with a fresh towel once the paste is gone. Leaving any moisture on the raw metal will only invite new oxidation to form almost immediately.
Step 8 – Treat Tough Spots with Vinegar
Sometimes baking soda alone is not quite enough for severe degradation. If stubborn spots remain, white vinegar provides a stronger acidic solution to dissolve heavy mineral bonds. Pour a small amount of white vinegar onto a clean rag and hold it directly against the stubborn patch.
When you want to know how to get rust off a bike that has been sitting outside for years, vinegar becomes your best friend. Wrap the vinegar-soaked cloth around the affected tube or component and leave it there for about ten minutes. The mild acid eats away at the rough texture, making it soft enough to wipe away easily.
Remove the cloth and scrub the area lightly with your toothbrush one last time. Follow up immediately with a damp rag to neutralize the acid and stop it from eating into the healthy metal.
Step 9 – Dry and Protect the Components
The final and most crucial step is protecting the fresh metal from future moisture exposure. Use a highly absorbent towel to ensure every single drop of water is completely gone from the frame, chain, and gears. Even a tiny bead of water left in a bolt head will cause problems down the road.
Apply a generous layer of bicycle-specific lubricant to your chain, pedaling backward to distribute the oil evenly across all the links. Wipe away any excess dripping oil with a rag, as too much lubricant attracts sticky dirt. For the frame and chrome pieces, apply a thin coat of rust inhibitor spray or specialized bike wax.
This protective barrier seals the microscopic pores in the metal and repels atmospheric moisture. Your bicycle is now clean, protected, and fully ready for your next outdoor adventure.
Common Mistakes When Treating Bike Rust
Many beginners accidentally scratch their beautiful paint jobs by using steel wool or harsh wire brushes to scrub their frames. While these aggressive tools certainly remove oxidation quickly, they also strip away protective clear coats and leave deep, permanent gouges in the metal. You should always rely on softer materials like old toothbrushes or microfiber towels to agitate cleaning solutions safely.
Another frequent error involves leaving acidic treatments like white vinegar on the components for far too long. Vinegar is incredibly effective at dissolving mineral deposits, but prolonged exposure will eventually corrode the healthy metal underneath. You must always set a timer, wipe the acid away promptly, and neutralize the area with water to prevent structural damage.
Finally, people often skip the crucial lubrication and protection phase after completing the cleaning process. Stripping away the corrosion leaves the raw metal completely exposed to the humidity in the air. If you fail to apply a protective wax or chain lubricant immediately after drying the bicycle, the orange flakes will inevitably return within a matter of days.
Expert Tips for Long-Lasting Results
Maintaining a pristine bicycle requires proactive care rather than just reactive cleaning. Experts always recommend storing your equipment indoors or in a dry garage whenever possible to minimize daily exposure to morning dew and rain. If you must leave your ride outside, invest in a high-quality, breathable waterproof cover to shield it from harsh weather conditions.
After riding through muddy trails or getting caught in a sudden downpour, take five minutes to wipe down the frame with a dry towel. Removing standing water immediately drastically reduces the chances of oxidation taking hold.
Additionally, keep an eye on minor paint chips caused by flying gravel. Covering these small exposed scratches with clear nail polish or matching touch-up paint seals the vulnerable metal before moisture can penetrate the surface. Consistency in these small habits ensures your gear stays in showroom condition for many years.
Frequently Asked Questions
Can I use WD-40 to clean my bicycle components?
You can absolutely use WD-40 to help loosen stubborn oxidation and displace moisture on your frame. It acts as a great penetrating oil for seized bolts and rough patches. However, it is not a dedicated lubricant, so you must still apply a proper bicycle chain oil afterward to ensure smooth mechanical operation.
Does Coca-Cola actually work for cleaning metal?
Coca-Cola contains phosphoric acid, which genuinely breaks down mineral deposits and oxidation on metal surfaces. You can pour it over a crumpled piece of aluminum foil and gently rub the affected areas. While effective in a pinch, it leaves a sticky sugary residue that requires thorough washing with soap and water immediately afterward.
How often should I lubricate my chain to prevent damage?
You should aim to clean and lubricate your chain every hundred miles, or immediately after riding in wet conditions. Frequent lubrication creates a protective barrier that repels water and prevents friction. Regular maintenance keeps the drivetrain shifting smoothly and completely blocks degradation from taking hold in the tight links.
Will household bleach help remove the orange stains?
You should never use household bleach on any part of your bicycle. Bleach contains harsh chemicals that actually accelerate the corrosion process on metal surfaces and can ruin your paint job entirely. Stick to gentle household abrasives like baking soda or mild acids like white vinegar for safe and effective results.
Is it safe to ride a bicycle with a brown chain?
Riding with a lightly discolored chain is generally safe for short distances, but it will make your pedaling feel stiff and noisy. If the chain is heavily rusted to the point where links are frozen or cracking, it poses a serious safety hazard. A brittle chain can easily snap under pressure, so it is best to clean or replace it before riding.
Conclusion
Restoring your bicycle does not require expensive tools or specialized mechanical knowledge. By using simple household items like baking soda and white vinegar, you can easily rescue your components from early decay. Taking action as soon as you notice discoloration prevents structural weakness and keeps your ride functioning beautifully.
Remember that thorough preparation, gentle scrubbing, and proper drying are the keys to a successful restoration project. Never skip the final protective steps, as sealing the raw metal is what truly guarantees long-lasting results. Building these consistent maintenance habits ensures your equipment remains reliable for all your upcoming weekend adventures.
Now that you know exactly how to get rust off a bike, you can tackle those ugly brown patches with complete confidence. Grab your supplies, head out to your workspace, and give your favorite two-wheeled companion the attention it truly deserves. Your smooth, quiet, and shiny ride will be well worth the afternoon of effort.

About Caleb
Caleb Merritt is a Virginia-based outdoor writer and gear analyst who has spent over a decade sleeping on the ground, crossing mountain passes, and obsessively shaving grams off his pack weight. He holds a Bachelor of Science in Environmental Science from James Madison University, where he also served as president of the university’s outdoor recreation club. After graduating, he spent three years as a wilderness educator with a backcountry youth program in the Shenandoah Valley — teaching Leave No Trace ethics, backcountry navigation, and campcraft — before moving into full-time writing in 2018.
His work focuses on one core belief: the best gear is the gear you understand. Whether he’s doing a side-by-side weight comparison of ultralight shelters or writing a beginner’s guide to building a sub-20-lb base weight kit, Caleb writes with the same directness you’d expect from a trusted trail partner. He has logged more than 4,000 miles across iconic routes including the John Muir Trail, the Wind River Range, Vermont’s Long Trail, and the Collegiate Peaks Loop in Colorado.
Areas of Expertise
- Ultralight backpacking systems and base weight optimization
- Tent, tarp, and shelter testing across three-season and shoulder-season conditions
- Sleeping bag and quilt temperature rating verification
- Backpacking nutrition, meal planning, and calorie-per-ounce analysis
- Leave No Trace principles and wilderness ethics
- Campfire safety, bear country protocols, and water treatment methods
- Gear care, repair, and long-term durability assessment
Education
James Madison University — B.S. in Environmental Science, 2015
During his time at JMU, Caleb served as President of the Outdoor Recreation Club, where he planned and led more than 30 backcountry trips annually across the Blue Ridge Mountains and Appalachian Trail corridor. The role sharpened his ability to assess gear performance under real conditions, manage group safety in remote environments, and develop the kind of practical trail knowledge that no classroom can teach.
Professional Experience
Gear Writer & Senior Contributor — [campeox.com]
Produces in-depth gear reviews, buyer’s guides, and how-to content across backpacking, camping, and ultralight hiking categories. Tests all gear in real field conditions before publishing recommendations.
Wilderness Educator & Trip Leader — Shenandoah Backcountry Youth Program — 2015–2018 Led multi-day backcountry expeditions for teens and young adults throughout Shenandoah National Park and George Washington National Forest. Taught LNT principles, orienteering, first aid awareness, and campcraft fundamentals.
Outdoor Recreation Club President — James Madison University — 2013–2015 Organized and led university-sponsored hiking, backpacking, and camping trips in the Blue Ridge Mountains and Appalachian Trail corridor. Managed club budget, safety protocols, and trip logistics for a membership of 120+ students.
Editorial Standards
Every piece of gear Caleb recommends has been personally tested in the field — not just unboxed and described. His review process includes a minimum of two overnight trips per shelter, a full-season evaluation for sleep systems, and side-by-side comparisons wherever possible. He does not accept payment for positive reviews. Affiliate relationships, where they exist, are always disclosed in accordance with FTC guidelines.
All factual claims about gear specifications, trail distances, and safety recommendations are cross-referenced against manufacturer data sheets and established sources such as the Leave No Trace Center for Outdoor Ethics and the American Hiking Society before publication.




