A closet packed with backpacks can turn a simple morning into a frustrating hunt. You shove the door open, dig past a tangle of straps, and somehow grab the wrong bag every time. Sound familiar? The good news is that fixing it takes less effort than you think. Once you learn how to organize backpacks in closet spaces the smart way, your gear stays tidy, easy to grab, and protected from dust and dampness.
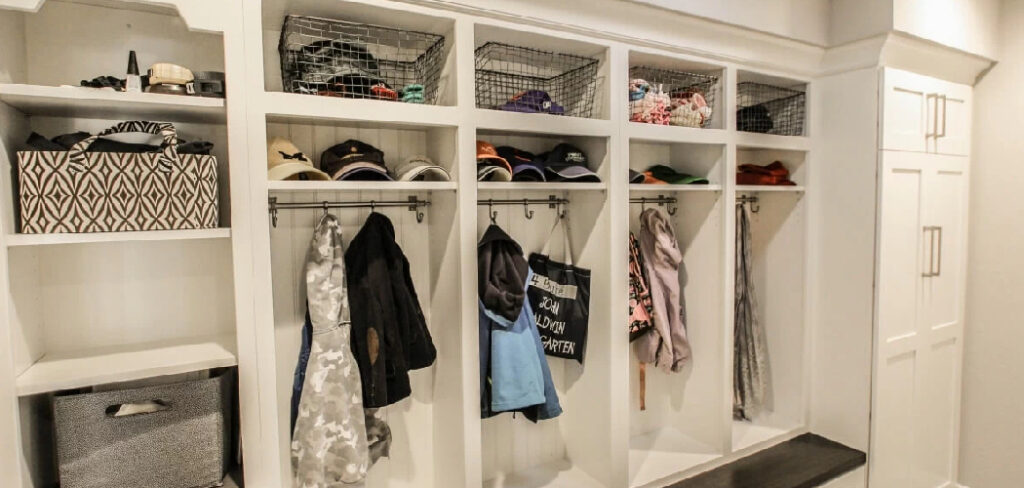
Whether you store a school backpack, a daypack, or bulky camping gear, a few simple changes make a huge difference. The trick is using shelves, hooks, and dividers to give every bag a clear home. This guide walks you through easy, beginner-friendly steps to set up a closet system that actually stays organized.
Why Closet Backpack Organization Matters
When backpacks pile up, your closet becomes a black hole where gear disappears. You waste time searching, and bags get crushed under heavier items. Over time, that pressure flattens padding and creases fabric, shortening the life of packs you paid good money for.
A tidy closet solves both problems. It saves you minutes every day and keeps your gear ready to go.
For campers and outdoor beginners, this matters even more. You often juggle a daypack, a framed hiking pack, and odd pieces of camping gear that don’t stack neatly. An organized closet means your gear stays clean, dry, and reachable, so packing for a trip feels exciting instead of stressful. You spend less time untangling straps and more time planning your next adventure.
Tools and Materials You’ll Need
You don’t need a big budget or fancy gadgets to whip your closet into shape. Most of these items cost little and install in minutes.
- Shelf dividers – keep stacked bags upright and separated so they don’t topple
- Hanging organizers – fabric shelves that drop from the closet rod for daypacks and pouches
- Wall hooks or rod hooks – hang lighter bags by their straps to free up shelf space
- An over-the-door rack – uses the back of the door for small bags and gear
- Storage bins or cubbies – corral loose accessories and seasonal items
- Adhesive labels – mark each spot so bags return to the right home
- Moisture absorber packets – fight dampness in enclosed closet air
- A clip-on closet light (optional) – a handy convenience item that helps you spot the right bag fast
That little light is the upgrade worth grabbing. A bright closet makes the whole system easier to use and keeps you from grabbing the wrong pack in the dark.
8 Step-by-Step Guide on How to Organize Backpacks in Closet
Step 1 – Empty and sort every bag
Start by pulling every backpack out of the closet and emptying each one. You’ll likely find old receipts, crumbs, and gear you forgot you owned. Shake out the debris, then wipe down the fabric so you store clean bags only.
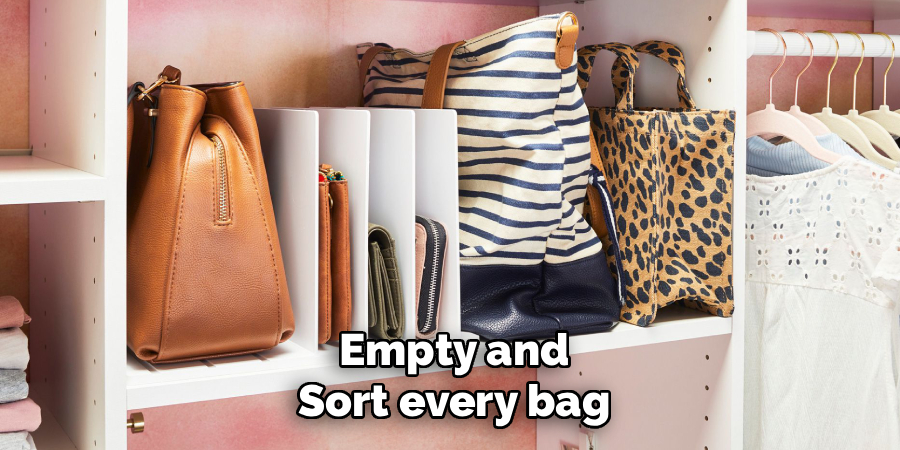
Lay everything on your bed and sort it into clear groups: everyday bags, school backpacks, and seasonal camping gear. This snapshot shows you exactly how much space you really need.
Sorting first saves you from cramming bags into spots that don’t fit. As you sort, set aside any pack you no longer use. Donating or tossing those frees up room and makes the rest of your system far easier to build.
Step 2 – Measure your closet space
Grab a tape measure and check your closet’s real dimensions. Note the shelf height, the depth, the width of any open floor, and the gap behind the door. Guessing leads to bins that don’t fit and racks that block the door.
Compare those numbers to your bulkiest bag. A framed hiking pack needs far more room than a slim daypack, so plan around your largest item.
Knowing exactly how to organize backpacks in closet areas starts with these measurements. When you have the numbers written down, shopping gets simple. You’ll buy the right-sized dividers and bins the first time, instead of hauling returns back to the store and losing precious weekend hours.
Step 3 – Add shelf dividers for upright storage
Stacked backpacks slide and topple, creating that messy avalanche you dread. Shelf dividers fix this fast. Slot them onto your closet shelf to create snug vertical slots that hold each bag upright.
Store packs standing on their base, like books on a shelf, so the padding keeps its shape. This also lets you grab one bag without disturbing the others.
You’ll hear less rustling and feel less frustration when every pack has its own slot. Space the dividers based on bag width, leaving a little wiggle room so bags slide in and out smoothly. This simple change turns a chaotic pile into a neat row you can scan in a single glance.
Step 4 – Hang lighter bags on hooks
Your closet has more storage potential than the shelf alone. Mount a few sturdy hooks on the side wall or along the rod, then hang lighter daypacks and school backpacks by their top loops or straps.
Choose wide, padded hooks instead of thin pegs. A narrow hook digs into the strap and stresses the stitching over time.
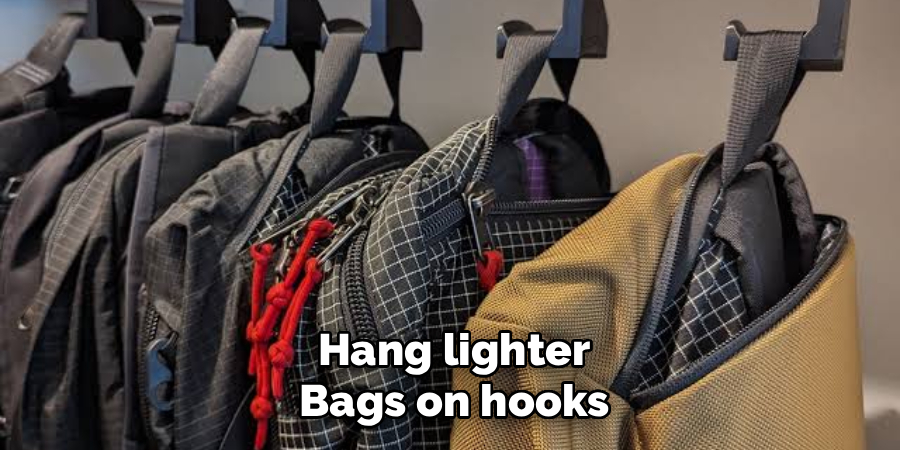
Hanging bags clears shelf space for bulkier gear and keeps frequently used packs within easy reach. Place hooks at a height you can grab without stretching. You’ll love how a quick hang-and-go habit replaces the old routine of digging through a heap. Just avoid hanging heavy framed packs this way, since their weight strains both the hook and the bag.
Step 5 – Use the door and vertical space
The back of your closet door is prime real estate that usually sits empty. An over-the-door rack hangs in seconds, no tools needed, and turns that dead space into a tidy zone for small bags and pouches.
Look up, too. The space above the rod often goes to waste, yet it’s perfect for a bin of seasonal camping gear you rarely touch.
Vertical storage is your best friend in a small closet. By building upward and using the door, you fit more without crowding the floor. Reserve the easy-to-reach spots for daily bags, and tuck the rarely used items higher up or behind the door where they stay out of your way.
Step 6 – Corral accessories in bins and cubbies
Loose straps, rain covers, and gear pouches create most of the clutter in a closet. Bins and cubbies solve this by giving small items a contained home instead of letting them scatter across the shelf.
Group similar things together. Put hydration bladders in one bin, rain gear in another, and small accessories in a cubby up front where you’ll spot them fast.
Clear bins work best because you see the contents without opening them. Slide these containers onto the shelf or floor wherever they fit your measurements. When the little stuff stays corralled, your backpacks get the open space they need, and your whole closet suddenly looks calm and intentional rather than crammed.
Step 7 – Label everything clearly
A labeling system might sound fussy, but it keeps your closet organized long after you set it up. Stick adhesive labels on shelves, bins, and hooks so every bag and accessory has an obvious home.
This matters most in a shared closet. When labels mark each spot, roommates and family members return bags correctly instead of stacking them randomly.
Sort by how often you use each item. Label the easy-reach hook for your everyday daypack, and mark a high shelf for the seasonal hiking pack. A glance tells anyone exactly where things belong. Putting gear away becomes a two-second task, and that small habit is what keeps the whole system from sliding back into chaos.
Step 8 – Protect against moisture and dust
Closets trap still air, and that stillness invites dampness, musty smells, and a fine layer of dust on everything. A little prevention keeps your bags fresh.
Tuck moisture absorber packets onto shelves and inside any closed bin. They soak up humidity and stop that stale odor from settling into the fabric.
Improve ventilation by leaving the closet door cracked now and then, especially in humid weather. Avoid sealing packs in airtight plastic, since trapped air turns musty fast. For open shelves and hooks, a quick monthly wipe-down keeps dust off the fabric. Good airflow and moisture control mean your backpacks stay clean and ready, so you grab a fresh pack every time instead of one that smells like a damp closet.
Common Mistakes When Organizing Backpacks in a Closet
Even with good intentions, beginners make a few errors that undo their hard work. The most common mistake is stacking bags flat in a tall pile. The bottom packs get crushed, the padding flattens, and you have to topple the whole stack just to reach the bag you want. Storing bags upright with dividers prevents this entirely.
Another frequent slip is skipping the measuring step. People buy bins and racks on impulse, only to find they don’t fit the shelf or block the door. A few minutes with a tape measure saves you returns and wasted money.
Many folks also waste their vertical space. They cram everything onto one shelf while the closet walls, the door, and the area above the rod sit empty. Building upward instantly doubles your usable room.
Overstuffing is another quiet problem. When you jam too many bags into one spot, fabric creases and zippers strain. Leave a little breathing room. Finally, plenty of people ignore moisture control, then wonder why their gear smells musty. A simple absorber packet and occasional airflow keep everything fresh.
Expert Tips
A few smart habits make your closet work harder for you. Store bags by frequency, keeping your daily daypack at eye level and tucking seasonal camping gear higher up or in the back. You’ll save time reaching for what you actually use.
Empty and air out each pack before long-term storage, and loosen the straps so the stitching doesn’t sit under constant tension. This small step extends the life of every bag.
Use clear bins so you can spot contents without rummaging, and add a clip-on light if your closet runs dark. Finally, do a quick five-minute reset each season. Pull everything out, wipe the shelves, refresh the moisture packets, and put it all back. That tiny ritual keeps your system running smoothly all year long.
Frequently Asked Questions
How do I store multiple backpacks in one closet?
Use shelf dividers to stand bags upright like books, so each one stays separate and easy to grab. Hang lighter daypacks on wall hooks to free up shelf room, and add an over-the-door rack for smaller bags. Store seasonal camping gear higher up or in bins. This mix of vertical storage and clear zones lets one closet hold several packs without the messy pile.
What’s the best way to keep backpacks from getting crushed?
Store them upright on their base rather than stacked flat in a tall pile. Shelf dividers hold each bag in its own slot so nothing presses down on the padding. Leave a little space between bags so the fabric doesn’t crease. For heavy hiking packs, a sturdy shelf works better than a hook, since hanging strains the straps and stitching over time.
How can I organize a small or shared closet for backpacks?
Go vertical and label everything. Use the door, the wall, and the space above the rod to add storage without taking floor room. Shelf dividers and hanging organizers create separate slots, and clear labels tell everyone where each bag belongs. In a shared closet, this prevents mix-ups and keeps roommates returning bags to the right spot, so the system stays tidy.
How do I stop my backpacks from smelling musty in the closet?
Musty smells come from trapped moisture and poor airflow. Always store bags completely dry, and tuck moisture absorber packets onto shelves and inside bins. Crack the closet door occasionally to improve ventilation, especially in humid weather. Avoid sealing packs in airtight plastic, since that traps stale air. A quick monthly wipe-down also keeps dust and odor from building up on the fabric.
Should I hang or shelve my hiking pack?
Shelve it. Heavy framed hiking packs are too bulky to hang for long, and the weight strains both the hook and the straps. Store the pack upright on a sturdy shelf so its base carries the load naturally. A deep bin works well for seasonal storage too. Loosen the straps during long breaks so the stitching relaxes, and keep the pack cool, dry, and roomy.
Conclusion
Getting your closet in order comes down to one simple idea: give every backpack a clear, dedicated home. Once you understand how to organize backpacks in closet spaces, those frustrating morning hunts disappear, and your gear stays fresh and ready. Start by emptying and sorting every bag, then measure your closet before you buy a single bin. Add shelf dividers for upright storage, hang lighter bags on hooks, and put the door and vertical space to work. Finish with bins, labels, and a little moisture control to keep everything tidy and dry.
Steer clear of the usual traps, like stacking bags flat, skipping measurements, ignoring vertical space, and forgetting about airflow. These small mistakes cost you room and slowly wear out your gear.
So pick one step and tackle it today, whether that’s adding a few dividers or mounting a hook on the wall. Your closet will feel roomier, your bags will last longer, and you’ll always grab the right pack on the first try.

About Caleb
Caleb Merritt is a Virginia-based outdoor writer and gear analyst who has spent over a decade sleeping on the ground, crossing mountain passes, and obsessively shaving grams off his pack weight. He holds a Bachelor of Science in Environmental Science from James Madison University, where he also served as president of the university’s outdoor recreation club. After graduating, he spent three years as a wilderness educator with a backcountry youth program in the Shenandoah Valley — teaching Leave No Trace ethics, backcountry navigation, and campcraft — before moving into full-time writing in 2018.
His work focuses on one core belief: the best gear is the gear you understand. Whether he’s doing a side-by-side weight comparison of ultralight shelters or writing a beginner’s guide to building a sub-20-lb base weight kit, Caleb writes with the same directness you’d expect from a trusted trail partner. He has logged more than 4,000 miles across iconic routes including the John Muir Trail, the Wind River Range, Vermont’s Long Trail, and the Collegiate Peaks Loop in Colorado.
Areas of Expertise
- Ultralight backpacking systems and base weight optimization
- Tent, tarp, and shelter testing across three-season and shoulder-season conditions
- Sleeping bag and quilt temperature rating verification
- Backpacking nutrition, meal planning, and calorie-per-ounce analysis
- Leave No Trace principles and wilderness ethics
- Campfire safety, bear country protocols, and water treatment methods
- Gear care, repair, and long-term durability assessment
Education
James Madison University — B.S. in Environmental Science, 2015
During his time at JMU, Caleb served as President of the Outdoor Recreation Club, where he planned and led more than 30 backcountry trips annually across the Blue Ridge Mountains and Appalachian Trail corridor. The role sharpened his ability to assess gear performance under real conditions, manage group safety in remote environments, and develop the kind of practical trail knowledge that no classroom can teach.
Professional Experience
Gear Writer & Senior Contributor — [campeox.com]
Produces in-depth gear reviews, buyer’s guides, and how-to content across backpacking, camping, and ultralight hiking categories. Tests all gear in real field conditions before publishing recommendations.
Wilderness Educator & Trip Leader — Shenandoah Backcountry Youth Program — 2015–2018 Led multi-day backcountry expeditions for teens and young adults throughout Shenandoah National Park and George Washington National Forest. Taught LNT principles, orienteering, first aid awareness, and campcraft fundamentals.
Outdoor Recreation Club President — James Madison University — 2013–2015 Organized and led university-sponsored hiking, backpacking, and camping trips in the Blue Ridge Mountains and Appalachian Trail corridor. Managed club budget, safety protocols, and trip logistics for a membership of 120+ students.
Editorial Standards
Every piece of gear Caleb recommends has been personally tested in the field — not just unboxed and described. His review process includes a minimum of two overnight trips per shelter, a full-season evaluation for sleep systems, and side-by-side comparisons wherever possible. He does not accept payment for positive reviews. Affiliate relationships, where they exist, are always disclosed in accordance with FTC guidelines.
All factual claims about gear specifications, trail distances, and safety recommendations are cross-referenced against manufacturer data sheets and established sources such as the Leave No Trace Center for Outdoor Ethics and the American Hiking Society before publication.