Hitting the trail requires more than just good boots and a strong sense of adventure. Your gear can drastically shape your outdoor experience, and the secret lies entirely in preparation. Figuring out how to pack a backpack for hiking properly ensures you stay comfortable, balanced, and energized from the trailhead to the summit.
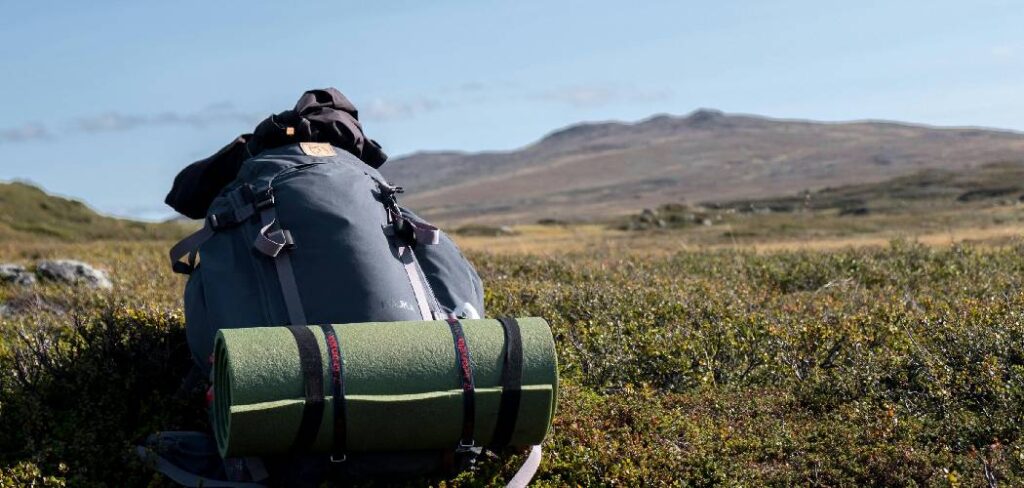
Many beginners simply throw their gear into a bag and hope for the best, only to face sore shoulders and endless frustration. By organizing your equipment strategically, you protect your back and keep essential items easily accessible. This guide walks you through the proven methods experts use to load gear safely. You will learn the core principles of weight distribution, accessibility, and load stabilization. Let us explore the exact steps to prepare your bag for an unforgettable journey into nature.
Why Correct Gear Distribution Matters
Understanding the physics of your gear distribution transforms a grueling trek into an enjoyable walk. An improperly loaded bag pulls your center of gravity backward, forcing you to lean forward and strain your lower back. This constant physical battle against your own equipment drains your energy surprisingly fast.
A well-organized bag rests the majority of its heavy weight on your hips rather than hanging from your shoulders. Correct placement also prevents hard objects from digging into your spine and stops items from shifting unpredictably during tricky river crossings or steep scrambles over rocks. Proper organization ensures you can grab your rain jacket or high-energy snacks instantly without emptying your entire bag onto the muddy ground. Taking the time to master this essential preparation skill guarantees a safer, much more pleasant outdoor adventure.
7 Step-by-Step Guide on How to Pack a Backpack for Hiking
Step 1: Gather and Organize All Your Gear
Laying out every single piece of equipment before you start loading prevents you from forgetting crucial survival items. Spread your tent, sleeping bag, clothes, cooking supplies, and food across the floor. This visual inventory allows you to group similar items together and accurately assess the total volume of your load.
By seeing everything at once, you can easily identify unnecessary heavy items that you should leave behind. Packing directly from a closet almost always results in poor weight distribution and forgotten essentials. Taking ten minutes to arrange your items by weight and purpose sets the proper foundation for a perfectly balanced load. Make sure all your hydration reservoirs are completely filled and your trail snacks are set aside before moving forward.
Step 2: Fill the Bottom Zone with Sleep Gear
The bottom of your bag serves as the foundation for the rest of your equipment. You want to place bulky, lightweight items down here that you will not need until you set up camp at the end of the day. Stuff your sleeping bag into this lower compartment first. Many modern bags feature a dedicated bottom zipper specifically designed for this purpose.
Push the sleeping bag down firmly to eliminate any dead air space. Next, add your sleeping pad and any soft camp clothing you plan to wear at night. Creating a stable, squishy base provides a solid platform for the heavier gear that goes on top. This method also acts as a natural shock absorber when you set your bag down on rocky terrain.
Step 3: Load the Heavy Items in the Core Zone
The middle section of your bag must hold your heaviest equipment. Placing dense items close to your spine and centered between your shoulder blades maintains your natural center of gravity. This prevents the bag from forcefully pulling you backward on steep inclines. Position your food canister, camp stove, cooking fuel, and extra water right in the middle against the back panel.
Once you master how to pack a backpack for hiking, you will realize that keeping this dense weight centralized permanently prevents severe shoulder strain. Surround these heavy items with softer gear to lock them securely in place. A tightly packed core zone fundamentally stops heavy objects from shifting around and throwing off your balance while you navigate tricky trail obstacles.
Step 4: Pack Bulky Items in the Front and Sides
With your heavy gear secured firmly against your back, you need to fill the remaining space in the middle section. Use your tent body, rainfly, and extra clothing layers to wrap tightly around the heavy core. Pushing these softer, moderately weighted items toward the front and sides of the bag creates a completely solid, unified load.
This technique fills awkward gaps and perfectly prevents your food and cooking gear from rattling. If you carry a tent, you might want to split the poles from the fabric, sliding the poles vertically down the side of the interior compartment. Wrapping your heavy items completely ensures the center of gravity stays exactly where you need it, right against your mid-back for optimal stability and long-term comfort.
Step 5: Place Quick-Access Gear in the Top Zone
The upper portion of your main compartment should contain the specific items you might need during your active trek. Bulky essentials that require quick deployment belong right at the top under the lid. Pack your warm fleece jacket, an insulated layer, and a comprehensive first aid kit in this upper zone.
If the weather looks unpredictable, keep your rain gear right at the top where you can grab it instantly without unbuckling the main structural straps. Placing these medium-weight items high up also helps seamlessly direct the overall weight of the bag down toward your hips. Keeping your emergency supplies and extra layers near the opening ensures you stay remarkably safe and completely prepared for sudden temperature drops on the mountain.
Step 6: Utilize Exterior Pockets for Trail Essentials
Your lid, hip belt pockets, and side mesh compartments represent prime real estate for items you need while actively moving. Stash your high-energy trail snacks, lip balm, sunscreen, and a small compass in the hip belt pockets so you can easily reach them without stopping. The top lid pocket works flawlessly for your headlamp, map, sunglasses, and a lightweight hat. Place your water bottles securely in the side mesh pockets for simple hydration.
Resist the urge to strap too many loose items to the outside of your bag. Dangling gear catches violently on tree branches, severely throws off your balance, and makes incredibly annoying noises as you walk. Keep the exterior completely sleek and highly secure by maximizing the built-in accessory pockets instead.
Step 7: Adjust the Straps for a Perfect Fit
Loading your gear correctly only works if you firmly secure the bag properly to your body. Loosen all the suspension straps entirely before putting the loaded bag on your back. Position the hip belt accurately over your hip bones and buckle it tightly, as your hips should physically carry about eighty percent of the total weight.
Next, pull the shoulder straps down snugly, but do not overtighten them. Fasten the sternum strap across your chest to completely keep the shoulder straps from sliding outward. Finally, smoothly pull the load lifter straps located near your collarbones to gently bring the top of the bag closer to your body. Making these final adjustments fundamentally ensures your carefully packed gear moves perfectly synchronously with you.
Frequently Asked Questions (FAQ)
What Is the Ideal Weight for a Loaded Backpack?
A general rule dictates that your loaded bag should not exceed twenty percent of your body weight for multiday trips. For day trips, aim for ten percent or less. Keeping the weight highly manageable reduces severe fatigue and vastly prevents joint injuries.
- Weigh your gear entirely before leaving home.
- Invest in lightweight equipment if your budget allows.
- Share heavy communal gear like tents and stoves with your partners.
Should I Put My Sleeping Bag Inside or Outside?
You should almost always store your sleeping bag inside the bottom compartment. Keeping it securely inside fully protects the delicate fabric from sharp branches, sticky mud, and unexpected rainstorms. A wet or completely torn sleeping bag presents a severe safety risk during extremely cold nights. If you absolutely must strap it externally, use a heavy-duty, completely waterproof dry bag for maximum protection.
Where Should I Pack My Bear Canister?
Bear canisters remain incredibly heavy and bulky, making their placement critically important for your balance. Position the loaded canister securely in the middle section of your bag, directly against your spine.
- Place it horizontally if your bag remains wide enough.
- Pack soft clothing around it to completely prevent shifting.
- Keep it strictly above your sleeping gear but below quick-access items.
This central placement keeps your center of gravity stable.
How Do I Keep My Gear Dry in the Rain?
Protecting your critical equipment from moisture thoroughly requires a multi-layered approach. Even if your bag claims to be water-resistant, steady heavy rain will eventually seep straight through the zippers and seams.
- Line the entire inside of your main compartment with a waterproof trash bag.
- Store sensitive electronics and extra clothes in dedicated dry bags.
- Always carry an exterior rain cover that fits snugly.
Can I Wash My Backpack After a Trip?
Yes, regular cleaning drastically extends the operational lifespan of your equipment. Avoid using automated washing machines, as the strong agitators can completely destroy the straps and permanently tear the fabric. Instead, meticulously spot clean dirty areas using a soft sponge and mild soap. For a deep clean, submerge the bag in a bathtub filled with cool water and gently scrub the zippers.
Conclusion
Properly organizing your gear fundamentally changes the way you experience the outdoors. By placing your sleeping equipment at the very bottom, centering the heavy items directly against your spine, and keeping essential layers right at the top, you create a perfectly balanced load.
This strategic approach entirely eliminates severe shoulder strain and completely keeps you energized for those incredibly long uphill climbs. Every single minute you spend preparing your equipment translates directly into hours of absolute comfort on the trail. Now that you know exactly how to pack a backpack for hiking, it is time to meticulously lay out your gear and practice. Empty your closet, load up your bag using these proven steps, and confidently head out to your favorite local trail.

About Caleb
Caleb Merritt is a Virginia-based outdoor writer and gear analyst who has spent over a decade sleeping on the ground, crossing mountain passes, and obsessively shaving grams off his pack weight. He holds a Bachelor of Science in Environmental Science from James Madison University, where he also served as president of the university’s outdoor recreation club. After graduating, he spent three years as a wilderness educator with a backcountry youth program in the Shenandoah Valley — teaching Leave No Trace ethics, backcountry navigation, and campcraft — before moving into full-time writing in 2018.
His work focuses on one core belief: the best gear is the gear you understand. Whether he’s doing a side-by-side weight comparison of ultralight shelters or writing a beginner’s guide to building a sub-20-lb base weight kit, Caleb writes with the same directness you’d expect from a trusted trail partner. He has logged more than 4,000 miles across iconic routes including the John Muir Trail, the Wind River Range, Vermont’s Long Trail, and the Collegiate Peaks Loop in Colorado.
Areas of Expertise
- Ultralight backpacking systems and base weight optimization
- Tent, tarp, and shelter testing across three-season and shoulder-season conditions
- Sleeping bag and quilt temperature rating verification
- Backpacking nutrition, meal planning, and calorie-per-ounce analysis
- Leave No Trace principles and wilderness ethics
- Campfire safety, bear country protocols, and water treatment methods
- Gear care, repair, and long-term durability assessment
Education
James Madison University — B.S. in Environmental Science, 2015
During his time at JMU, Caleb served as President of the Outdoor Recreation Club, where he planned and led more than 30 backcountry trips annually across the Blue Ridge Mountains and Appalachian Trail corridor. The role sharpened his ability to assess gear performance under real conditions, manage group safety in remote environments, and develop the kind of practical trail knowledge that no classroom can teach.
Professional Experience
Gear Writer & Senior Contributor — [campeox.com]
Produces in-depth gear reviews, buyer’s guides, and how-to content across backpacking, camping, and ultralight hiking categories. Tests all gear in real field conditions before publishing recommendations.
Wilderness Educator & Trip Leader — Shenandoah Backcountry Youth Program — 2015–2018 Led multi-day backcountry expeditions for teens and young adults throughout Shenandoah National Park and George Washington National Forest. Taught LNT principles, orienteering, first aid awareness, and campcraft fundamentals.
Outdoor Recreation Club President — James Madison University — 2013–2015 Organized and led university-sponsored hiking, backpacking, and camping trips in the Blue Ridge Mountains and Appalachian Trail corridor. Managed club budget, safety protocols, and trip logistics for a membership of 120+ students.
Editorial Standards
Every piece of gear Caleb recommends has been personally tested in the field — not just unboxed and described. His review process includes a minimum of two overnight trips per shelter, a full-season evaluation for sleep systems, and side-by-side comparisons wherever possible. He does not accept payment for positive reviews. Affiliate relationships, where they exist, are always disclosed in accordance with FTC guidelines.
All factual claims about gear specifications, trail distances, and safety recommendations are cross-referenced against manufacturer data sheets and established sources such as the Leave No Trace Center for Outdoor Ethics and the American Hiking Society before publication.