Few things feel worse than pulling your camera from your pack, only to find fog inside the lens or a scratch across the body. A DSLR is a big investment, and the trail throws plenty at it: dust, rain, sweat, and the occasional tumble down a rocky slope. The good news is that keeping your gear safe doesn’t take a photography degree.
Learning how to protect your DSLR while hiking comes down to a few smart habits and the right bit of kit. Whether you shoot alpine sunrises or forest streams, a little preparation keeps your camera clicking for years. This guide walks first-time hikers and beginner photographers through simple, reliable ways to keep their gear safe on every adventure.
Why Protecting Your Camera Gear Matters on the Trail
Your DSLR isn’t just expensive—it’s often the reason you hiked out in the first place. Losing it to moisture damage or a cracked lens can cut a trip short and drain your wallet fast.
For campers and outdoor beginners, protecting your gear also means protecting your memories. A camera that survives the whole trip is one that captures the summit view, the wildlife you stumbled on, and the golden light at camp. When your equipment works, you stay present and creative instead of worrying about scratches.
There’s a practical payoff, too. Well-cared-for gear holds its resale value, needs fewer repairs, and performs better in tough conditions. Building good habits early saves you money and frustration on every future hike.
Tools and Materials You’ll Need
You don’t need a mountain of accessories to keep your camera safe. A handful of well-chosen items does most of the work.
- Padded camera bag or insert to cushion your DSLR against bumps and drops
- Rain cover or a heavy-duty dry bag for sudden downpours and stream crossings
- UV filter to shield the front element of your lens from scratches and grit
- Padded strap or harness that keeps the camera secure and comfortable on long climbs
- Microfiber cloth and a blower brush for wiping away moisture and clearing sensor dust
- Silica gel packets to fight condensation inside your bag
- Spare memory card stored in a small waterproof case
- Optional: a lightweight camera clip that mounts to your backpack strap for quick, hands-free access
Keep these items easy to reach, not buried at the bottom of your pack.
8 Step-by-Step Guide on How to Protect Your DSLR While Hiking
Step 1 – Choose the Right Camera Bag
Everything starts with a good bag. A padded camera bag or a protective insert inside your regular backpack shields your DSLR from the constant jostling of a long trail. Look for thick foam dividers you can rearrange to fit your body and lenses snugly.
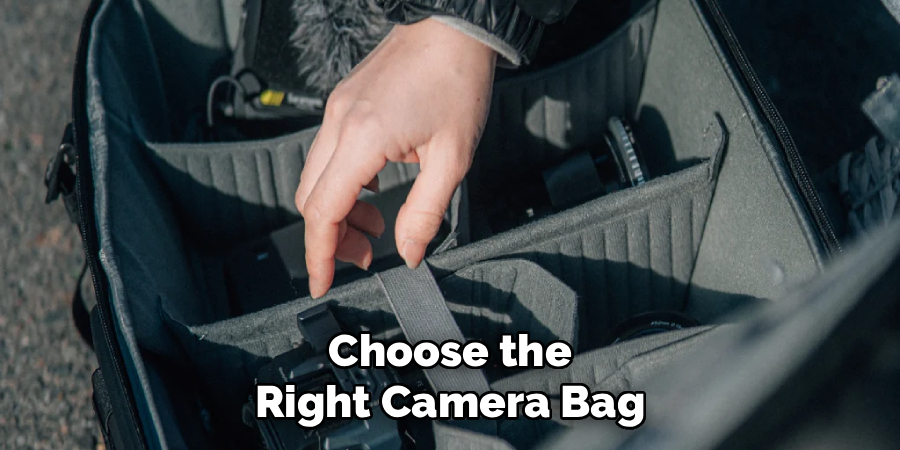
Snug is the goal here. When gear shifts around, it knocks against zippers and hard edges, and those tiny impacts add up over miles. Give each item its own padded pocket so nothing rattles loose.
Test the bag before your trip by shaking it gently. If you hear or feel movement, tighten the dividers. Knowing how to protect your DSLR while hiking begins with a bag that hugs your gear like a glove.
Step 2 – Add a Rain Cover for Wet Weather
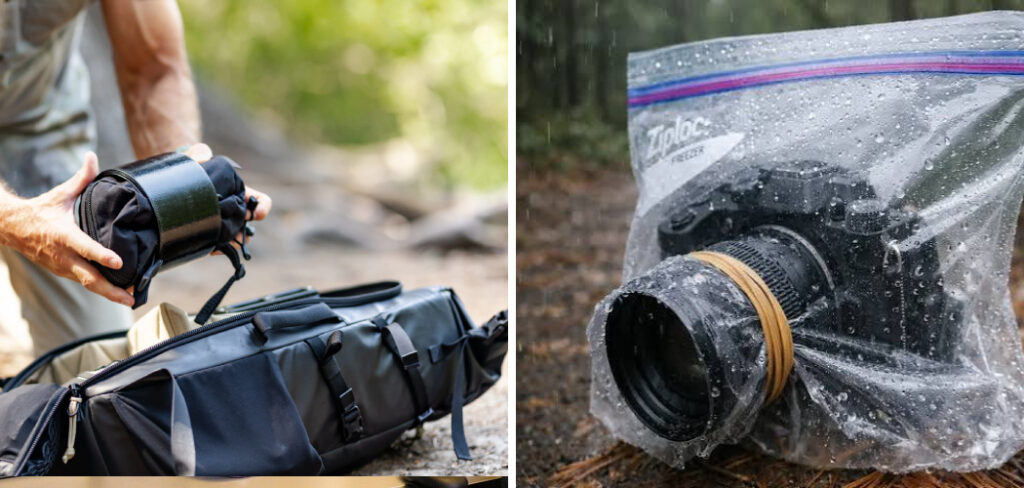
Weather changes fast in the backcountry, and rain is your camera’s biggest enemy. Before you leave, pack a dedicated rain cover or slip your whole camera bag into a heavy-duty dry bag. Even a cheap cover buys you precious minutes when the sky opens up.
When clouds start building, cover your gear early rather than waiting for the first drops. Fumbling with a wet cover mid-storm usually means water has already crept in. That damp chill on your fingers is your cue to act.
Moisture damage often shows up days later as fog inside the lens or corrosion on contacts. A simple waterproof layer prevents an expensive repair and keeps you shooting through drizzle without a second thought.
Step 3 – Fit a UV Filter and Lens Cap
Your lens is the most vulnerable and priciest part of your setup. A UV filter screws onto the front and acts like a cheap sacrificial shield. If a branch scrapes it or grit blows against it, the filter takes the hit instead of your expensive glass.
Keep the lens cap on whenever you’re not shooting. It’s a small habit that saves you from dust, fingerprints, and scratches during scrambles. Snap it back on the moment you lower the camera.
For extra lens protection, add a lens hood. It blocks stray branches, softens minor bumps, and cuts glare in bright sun. These small guards work quietly, but they prevent the kind of damage that ruins a lens for good.
Step 4 – Carry Your DSLR Safely on the Move
How you carry your camera matters as much as how you store it. A padded strap spreads the weight across your shoulders and stops the body from swinging into rocks on steep sections. Swinging gear is a scratch or a crack waiting to happen.
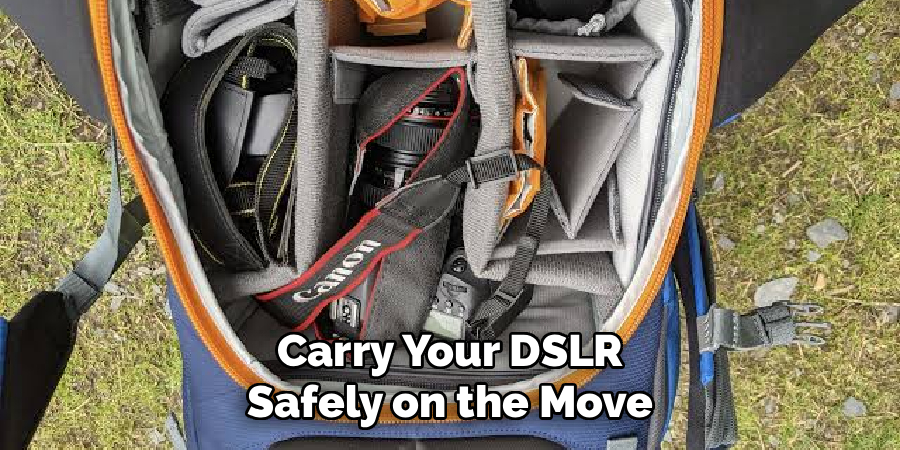
For quick access, try a camera clip mounted on your backpack strap. It locks the DSLR against your chest, keeping your hands free for trekking poles or tricky footing. You’ll feel the reassuring click when it seats properly.
On sketchy terrain, tuck the camera back into your bag entirely. A few seconds of packing beats watching your gear tumble down a slope. Balance easy access with real security, and adjust based on the trail.
Step 5 – Manage Moisture and Condensation
Temperature swings cause condensation, and condensation causes corrosion. When you move from cold mountain air into a warm tent or car, water droplets form on and inside your camera. That hidden moisture is what breeds moisture damage over time.
To beat it, let your gear warm up slowly. Keep the DSLR sealed in its bag as the temperature changes, giving it time to adjust before you expose the lens. Toss a few silica gel packets into your bag to soak up extra humidity.
If your camera does get damp, wipe it gently with a microfiber cloth and let it air out. Never seal a wet camera in an airtight bag—trapped moisture only makes the problem worse.
Step 6 – Protect the Sensor and Internals
Sensor dust is a quiet frustration that shows up as dark spots in your photos. To keep dust out, change lenses as little as possible on the trail, and always do it with the camera facing down and your back to the wind.
Work fast and shield the open camera body with your jacket if a breeze kicks up. That gritty air carries tiny particles straight toward the sensor and mirror box.
Carry a blower brush to puff away loose dust without touching anything delicate. Skip canned air, which can spray propellant onto the sensor. If you spot stubborn spots, leave deep cleaning to a professional. A little caution keeps your internals clean and your images crisp.
Step 7 – Store Memory Cards and Batteries Smartly
Your photos are only as safe as the memory card holding them. Store spare cards in a small waterproof case, tucked into an inner pocket where they won’t get wet, crushed, or lost. Loose cards vanish into pack corners fast.
Cold drains batteries quickly, so keep spares in an inside pocket close to your body. That warmth keeps them ready when the light turns magic and you need every shot.
Back up your images whenever you reach camp or signal, if you carry a phone or small drive. Learning how to protect your DSLR while hiking includes guarding the data, not just the gear. Losing a day of shots stings as much as a scratched lens.
Step 8 – Weatherproof and Insure for Peace of Mind
Check your DSLR’s weather sealing before relying on it. Higher-end bodies handle light rain and dust well, but entry-level models need extra care and covers. Know your camera’s limits so you don’t push it too far.
Wipe down seals and buttons after dusty or damp hikes to keep grit from working its way inside. A clean camera seals better and lasts longer.
Finally, consider camera insurance if you hike often or carry pricey glass. A dedicated policy covers accidental drops, theft, and water damage that standard warranties skip. It’s a small yearly cost that turns a devastating loss into a simple claim, letting you shoot with real confidence.
Common Mistakes Hikers Make With Their Cameras
The most common blunder is skipping rain protection because the forecast looked clear. Mountain weather turns on a dime, and hikers who leave the rain cover at home often end up stuffing their DSLR under a jacket while water seeps into the seams. By the time fog appears inside the lens, the moisture damage is already done.
Another frequent error is changing lenses carelessly in windy, dusty conditions. Beginners swap glass out in the open without thinking, and grit drifts straight onto the sensor. Those dark specks then haunt every photo until a costly cleaning fixes them.
Many hikers also let their camera swing freely on a thin strap. It feels convenient, but the body bangs against rocks and trekking poles on every descent, chipping corners and loosening parts over time.
Overpacking is a quieter mistake. Cramming the DSLR into a bag with no padding, wedged against hard gear, invites cracks and misalignment. Give it dedicated cushioning instead.
Finally, people forget about condensation. They pull a cold camera into a warm space and expose it immediately, trapping droplets inside the body where corrosion slowly takes hold.
Expert Tips
Seasoned hikers pack their camera gear where they can reach it fast. The best light rarely waits, so keep your DSLR accessible while still protected, whether on a chest clip or in a top-loading pouch.
Trust the weather and your gut. If storms threaten, seal your gear early rather than gambling on a few more shots. A dry camera beats a dramatic photo every time.
Practice your lens changes at home until they’re quick and clean. Speed and good technique keep sensor dust out in the field. Carry a small microfiber cloth in your pocket, not your pack, so you can wipe spray or fingerprints instantly. These small routines separate frustrated beginners from confident trail photographers who come home with sharp images and undamaged gear.
Frequently Asked Questions
Can I use my DSLR in the rain?
It depends on your camera’s weather sealing. Higher-end bodies handle light rain, but entry-level models need a rain cover or dry bag. Even sealed cameras aren’t fully waterproof, so protect the lens mount and buttons. When rain gets heavy, pack the camera away completely and wait for a break before shooting again.
How do I stop condensation inside my camera?
Let your DSLR adjust to temperature changes slowly. When moving from cold air into a warm tent or car, keep the camera sealed in its bag until it warms up. Toss silica gel packets inside to absorb humidity. If droplets form, wipe them gently and let the gear air out rather than sealing it up.
What’s the best way to carry a DSLR while hiking?
Use a padded strap or a chest clip mounted on your backpack strap. Both spread the weight and stop the camera from swinging into rocks. For rough or steep terrain, tuck the DSLR into a padded bag entirely. Balance quick access with security, and always secure it before scrambling over tricky sections.
Do I really need a UV filter?
A UV filter is worth it as cheap lens protection. It shields the front element from scratches, dust, and grit, taking the damage instead of your pricey glass. Replacing a filter costs far less than repairing a lens. Add a lens hood too, since it blocks branches and softens minor knocks on the trail.
Is camera insurance worth it for hikers?
If you hike often or carry expensive lenses, yes. Camera insurance covers accidental drops, water damage, and theft that standard warranties usually exclude. For a small yearly cost, you turn a potentially devastating loss into a simple claim. It gives you the freedom to shoot in tough conditions without constantly worrying about your investment.
Conclusion
Your DSLR can handle the trail beautifully when you give it a little care. The key takeaways are simple: pack it in a padded bag, guard it from rain, shield the lens with a filter, and carry it securely as you move. Manage condensation, keep dust away from the sensor, and store your memory cards and batteries safely.
None of this demands a huge investment. A few smart accessories and steady habits do the heavy lifting, protecting both your gear and the memories it captures. Add camera insurance if you hike often, and you’ll shoot with genuine peace of mind.
Now that you understand how to protect your DSLR while hiking, you can head into the backcountry ready for anything the weather and terrain throw your way. Storms, dust, and steep climbs won’t rattle you, because your gear stays safe and ready. So plan your next adventure, pack with care, and chase that perfect light—your camera will be there to catch it, hike after hike.

About Caleb
Caleb Merritt is a Virginia-based outdoor writer and gear analyst who has spent over a decade sleeping on the ground, crossing mountain passes, and obsessively shaving grams off his pack weight. He holds a Bachelor of Science in Environmental Science from James Madison University, where he also served as president of the university’s outdoor recreation club. After graduating, he spent three years as a wilderness educator with a backcountry youth program in the Shenandoah Valley — teaching Leave No Trace ethics, backcountry navigation, and campcraft — before moving into full-time writing in 2018.
His work focuses on one core belief: the best gear is the gear you understand. Whether he’s doing a side-by-side weight comparison of ultralight shelters or writing a beginner’s guide to building a sub-20-lb base weight kit, Caleb writes with the same directness you’d expect from a trusted trail partner. He has logged more than 4,000 miles across iconic routes including the John Muir Trail, the Wind River Range, Vermont’s Long Trail, and the Collegiate Peaks Loop in Colorado.
Areas of Expertise
- Ultralight backpacking systems and base weight optimization
- Tent, tarp, and shelter testing across three-season and shoulder-season conditions
- Sleeping bag and quilt temperature rating verification
- Backpacking nutrition, meal planning, and calorie-per-ounce analysis
- Leave No Trace principles and wilderness ethics
- Campfire safety, bear country protocols, and water treatment methods
- Gear care, repair, and long-term durability assessment
Education
James Madison University — B.S. in Environmental Science, 2015
During his time at JMU, Caleb served as President of the Outdoor Recreation Club, where he planned and led more than 30 backcountry trips annually across the Blue Ridge Mountains and Appalachian Trail corridor. The role sharpened his ability to assess gear performance under real conditions, manage group safety in remote environments, and develop the kind of practical trail knowledge that no classroom can teach.
Professional Experience
Gear Writer & Senior Contributor — [campeox.com]
Produces in-depth gear reviews, buyer’s guides, and how-to content across backpacking, camping, and ultralight hiking categories. Tests all gear in real field conditions before publishing recommendations.
Wilderness Educator & Trip Leader — Shenandoah Backcountry Youth Program — 2015–2018 Led multi-day backcountry expeditions for teens and young adults throughout Shenandoah National Park and George Washington National Forest. Taught LNT principles, orienteering, first aid awareness, and campcraft fundamentals.
Outdoor Recreation Club President — James Madison University — 2013–2015 Organized and led university-sponsored hiking, backpacking, and camping trips in the Blue Ridge Mountains and Appalachian Trail corridor. Managed club budget, safety protocols, and trip logistics for a membership of 120+ students.
Editorial Standards
Every piece of gear Caleb recommends has been personally tested in the field — not just unboxed and described. His review process includes a minimum of two overnight trips per shelter, a full-season evaluation for sleep systems, and side-by-side comparisons wherever possible. He does not accept payment for positive reviews. Affiliate relationships, where they exist, are always disclosed in accordance with FTC guidelines.
All factual claims about gear specifications, trail distances, and safety recommendations are cross-referenced against manufacturer data sheets and established sources such as the Leave No Trace Center for Outdoor Ethics and the American Hiking Society before publication.