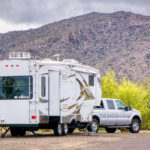
Nothing ruins a great camping trip faster than water dripping on your forehead while you sleep. A leaking RV roof might feel like a disaster, but you do not need to panic. Handling repairs yourself saves money and gives you peace of mind on the road. Whether you have minor cracks or a noticeable tear, learning how to fix a camper roof is completely doable for beginners.
You just need the right tools, a bit of patience, and a clear plan. In this guide, we break down the repair process into simple, manageable steps. You will learn everything from spotting hidden damage to applying the final seal. Let’s get your rig ready for your next big adventure.
Why Roof Maintenance Matters for Your RV
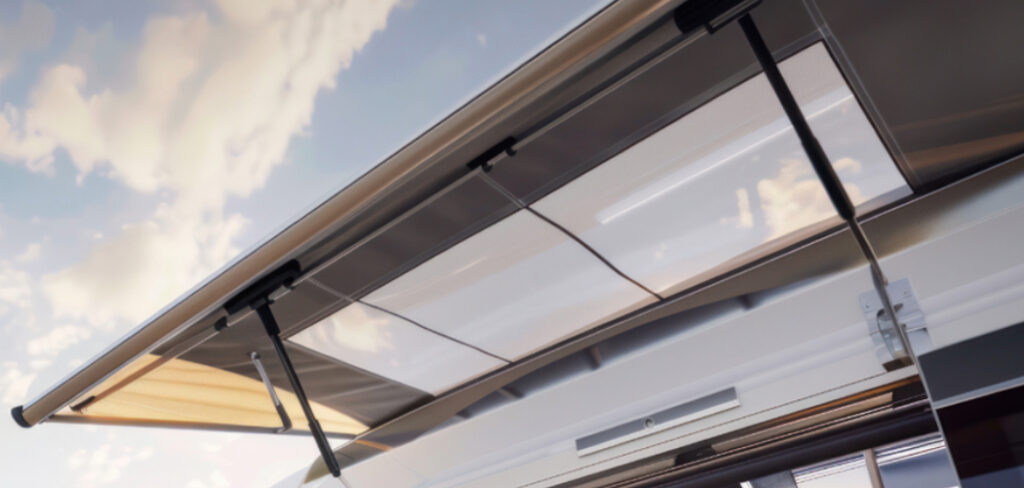
Your recreational vehicle takes a beating from the elements. Blistering sun, heavy rain, and falling branches all weaken the exterior over time. Regular maintenance prevents tiny issues from turning into massive water damage. Water intrusion rots the wood frame, ruins your insulation, and causes dangerous mold growth inside the cabin. Staying proactive keeps your travel trailer in top shape and protects your investment. A well-maintained exterior also maintains the resale value of your motorhome. By inspecting the seals and seams a few times a year, you catch small cracks early. You can seal a tiny puncture in ten minutes, whereas replacing water-logged ceiling panels takes weeks. Routine care simply ensures your rig stays safe, dry, and ready for travel.
8 Step-by-Step Guide on How to Fix a Camper Roof
Step 1: Identify the Damage
Spotting the exact source of a leak can be tricky because water travels along the ceiling panels before dripping inside. Start your repair process by carefully inspecting the exterior. Climb a sturdy ladder and look closely at the seams, vents, and skylights. These areas naturally experience the most stress and movement while you drive.
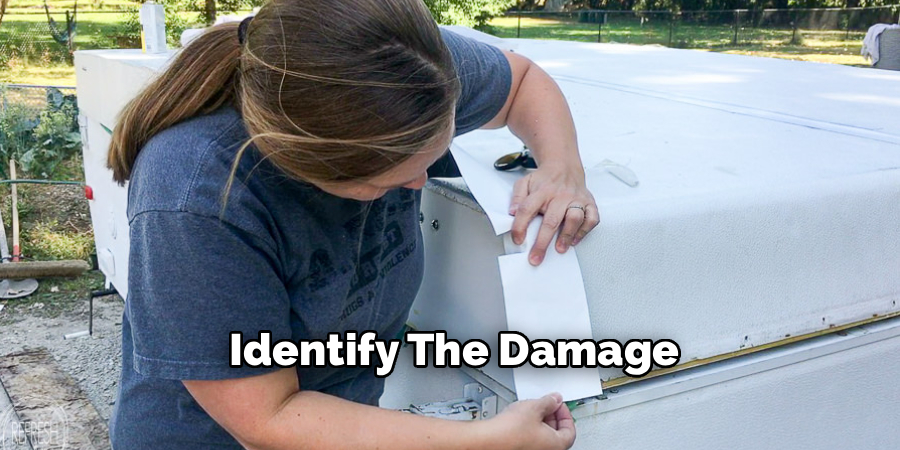
Search for cracking, peeling sealant, or obvious punctures in the membrane. You should also check the interior ceiling for soft spots or discoloration. Press gently on the roof materials to feel for any underlying rot. Taking your time during this initial inspection guarantees you find every single problem area before you begin working.
Step 2: Gather Your Repair Materials
Before you start pulling off old sealant, make sure you have all the necessary supplies within reach. You will need a high-quality RV sealant tape, a tube of self-leveling lap sealant, and a standard caulking gun. Grab a plastic putty knife to gently scrape away old material without scratching the surface. You also need a specialized cleaner or denatured alcohol to prep the surface properly. Clean rags and disposable gloves will keep your hands and the workspace tidy. Keep a trash bag tied to your ladder to easily toss out debris. Having everything ready means you will not have to climb up and down the ladder repeatedly, making the repair process much safer and faster.
Step 3: Remove the Old Sealant
You cannot simply apply new patches over peeling materials and expect a waterproof seal. Grab your plastic putty knife and carefully scrape away the old, degraded caulk around the damaged area. Work slowly to avoid gouging the underlying rubber or fiberglass membrane. Sometimes the old material feels extremely stubborn and hard. If this happens, apply gentle heat from a hair dryer to soften the compound, making it much easier to peel away. You want to expose the bare surface beneath the damage. Clear away any loose flakes or debris with a soft brush. Getting rid of the compromised material provides a completely smooth foundation for your new adhesive to grip securely.
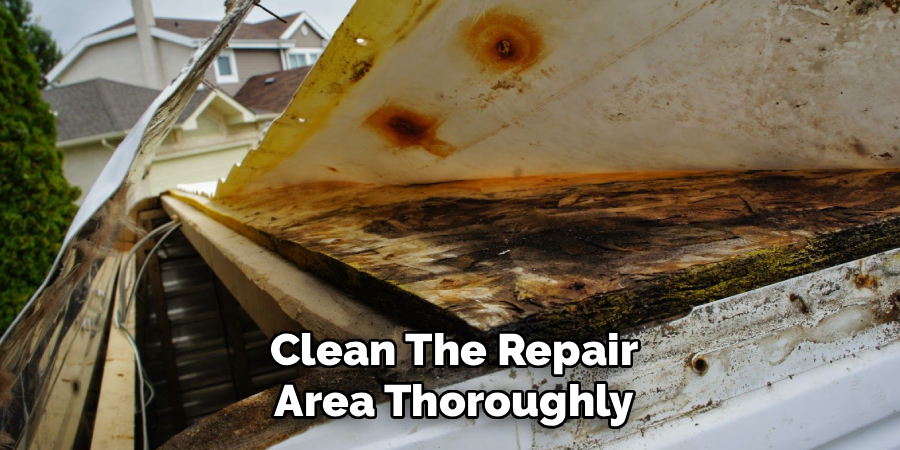
Step 4: Clean the Repair Area Thoroughly
New adhesives absolutely refuse to stick to dirt, grease, or grime. Once you remove the old caulk, scrub the exposed area using a sponge and an appropriate RV roof cleaner. Wipe away the soapy residue with a damp rag. Next, apply denatured alcohol to a clean cloth and wipe the surface down completely. This crucial step strips away invisible oils and leftover chemical residues. Let the area air dry completely before moving forward. Even a tiny amount of moisture trapped under your new patch will eventually cause the seal to fail. Taking a few extra minutes to achieve a spotless surface makes the difference between a temporary fix and a permanent solution.
Step 5: Apply the Patching Tape
If you are dealing with a straight tear or a small hole, specialized RV repair tape offers the strongest fix. Cut a piece of tape that extends at least two inches beyond the edges of the damage on all sides. Peel back a small section of the paper liner and stick the exposed adhesive to the surface. Slowly pull the rest of the liner away while pressing the tape down firmly. Smooth out the tape starting from the center and working toward the edges to push out any trapped air bubbles. Pressing down hard activates the adhesive, creating a permanent, watertight bond over the puncture. Make sure the edges lie completely flat against the membrane.
Step 6: Seal the Edges With Lap Sealant
While patching tape provides a fantastic barrier, adding a layer of lap sealant around the edges ensures ultimate water protection. Load your caulking gun with an RV-specific self-leveling sealant. Carefully run a steady bead of the compound entirely around the perimeter of the patch you just applied. If you are fixing a seam around a roof vent or air conditioning unit, apply the bead directly over the freshly cleaned joint. The self-leveling formula will slowly spread out and settle flat, filling every microscopic gap. Apply enough pressure on the gun trigger to keep the bead thick and continuous. This secondary layer completely locks out moisture and prevents the tape edges from curling up later.
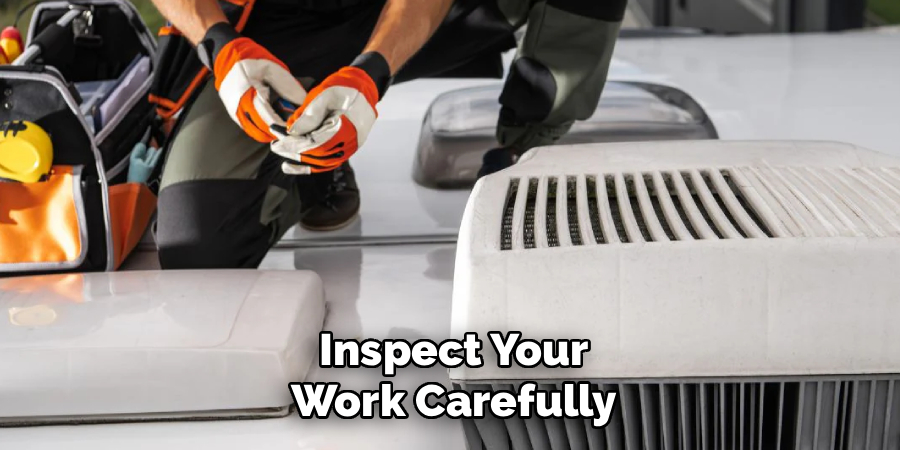
Step 7: Inspect Your Work Carefully
Once the sealant settles, visually inspect your repair to confirm everything looks solid. Check the entire perimeter of the fresh caulk to ensure there are no gaps or thin spots. If you notice any missed sections, add a tiny bit more compound before it begins to cure. Look at the tape patch to verify no air bubbles formed under the surface. It helps to view the repair from a few different angles to catch any subtle imperfections. Catching a tiny flaw right now saves you from discovering a leak during your next rainy camping trip. You want total confidence in your work before you pack up your tools and climb down the ladder.
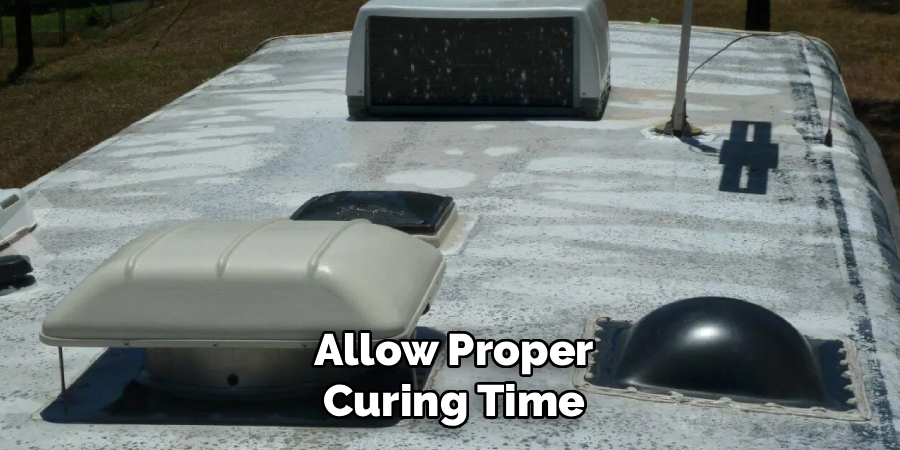
Step 8: Allow Proper Curing Time
Patience becomes your best friend during this final step of the process. Every sealant requires a specific amount of time to cure fully before it can withstand rain or travel. Check the manufacturer instructions on your specific tube of adhesive to find the exact curing timeline. In most cases, you should keep the rig parked and protected from moisture for at least twenty-four to forty-eight hours. Mastering how to fix a camper roof requires respecting this waiting period. Rushing to hit the highway before the compound dries can cause the wind to rip your hard work apart. Let the chemicals do their job and bond permanently to the surface.
Frequently Asked Questions
How Often Should I Inspect My RV Roof?
Experts recommend inspecting your RV exterior at least three to four times a year. You should always perform a thorough check before storing your rig for the winter and right before your first spring trip.
Frequent checks help you spot:
- Cracked caulk
- Tree branch damage
- Loose vent covers
Catching issues early prevents costly water damage inside your living space.
What Is the Best Sealant for a Rubber Membrane?
You should always use a self-leveling lap sealant specifically designed for EPDM or TPO materials. Never use standard household silicone caulk, as it will not adhere properly and can actually degrade the rubber. Popular brands like Dicor or Sikaflex offer excellent adhesion and flexibility to withstand constant road vibrations without cracking.
Can I Walk Safely on Top of My Travel Trailer?
Most modern travel trailers feature walkable structures, but you must verify this in your owner’s manual first. If it is walkable, step carefully on the supportive trusses rather than the thin panels between them. Wear soft-soled shoes to prevent accidental scuffs or tears. If your rig is not walkable, use scaffolding or tall ladders to reach the damage.
How Do I Fix a Large Tear in the Material?
For tears longer than a few inches, sealing tape works best. You need to clean the area thoroughly with denatured alcohol first. Then, apply a wide strip of Eternabond or a similar specialized patching tape directly over the tear. Roll it flat to remove bubbles, and apply lap sealant around the perimeter for extra security.
Should I Cover My Camper When Not in Use?
Yes, using a breathable, heavy-duty cover significantly extends the lifespan of your exterior.
Covers provide excellent protection from:
- Harmful UV rays
- Bird dropping acidity
- Falling debris and sap
Just ensure the cover breathes well to prevent trapped moisture, which causes mold. A good cover reduces how frequently you need to patch leaks.
Conclusion
Taking care of leaks does not have to ruin your travel plans. By staying proactive, gathering the proper materials, and following a methodical cleaning and patching process, you protect your investment from serious water damage. You now know exactly what to look for and how to apply professional-grade patches and sealants. Fixing small punctures yourself is incredibly rewarding and keeps your travel trailer ready for whatever nature throws your way. Now that you understand how to fix a camper roof, you can confidently handle repairs right in your driveway. Grab your ladder, inspect your seams, and get your rig in perfect shape for your next great camping adventure.
About Caleb
Caleb Merritt is a Virginia-based outdoor writer and gear analyst who has spent over a decade sleeping on the ground, crossing mountain passes, and obsessively shaving grams off his pack weight. He holds a Bachelor of Science in Environmental Science from James Madison University, where he also served as president of the university’s outdoor recreation club. After graduating, he spent three years as a wilderness educator with a backcountry youth program in the Shenandoah Valley — teaching Leave No Trace ethics, backcountry navigation, and campcraft — before moving into full-time writing in 2018.
His work focuses on one core belief: the best gear is the gear you understand. Whether he’s doing a side-by-side weight comparison of ultralight shelters or writing a beginner’s guide to building a sub-20-lb base weight kit, Caleb writes with the same directness you’d expect from a trusted trail partner. He has logged more than 4,000 miles across iconic routes including the John Muir Trail, the Wind River Range, Vermont’s Long Trail, and the Collegiate Peaks Loop in Colorado.
Areas of Expertise
- Ultralight backpacking systems and base weight optimization
- Tent, tarp, and shelter testing across three-season and shoulder-season conditions
- Sleeping bag and quilt temperature rating verification
- Backpacking nutrition, meal planning, and calorie-per-ounce analysis
- Leave No Trace principles and wilderness ethics
- Campfire safety, bear country protocols, and water treatment methods
- Gear care, repair, and long-term durability assessment
Education
James Madison University — B.S. in Environmental Science, 2015
During his time at JMU, Caleb served as President of the Outdoor Recreation Club, where he planned and led more than 30 backcountry trips annually across the Blue Ridge Mountains and Appalachian Trail corridor. The role sharpened his ability to assess gear performance under real conditions, manage group safety in remote environments, and develop the kind of practical trail knowledge that no classroom can teach.
Professional Experience
Gear Writer & Senior Contributor — [Your Website Name]
Produces in-depth gear reviews, buyer’s guides, and how-to content across backpacking, camping, and ultralight hiking categories. Tests all gear in real field conditions before publishing recommendations.
Wilderness Educator & Trip Leader — Shenandoah Backcountry Youth Program — 2015–2018 Led multi-day backcountry expeditions for teens and young adults throughout Shenandoah National Park and George Washington National Forest. Taught LNT principles, orienteering, first aid awareness, and campcraft fundamentals.
Outdoor Recreation Club President — James Madison University — 2013–2015 Organized and led university-sponsored hiking, backpacking, and camping trips in the Blue Ridge Mountains and Appalachian Trail corridor. Managed club budget, safety protocols, and trip logistics for a membership of 120+ students.
Editorial Standards
Every piece of gear Caleb recommends has been personally tested in the field — not just unboxed and described. His review process includes a minimum of two overnight trips per shelter, a full-season evaluation for sleep systems, and side-by-side comparisons wherever possible. He does not accept payment for positive reviews. Affiliate relationships, where they exist, are always disclosed in accordance with FTC guidelines.
All factual claims about gear specifications, trail distances, and safety recommendations are cross-referenced against manufacturer data sheets and established sources such as the Leave No Trace Center for Outdoor Ethics and the American Hiking Society before publication.