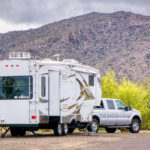
Summer road trips bring endless memories, but a torn or weathered patio shade can quickly dampen your outdoor fun. Your RV canopy provides crucial shelter from blistering sun and unexpected rain showers, making it one of the most vital accessories on your rig. Over time, UV rays, high winds, and moisture break down the fabric, leaving you with a compromised setup.

Fortunately, you do not need to pay expensive dealership fees to fix this problem. Learning how to replace camper awning fabric yourself saves money and gives you a deep sense of accomplishment. This beginner-friendly guide walks you through the entire process, from gathering the right tools to sliding your fresh fabric into place. Grab a friend, set aside an afternoon, and get ready to revitalize your mobile patio.
Why Replace Your Camper Awning?
A damaged canopy does more than just ruin the aesthetic appeal of your beloved recreational vehicle. Small rips and pinholes quickly expand under wind tension, creating a massive liability during storms. When water seeps through compromised material, it often damages the roller tube mechanism or leads to mold growth that smells awful and threatens your health.
Upgrading your fabric restores vital UV protection, keeping your outdoor living space cool and comfortable during peak afternoon heat. A fresh, vibrant shade also boosts the resale value of your rig if you ever decide to upgrade. Tackling this maintenance project ensures your equipment operates smoothly, prevents costly water damage to the side of your RV, and guarantees a welcoming, shaded oasis at every campsite you visit.
8 Step-by-Step Guide: How to Replace Camper Awning
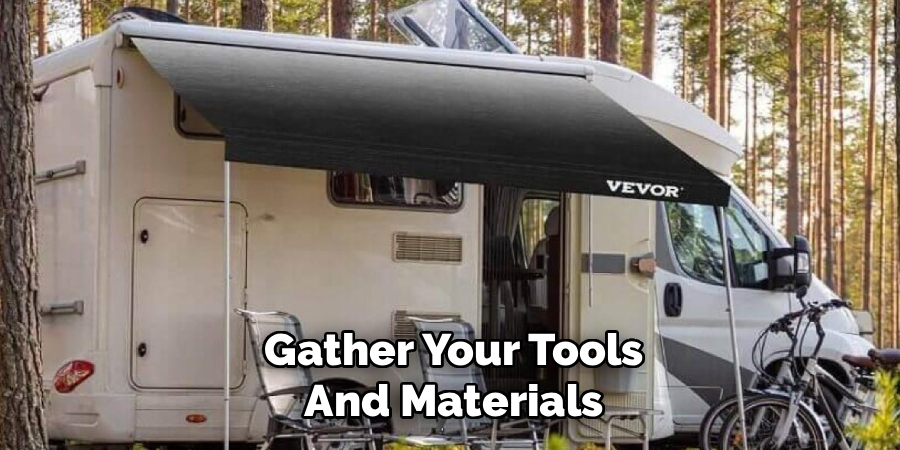
Step 1: Gather Your Tools and Materials
Before you start tearing off the old material, you must collect all necessary supplies to ensure a smooth workflow. You will need a heavy-duty replacement fabric perfectly sized for your specific rig, two sturdy ladders, a drill with various bits, heavy-duty zip ties, a utility knife, and silicone lubricant. Having a reliable helper is absolutely crucial for this project, as the roller tube is incredibly heavy and awkward to maneuver alone. Stage all your tools on a flat surface near your workspace so you never have to abandon the heavy lifting to search for a missing screwdriver. Preparation eliminates frustration and keeps you safe.
Step 2: Secure the Roller Tube Springs
The most critical safety measure involves locking the internal springs located at the ends of your roller tube. These springs hold massive amounts of tension and can cause severe injury if they rapidly unwind. Locate the small holes on the end caps of your awning arms. Insert a heavy cotter pin or a hardened steel nail straight through the hole to lock the spring mechanism securely in place. You must perform this action on both ends of the tube before attempting any further disassembly. Double-check that the pins are fully engaged and holding the tension firmly so you can work with complete peace of mind.
Step 3: Detach the Awning Arms
With your springs safely pinned, you and your helper can now remove the entire assembly from the side of your recreational vehicle. Use your drill to remove the lag bolts securing the upper brackets to the RV sidewall. Carefully tilt the arms outward to slide the fabric out of the awning rail track attached to the roofline. You need to communicate clearly with your partner during this maneuver to keep the weight evenly distributed. Once you free the fabric from the track, carry the entire arm and tube assembly to a clear, grassy area or a set of sawhorses for the next phase.
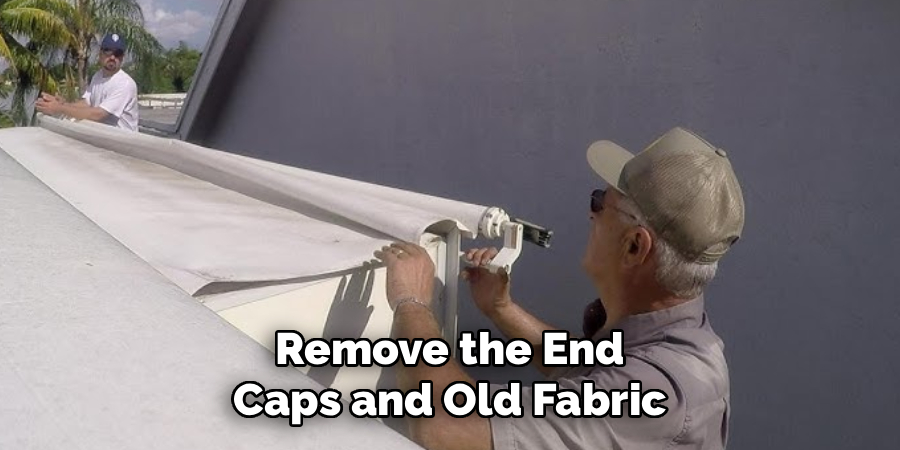
Step 4: Remove the End Caps and Old Fabric
Lay the assembly flat on your sawhorses and mark the position of the lever on the right end cap with a permanent marker. This ensures you put it back in the exact same position later. Remove the bolts holding the end cap to the roller tube and carefully pull the cap off, setting it aside safely. Now, take your utility knife and slice the old fabric straight down the middle to easily slide it out of the tube channels. Once the old material is gone, take a moment to thoroughly clean the bare aluminum tube, removing any built-up dirt or sticky residue.
Step 5: Prepare the New Fabric for Installation
Unfold your fresh canopy material on a clean, dry surface, taking care to avoid dragging it across sharp rocks or concrete. Inspect the edges to locate the poly cords, which are the thick plastic ropes sewn into the hems. Spray a generous amount of silicone lubricant down the tracks of both your roller tube and the awning rail on your RV. Proper lubrication is the secret to mastering how to replace camper awning material without ripping the fresh vinyl. Slide the new poly cords into the corresponding channels on the roller tube, ensuring the pattern faces the correct direction for your specific setup.
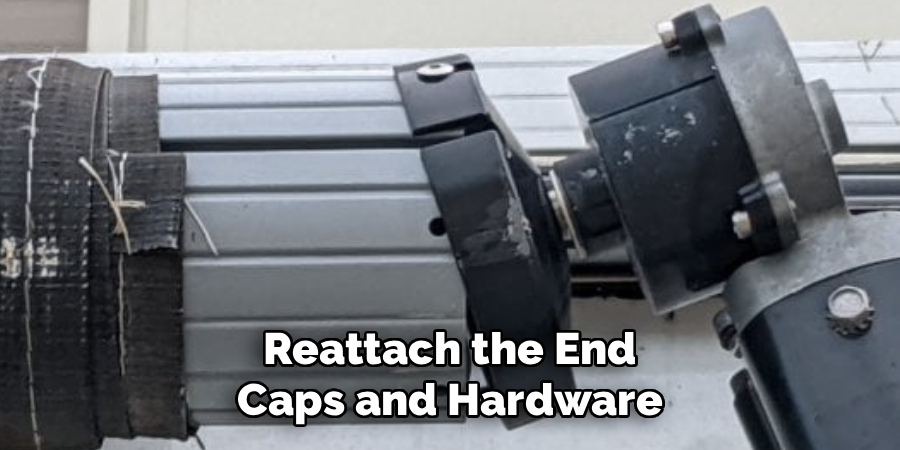
Step 6: Reattach the End Caps and Hardware
Once you center the new fabric perfectly along the roller tube, you can reinstall the end cap you previously removed. Align the cap using the marker line you drew earlier to ensure the tension lever functions correctly. Insert the factory bolts and tighten them securely, but be careful not to strip the aluminum threading. Verify that your locking pins are still firmly in place, as the spring tension remains active inside the tube. Roll the new canopy tightly and evenly around the tube by hand, mimicking how it will sit against the side of your rig when fully retracted for travel.
Step 7: Mount the Assembly Back onto the RV
Lift the rolled assembly together with your partner and carefully walk it back to the side of your vehicle. Guide the top poly cord of the new canopy into the lubricated awning rail attached to the roofline. Walk slowly down the length of the rig, sliding the fabric through the track while keeping the arms parallel to the sidewall. Reattach the upper brackets using the original lag bolts, applying a fresh dab of waterproof sealant to the bolt holes to prevent future leaks. Ensure the entire frame feels solid and flush against the exterior wall before moving on.
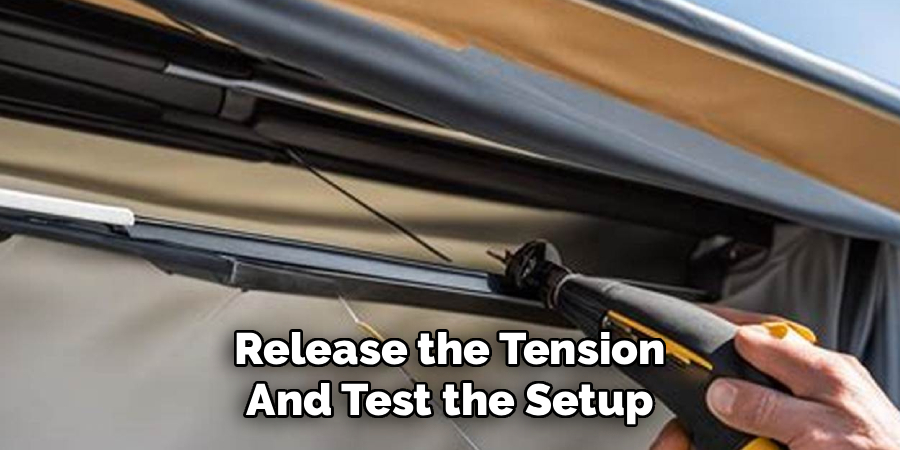
Step 8: Release the Tension and Test the Setup
Grip the roller tube firmly with both hands while your helper carefully pulls out the locking pins from the end caps. The spring tension will immediately transfer to the arms, so maintain a tight grip to prevent the tube from snapping backward. Slowly extend and retract the canopy several times to ensure the material rolls up evenly without wrinkling. If you notice any unevenness, simply extend the shade and gently tug the fabric side to side in the rail to center it. Knowing how to replace camper awning assemblies correctly guarantees years of reliable shade for your future outdoor adventures.
Frequently Asked Questions
How Long Does It Take To Change An RV Awning?
Replacing an RV shade typically takes two reasonably handy adults between one and three hours. The exact timeframe depends heavily on your experience level and the condition of your existing hardware. If you encounter rusted bolts or stubborn tension springs, the process naturally takes longer. Taking your time ensures safety and prevents accidental damage.
Can I Do This Project By Myself?
You should never attempt this replacement alone. The roller tube and metal arms are extremely heavy, awkward, and difficult to maneuver. Furthermore, the internal springs hold massive amounts of tension that can cause severe injury if they slip. Having at least one reliable helper ensures you can safely slide the fabric into the tracks.
What Type Of Fabric Is Best For RV Canopies?
You generally have two main choices for replacement materials:
- Acrylic: Highly breathable, resists mildew well, and handles intense sun exposure without fading quickly.
- Vinyl: Completely waterproof, much easier to clean, and typically more affordable.
Most campers prefer vinyl for its superior water resistance, though acrylic remains an excellent choice for dry climates.
How Do I Measure For A Replacement Canopy?
Never measure your old fabric, as it stretches and shrinks over time. Instead, measure the distance from the center of the front arm directly to the center of the rear arm. This measurement determines the true size of your assembly. Simply use this exact center-to-center measurement when ordering your replacement material.
Why Is Silicone Lubricant Necessary During Installation?
Silicone lubricant significantly reduces friction when sliding the thick poly cords through the aluminum tracks. Benefits include:
- Prevents accidental tearing of the fresh vinyl.
- Speeds up the installation timeline.
- Reduces physical strain on you and your helper.
Avoid using oil-based lubricants, as they attract dirt and degrade synthetic materials over time.
Conclusion
Upgrading your outdoor living space is one of the most rewarding maintenance tasks you can perform on your recreational vehicle. We have covered the essential steps, from safely pinning those high-tension springs to sliding the fresh canopy through the roofline rail. By following these detailed instructions, you bypass expensive dealership labor costs and gain a deeper understanding of how your rig operates.
Do not let a ripped or moldy shade ruin your upcoming summer road trips. Gather your tools, invite a friend over to help, and take charge of your campsite comfort today. Once you master how to replace camper awning fabric, you will feel empowered to tackle even more DIY projects, ensuring your mobile oasis remains beautiful and functional for years to come.
About Caleb
Caleb Merritt is a Virginia-based outdoor writer and gear analyst who has spent over a decade sleeping on the ground, crossing mountain passes, and obsessively shaving grams off his pack weight. He holds a Bachelor of Science in Environmental Science from James Madison University, where he also served as president of the university’s outdoor recreation club. After graduating, he spent three years as a wilderness educator with a backcountry youth program in the Shenandoah Valley — teaching Leave No Trace ethics, backcountry navigation, and campcraft — before moving into full-time writing in 2018.
His work focuses on one core belief: the best gear is the gear you understand. Whether he’s doing a side-by-side weight comparison of ultralight shelters or writing a beginner’s guide to building a sub-20-lb base weight kit, Caleb writes with the same directness you’d expect from a trusted trail partner. He has logged more than 4,000 miles across iconic routes including the John Muir Trail, the Wind River Range, Vermont’s Long Trail, and the Collegiate Peaks Loop in Colorado.
Areas of Expertise
- Ultralight backpacking systems and base weight optimization
- Tent, tarp, and shelter testing across three-season and shoulder-season conditions
- Sleeping bag and quilt temperature rating verification
- Backpacking nutrition, meal planning, and calorie-per-ounce analysis
- Leave No Trace principles and wilderness ethics
- Campfire safety, bear country protocols, and water treatment methods
- Gear care, repair, and long-term durability assessment
Education
James Madison University — B.S. in Environmental Science, 2015
During his time at JMU, Caleb served as President of the Outdoor Recreation Club, where he planned and led more than 30 backcountry trips annually across the Blue Ridge Mountains and Appalachian Trail corridor. The role sharpened his ability to assess gear performance under real conditions, manage group safety in remote environments, and develop the kind of practical trail knowledge that no classroom can teach.
Professional Experience
Gear Writer & Senior Contributor — [Your Website Name]
Produces in-depth gear reviews, buyer’s guides, and how-to content across backpacking, camping, and ultralight hiking categories. Tests all gear in real field conditions before publishing recommendations.
Wilderness Educator & Trip Leader — Shenandoah Backcountry Youth Program — 2015–2018 Led multi-day backcountry expeditions for teens and young adults throughout Shenandoah National Park and George Washington National Forest. Taught LNT principles, orienteering, first aid awareness, and campcraft fundamentals.
Outdoor Recreation Club President — James Madison University — 2013–2015 Organized and led university-sponsored hiking, backpacking, and camping trips in the Blue Ridge Mountains and Appalachian Trail corridor. Managed club budget, safety protocols, and trip logistics for a membership of 120+ students.
Editorial Standards
Every piece of gear Caleb recommends has been personally tested in the field — not just unboxed and described. His review process includes a minimum of two overnight trips per shelter, a full-season evaluation for sleep systems, and side-by-side comparisons wherever possible. He does not accept payment for positive reviews. Affiliate relationships, where they exist, are always disclosed in accordance with FTC guidelines.
All factual claims about gear specifications, trail distances, and safety recommendations are cross-referenced against manufacturer data sheets and established sources such as the Leave No Trace Center for Outdoor Ethics and the American Hiking Society before publication.