Many people think RV living ends when the snow starts falling, but cold weather actually unlocks some of the most peaceful and beautiful travel experiences imaginable. If you are wondering how to live in a camper in the winter, you are in the exact right place. This guide will show you that with a little preparation, winter RVing is completely manageable and highly rewarding.
We will cover everything from keeping your plumbing safe from freezing temperatures to maximizing your heat retention. You will learn the exact steps to winterize your rig, choose the right heating solutions, and stay comfortable all season long. Grab a warm drink, and let us dive into the best strategies for cold weather camper living.
Why You Should Embrace Cold Weather RV Living
You might ask yourself why anyone would choose freezing temperatures over a warm house. The truth is, winter camper living offers unparalleled peace, quiet, and access to stunning snow-covered landscapes that summer travelers never see. State and national parks that are packed in July become private winter wonderlands in January.
Furthermore, staying in your rig year-round saves you money on seasonal storage fees and expensive winter rent. You get to continue your nomadic lifestyle without pausing for the seasons. While it does require extra effort, the reward of sipping hot coffee while watching the snow fall outside your window is unmatched. Preparing your rig for these conditions teaches you valuable maintenance skills, making you a much more confident and capable traveler overall.
7 Step-by-Step Guide on How to Live in a Camper in the Winter
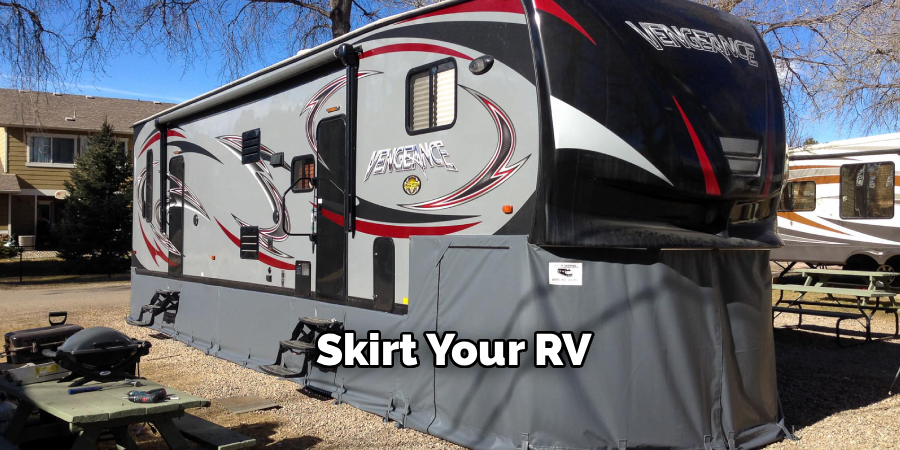
Step 1: Skirt Your RV
One of the most critical steps to surviving freezing temperatures is installing an RV skirt. Cold wind blowing directly underneath your floor will pull the heat right out of your living space and quickly freeze your holding tanks. Skirting creates a pocket of insulating air beneath your rig that acts as a thermal barrier. You can use specialized heavy-duty vinyl skirting, rigid foam board insulation, or even plywood depending on your budget and how often you plan to move. Secure the material tightly around the entire perimeter of your vehicle to block all drafts effectively. This simple physical barrier drastically reduces your heating bill and keeps your interior floors comfortably warm all season long.
Step 2: Insulate Your Windows and Doors
Windows and doors are the biggest culprits for massive heat loss in any recreational vehicle. Most standard rigs have thin, single-pane glass that lets the cold outside air seep right inside. To combat this issue, cut reflective foil insulation to the exact size of your windows and place them between the glass and your blinds. For a clearer view of the outdoors, apply heavy-duty shrink-wrap window film to create a highly effective makeshift double-pane effect. You should also check the rubber weather stripping around your main entry door and all exterior storage bays. Replacing worn-out seals prevents icy drafts from ruining your cozy indoor atmosphere and saves your furnace from overworking.
Step 3: Protect Your Water Hoses and Pipes
Frozen plumbing is the biggest nightmare for cold weather campers, but it is entirely preventable with proper planning and gear. If you are hooked up to a campground water supply, you absolutely must invest in a high-quality heated water hose. These specialized hoses have built-in heating elements that stop water from turning into ice before it ever reaches your rig. Inside the camper, open your lower cabinet doors slightly so warm room air can freely circulate around your interior pipes. You should also wrap any exposed exterior plumbing lines with thick foam pipe insulation and heat tape to ensure consistent, safe water flow during those freezing overnight temperature drops.
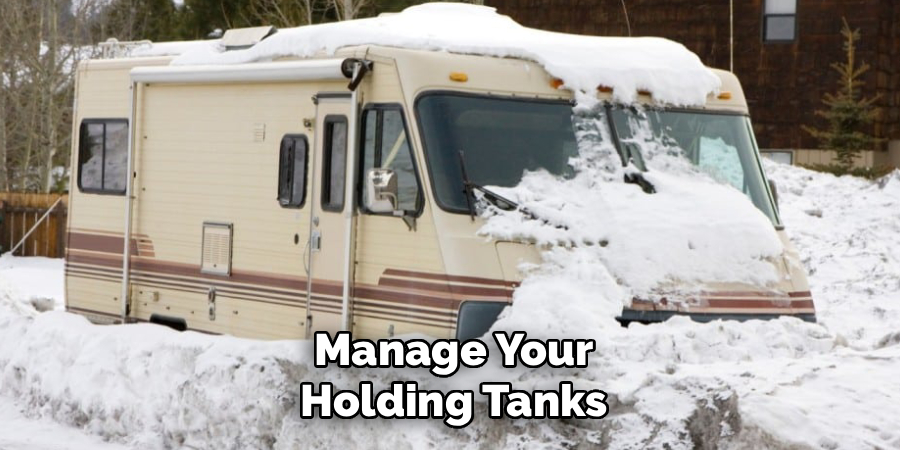
Step 4: Manage Your Holding Tanks
Your fresh water, gray water, and black water tanks sit exposed right under your rig, making them highly vulnerable to freezing solid. To prevent a messy disaster, install thermostatically controlled electrical heating pads directly onto the bottom of each tank. These pads automatically turn on when the outside temperature drops dangerously close to freezing. You can also add non-toxic RV antifreeze directly to your gray and black tanks to lower the freezing point of the liquids inside. Always keep your exterior dump valves completely closed until the tanks are full and ready to empty. A slow trickle of draining water will quickly freeze and completely block your main sewer hose.
Step 5: Choose the Right Heating System
Relying solely on your built-in propane furnace will quickly drain your tanks and your wallet. Figuring out how to live in a camper in the winter requires a smart, multi-layered approach to indoor heating. If you have access to campground electrical hookups, use small ceramic space heaters to maintain a comfortable baseline temperature inside the rig. For off-grid camping, a portable catalytic propane heater provides excellent warmth without using any of your battery power. Just make sure you leave a roof vent slightly open to prevent carbon monoxide buildup and to manage interior moisture. A heated electric blanket is also the perfect addition for exceptionally chilly nights.
Step 6: Control Interior Condensation
Cooking, breathing, and using your propane furnace all generate significant moisture inside your small, enclosed living space. When this warm, humid air hits your ice-cold exterior walls and windows, it immediately turns into condensation. If left unchecked, this pooling moisture will quickly lead to harmful mold growth and severe structural rot. You must run a high-quality electric dehumidifier continuously to pull this excess water out of the air safely. Furthermore, always run your ceiling exhaust fans when boiling water on the stove or taking a hot shower. Wiping down your windows with a dry micro-fiber towel every morning also helps keep moisture levels manageable and protects your interior walls.
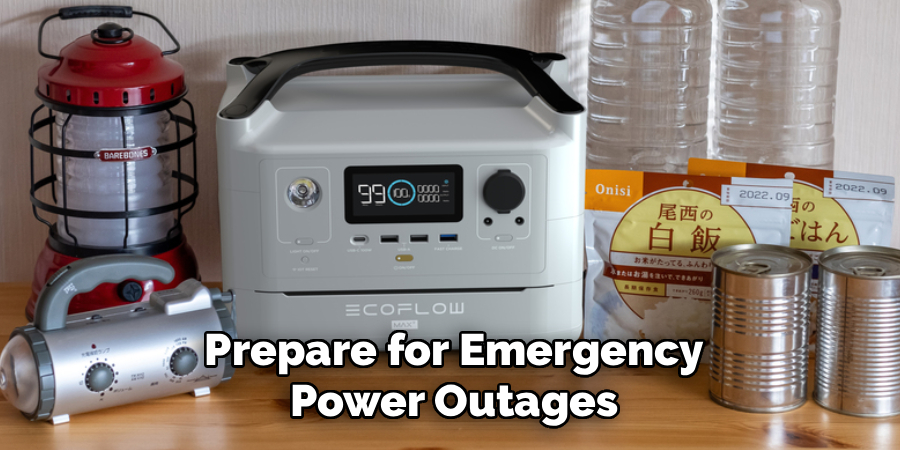
Step 7: Prepare for Emergency Power Outages
Winter ice storms can completely knock out campground electricity without any warning, leaving you completely stranded in the cold. You need a highly reliable backup plan to keep your heat running and your house batteries charged. A portable gasoline or dual-fuel inverter generator is an absolute necessity for cold weather survival and peace of mind. Make sure you test the generator and top off your fuel cans long before the first major snowstorm arrives. Upgrading your house battery bank to lithium-ion also provides a much longer runtime for your essential appliances and your main furnace fan. Always keep plenty of warm layered clothing and thermal sleeping bags easily accessible just in case.
Frequently Asked Questions
What Is The Best Way To Heat An RV In Winter?
The most effective heating strategy combines multiple heat sources to save energy and stay warm.
- Use a built-in propane furnace to heat the underbelly and protect your tanks.
- Use ceramic electric space heaters to warm the main living areas if you have shore power.
- Use catalytic propane heaters for off-grid warmth.
- Always ensure proper ventilation when running propane heaters to stay safe.
How Do I Stop Condensation Inside My Camper?
Managing indoor humidity is crucial during cold weather camping. You can prevent excess moisture buildup by taking a few simple daily actions.
- Run a high-capacity electric dehumidifier constantly.
- Crack a roof vent or window slightly to promote airflow.
- Always use exhaust fans while cooking or showering.
- Place moisture-absorbing tubs inside your closets and dark cabinets.
Can I Use My RV Plumbing In Freezing Temperatures?
Yes, you can safely use your plumbing during the winter if you take the proper precautions to prevent freezing.
- Wrap exposed pipes in heat tape and thick foam insulation.
- Use a heated fresh water hose for city water connections.
- Install electric heating pads on your black and gray holding tanks.
- Leave cabinet doors open to let warm air reach interior pipes.
Do I Need Special RV Skirting For Cold Weather?
Skirting is absolutely essential for winter survival because it stops freezing winds from chilling your floors and holding tanks. You do not necessarily need expensive custom skirting, though it is highly effective. Many campers successfully use rigid foam insulation boards cut to size and taped together. Heavy-duty vinyl or even piled snow can also act as an effective windbreak.
Is It Expensive To Live In A Camper During Winter?
Winter RV living can be very cost-effective, but you must accurately budget for your increased utility expenses.
- Propane usage will significantly increase to keep your furnace running.
- Campgrounds may charge extra for heavy electricity usage from space heaters.
- Initial investments like skirting, heated hoses, and dehumidifiers cost money upfront but save you from expensive plumbing repairs later.
Conclusion
Transitioning to cold weather RVing might seem intimidating at first, but proper preparation makes all the difference in the world. By skirting your rig, upgrading your window insulation, and managing your plumbing with heated hoses and tank pads, you can easily conquer freezing temperatures. Remember to balance your heating sources and continuously run a dehumidifier to keep your interior comfortable, warm, and dry. The stunning snowy landscapes and peaceful campgrounds make the extra maintenance effort completely worthwhile. Now that you understand exactly how to live in a camper in the winter, you are fully ready to pack your warm clothes and hit the road. Embrace the chill, stay safe, and enjoy the magical experience of winter travel.
About Caleb
Caleb Merritt is a Virginia-based outdoor writer and gear analyst who has spent over a decade sleeping on the ground, crossing mountain passes, and obsessively shaving grams off his pack weight. He holds a Bachelor of Science in Environmental Science from James Madison University, where he also served as president of the university’s outdoor recreation club. After graduating, he spent three years as a wilderness educator with a backcountry youth program in the Shenandoah Valley — teaching Leave No Trace ethics, backcountry navigation, and campcraft — before moving into full-time writing in 2018.
His work focuses on one core belief: the best gear is the gear you understand. Whether he’s doing a side-by-side weight comparison of ultralight shelters or writing a beginner’s guide to building a sub-20-lb base weight kit, Caleb writes with the same directness you’d expect from a trusted trail partner. He has logged more than 4,000 miles across iconic routes including the John Muir Trail, the Wind River Range, Vermont’s Long Trail, and the Collegiate Peaks Loop in Colorado.
Areas of Expertise
- Ultralight backpacking systems and base weight optimization
- Tent, tarp, and shelter testing across three-season and shoulder-season conditions
- Sleeping bag and quilt temperature rating verification
- Backpacking nutrition, meal planning, and calorie-per-ounce analysis
- Leave No Trace principles and wilderness ethics
- Campfire safety, bear country protocols, and water treatment methods
- Gear care, repair, and long-term durability assessment
Education
James Madison University — B.S. in Environmental Science, 2015
During his time at JMU, Caleb served as President of the Outdoor Recreation Club, where he planned and led more than 30 backcountry trips annually across the Blue Ridge Mountains and Appalachian Trail corridor. The role sharpened his ability to assess gear performance under real conditions, manage group safety in remote environments, and develop the kind of practical trail knowledge that no classroom can teach.
Professional Experience
Gear Writer & Senior Contributor — [Your Website Name]
Produces in-depth gear reviews, buyer’s guides, and how-to content across backpacking, camping, and ultralight hiking categories. Tests all gear in real field conditions before publishing recommendations.
Wilderness Educator & Trip Leader — Shenandoah Backcountry Youth Program — 2015–2018 Led multi-day backcountry expeditions for teens and young adults throughout Shenandoah National Park and George Washington National Forest. Taught LNT principles, orienteering, first aid awareness, and campcraft fundamentals.
Outdoor Recreation Club President — James Madison University — 2013–2015 Organized and led university-sponsored hiking, backpacking, and camping trips in the Blue Ridge Mountains and Appalachian Trail corridor. Managed club budget, safety protocols, and trip logistics for a membership of 120+ students.
Editorial Standards
Every piece of gear Caleb recommends has been personally tested in the field — not just unboxed and described. His review process includes a minimum of two overnight trips per shelter, a full-season evaluation for sleep systems, and side-by-side comparisons wherever possible. He does not accept payment for positive reviews. Affiliate relationships, where they exist, are always disclosed in accordance with FTC guidelines.
All factual claims about gear specifications, trail distances, and safety recommendations are cross-referenced against manufacturer data sheets and established sources such as the Leave No Trace Center for Outdoor Ethics and the American Hiking Society before publication.