Getting ready for your next great outdoor adventure means making sure your recreational vehicle is fully prepared for the journey. One of the most important maintenance tasks you face before hitting the open road is ensuring your drinking water supply remains safe, clean, and completely free of harmful bacteria. Understanding exactly how to sanitize camper water tank systems will give you peace of mind throughout your entire camping trip.
Many beginners feel intimidated by RV plumbing, but the process is straightforward once you know the right steps. We will walk you through everything from gathering your basic supplies to doing the final flush of your fresh water lines. By following this simple guide, you will learn the best practices for keeping your drinking water pure, crisp, and ready for your family to enjoy all season long.
Why You Must Regularly Purify Your Fresh Water System
Leaving water sitting in your holding tanks between camping trips creates the perfect environment for unwanted growth. Even if you use filtered city water, stagnant moisture can quickly develop algae, mold, and dangerous bacteria inside the dark confines of your plastic reservoir. This buildup often leads to a stale, foul-tasting water supply, or worse, an unexpected illness that ruins your entire vacation.
Regular sanitization eliminates these hidden hazards and strips away lingering odors, like the dreaded rotten egg sulfur smell. Experts highly recommend performing this deep cleaning process at least twice a year, especially right after pulling your rig out of winter storage. Taking the time to properly treat your plumbing ensures that every drop coming from your faucet is perfectly safe for drinking, cooking, and brushing your teeth, protecting both your health and your expensive plumbing components.
8 Step-by-Step Guide on How to Sanitize Camper Water Tank
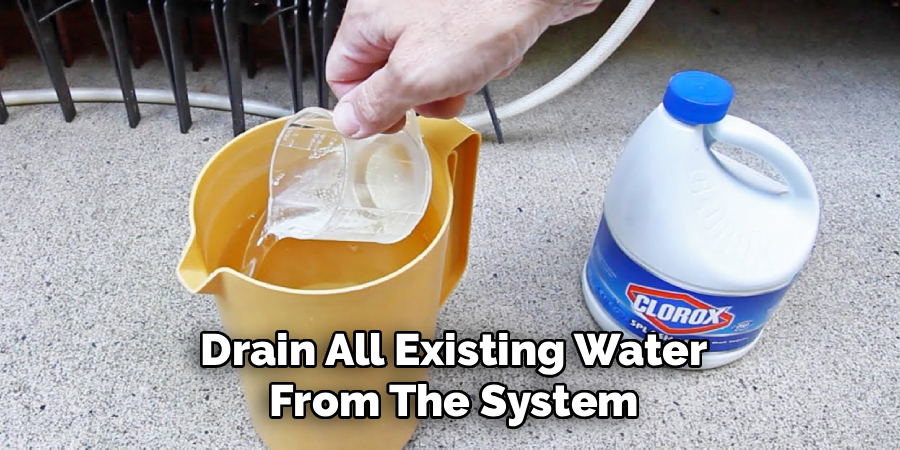
Step 1: Drain All Existing Water From The System
Before you can introduce any cleaning agents, you must completely empty your current fresh water reservoir. Start by locating the low-point drains underneath your rig and opening the petcock valve to let gravity pull the old water out. Turn on your water pump briefly to push out any remaining liquid trapped inside the internal lines, making sure you open all the faucets, showerheads, and outdoor spigots. It is crucial to bypass your water heater before you begin draining, as you do not want harsh cleaning chemicals sitting inside the delicate heating tank. Taking your time to remove all the stagnant water guarantees that your fresh bleach mixture will not be diluted and can work effectively.
Step 2: Prepare The Correct Bleach Solution
Creating the perfect cleaning mixture requires standard, unscented household bleach and a clean bucket. You want to avoid using any splashless or scented varieties, as these contain extra chemicals that will leave a soapy residue or lingering perfume taste in your drinking supply. The standard ratio is one-quarter cup of liquid bleach for every fifteen gallons of your holding tank capacity. Simply pour the measured bleach into a bucket and mix it with about a gallon of regular tap water. Diluting the bleach before pouring it into your rig protects your plastic intake valves and rubber seals from direct contact with highly concentrated chemicals, preventing premature wear and tear on your plumbing system.
Step 3: Learn How To Sanitize Camper Water Tank Intakes
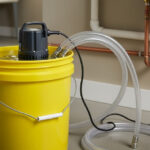
Now that your mixture is ready, you need to transfer it into your fresh water intake port. You can use a dedicated clean funnel to pour the diluted bleach mixture directly into the gravity fill port on the side of your rig. If your unit only has a pressurized city water connection, you can use a clean winterizing hose or a small hand pump to force the liquid into the reservoir. Make sure you pour slowly to avoid spilling any harsh chemicals onto your vehicle’s exterior paint or decals, as bleach can cause permanent discoloration. Pour the entire bucket of solution into the system so it can begin doing its job.
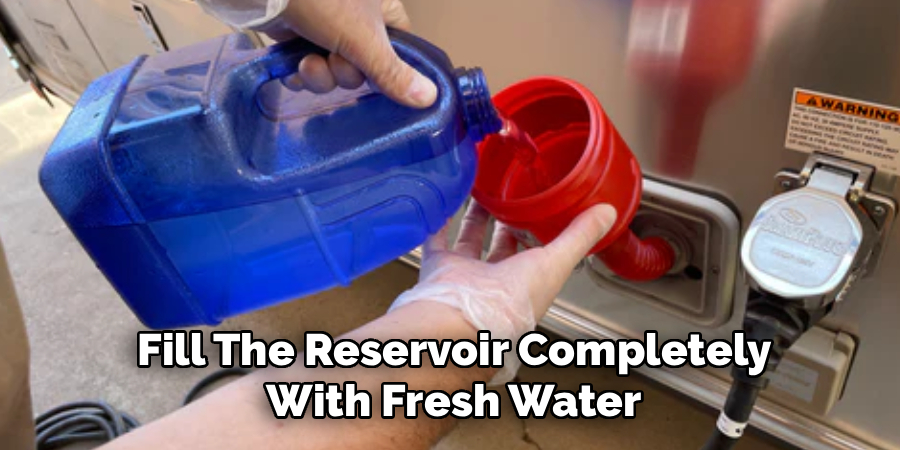
Step 4: Fill The Reservoir Completely With Fresh Water
With the concentrated cleaning mixture sitting safely inside your tank, you need to top off the rest of the reservoir with clean, potable water. Connect your trusted white drinking hose to a nearby spigot and attach the other end to your fresh water fill port. Turn the spigot on full blast and allow the tank to fill until it reaches maximum capacity or water begins coming out of the overflow valve. Filling the container to the very top ensures that the sanitizing solution touches every single interior wall, including the ceiling of the tank where condensation and bacteria love to hide. This full volume also guarantees the correct dilution ratio.
Step 5: Pump The Solution Through Every Plumbing Line
The chemicals need to clean your pipes just as much as the main holding tank. Turn on your twelve-volt water pump and go inside your rig to open the cold and hot water handles on the kitchen sink. Wait until you clearly smell the distinct odor of bleach coming from the faucet, then turn it off. Repeat this exact process for the bathroom sink, the indoor shower, the toilet flush valve, and any exterior shower attachments you might have. Pulling the treated liquid through every single pipe ensures that no hidden section of your plumbing is left vulnerable to algae or dangerous microscopic pathogens.
Step 6: Wait While Learning How To Sanitize Camper Water Tank Effectively
Patience is the most critical element of the entire cleaning process. The bleach needs adequate time to kill off the bacteria, mold, and algae clinging to the walls of your plumbing network. Let the treated liquid sit completely undisturbed inside your rig for a minimum of four hours, though leaving it overnight often yields the absolute best results. During this waiting period, do not run the pump or use any of the fixtures. Some seasoned travelers like to drive their vehicle around the block for a few minutes before letting it sit, as the gentle sloshing motion helps the solution scrub the upper corners of the holding container.
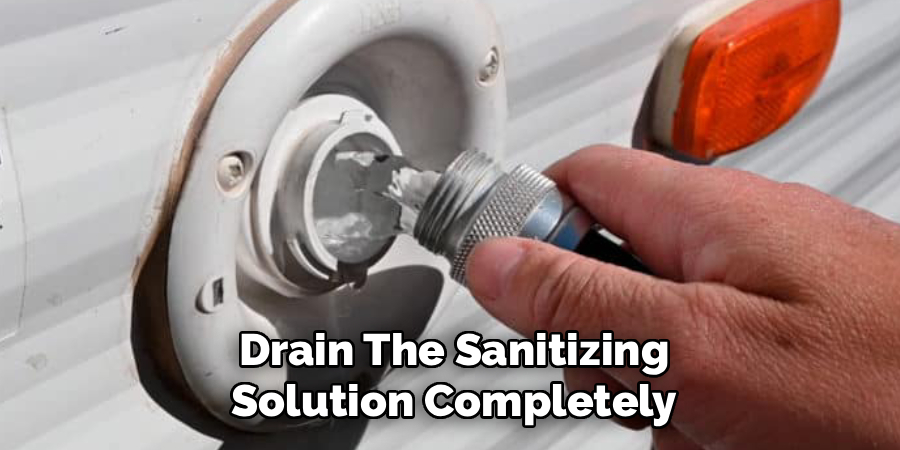
Step 7: Drain The Sanitizing Solution Completely
Once the waiting period is finally over, it is time to remove the heavy chemical mixture from your vehicle. Head back outside and open all of the low-point drains underneath your rig to let the large volume of liquid escape onto the ground or into a designated drain. Turn the twelve-volt pump back on and open every single indoor and outdoor faucet to break the vacuum seal, which helps the liquid drain much faster. Ensure the reservoir is entirely empty before closing the low-point valves and shutting off the interior faucets. You want to remove as much of the chlorine-heavy liquid as possible before the final flushing phase begins.
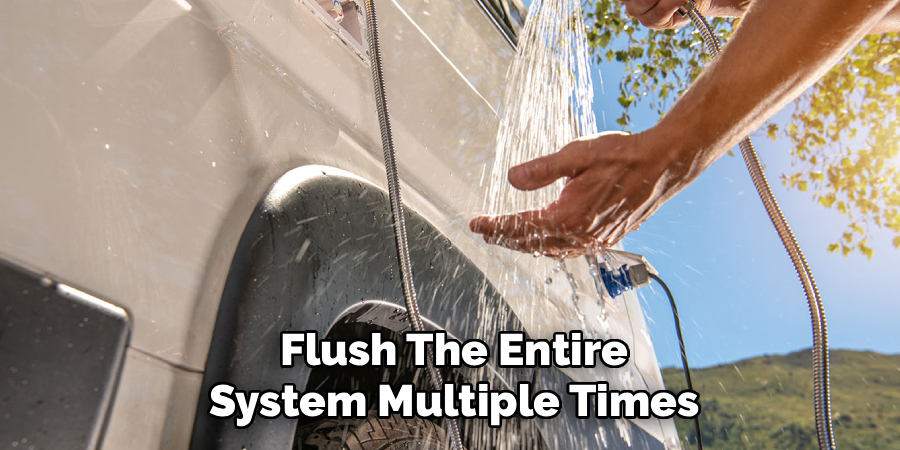
Step 8: Flush The Entire System Multiple Times
The final step is to remove any lingering chlorine taste or odor from your drinking supply. Connect your white hose and fill your main holding tank completely with clean, fresh tap water. Turn on the pump and open all your interior and exterior faucets, letting the water run for several minutes to push out the remaining bleach residue. You will likely need to drain the entire tank and refill it two or three times before the distinct smell of chlorine completely fades away. Once the water smells fresh and tastes clean, your plumbing network is officially ready for your next big outdoor adventure.
Frequently Asked Questions
How Often Should I Sanitize My RV Fresh Water Tank?
You should perform a full sanitization at least twice a year.
- Spring: Always clean the system when pulling the rig out of winter storage.
- Fall: Clean it again if you have let water sit unused for more than two weeks during the camping season to prevent bacterial growth.
Can I Use White Vinegar Instead Of Household Bleach?
Yes, white vinegar is a safe alternative if you want to avoid harsh chemicals. You should mix one quart of white vinegar with three quarts of water. While it is excellent for removing scale and neutralizing odors, keep in mind that vinegar is slightly less effective at killing severe bacteria than traditional unscented bleach.
What Is The Correct Ratio Of Bleach To Water?
The industry standard rule is to use exactly one-quarter cup of standard, unscented household bleach for every fifteen gallons of fresh water tank capacity. For a standard forty-five-gallon tank, you would mix three-quarters of a cup of bleach into a gallon of water before pouring it into your system.
Do I Need To Bypass The RV Water Heater?
You should always bypass the hot water heater before running the bleach mixture through your lines. Harsh chlorine can heavily damage the anode rod and internal lining of your heating unit. Simply turn the bypass valves behind the heater so the water flows directly past it during the cleaning process.
How Do I Get Rid Of A Lingering Bleach Smell?
If multiple flushes do not remove the strong chlorine odor, you can create a neutralizing mixture.
- Mix a half cup of baking soda with a gallon of warm water.
- Pour it into the fresh tank.
- Fill with water, run it through the lines, and let it sit for a few days before draining.
Conclusion
Taking proper care of your RV plumbing system does not have to be a complicated or intimidating chore. By regularly draining your lines, mixing the right bleach solution, letting it sit to kill bacteria, and flushing the pipes thoroughly, you guarantee a safe environment for your family.
Now that you know the exact steps, it is time to grab a bucket, head out to your driveway, and get your rig ready for the season. Understanding exactly how to sanitize camper water tank setups empowers you to travel with confidence, knowing every drop of water from your faucet is as fresh and clean as the great outdoors.
About Caleb
Caleb Merritt is a Virginia-based outdoor writer and gear analyst who has spent over a decade sleeping on the ground, crossing mountain passes, and obsessively shaving grams off his pack weight. He holds a Bachelor of Science in Environmental Science from James Madison University, where he also served as president of the university’s outdoor recreation club. After graduating, he spent three years as a wilderness educator with a backcountry youth program in the Shenandoah Valley — teaching Leave No Trace ethics, backcountry navigation, and campcraft — before moving into full-time writing in 2018.
His work focuses on one core belief: the best gear is the gear you understand. Whether he’s doing a side-by-side weight comparison of ultralight shelters or writing a beginner’s guide to building a sub-20-lb base weight kit, Caleb writes with the same directness you’d expect from a trusted trail partner. He has logged more than 4,000 miles across iconic routes including the John Muir Trail, the Wind River Range, Vermont’s Long Trail, and the Collegiate Peaks Loop in Colorado.
Areas of Expertise
- Ultralight backpacking systems and base weight optimization
- Tent, tarp, and shelter testing across three-season and shoulder-season conditions
- Sleeping bag and quilt temperature rating verification
- Backpacking nutrition, meal planning, and calorie-per-ounce analysis
- Leave No Trace principles and wilderness ethics
- Campfire safety, bear country protocols, and water treatment methods
- Gear care, repair, and long-term durability assessment
Education
James Madison University — B.S. in Environmental Science, 2015
During his time at JMU, Caleb served as President of the Outdoor Recreation Club, where he planned and led more than 30 backcountry trips annually across the Blue Ridge Mountains and Appalachian Trail corridor. The role sharpened his ability to assess gear performance under real conditions, manage group safety in remote environments, and develop the kind of practical trail knowledge that no classroom can teach.
Professional Experience
Gear Writer & Senior Contributor — [Your Website Name]
Produces in-depth gear reviews, buyer’s guides, and how-to content across backpacking, camping, and ultralight hiking categories. Tests all gear in real field conditions before publishing recommendations.
Wilderness Educator & Trip Leader — Shenandoah Backcountry Youth Program — 2015–2018 Led multi-day backcountry expeditions for teens and young adults throughout Shenandoah National Park and George Washington National Forest. Taught LNT principles, orienteering, first aid awareness, and campcraft fundamentals.
Outdoor Recreation Club President — James Madison University — 2013–2015 Organized and led university-sponsored hiking, backpacking, and camping trips in the Blue Ridge Mountains and Appalachian Trail corridor. Managed club budget, safety protocols, and trip logistics for a membership of 120+ students.
Editorial Standards
Every piece of gear Caleb recommends has been personally tested in the field — not just unboxed and described. His review process includes a minimum of two overnight trips per shelter, a full-season evaluation for sleep systems, and side-by-side comparisons wherever possible. He does not accept payment for positive reviews. Affiliate relationships, where they exist, are always disclosed in accordance with FTC guidelines.
All factual claims about gear specifications, trail distances, and safety recommendations are cross-referenced against manufacturer data sheets and established sources such as the Leave No Trace Center for Outdoor Ethics and the American Hiking Society before publication.