Hitting the slopes for the first time brings a rush of adrenaline and a few natural nerves. You clip into your bindings, look down the mountain, and suddenly realize your feet feel entirely foreign. Finding your center of gravity on snow differs greatly from walking on solid ground.
Many new skiers struggle with feeling out of control or leaning too far back. This happens because your brain wants to pull away from the downward slope. We can fix that natural instinct with a few targeted techniques.
By the end of this guide, you will understand exactly how to balance while skiing down any green or blue run. You will learn the proper athletic stance, how to distribute your weight, and where to look. Let us get your skis flat on the snow and your body perfectly centered.
Why Mastering Balance Matters for Outdoor Beginners
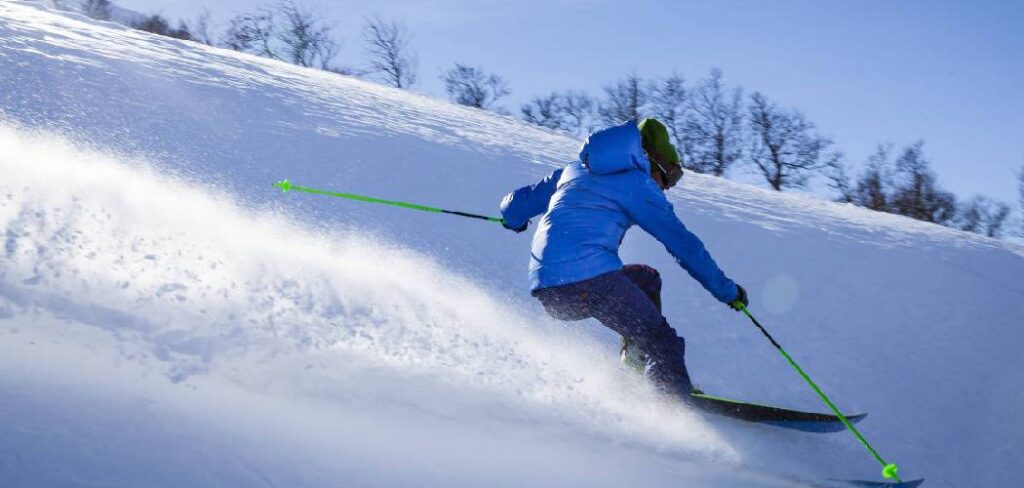
Balance serves as the absolute foundation of all skiing techniques. Without a solid center of gravity, you cannot steer, stop, or control your speed effectively. Every movement you make on the snow starts from a balanced stance.
When you establish proper equilibrium, you conserve a massive amount of physical energy. Skiers who fight their center of gravity experience rapid muscle fatigue, particularly in their quadriceps and calves. A balanced posture allows your skeletal structure to support your weight instead of forcing your muscles to do all the heavy lifting.
Proper centering also drastically reduces your risk of falling and potential injury. You gain the ability to react quickly to changes in the terrain, such as unexpected ice patches or small bumps. Mastering this core skill builds the confidence you need to explore harder runs and truly enjoy your time on the mountain.
Tools and Materials You’ll Need
Before you can practice your stance, you need the right equipment tailored to your body and skill level.
- Properly fitted ski boots that hold your heel firmly in place without cutting off circulation.
- Skis sized appropriately for your height and beginner status (usually coming up to your chin or nose).
- Ski poles sized so your elbows form a 90-degree angle when you plant them in the snow.
- A well-fitting snow helmet to protect your head during inevitable beginner falls.
- Moisture-wicking base layers to keep your body dry and warm.
- Waterproof outer layers, including a jacket and snow pants, to block the wind and snow.
- Warm, waterproof ski gloves or mittens to protect your hands.
- Ski goggles to shield your eyes from the bright alpine sun and biting wind.
Step-by-Step Guide on How to Balance While Skiing
Step 1: Establish the Athletic Stance
Your posture dictates your success on the mountain. Start by standing on flat snow with your skis parallel and hip-width apart. Keep your feet flat inside your boots.
Bend your ankles, knees, and hips slightly. You should feel like you are preparing to jump straight up into the air. Keep your back straight, but lean your entire torso forward from the ankles, not the waist.
Let your arms rest comfortably in front of you, slightly bent at the elbows. Imagine you are holding a large serving tray. This athletic stance creates a stable base and lowers your center of gravity, making you much harder to knock over.
Step 2: Feel the Pressure on Your Shins
A critical part of staying centered involves the connection between your lower leg and your ski boot. You must press your shins firmly into the front tongues of your boots. This forward pressure translates directly to the front of your skis.
When you lean back, the tails of your skis wash out, and you lose steering control. Pushing your shins forward engages the entire length of the ski into the snow. You should feel constant, gentle pressure on your shins at all times.
If your calves press into the back of your boots, you have lost your balance. Reset your stance, bend your knees deeply, and push your weight forward again. This simple adjustment fixes a huge percentage of beginner stability issues.
Step 3: Keep Your Eyes Looking Forward
Your body follows your eyes. If you stare at your ski tips, your head drops, your shoulders round, and your weight shifts off-center. To understand how to balance while skiing, you must train your eyes to look ahead.
Focus on the terrain roughly twenty to thirty feet in front of you. This gives your brain time to process upcoming bumps, ice, or other skiers. Keeping your chin up straightens your spine and stacks your upper body directly over your feet.
Peripheral vision handles the immediate space around your skis perfectly well. Trust your feet to do their job while you scan the path ahead. Looking forward also helps alleviate motion sickness and builds overall confidence.
Step 4: Center Your Weight Over Your Arches
While you want shin pressure on the front of the boots, your actual body weight must center over the arches of your feet. Many beginners mistakenly push all their weight onto their toes. This causes the ski tails to lift and creates a highly unstable, jittery ride.
Conversely, sitting back on your heels causes the ski tips to wander aimlessly. Focus on pressing the entire sole of your foot flat against the bottom of the boot. You should feel grounded and heavy right in the middle of your foot.
Try bouncing gently up and down while standing on flat snow. Notice where your weight settles when you land softly. That middle point over the arch provides the ultimate sweet spot for stability.
Step 5: Keep Your Hands Visible
Arm position completely dictates your upper body balance. Dropping your hands to your sides pulls your shoulders back and ruins your forward stance. Throwing your arms behind you instantly shifts your center of gravity to your heels.
Keep your hands up and out in front of you, within your peripheral vision. You should be able to see both of your hands without turning your head. This forward hand placement acts as a counterbalance to the downward pull of the slope.
Pretend you are driving a car and holding the steering wheel at ten and two o’clock. Maintaining this quiet, forward hand position stops unnecessary upper body rotation and keeps your core perfectly aligned over your skis.
Step 6: Engage Your Core Muscles
Your abdominal muscles act as the bridge between your upper and lower body. A loose, relaxed core allows your torso to flop around, instantly throwing you off balance. You need to actively engage your stomach muscles as you ski down the hill.
Tighten your core just enough to stabilize your spine, similar to holding a light plank position. This engagement prevents your upper body from collapsing when you hit a bump or change directions. A strong core also helps you transfer energy from your legs into the skis.
Do not hold your breath while doing this. Maintain steady breathing while keeping the abdominal wall firm. This internal tension provides massive stability and helps you absorb the vibrations from the snow.
Step 7: Manage Your Weight Transfer in Turns
Turning requires you to shift your balance from one ski to the other. When making a turn, the majority of your body weight must move to the outside ski. The outside ski acts as your platform and grips the snow to carve the turn.
If you turn left, your right ski becomes the outside ski, and you must press your weight into it. If you turn right, your left ski takes the weight. Failing to shift your weight causes the skis to cross or slide out from under you.
Practice lifting the inside ski slightly off the snow while traversing the slope. This drill forces you to balance entirely on the outside ski. Mastering this weight transfer unlocks fluid, controlled turns.
Step 8: Keep Your Upper Body Quiet
Excessive movement ruins your stability on the snow. Many beginners try to force their skis to turn by violently twisting their shoulders and torso. To master how to balance while skiing, you must separate your upper body from your lower body.
Your legs should do all the turning while your torso remains relatively still, facing down the fall line. Imagine your upper body is a statue resting on top of a swiveling office chair. The chair spins, but the statue stays perfectly still.
A quiet upper body keeps your center of mass consistently located over your base of support. Let your knees and ankles steer the skis while your shoulders remain stable and relaxed.
Step 9: Adapt to the Terrain
The mountain surface constantly changes, and your balance must adapt with it. You will encounter steep pitches, flat runouts, ice, and soft snow all on the same run. Rigid, stiff legs will buck you off the skis the moment you hit a bump.
Keep your joints loose and act like a shock absorber. When you encounter a bump, allow your knees to bend deeply and absorb the impact. As you pass over the crest, extend your legs back down to maintain contact with the snow.
Never lock your knees straight. Fluid, dynamic movement allows your body to float over the terrain while your center of gravity remains relatively stable. Stay relaxed and let the skis track over the imperfections in the snow.
Step 10: Practice the Falling Leaf Drill
Sometimes the best way to find your center involves playing with the edges of your skis. The falling leaf drill helps you understand edge control and lateral balance. Find a gentle, wide slope and point your skis across the hill, perpendicular to the downward slope.
Release the uphill edges slightly to let the skis slip sideways down the hill. To stop, roll your ankles up the hill to bite the edges back into the snow. Practice this side-slipping motion repeatedly.
Next, shift your weight slightly forward to make the skis slide diagonally forward. Shift your weight back to slide diagonally backward. This drill teaches you exactly where your sweet spot lives and how minor weight shifts affect your stability.
Common Mistakes When Learning to Balance While Skiing
The most prevalent mistake on the mountain involves the dreaded “backseat” stance. Beginners naturally fear the speed of the downward slope, so they lean back away from the danger. This pulls the hips behind the heels, straightens the legs, and removes all pressure from the front of the skis. Once you sit in the backseat, you cannot steer your skis, and you will inevitably accelerate out of control until you crash. You must fight this instinct by actively pushing your hips forward and pressing your shins into your boots.
Another frequent error involves looking down at the ski tips. When you drop your chin to look at your feet, your heavy head pulls your torso forward and rounds your shoulders. This breaks your posture at the waist rather than the ankles, causing you to bend over like a folding chair. You lose your powerful athletic stance and become highly vulnerable to falling forward. Keep your head up and trust that your skis are still securely attached to your boots.
Finally, many new skiers try to balance by keeping their feet tightly glued together. A narrow stance provides a tiny base of support, making you incredibly tippy. If you hit a small clump of snow with your feet touching, you will likely fall over. Always maintain a hip-width stance. This wider base gives you the lateral stability needed to absorb uneven terrain and maintain your balance through wide, sweeping turns.
Expert Tips
Spend time warming up your balance before you ever get on the chairlift. Put your boots and skis on in the flat base area and practice walking around. Slide one ski forward, then the other, feeling how the equipment reacts to your weight. Try stepping sideways up a tiny incline. These small movements calibrate your brain to the new equipment.
Focus heavily on ankle flexion rather than just bending your knees. Bending your knees without bending your ankles simply pushes your hips backward, putting you straight into the backseat stance. You must flex the ankle joint to drive the knee forward over the toe piece of the binding. This action keeps your center of mass stacked correctly.
Do not squeeze your toes inside your boots. Gripping the footbed with your toes creates massive tension in your lower legs and feet, leading to rapid cramping. Keep your toes relaxed and flat. Let the structural design of the rigid plastic boot support your ankles and lower legs.
Frequently Asked Questions
Why do my thighs burn so much when I try to balance on skis?
Thigh burn usually occurs because you are leaning too far back into the backseat stance. When your hips drop behind your heels, your quadriceps have to work overtime to keep you from falling backward onto the snow. Shifting your weight forward, pressing your shins into the boots, and relying on your skeletal structure will relieve the tension in your leg muscles.
How do I regain my balance if I start to fall backward?
If you feel your weight shifting too far back, take immediate action to drive your hands forward. Reach out as if you are trying to grab something in front of you, and actively push your shins hard into the front of your boots. Looking up and forward also helps pull your center of gravity back to the middle of your skis.
Should I use my poles to help me balance?
Ski poles assist with timing and rhythm during turns, but they should not be used as crutches to hold you up. Relying on your poles for support often leads to poor body positioning and leaning back. Your balance should come entirely from your athletic stance, core engagement, and proper foot pressure.
Why do I keep crossing my ski tips when I try to turn?
Crossing your ski tips happens when you fail to transfer your weight to the outside ski during a turn. If you leave too much weight on the inside ski, it catches an edge and wanders into the path of your outside ski. Focus on pressing your weight heavily onto the downhill ski to keep them tracking parallel.
Is it harder to balance on ice compared to soft snow?
Yes, balancing on ice requires much more precision than soft snow. Ice provides very little friction, so any sudden movements or poor weight distribution will cause your skis to slide out. On icy days, you must keep your movements incredibly smooth, stay perfectly centered, and ensure your edges are sharp to grip the hard surface.
Conclusion
Finding your center of gravity on snow takes patience, practice, and a willingness to trust the equipment. You have to actively fight your brain’s instinct to pull away from the slope. By maintaining an athletic stance, keeping your hands forward, and pressing those shins into your boots, you build an unshakable foundation.
Every great skier on the mountain started exactly where you are today. They fell down, they crossed their tips, and they felt the burn in their thighs. The difference is that they kept making small adjustments until their posture became muscle memory. Review these techniques on your next trip to the mountain.
When you understand how to balance while skiing, the entire sport opens up to you. You stop fighting the mountain and start flowing with it. Grab your gear, head to the beginner slopes, and start practicing your stance today.

About Caleb
Caleb Merritt is a Virginia-based outdoor writer and gear analyst who has spent over a decade sleeping on the ground, crossing mountain passes, and obsessively shaving grams off his pack weight. He holds a Bachelor of Science in Environmental Science from James Madison University, where he also served as president of the university’s outdoor recreation club. After graduating, he spent three years as a wilderness educator with a backcountry youth program in the Shenandoah Valley — teaching Leave No Trace ethics, backcountry navigation, and campcraft — before moving into full-time writing in 2018.
His work focuses on one core belief: the best gear is the gear you understand. Whether he’s doing a side-by-side weight comparison of ultralight shelters or writing a beginner’s guide to building a sub-20-lb base weight kit, Caleb writes with the same directness you’d expect from a trusted trail partner. He has logged more than 4,000 miles across iconic routes including the John Muir Trail, the Wind River Range, Vermont’s Long Trail, and the Collegiate Peaks Loop in Colorado.
Areas of Expertise
- Ultralight backpacking systems and base weight optimization
- Tent, tarp, and shelter testing across three-season and shoulder-season conditions
- Sleeping bag and quilt temperature rating verification
- Backpacking nutrition, meal planning, and calorie-per-ounce analysis
- Leave No Trace principles and wilderness ethics
- Campfire safety, bear country protocols, and water treatment methods
- Gear care, repair, and long-term durability assessment
Education
James Madison University — B.S. in Environmental Science, 2015
During his time at JMU, Caleb served as President of the Outdoor Recreation Club, where he planned and led more than 30 backcountry trips annually across the Blue Ridge Mountains and Appalachian Trail corridor. The role sharpened his ability to assess gear performance under real conditions, manage group safety in remote environments, and develop the kind of practical trail knowledge that no classroom can teach.
Professional Experience
Gear Writer & Senior Contributor — [campeox.com]
Produces in-depth gear reviews, buyer’s guides, and how-to content across backpacking, camping, and ultralight hiking categories. Tests all gear in real field conditions before publishing recommendations.
Wilderness Educator & Trip Leader — Shenandoah Backcountry Youth Program — 2015–2018 Led multi-day backcountry expeditions for teens and young adults throughout Shenandoah National Park and George Washington National Forest. Taught LNT principles, orienteering, first aid awareness, and campcraft fundamentals.
Outdoor Recreation Club President — James Madison University — 2013–2015 Organized and led university-sponsored hiking, backpacking, and camping trips in the Blue Ridge Mountains and Appalachian Trail corridor. Managed club budget, safety protocols, and trip logistics for a membership of 120+ students.
Editorial Standards
Every piece of gear Caleb recommends has been personally tested in the field — not just unboxed and described. His review process includes a minimum of two overnight trips per shelter, a full-season evaluation for sleep systems, and side-by-side comparisons wherever possible. He does not accept payment for positive reviews. Affiliate relationships, where they exist, are always disclosed in accordance with FTC guidelines.
All factual claims about gear specifications, trail distances, and safety recommendations are cross-referenced against manufacturer data sheets and established sources such as the Leave No Trace Center for Outdoor Ethics and the American Hiking Society before publication.