

Returning from a fantastic camping trip usually means you brought a little bit of the great outdoors back home with you. Pine needles, mud, and campfire smells tend to linger on your favorite camping shelter long after the trip ends. If you want your expensive outdoor gear to last through multiple seasons, you need to know exactly how to clean a tent without damaging its delicate waterproof fabrics.
Many beginners make the mistake of throwing their dirty shelter straight into the washing machine, which ruins the protective polyurethane coatings and seam tape. Instead, a gentle hand-washing approach guarantees your outdoor home stays fresh, dry, and ready for your next adventure. We will walk you through the entire process, making it simple and stress-free even if you have never washed outdoor gear before.
Why Cleaning Your Tent Matters
Leaving dirt and moisture packed away inside your gear bag invites absolute disaster. When soil sits on synthetic fabrics, it slowly degrades the durable water repellent finish that keeps you dry during sudden rainstorms. Trapping damp fabric in a dark stuff sack also creates the perfect breeding ground for mold and mildew. These funky fungi not only smell terrible, but they also eat away at the polyurethane coating, causing it to peel off in sticky flakes.
Taking an hour to properly wash and dry your camping shelter prevents these expensive issues entirely. Regular maintenance extends the lifespan of your gear by years, saving you hundreds of dollars in replacement costs down the line. A well-maintained shelter simply performs better in harsh weather, ensuring you stay comfortable, warm, and completely protected from the elements.
8 Step-by-Step Guide on How to Clean a Tent Properly
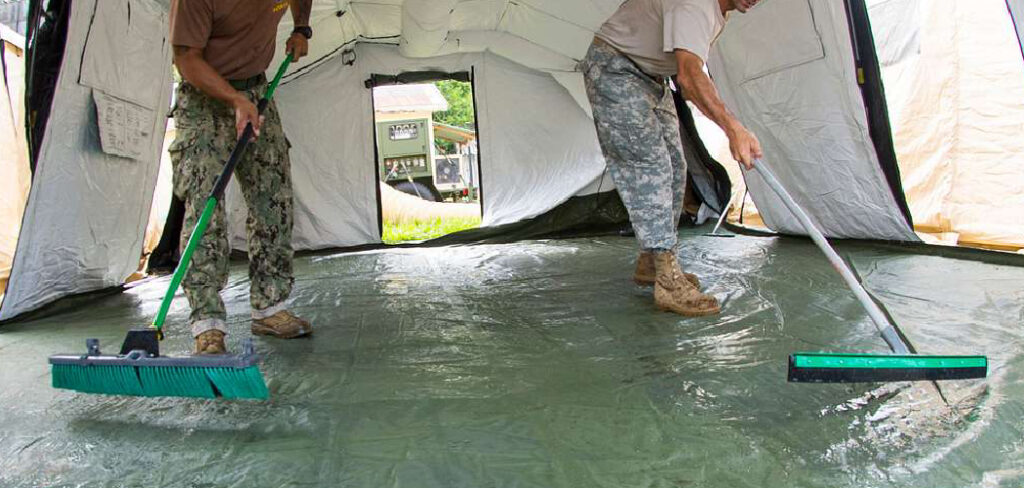
Step 1: Shake Out Dirt And Debris
Start by setting up your shelter in a shaded spot in your backyard. Sweeping the interior is much easier when the structure is fully pitched and taut. Unzip all the doors and gently sweep out dried mud, pine needles, leaves, and leftover snack crumbs using a small hand brush. You want to remove as much loose dirt as possible before introducing any water to the fabric. If you have a freestanding model, you can physically lift the entire structure and shake the remaining dust out through the main door. Removing this abrasive grit prevents it from grinding into the delicate floor material and scratching the waterproof membrane during the scrubbing process.
Step 2: Spot Clean Heavily Soiled Areas
Once you remove the loose debris, look closely for heavy mud stains, bird droppings, or sticky tree sap on the rainfly and floor. You need to address these stubborn spots before doing a full wash. Mix a few drops of mild soap with warm water in a small bucket. Dip a soft sponge into the soapy water and gently dab the stained areas. Never use harsh household detergents or abrasive scrubbing pads, as these will strip away the durable water repellent coating instantly. Rub the fabric gently in circular motions until the grime lifts away, and wipe it clean with a wet rag.
Step 3: Prepare Your Washing Tub
If your shelter requires a deep wash, you need a vessel large enough to submerge it completely. A standard bathtub works perfectly for this task, but a large plastic storage bin also does the trick. Fill the tub with cool or lukewarm water, taking care to avoid hot water since extreme heat melts seam sealing tape. Add a specialized outdoor gear cleaner designed specifically for synthetic technical fabrics. If you learn the proper techniques for how to clean a tent, you quickly realize that regular laundry detergents leave water-attracting residues behind. Swish the wash around until it creates a nice, soapy mixture.
Step 4: Submerge And Soak The Fabric
Take your shelter body and rainfly, turning them inside out to expose the dirty floor and interior seams. Submerge the fabrics completely into your prepared bathtub, pushing them down gently until the material absorbs the soapy water. Allow everything to soak undisturbed for about twenty to thirty minutes. This resting period gives the specialized technical wash enough time to break down body oils, campfire smoke, and embedded soil without requiring aggressive scrubbing. Keep the poles and metal stakes far away from this bath, as they require a separate, simple wipe-down to prevent rust and bending.
Step 5: Hand Wash The Fabric Gently
After the soaking period ends, return to the bathtub and gently knead the fabric with your hands. Press the soapy water through the mesh panels, solid nylon walls, and heavy-duty floor materials. Pay special attention to the areas around the doors and zippers where dirty hands frequently grab the material. Squeeze the fabric carefully rather than wringing or twisting it. Aggressive twisting places immense stress on the delicate seams and zippers, causing permanent tears. Moving the material around in the water helps dislodge any microscopic dirt particles trapped between the synthetic fibers, leaving the fabric refreshed.
Step 6: Drain And Rinse Thoroughly
Once you feel satisfied with the washing process, pull the drain plug and let the dirty water empty from the tub completely. Gently press the remaining soapy water out of the bunched-up fabric, remembering to avoid wringing it out. Refill the tub with clean, cool water and submerge the gear once again to begin the rinsing phase. Knead the fabric to work the clean water through the fibers, flushing out the remaining soap. You might need to drain and refill the tub two or three times to remove all the suds entirely. Continue rinsing until the bathwater remains completely clear.
Step 7: Air Dry In A Shaded Area
Drying your gear correctly is arguably the most crucial step in this entire process. Never place your camping shelter in a mechanical dryer, as the intense heat will melt the polyurethane coatings and destroy the mesh windows. Instead, pitch the clean shelter outdoors in a cool, fully shaded area with plenty of natural airflow. Direct sunlight causes ultraviolet damage that weakens synthetic fabrics over time, so keep it out of the harsh afternoon sun. Wait until every single inch of the fabric, including the thick webbing loops, feels completely bone dry before packing it away.
Step 8: Reapply Waterproofing And Seam Sealer
Washing your gear provides the perfect opportunity to inspect and repair your waterproofing layers. While the fabric is clean and dry, look closely at the taped seams along the floor and rainfly. If you notice any peeling tape, apply a thin layer of liquid seam sealer to the inside of those seams to prevent future leaks. You can also spray a fresh coat of durable water repellent on the outside of the rainfly to restore its ability to bead up rainwater. Maintaining these weather barriers ensures you stay completely dry during your next rainy camping excursion.
Frequently Asked Questions (FAQ)
Can I Wash My Camping Shelter In A Washing Machine?
You should never put your outdoor shelter in a washing machine. The agitator inside a top-loading machine will easily tear delicate mesh panels and stretch the fabric. Even gentle front-loading washers spin too aggressively, which damages the waterproof polyurethane coating and rips off the protective seam tape. Hand washing in a bathtub remains the safest method.
What Kind Of Soap Should I Use?
Using the right cleaning product prevents lasting damage to your gear. Avoid standard household laundry detergents, dish soaps, and bleach entirely. Instead, use:
- Specialized technical gear washes
- Mild, non-detergent soaps
- Fragrance-free baby soap
These gentle alternatives clean synthetic fabrics thoroughly without stripping away the essential durable water repellent finish that keeps you dry.
How Do I Remove Mildew And Mold Smells?
Mildew requires a specific enzyme cleaner to eliminate both the funky odor and the active spores. Mix one cup of lemon juice and one cup of salt into a gallon of hot water, then sponge the mixture directly onto the affected areas. Allow the solution to dry completely in the fresh air before thoroughly rinsing it off with clean water.
How Often Do I Need To Deep Clean My Gear?
You do not need to perform a deep bath wash after every single camping trip. For most outdoor enthusiasts, a thorough deep clean once a season or right before long-term winter storage is perfectly adequate. However, you should sweep out interior dirt and spot-clean bird droppings immediately after every outing to prevent permanent stains.
Is It Safe To Use A Pressure Washer?
Absolutely not. The intense force generated by a pressure washer or a high-power garden hose nozzle will immediately blast right through the waterproof membrane of your rainfly. High-pressure water also easily shreds delicate window mesh and forces moisture deep into sealed zippers. Always stick to a soft sponge and gentle hand pressure.
Conclusion
Maintaining your outdoor gear might seem like a tedious chore at first, but it is an essential part of being a responsible camper. By taking the time to sweep out debris, spot-clean stubborn tree sap, and gently hand-wash the delicate fabrics, you protect your valuable investment for years to come. Remember to avoid harsh detergents and the destructive heat of a mechanical dryer to keep your waterproofing intact and reliable. Now that you understand exactly how to clean a tent, you can confidently pack away your shelter knowing it will be fresh, odorless, and fully prepared for your next backcountry adventure. Grab your mild soap and give your favorite shelter the care it deserves today!
About Caleb
Caleb Merritt is a Virginia-based outdoor writer and gear analyst who has spent over a decade sleeping on the ground, crossing mountain passes, and obsessively shaving grams off his pack weight. He holds a Bachelor of Science in Environmental Science from James Madison University, where he also served as president of the university’s outdoor recreation club. After graduating, he spent three years as a wilderness educator with a backcountry youth program in the Shenandoah Valley — teaching Leave No Trace ethics, backcountry navigation, and campcraft — before moving into full-time writing in 2018.
His work focuses on one core belief: the best gear is the gear you understand. Whether he’s doing a side-by-side weight comparison of ultralight shelters or writing a beginner’s guide to building a sub-20-lb base weight kit, Caleb writes with the same directness you’d expect from a trusted trail partner. He has logged more than 4,000 miles across iconic routes including the John Muir Trail, the Wind River Range, Vermont’s Long Trail, and the Collegiate Peaks Loop in Colorado.
Areas of Expertise
- Ultralight backpacking systems and base weight optimization
- Tent, tarp, and shelter testing across three-season and shoulder-season conditions
- Sleeping bag and quilt temperature rating verification
- Backpacking nutrition, meal planning, and calorie-per-ounce analysis
- Leave No Trace principles and wilderness ethics
- Campfire safety, bear country protocols, and water treatment methods
- Gear care, repair, and long-term durability assessment
Education
James Madison University — B.S. in Environmental Science, 2015
During his time at JMU, Caleb served as President of the Outdoor Recreation Club, where he planned and led more than 30 backcountry trips annually across the Blue Ridge Mountains and Appalachian Trail corridor. The role sharpened his ability to assess gear performance under real conditions, manage group safety in remote environments, and develop the kind of practical trail knowledge that no classroom can teach.
Professional Experience
Gear Writer & Senior Contributor — [campeox.com]
Produces in-depth gear reviews, buyer’s guides, and how-to content across backpacking, camping, and ultralight hiking categories. Tests all gear in real field conditions before publishing recommendations.
Wilderness Educator & Trip Leader — Shenandoah Backcountry Youth Program — 2015–2018 Led multi-day backcountry expeditions for teens and young adults throughout Shenandoah National Park and George Washington National Forest. Taught LNT principles, orienteering, first aid awareness, and campcraft fundamentals.
Outdoor Recreation Club President — James Madison University — 2013–2015 Organized and led university-sponsored hiking, backpacking, and camping trips in the Blue Ridge Mountains and Appalachian Trail corridor. Managed club budget, safety protocols, and trip logistics for a membership of 120+ students.
Editorial Standards
Every piece of gear Caleb recommends has been personally tested in the field — not just unboxed and described. His review process includes a minimum of two overnight trips per shelter, a full-season evaluation for sleep systems, and side-by-side comparisons wherever possible. He does not accept payment for positive reviews. Affiliate relationships, where they exist, are always disclosed in accordance with FTC guidelines.
All factual claims about gear specifications, trail distances, and safety recommendations are cross-referenced against manufacturer data sheets and established sources such as the Leave No Trace Center for Outdoor Ethics and the American Hiking Society before publication.


