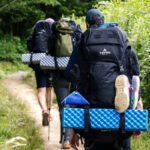
Mud, dirt, and trail grime are badges of honor after a long trek in the wilderness. Leaving them on your favorite footwear, however, is a guaranteed way to shorten their lifespan. Proper maintenance keeps the materials flexible, preserves critical waterproofing, and ensures you stay comfortable on your next adventure. If you are wondering how to clean hiking boots without damaging them, you have come to the right place.
This guide walks you through the entire maintenance process from start to finish. We will cover the basic tools you need, the best scrubbing techniques for different materials, and the drying methods that protect your investment. Let us dive right in and get your favorite outdoor gear looking and performing like brand new again.
Why Cleaning Hiking Boots Is Important
Every time you hit the trail, abrasive particles like sand and tiny rocks work their way into the fabric and leather creases of your footwear. As you walk, these particles act like sandpaper, slowly breaking down the fibers and causing premature wear and tear.
Mud also poses a significant threat to your outdoor gear. When mud dries on the surface, it draws out natural moisture from leather and synthetic materials, leaving them stiff and highly prone to cracking. Dirt clogs the breathable membranes, which traps sweat inside and leaves your feet feeling damp and cold. Regular washing prevents this structural breakdown and revitalizes the durable water-repellent finish. Taking time to maintain your gear ultimately saves you money and keeps your feet completely blister-free during long treks.
7 Step-by-Step Guide on How to Clean Hiking Boots
Step 1: Gather Your Cleaning Supplies
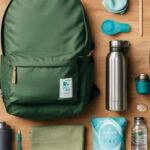
Before starting the washing process, you need to assemble the right tools for the job. You will want a soft-bristled brush, a specialized boot cleaner, and a sink or bucket filled with lukewarm water. Never use regular bar soap or strong laundry detergents, as these harsh chemicals strip away the waterproof coatings and dry out natural leather. If you do not have a specialized cleaner on hand, a mild mixture of water and gentle dish soap works well in a pinch. Having everything within reach makes the entire process much smoother and prevents you from tracking mud across your floors while searching for a rag. Set up your cleaning station outside or lay down some old newspapers in your garage.
Step 2: Remove the Laces and Insoles
Your first physical task involves taking out the shoelaces and the interior padded insoles. Dirt loves to hide in the gussets of the tongue and underneath the laces, so removing them gives you full access to these hard-to-reach areas. You can toss the laces directly into your washing machine with your regular laundry, or simply let them soak in a small bowl of soapy water. Pulling out the insoles also allows the interior of the footwear to breathe and dry properly later on. If your insoles smell a bit funky from previous trips, sprinkle a tiny amount of baking soda on them to neutralize the odors while you work on the exterior materials.
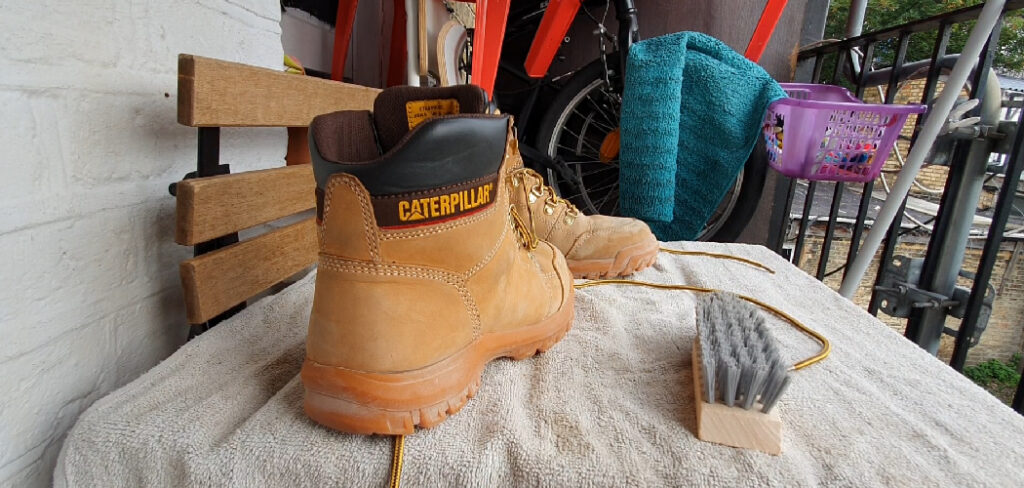
Step 3: Brush Away Loose Dirt and Mud
Grab your dry, soft-bristled brush and start working over the entire exterior surface. Your goal here is to knock off any large clumps of dried mud, loose sand, or trail debris before introducing any water to the material. Pay special attention to the deep lugs on the rubber outsoles, as small pebbles often get wedged tightly in there. If a brush cannot dislodge a stubborn rock from the tread, use an old toothbrush or a dull flathead screwdriver to gently pry it out. Removing this superficial layer of grime right now makes the wet washing phase significantly easier and prevents you from simply rubbing wet mud deeper into the delicate fabric fibers.
Step 4: Scrub the Exterior Gently
Now it is time to introduce water and your specialized liquid cleaner. Dip your brush into the lukewarm water and apply a small amount of the cleaning solution directly to the soft bristles. Work the brush over the surface using gentle, circular motions. Start at the top near the ankle collar and slowly work your way down to the heavy rubber midsole. For heavy stains, let the cleaning solution sit on the surface for a few minutes before scrubbing away the grime. Take extra care around the seams and stitching, as these areas are vulnerable to aggressive scrubbing. A thorough wash removes embedded oils and restores the breathability of the waterproof membrane lining.
Step 5: Rinse Thoroughly with Clean Water
Once you have scrubbed away all the stubborn grime, you need to rinse off all the remaining soapy residue. You can use a wet sponge, a clean damp rag, or a gentle stream of water from a garden hose. Make sure you use cold or lukewarm water, as hot water damages the industrial adhesives holding the rubber sole together. Keep rinsing until the water runs completely clear and no suds remain on the surface at all. Leaving soap residue behind actually attracts more dirt the next time you hit the trail. Taking a few extra minutes to achieve a perfectly clean surface sets you up for absolute success in the next maintenance phases.
Step 6: Apply Waterproofing Treatment
While the exterior is still slightly damp, this is the perfect moment to apply a fresh layer of waterproofing treatment. The moisture left on the surface actually helps draw the water-repellent polymers deep into the leather or synthetic fibers. Choose a spray or conditioning wax specifically designed for your exact footwear material. Learning how to clean hiking boots effectively always involves this crucial re-waterproofing step to maintain weather resistance. Spray the treatment evenly across the entire upper section, paying close attention to the flex points where water usually tries to sneak inside. Let the solution soak in for a few minutes, then wipe away any excess liquid with a clean, dry microfiber cloth.
Step 7: Air Dry at Room Temperature
The final step requires absolute patience. Place your footwear in a well-ventilated area with low humidity and let them air dry completely at room temperature. Never use direct heat sources like hair dryers, roaring campfires, or household radiators to speed up the process. High heat causes natural leather to shrink, crack, and pull away from the rubber sole. To help them keep their proper shape and absorb internal moisture, stuff the insides with crumpled newspaper or dry paper towels. Change the paper every few hours as it absorbs the dampness. Depending on the humidity levels in your home, it might take a full day or two for them to dry entirely.
Frequently Asked Questions
Can I Put My Hiking Boots In The Washing Machine?
No, you should never put your outdoor footwear in a household washing machine. The aggressive agitation cycle can seriously damage the adhesives, ruin the waterproof membranes, and distort the overall shape.
- Always wash your gear by hand.
- Use a gentle brush for scrubbing.
- Avoid complete submersion in water.
The washing machine drum will also take a heavy beating from heavy rubber soles bouncing around inside. Stick to manual scrubbing to protect your investment.
How Often Should I Wash My Trail Footwear?
The frequency of washing depends entirely on how often you hike and the muddy conditions you face on the trail.
- Brush off dry dirt after every single hike.
- Perform a deep wash every few months for moderate users.
- Clean immediately after a particularly muddy or wet trek.
If you notice the exterior material soaking up water instead of repelling it, that is a clear sign it is time for a thorough scrub and a fresh coat of waterproofing spray.
What Household Items Can I Use For Scrubbing?
If you lack specialized gear cleaner, several common household items work perfectly well for routine trail gear maintenance.
- A soft-bristled toothbrush is excellent for tight seams.
- A mixture of mild dish soap and water works for synthetic materials.
- Baking soda helps neutralize strong odors inside the shoe.
Just remember to avoid harsh chemicals, bleach, or highly acidic solutions, as these will permanently damage the leather and degrade the protective synthetic finishes over time.
How Do I Get Rid Of Bad Smells Inside?
Dealing with foul odors inside your footwear requires targeting the harmful bacteria that thrive in damp, sweaty environments.
- Remove the insoles and wash them separately.
- Sprinkle a generous amount of baking soda inside and let it sit overnight.
- Use a mixture of water and white vinegar to wipe down the interior lining.
Always ensure the inside dries completely after every hike, as trapping moisture guarantees the quick return of unpleasant, musty smells.
Do Leather And Synthetic Materials Need Different Care?
Yes, different manufacturing materials require slightly different maintenance approaches to stay in top functional condition.
- Full-grain leather needs conditioning waxes to prevent cracking and drying out.
- Synthetic fabrics respond better to simple liquid waterproofing sprays.
- Suede and nubuck require specialized soft brushes to maintain their textured nap.
Always read the manufacturer guidelines for your specific pair, as applying heavy leather wax to a breathable mesh panel will ruin its crucial ventilation capabilities entirely.
Conclusion
Keeping your trail gear in prime condition does not require a massive time commitment, but it does make a significant difference in your overall outdoor experience. By gathering the right supplies, scrubbing away abrasive dirt, and reapplying protective treatments, you preserve the structural integrity and comfort of your footwear. Nobody wants to deal with cold, wet, and blistered feet in the middle of a beautiful forest hike.
Now that you know exactly how to clean hiking boots, you can confidently tackle the muddiest trails knowing your gear will survive the journey. Grab your brush, give your favorite footwear some much-needed attention, and get ready for your next big adventure with happy, comfortable feet.
About Caleb
Caleb Merritt is a Virginia-based outdoor writer and gear analyst who has spent over a decade sleeping on the ground, crossing mountain passes, and obsessively shaving grams off his pack weight. He holds a Bachelor of Science in Environmental Science from James Madison University, where he also served as president of the university’s outdoor recreation club. After graduating, he spent three years as a wilderness educator with a backcountry youth program in the Shenandoah Valley — teaching Leave No Trace ethics, backcountry navigation, and campcraft — before moving into full-time writing in 2018.
His work focuses on one core belief: the best gear is the gear you understand. Whether he’s doing a side-by-side weight comparison of ultralight shelters or writing a beginner’s guide to building a sub-20-lb base weight kit, Caleb writes with the same directness you’d expect from a trusted trail partner. He has logged more than 4,000 miles across iconic routes including the John Muir Trail, the Wind River Range, Vermont’s Long Trail, and the Collegiate Peaks Loop in Colorado.
Areas of Expertise
- Ultralight backpacking systems and base weight optimization
- Tent, tarp, and shelter testing across three-season and shoulder-season conditions
- Sleeping bag and quilt temperature rating verification
- Backpacking nutrition, meal planning, and calorie-per-ounce analysis
- Leave No Trace principles and wilderness ethics
- Campfire safety, bear country protocols, and water treatment methods
- Gear care, repair, and long-term durability assessment
Education
James Madison University — B.S. in Environmental Science, 2015
During his time at JMU, Caleb served as President of the Outdoor Recreation Club, where he planned and led more than 30 backcountry trips annually across the Blue Ridge Mountains and Appalachian Trail corridor. The role sharpened his ability to assess gear performance under real conditions, manage group safety in remote environments, and develop the kind of practical trail knowledge that no classroom can teach.
Professional Experience
Gear Writer & Senior Contributor — [campeox.com]
Produces in-depth gear reviews, buyer’s guides, and how-to content across backpacking, camping, and ultralight hiking categories. Tests all gear in real field conditions before publishing recommendations.
Wilderness Educator & Trip Leader — Shenandoah Backcountry Youth Program — 2015–2018 Led multi-day backcountry expeditions for teens and young adults throughout Shenandoah National Park and George Washington National Forest. Taught LNT principles, orienteering, first aid awareness, and campcraft fundamentals.
Outdoor Recreation Club President — James Madison University — 2013–2015 Organized and led university-sponsored hiking, backpacking, and camping trips in the Blue Ridge Mountains and Appalachian Trail corridor. Managed club budget, safety protocols, and trip logistics for a membership of 120+ students.
Editorial Standards
Every piece of gear Caleb recommends has been personally tested in the field — not just unboxed and described. His review process includes a minimum of two overnight trips per shelter, a full-season evaluation for sleep systems, and side-by-side comparisons wherever possible. He does not accept payment for positive reviews. Affiliate relationships, where they exist, are always disclosed in accordance with FTC guidelines.
All factual claims about gear specifications, trail distances, and safety recommendations are cross-referenced against manufacturer data sheets and established sources such as the Leave No Trace Center for Outdoor Ethics and the American Hiking Society before publication.