Stepping onto a rugged trail brings a sense of freedom, but getting lost can quickly turn an exciting adventure into a stressful ordeal. While traditional maps and compasses remain essential backup tools, modern technology offers an incredible way to navigate with precision and confidence.
If you want to explore new territories without the constant fear of taking a wrong turn, understanding how to use a GPS device for hiking is an absolute must. These compact, durable gadgets connect to satellites to pinpoint your exact location, track your progress, and guide you safely back to your starting point. Whether you are planning a casual weekend camping trip or a multi-day trek through dense forests, mastering this tool will transform your outdoor experience. Let us dive into everything you need to know to hit the trails safely.
Why You Should Learn How to Use a GPS Device for Hiking
Relying solely on your smartphone for navigation might seem convenient, but it comes with significant risks in the wilderness. Cell service frequently drops the moment you leave paved roads, and phone batteries drain rapidly in cold weather or when searching for a signal. Dedicated handheld navigators solve these problems completely. They feature rugged, waterproof designs built to withstand accidental drops, heavy rain, and harsh environments.
Furthermore, they utilize replaceable batteries, ensuring you can simply swap them out and keep moving. Learning this skill gives you the ultimate peace of mind. You can mark important locations like your campsite, find water sources, and track your elevation gains. It empowers beginners to tackle more ambitious routes and allows seasoned travelers to explore off-the-beaten-path destinations with complete confidence and security.
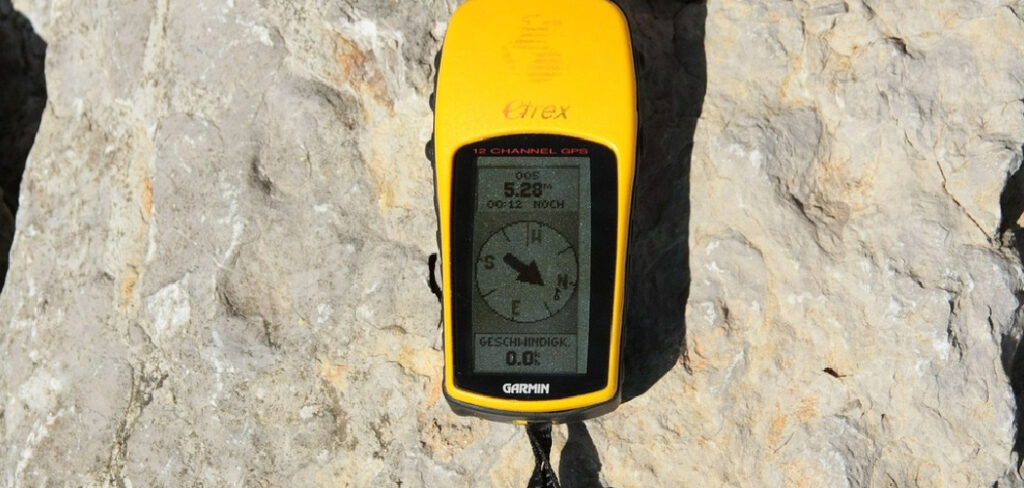
7 Step-by-Step Guide on How to Use a GPS Device for Hiking
Step 1: Initialize Your New Gadget
Before you head out into the wilderness, you must set up your equipment properly at home. Turn the unit on and allow it a few minutes to acquire a satellite signal. This first connection often takes a bit longer than usual because the receiver needs to download precise satellite location data.
Once connected, navigate through the main settings menu to customize your preferences. You should select your preferred coordinate format and map datum, ensuring they match any paper maps you plan to carry. Familiarize yourself with the screen layout, button functions, and back-light settings to conserve battery power. Taking time to understand the interface now prevents frustration later when you are out on the trail facing changing weather conditions.
Step 2: Calibrate the Compass and Altimeter
Many modern units come equipped with a built-in electronic compass and a barometric altimeter. To ensure maximum accuracy, you need to calibrate these sensors before every major trip or whenever you change batteries. Access the calibration menu and follow the on-screen instructions, which usually require you to rotate the unit slowly in a figure-eight motion.
This process aligns the internal compass with the earth’s magnetic field. Next, calibrate the altimeter by entering your current known elevation or correct barometric pressure if you have that information. Regular calibration guarantees that your heading and altitude readings remain precise, which becomes crucial when navigating through dense fog or traversing steep mountainous terrain where visibility is severely limited.
Step 3: Download and Install Detailed Maps
Most receivers come with a basic base map that shows major highways and cities, but this proves entirely useless for backcountry navigation. You must download and install detailed topographic maps for your specific destination. Connect the unit to your computer using the provided software to transfer high-resolution maps that display contour lines, rivers, trails, and terrain features.
Some manufacturers allow you to purchase digital maps on micro-SD cards, which you can simply insert into the back of your unit. Verify that the maps load correctly and zoom in on your planned route to ensure all necessary geographic details appear clearly on the screen before you leave your house.
Step 4: Mark Your Starting Waypoint
The single most important action you can take at the trailhead is marking your starting location. Turn on your receiver, wait for a strong satellite lock, and press the button to create a new waypoint. Name this location something obvious, like “Trailhead” or “Car,” and save it to the internal memory.
This simple step guarantees that no matter how twisted the trail becomes or how far you wander off the path, you will always have a precise digital breadcrumb leading back to your vehicle. Experienced hikers make this a mandatory habit, as it provides a critical safety net if you become disoriented or need to retreat quickly due to sudden weather changes or unexpected emergencies.
Step 5: Master How to Use a GPS Device for Hiking Navigation
As you begin walking, your receiver will display a digital map showing your current position as a small arrow or triangle. The device continuously draws a track log behind you, leaving a virtual trail of breadcrumbs on the screen. Pay attention to how the map orients itself as you move forward.
You can set the screen to always point north or to rotate so the top of the screen aligns with your current direction of travel. Many beginners find the “track up” orientation much easier to interpret while walking. Glance at the screen periodically at major trail junctions, but remember to keep your eyes on your surroundings to fully enjoy the natural beauty around you.
Step 6: Create Waypoints Along Your Route
Throughout your journey, you should proactively mark important geographical features or points of interest. Whenever you discover a reliable water source, a great camping spot, or a confusing trail intersection, create a new waypoint. Take a moment to give each point a descriptive name rather than relying on the default numbers the system assigns.
This practice helps you build a custom map of your adventure, which proves incredibly useful for the return trip or for future visits to the same area. Sharing these specific coordinates with fellow travelers or park rangers also helps others navigate the terrain safely and ensures you can easily locate that perfect scenic overlook on your next visit.
Step 7: Practice How to Use a GPS Device for Hiking Back to Camp
When it is time to head home or return to your campsite, utilize the navigation feature to guide you back safely. Select your previously saved starting waypoint from your stored list and choose the “Go To” or “Navigate” option. The screen will display a direct line to your destination and provide an electronic compass pointer to guide your heading.
Alternatively, you can use the trackback feature, which reverses your recorded track log and guides you step-by-step along the exact same path you took to get there. Trust the directional arrow, but always cross-reference the screen with your physical surroundings and your paper map to ensure you are avoiding hazardous terrain like steep cliffs or deep rivers.
Frequently Asked Questions
Do I Still Need a Paper Map If I Have a Handheld Navigator?
Yes, you absolutely need a paper map and a traditional compass. Electronics can fail, batteries can die, and screens can shatter if dropped on rocks. Consider your digital receiver as your primary tool, but rely on your paper map as an essential safety backup.
- Paper maps provide a better wide-angle view of the terrain.
- They require no batteries.
- They never lose satellite signals in deep canyons.
How Long Do the Batteries Typically Last on the Trail?
Battery life varies heavily depending on the specific model and your usage habits. Most modern units last anywhere from 16 to 24 hours on a single set of AA batteries. To maximize your power supply:
- Turn down the screen brightness.
- Reduce the screen timeout duration.
- Turn off unnecessary features like Bluetooth.
Always pack extra lithium batteries, as they perform much better in cold weather.
Will My Receiver Work Under Dense Tree Cover or in Deep Canyons?
Modern receivers feature highly sensitive antennas that connect to multiple satellite networks, including GLONASS and Galileo, alongside the standard global positioning system. This dual-network capability allows them to maintain a strong signal even under thick forest canopies. However, narrow slot canyons or towering rock walls can still block signals, temporarily reducing your accuracy until you reach higher or more open ground.
What is the Difference Between a Waypoint and a Track?
Understanding this terminology is crucial for outdoor navigation.
- A waypoint is a specific, singular set of coordinates saved in your device’s memory, such as a trailhead, a bridge, or your campsite.
- A track is a continuous digital breadcrumb trail that the device automatically records as you walk, showing your precise path of travel over a period of time.
Is It Difficult for Beginners to Learn This Technology?
While the menus and settings might feel slightly overwhelming at first glance, the basic functions are quite intuitive. If you can use a smartphone mapping application, you can easily grasp these systems. The key is to practice in a familiar environment, like your neighborhood park, before relying on the technology in a remote wilderness setting where mistakes carry higher stakes.
Conclusion
Navigating the great outdoors should be an exhilarating experience, not a source of anxiety. By taking the time to initialize your equipment, download topographical maps, and mark your crucial starting waypoints, you set yourself up for a successful adventure. Remember to calibrate your sensors regularly and practice following your digital tracks before tackling remote backcountry routes.
Technology is a powerful tool that unlocks new levels of exploration, giving you the confidence to wander further and discover hidden natural wonders. Now that you understand the fundamentals of how to use a GPS device for hiking, grab your gear, pack plenty of extra batteries, and hit the trail. The wilderness is calling, and you are finally ready to answer it safely and confidently.
About Caleb
Caleb Merritt is a Virginia-based outdoor writer and gear analyst who has spent over a decade sleeping on the ground, crossing mountain passes, and obsessively shaving grams off his pack weight. He holds a Bachelor of Science in Environmental Science from James Madison University, where he also served as president of the university’s outdoor recreation club. After graduating, he spent three years as a wilderness educator with a backcountry youth program in the Shenandoah Valley — teaching Leave No Trace ethics, backcountry navigation, and campcraft — before moving into full-time writing in 2018.
His work focuses on one core belief: the best gear is the gear you understand. Whether he’s doing a side-by-side weight comparison of ultralight shelters or writing a beginner’s guide to building a sub-20-lb base weight kit, Caleb writes with the same directness you’d expect from a trusted trail partner. He has logged more than 4,000 miles across iconic routes including the John Muir Trail, the Wind River Range, Vermont’s Long Trail, and the Collegiate Peaks Loop in Colorado.
Areas of Expertise
- Ultralight backpacking systems and base weight optimization
- Tent, tarp, and shelter testing across three-season and shoulder-season conditions
- Sleeping bag and quilt temperature rating verification
- Backpacking nutrition, meal planning, and calorie-per-ounce analysis
- Leave No Trace principles and wilderness ethics
- Campfire safety, bear country protocols, and water treatment methods
- Gear care, repair, and long-term durability assessment
Education
James Madison University — B.S. in Environmental Science, 2015
During his time at JMU, Caleb served as President of the Outdoor Recreation Club, where he planned and led more than 30 backcountry trips annually across the Blue Ridge Mountains and Appalachian Trail corridor. The role sharpened his ability to assess gear performance under real conditions, manage group safety in remote environments, and develop the kind of practical trail knowledge that no classroom can teach.
Professional Experience
Gear Writer & Senior Contributor — [campeox.com]
Produces in-depth gear reviews, buyer’s guides, and how-to content across backpacking, camping, and ultralight hiking categories. Tests all gear in real field conditions before publishing recommendations.
Wilderness Educator & Trip Leader — Shenandoah Backcountry Youth Program — 2015–2018 Led multi-day backcountry expeditions for teens and young adults throughout Shenandoah National Park and George Washington National Forest. Taught LNT principles, orienteering, first aid awareness, and campcraft fundamentals.
Outdoor Recreation Club President — James Madison University — 2013–2015 Organized and led university-sponsored hiking, backpacking, and camping trips in the Blue Ridge Mountains and Appalachian Trail corridor. Managed club budget, safety protocols, and trip logistics for a membership of 120+ students.
Editorial Standards
Every piece of gear Caleb recommends has been personally tested in the field — not just unboxed and described. His review process includes a minimum of two overnight trips per shelter, a full-season evaluation for sleep systems, and side-by-side comparisons wherever possible. He does not accept payment for positive reviews. Affiliate relationships, where they exist, are always disclosed in accordance with FTC guidelines.
All factual claims about gear specifications, trail distances, and safety recommendations are cross-referenced against manufacturer data sheets and established sources such as the Leave No Trace Center for Outdoor Ethics and the American Hiking Society before publication.