

Have you ever found yourself wandering down a beautiful forest trail, wishing you had a little extra balance for that tricky rocky patch? A trusty walking staff provides stability, reduces strain on your knees, and becomes a personalized companion on all your outdoor adventures. If you love camping and exploring nature, learning how to make a hiking stick is an incredibly rewarding project.
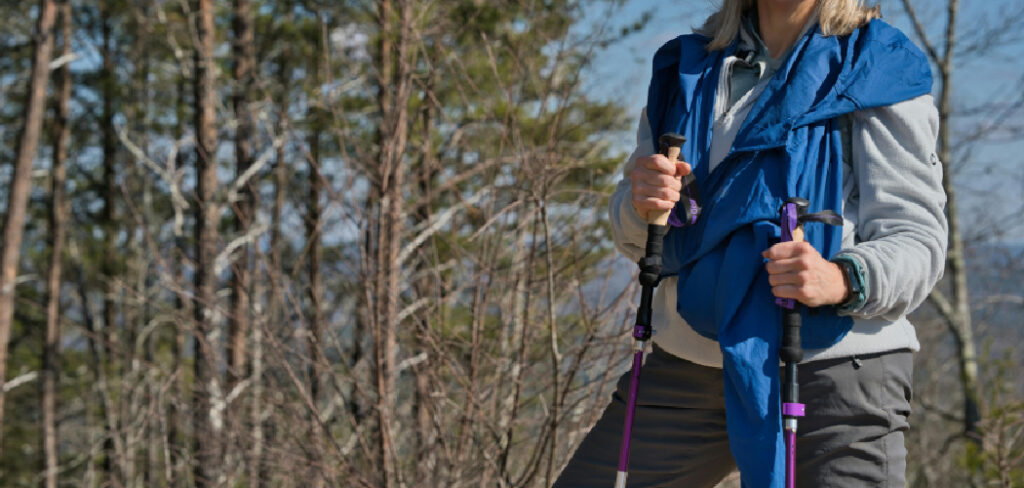
Instead of spending big money on mass-produced trekking poles, you can source your own wood and craft something truly unique with just a few basic tools. Whether you are prepping for a weekend camping trip or a casual walk in the local park, crafting your own staff brings you closer to nature before you even hit the trail. Let us walk through the process together and get you ready for your next big outdoor adventure.
Why Craft Your Own Hiking Stick
Buying commercial trekking poles is easy, but crafting a wooden staff offers distinct advantages for both beginners and seasoned travelers. First, creating your own gear allows you to customize the height, weight, and grip thickness to perfectly match your body mechanics. A tailored fit means better support during long, strenuous treks.
Second, the creative process connects you directly to the environment. When you select a fallen branch or sapling from your local woods, you carry a piece of that landscape on all your future journeys. Finally, a handcrafted staff is exceptionally durable and cost-effective. Hardwoods can withstand years of heavy use, absorbing shock much better than cheap aluminum alternatives. You get an heirloom-quality piece of outdoor equipment without breaking your budget, ready to tackle any trail you encounter.
9 Step-by-Step Guide on How to Make a Hiking Stick
Step 1: Choose the Right Wood for Your Project
The foundation of any great wilderness staff starts with selecting the best material. Hardwoods like hickory, maple, oak, and ash provide the ideal combination of strength and reasonable weight. Look for a relatively straight piece of wood that feels comfortable in your hand. You want a branch or sapling roughly one and a half to two inches in diameter.
When you forage for materials, prioritize dead but standing wood or freshly fallen branches to ensure the timber remains solid and free from severe rot. Avoid picking up wood that feels unusually light or crumbles slightly when squeezed, as this indicates decay. Bring a small folding saw to cut the branch loose, leaving a few extra inches of length that you can trim down perfectly later on.
Step 2: Cut the Wood to the Perfect Height
Once you bring your chosen wood home, the next crucial phase is sizing it correctly for your body height. A general rule of thumb dictates that the staff should reach approximately to your armpit or slightly lower, depending on your walking style and the terrain you frequent. Stand up straight on flat ground, bend your elbow to a comfortable ninety-degree angle, and measure from the floor to your hand.
This measurement gives you a solid baseline for your main grip area. Add about six to eight inches above that grip for the total length. Use a sharp hand saw to cut both ends clean. Giving yourself this extra length now prevents mistakes and provides plenty of room to carve a decorative top piece.
Step 3: Remove the Bark for a Smooth Finish
Taking the bark off your wood helps prevent rot and reveals the beautiful natural grain hidden underneath. You can use a sturdy pocket knife, a drawknife, or a dedicated carving tool for this task. Sit in a comfortable, well-lit area and firmly brace the wood against a stable surface. Always push the blade away from your body to ensure safety while working.
Take off long, thin strips of bark rather than trying to dig deep into the wood. If the branch is relatively green, the bark might peel off easily in satisfying ribbons. For dried wood, you must apply slightly more pressure to shave down to the bare timber. Work systematically from the top to the bottom until the entire staff is completely stripped.
Step 4: Trim and Sand the Knots
With the bark fully removed, you will likely notice several bumps, knots, or small remnants of branches sticking out along the shaft. Smoothing these imperfections out is absolutely essential for creating a comfortable grip. Carefully shave down these protrusions with your knife so they sit flush with the rest of the surface. Be gentle around the knot areas, as the grain often changes direction and can easily chip or splinter if you carve too aggressively. Once the heavy carving is done, grab some coarse sandpaper to smooth out the remaining ridges. The goal is a uniform, comfortable surface that will not snag your hands or clothing when you are out exploring your favorite camping destinations.
Step 5: Dry and Cure the Wood Properly
Patience plays a massive role in crafting durable outdoor gear. If you started with a green, freshly cut branch, you must let it dry before applying any finishes. Skipping this drying phase causes the wood to warp, crack, or rot from the inside out. Place your shaved staff in a dry, cool location away from direct sunlight or extreme heat sources.
A garage or a covered patio works perfectly. Lean the staff perfectly upright to prevent bowing. Depending on the wood type and the humidity of your climate, the curing process takes anywhere from two to four weeks. You will know it is fully cured when it feels lighter and sounds crisp when lightly tapped against a hard, solid surface.
Step 6: Sand the Entire Shaft for a Flawless Grip
When the curing phase finishes, it is time to give your project a professional, polished feel. Start with a medium-grit sandpaper, around one hundred grit, and vigorously sand the entire length of the wood. Work your way up and down the shaft, following the natural direction of the wood grain to avoid leaving ugly cross-scratches.
After removing the rough spots, switch to a finer sandpaper, such as two hundred and twenty grit, for the final smoothing. Pay special attention to the middle and upper sections where your hands will naturally rest during long walks. When you finish sanding, wipe the entire surface down with a lightly damp cloth to remove all the leftover sawdust, preparing it for a beautiful protective finish.
Step 7: Personalize Your Design When Learning How to Make a Hiking Stick
Now comes the truly fun and creative part of the process. You can personalize the wood to reflect your personality and travel style. Many outdoor enthusiasts enjoy woodburning initials, favorite quotes, or intricate nature designs into the shaft. Alternatively, you might want to carve a series of shallow grooves around the primary handle area to improve your grip during sweaty, strenuous climbs.
Some people wrap the top grip section with paracord or soft leather strips, which provides a comfortable cushion and adds a rugged, classic look to the final product. Whatever modifications you choose, make sure they enhance rather than hinder your ability to hold the wood comfortably for hours on end.
Read More: How to Break in Hiking Boots
Step 8: Apply a Protective Stain and Sealant
To protect your creation from rain, mud, and dirt, you need to apply a high-quality sealant. You can choose to apply a colored wood stain first if you want a darker, richer aesthetic, though many prefer to highlight the natural blonde color of the stripped wood. For the protective layer, boiled linseed oil, polyurethane, or natural beeswax all work wonderfully.
Use a clean rag to rub the finish deeply into the grain. Allow the first coat to dry completely according to the manufacturer instructions. Lightly buff the surface with ultra-fine steel wool, then apply a second or even third coat. This sealing process creates a water-resistant barrier that dramatically extends the lifespan of your trusted trail companion.
Step 9: Attach a Tip to Master How to Make a Hiking Stick
The bottom of your staff takes a severe beating against rocks, asphalt, and hard-packed dirt trails. To prevent the wood from splintering and fraying over time, adding a protective tip is highly recommended. You can purchase rubber cane tips from almost any local pharmacy or outdoor supply store. Simply find one that matches the diameter of your wood and slide it firmly onto the base.
For a more traditional or rugged approach, you can attach a copper pipe cap or a specialized metal spike designed specifically for walking staffs. This small addition provides extra traction on slippery rocks and preserves the structural integrity of your beautifully crafted gear.
Frequently Asked Questions
What Is the Best Wood for a Walking Staff?
Hardwoods are generally the top choice for crafting outdoor staffs. They offer the best balance of strength and durability. Great options include:
- Hickory
- Ash
- Oak
- Maple
Avoid softwoods like pine or cedar, as they tend to snap under pressure and dent easily when striking rocks or uneven ground on the trail.
How Long Should My Staff Be?
The ideal length depends largely on your height and personal preference. Generally, the staff should measure somewhere between your waist and your armpit. When standing on flat ground, holding the grip area should allow your elbow to sit at a comfortable ninety-degree angle. Add a few extra inches to the top for versatility during steep descents.
Can I Use a Wet Branch?
You can begin the carving and stripping process with a wet or “green” branch, but you must let it dry before applying any finish. Carving green wood is actually easier because it remains soft. However, sealing wet wood traps moisture inside, which eventually leads to rotting, severe cracking, and structural failure down the road.
How Do I Prevent the Wood From Splitting?
Proper drying techniques are essential to prevent splitting or checking at the ends. Here are a few reliable methods:
- Keep the wood out of direct sunlight.
- Store it in a cool, dry environment.
- Seal the cut ends with wax or wood glue while the rest of the branch cures slowly over a few weeks.
Do I Really Need to Apply a Sealant?
While leaving the wood natural is an option, applying a proper sealant is highly recommended if you plan to use it regularly. Unfinished wood absorbs moisture from rain and sweat, swelling and degrading over time. A simple coat of linseed oil, beeswax, or polyurethane provides a crucial moisture barrier that keeps the timber strong for years.
Read More: How to Tie Hiking Boots
Conclusion
Crafting your own outdoor gear is an incredibly fulfilling journey that connects you deeply with nature. We covered everything from selecting the perfect sturdy hardwood to curing, carving, and sealing your new trail companion. Taking the time to properly size and sand the wood ensures you end up with a comfortable, reliable tool for your outdoor adventures.
There is nothing quite like hitting the trail with a beautiful piece of equipment you built with your own two hands. It provides stability on uneven ground and serves as a proud reminder of your dedication to exploring the wilderness. Gather your tools, head out to the woods, and discover how to make a hiking stick that will accompany you on countless journeys to come. Grab a fallen branch and start carving today!

About Caleb
Caleb Merritt is a Virginia-based outdoor writer and gear analyst who has spent over a decade sleeping on the ground, crossing mountain passes, and obsessively shaving grams off his pack weight. He holds a Bachelor of Science in Environmental Science from James Madison University, where he also served as president of the university’s outdoor recreation club. After graduating, he spent three years as a wilderness educator with a backcountry youth program in the Shenandoah Valley — teaching Leave No Trace ethics, backcountry navigation, and campcraft — before moving into full-time writing in 2018.
His work focuses on one core belief: the best gear is the gear you understand. Whether he’s doing a side-by-side weight comparison of ultralight shelters or writing a beginner’s guide to building a sub-20-lb base weight kit, Caleb writes with the same directness you’d expect from a trusted trail partner. He has logged more than 4,000 miles across iconic routes including the John Muir Trail, the Wind River Range, Vermont’s Long Trail, and the Collegiate Peaks Loop in Colorado.
Areas of Expertise
- Ultralight backpacking systems and base weight optimization
- Tent, tarp, and shelter testing across three-season and shoulder-season conditions
- Sleeping bag and quilt temperature rating verification
- Backpacking nutrition, meal planning, and calorie-per-ounce analysis
- Leave No Trace principles and wilderness ethics
- Campfire safety, bear country protocols, and water treatment methods
- Gear care, repair, and long-term durability assessment
Education
James Madison University — B.S. in Environmental Science, 2015
During his time at JMU, Caleb served as President of the Outdoor Recreation Club, where he planned and led more than 30 backcountry trips annually across the Blue Ridge Mountains and Appalachian Trail corridor. The role sharpened his ability to assess gear performance under real conditions, manage group safety in remote environments, and develop the kind of practical trail knowledge that no classroom can teach.
Professional Experience
Gear Writer & Senior Contributor — [campeox.com]
Produces in-depth gear reviews, buyer’s guides, and how-to content across backpacking, camping, and ultralight hiking categories. Tests all gear in real field conditions before publishing recommendations.
Wilderness Educator & Trip Leader — Shenandoah Backcountry Youth Program — 2015–2018 Led multi-day backcountry expeditions for teens and young adults throughout Shenandoah National Park and George Washington National Forest. Taught LNT principles, orienteering, first aid awareness, and campcraft fundamentals.
Outdoor Recreation Club President — James Madison University — 2013–2015 Organized and led university-sponsored hiking, backpacking, and camping trips in the Blue Ridge Mountains and Appalachian Trail corridor. Managed club budget, safety protocols, and trip logistics for a membership of 120+ students.
Editorial Standards
Every piece of gear Caleb recommends has been personally tested in the field — not just unboxed and described. His review process includes a minimum of two overnight trips per shelter, a full-season evaluation for sleep systems, and side-by-side comparisons wherever possible. He does not accept payment for positive reviews. Affiliate relationships, where they exist, are always disclosed in accordance with FTC guidelines.
All factual claims about gear specifications, trail distances, and safety recommendations are cross-referenced against manufacturer data sheets and established sources such as the Leave No Trace Center for Outdoor Ethics and the American Hiking Society before publication.




