

Hitting the trail should be a thrilling experience filled with breathtaking views and fresh mountain air. However, nothing ruins a hike faster than foot pain, heel slippage, or painful blisters. The secret to a comfortable trek often lies in something surprisingly simple. Learning exactly how to tie hiking boots correctly can completely transform your outdoor adventures.
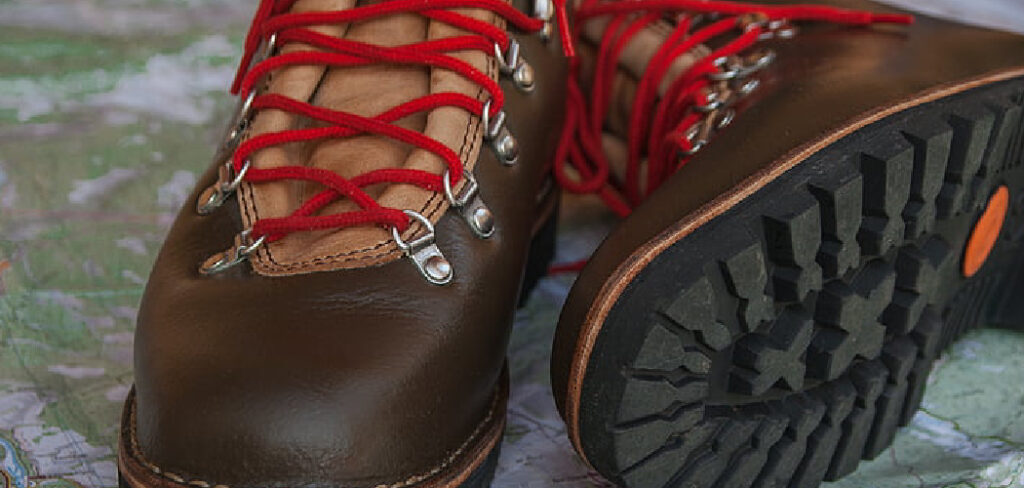
Many beginners assume that standard shoe-lacing works just fine for the trails, but rugged terrain demands more support and stability. When you secure your footwear properly, you lock your heel in place, distribute pressure evenly across the top of your foot, and give your ankles the support they desperately need. Whether you are planning a short day trip or a multi-day backpacking excursion, mastering this skill ensures your feet stay happy from the trailhead to the summit.
Why Proper Boot Lacing Matters on the Trail
You might wonder why adjusting your laces is such a big deal. Proper lacing techniques do much more than keep your shoes from falling off. They act as a vital safety measure on uneven ground. When you adjust the tension correctly, you prevent your toes from repeatedly jamming into the front of the boot during steep descents.
This simple adjustment saves you from bruised toenails and painful friction. Furthermore, adequate lacing provides essential ankle support, drastically reducing your risk of dangerous sprains on rocky paths. A secure fit minimizes internal movement, which is the primary cause of debilitating blisters. By taking a few extra minutes at the trailhead to adjust your tension and secure your knots, you invest directly in your comfort, safety, and overall endurance. Your feet carry you through every mile, so give them the foundation they deserve.
7 Step-by-Step Guide on How to Tie Hiking Boots
Step 1: Choose the Right Socks and Prepare Your Footwear
Before we even touch the laces, you must start with a solid foundation. Slip on the exact pair of hiking socks you plan to wear on the trail. Thick wool or synthetic blend socks add volume, which changes how your footwear fits compared to everyday cotton socks. Slide your foot inside and kick your heel back firmly against the ground.
This action sets your heel deeply into the heel cup, establishing the optimal starting position. Make sure the tongue of the shoe is sitting perfectly straight across the top of your foot. If the tongue is twisted or folded, it will create agonizing pressure points as you walk. Taking these preparatory actions ensures the rest of the lacing process goes smoothly.
Step 2: Start Threading the Lower Eyelets with Even Tension
Begin at the very bottom near your toes and work your way up. Pull the laces firmly at each set of eyelets to establish an even, snug fit across the top of your foot. You want the material to hug your foot securely without cutting off your circulation. Many beginners make the mistake of leaving the bottom section too loose, which allows the foot to slide forward on downhill sections.
Conversely, pulling them too tightly right away can cause your foot to go numb or cramp up. Find that perfect middle ground where your foot feels cradled and supported. Smooth out any twists in the strings as you go, ensuring they lay perfectly flat against the tongue.
Step 3: Create a Surgeon’s Knot to Lock Lower Tension
Once you reach the top of the instep, right before the ankle flex point, you need to lock that tension in place. This is where the surgeon’s knot comes in incredibly handy. Instead of crossing the laces over each other just once like a standard knot, cross them under and over a second time. Pull them tightly so the knot sits flat against the center of the tongue.
This specific knot prevents the lower section from loosening up while you walk. It acts as a barrier, allowing you to have different tension levels on the bottom of your foot compared to your ankle area. This separation is crucial for long-distance comfort on varied terrain.
Step 4: Engage the Heel Lock Lacing Technique
Now we will tackle the most common issue hikers face: heel slippage. To prevent this, route the strings straight up the sides from the last lower eyelet into the first set of hooks, without crossing them in the middle. This creates two vertical loops on either side of your ankle. Next, take the ends and cross them over the tongue, threading each end underneath the vertical loop on the opposite side. When you pull the ends tight, the vertical loops will pull the material snugly inward around your ankle bone. This pulls your heel firmly backward into the pocket, completely eliminating the friction that usually causes severe blisters on your heels.
Step 5: Master How to Tie Hiking Boots for the Upper Section
With your heel safely secured, you can proceed to lace the upper ankle hooks. Cross the strings and wrap them around each hook, working your way upward. The tightness here depends heavily on the terrain you plan to conquer. For steep uphill climbs, leave the upper section slightly looser to give your ankle the forward mobility it needs to step upward comfortably.
If you are preparing for a long, rocky descent, pull these upper sections quite tight. A rigid, secure ankle section prevents your foot from sliding forward and provides maximum stability when stepping down onto uneven boulders. Always adjust this upper section according to the immediate trail conditions ahead of you.
Step 6: Finish with a Secure Double Overhand Bow
Reaching the top hooks means it is time to tie everything off permanently. Tie a standard bow knot, but add an extra layer of security to prevent it from snagging on roots and coming undone. After creating your two loops and crossing them over, pass one loop through the center hole a second time before pulling everything tight.
This creates an incredibly strong knot that will not easily rattle loose from the repetitive motion of walking. It is far superior to a simple single bow, which frequently unties when brushed against heavy brush or tall grass. Give the loops a firm tug to ensure everything is properly seated and locked down securely.
Step 7: Tuck the Excess Laces to Prevent Tripping Hazards
The final safety measure requires dealing with any leftover string dangling from your newly tied knots. Long, loose loops pose a significant tripping hazard on technical trails, as they can easily catch on rocks, branches, or even your other foot. Take the remaining loops and ends and tuck them carefully down inside the sides of your footwear.
Alternatively, you can slide them underneath the crossed sections across the top of the tongue. Keeping the exterior profile of your footwear clean and streamlined prevents dangerous falls. Walk around your living room for a few minutes to ensure everything feels comfortable, making any minor adjustments before heading out to the trailhead.
Read More: How to Make a Hiking Stick
Frequently Asked Questions
Why Do My Toes Hurt When Hiking Downhill?
Toe pain during descents usually occurs because your foot slides forward, smashing your toes against the front of the toe box. You can prevent this by implementing a heel lock lacing technique. This pulls your heel firmly into the back of the shoe.
- Always trim your toenails before a long trek.
- Ensure your footwear has a snug fit around the instep.
How Tight Should My Laces Be Around The Ankle?
Your ankle lacing should be snug enough to provide support but not so tight that it restricts circulation or limits natural mobility. The ideal tension depends on the trail gradient.
- Uphill hiking requires looser ankle lacing for better forward flex.
- Downhill hiking demands tighter ankle support for stability.
Listen to your body and adjust if you experience tingling.
Can Changing My Socks Prevent Blisters?
Absolutely. Your socks act as the primary barrier between your skin and the shoe material. Avoid cotton, as it retains moisture and dramatically increases friction.
- Choose merino wool or moisture-wicking synthetic blends.
- Consider wearing a thin liner sock under a thicker outer sock.
Properly fitted moisture-wicking socks significantly reduce your chances of developing painful hot spots.
What Is A Surgeon’s Knot And When Should I Use It?
A surgeon’s knot is a simple variation of a standard overhand knot where you cross the strings twice instead of once before pulling tight. This extra twist adds immense friction, locking the tension in place.
- Use it at the top of the instep to separate foot tension from ankle tension.
- Apply it anywhere you notice strings constantly loosening.
How Often Should I Replace My Lacing Strings?
You should replace your strings as soon as you notice any signs of fraying, thinning, or loss of elasticity. Damaged strings can suddenly snap under pressure on the trail.
- Inspect them closely before any multi-day backpacking trip.
- Keep a spare pair in your emergency kit just in case.
High-quality replacements ensure you always maintain a secure, reliable fit.
Read More: How to Break in Hiking Boots
Conclusion
Your feet are your most valuable asset when exploring the great outdoors, so giving them the proper support is absolutely essential. By taking the time to master these simple lacing techniques, you can eliminate heel slip, prevent crushed toes, and drastically reduce the likelihood of developing trail-ending blisters.
Remember that adjusting your tension based on whether you are hiking uphill or downhill will keep you comfortable throughout the entire journey. Now that you know exactly how to tie hiking boots, you are completely prepared to tackle more challenging trails with supreme confidence. Grab your favorite pair of socks, lace up your footwear using these expert methods, and hit the trail. The mountains are calling, and your perfectly supported feet are ready for the adventure.

About Caleb
Caleb Merritt is a Virginia-based outdoor writer and gear analyst who has spent over a decade sleeping on the ground, crossing mountain passes, and obsessively shaving grams off his pack weight. He holds a Bachelor of Science in Environmental Science from James Madison University, where he also served as president of the university’s outdoor recreation club. After graduating, he spent three years as a wilderness educator with a backcountry youth program in the Shenandoah Valley — teaching Leave No Trace ethics, backcountry navigation, and campcraft — before moving into full-time writing in 2018.
His work focuses on one core belief: the best gear is the gear you understand. Whether he’s doing a side-by-side weight comparison of ultralight shelters or writing a beginner’s guide to building a sub-20-lb base weight kit, Caleb writes with the same directness you’d expect from a trusted trail partner. He has logged more than 4,000 miles across iconic routes including the John Muir Trail, the Wind River Range, Vermont’s Long Trail, and the Collegiate Peaks Loop in Colorado.
Areas of Expertise
- Ultralight backpacking systems and base weight optimization
- Tent, tarp, and shelter testing across three-season and shoulder-season conditions
- Sleeping bag and quilt temperature rating verification
- Backpacking nutrition, meal planning, and calorie-per-ounce analysis
- Leave No Trace principles and wilderness ethics
- Campfire safety, bear country protocols, and water treatment methods
- Gear care, repair, and long-term durability assessment
Education
James Madison University — B.S. in Environmental Science, 2015
During his time at JMU, Caleb served as President of the Outdoor Recreation Club, where he planned and led more than 30 backcountry trips annually across the Blue Ridge Mountains and Appalachian Trail corridor. The role sharpened his ability to assess gear performance under real conditions, manage group safety in remote environments, and develop the kind of practical trail knowledge that no classroom can teach.
Professional Experience
Gear Writer & Senior Contributor — [campeox.com]
Produces in-depth gear reviews, buyer’s guides, and how-to content across backpacking, camping, and ultralight hiking categories. Tests all gear in real field conditions before publishing recommendations.
Wilderness Educator & Trip Leader — Shenandoah Backcountry Youth Program — 2015–2018 Led multi-day backcountry expeditions for teens and young adults throughout Shenandoah National Park and George Washington National Forest. Taught LNT principles, orienteering, first aid awareness, and campcraft fundamentals.
Outdoor Recreation Club President — James Madison University — 2013–2015 Organized and led university-sponsored hiking, backpacking, and camping trips in the Blue Ridge Mountains and Appalachian Trail corridor. Managed club budget, safety protocols, and trip logistics for a membership of 120+ students.
Editorial Standards
Every piece of gear Caleb recommends has been personally tested in the field — not just unboxed and described. His review process includes a minimum of two overnight trips per shelter, a full-season evaluation for sleep systems, and side-by-side comparisons wherever possible. He does not accept payment for positive reviews. Affiliate relationships, where they exist, are always disclosed in accordance with FTC guidelines.
All factual claims about gear specifications, trail distances, and safety recommendations are cross-referenced against manufacturer data sheets and established sources such as the Leave No Trace Center for Outdoor Ethics and the American Hiking Society before publication.




