

Heading outdoors with a lumpy, disorganized bag ruins the trip before it even starts. When you shove shirts and pants randomly into your gear, you waste valuable space and risk damaging your favorite garments. We have all experienced the frustration of digging for a dry pair of socks at the bottom of a chaotic heap.
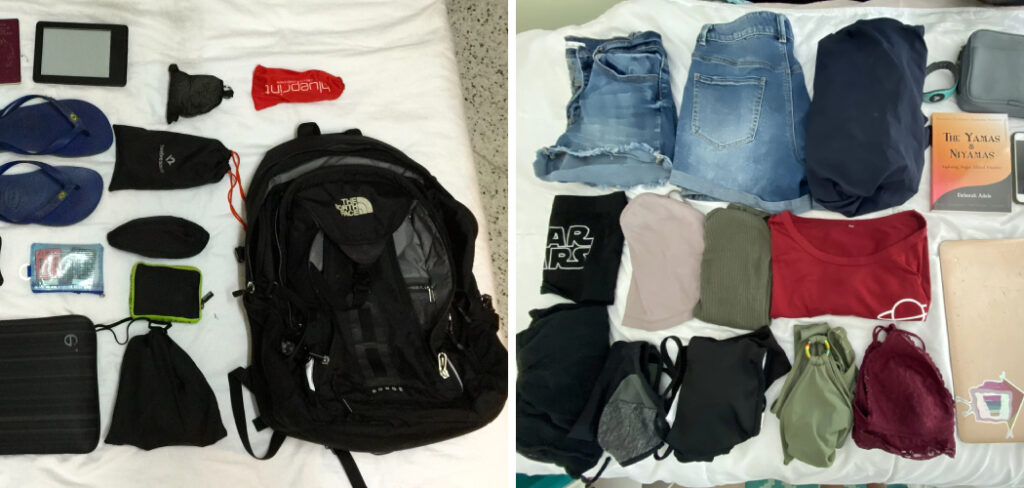
Learning exactly how to pack clothes in a backpack transforms your travel experience from a stressful chore into a seamless process. Proper organization distributes weight evenly across your shoulders, keeping you comfortable during long treks. You will save time at camp, keep your fabrics wrinkle-free, and maximize every inch of capacity. This guide provides a straightforward, foolproof method for securing your wardrobe efficiently for your upcoming adventure.
Why Knowing How to Pack Matters
Securing your garments correctly makes a massive difference for campers and outdoor beginners. A well-organized bag shifts the center of gravity closer to your back, which prevents shoulder strain and fatigue during long hikes. If you place heavy items poorly, your center of balance shifts, forcing your muscles to work much harder with every single step.
Efficient folding and rolling techniques also protect your gear from moisture and dirt. You can quickly grab a warm layer when temperatures drop without unpacking your entire setup. Properly arranged gear means you spend less time searching for essentials and more time enjoying the scenery. Mastering this skill gives you confidence, ensures your comfort on the trail, and extends the lifespan of both your apparel and your equipment.
Tools and Materials You’ll Need
Before you begin folding and rolling, gather a few essential items to streamline the process. Having the right gear on hand makes organization completely effortless.
- A quality travel bag: Choose a comfortable, properly fitted pack with a large main compartment and sturdy zippers.
- Packing cubes: These lightweight zippered pouches separate your shirts from your pants and keep everything tightly compressed.
- Waterproof stuff sacks: Essential for shielding your dry garments from rain, river crossings, or unexpected leaks.
- A laundry bag: Bring a dedicated fabric pouch to isolate dirty or damp items from your clean wardrobe.
- Compression straps: These useful ties help reduce the bulk of heavy jackets or thick sweaters.
- Fabric wrinkle-release spray (Optional): Toss a tiny travel-sized bottle into your kit for instant freshness and convenience upon arrival.
8 Step-by-Step Guide on How To Pack Clothes In A Backpack
Step 1 – Gather and Categorize Your Wardrobe
Start by pulling out every single garment you plan to bring on your trip and laying them across your bed. Seeing all your garments in one place prevents overpacking and highlights missing necessities. Sort your apparel into distinct categories, such as base layers, insulating layers, outerwear, and underwear. We recommend creating a dedicated pile for heavy items like denim and thick wool sweaters.
Grouping your pieces by function helps you visualize your daily outfits and ensures you pack only what you truly need. Discard any duplicate items that will simply add unnecessary weight to your shoulders. By organizing everything visibly before it goes into the bag, you establish a clear strategy for the actual packing process.
Step 2 – Roll Lightweight and Synthetic Fabrics
The rolling method serves as the ultimate secret weapon for maximizing space inside tight compartments. Take your lightweight t-shirts, synthetic base layers, and athletic shorts, and lay them flat on a smooth surface. Fold the sleeves inward, fold the garment in half lengthwise, and then roll it tightly from the bottom hem up to the collar.
This technique squeezes out excess air and prevents deep creases from forming in your favorite shirts. When figuring out how to pack clothes in a backpack, rolling proves far more efficient than traditional folding. You can tuck these small, cylindrical rolls into the empty gaps and corners of your main compartment. This method keeps your soft materials easily accessible and highly organized.
Step 3 – Fold Heavy and Bulky Items Flat
While rolling works wonders for thin shirts, thick fabrics require a different approach to avoid creating awkward lumps. Items like heavy denim jeans, thick wool sweaters, and bulky fleece jackets should be folded flat. Zip up the jackets, lay them face down, and fold the sleeves across the back before folding the bottom hem upward.
Place these flat, heavy squares directly against the back panel of your bag to create a smooth, comfortable surface against your spine. Folding these garments flat distributes their considerable weight evenly across your back. If you try to roll a thick sweater, you end up with a massive cylinder that wastes precious volume. Flat folding keeps your heaviest apparel balanced and secure.
Step 4 – Utilize Packing Cubes for Easy Access
Packing cubes completely revolutionize the way you organize your travel wardrobe. Assign a specific cube for your shirts, another for your pants, and a smaller one for undergarments and socks. Place your tightly rolled garments into these zippered mesh containers side by side, ensuring they fit snugly without bulging at the seams.
These handy cubes act like miniature drawers inside your main compartment, preventing your carefully arranged items from shifting during transit. If you ever need to retrieve a specific shirt, you simply pull out the designated cube instead of tearing apart your entire setup. This strategy saves you immense time and frustration, especially when you arrive at a campsite late at night.
Step 5 – Stash Underwear and Socks in Small Gaps
Underwear and socks serve as the perfect filler materials for the inevitable awkward spaces left inside your bag. Roll your socks tightly into small balls and fold your underwear compactly to create tiny, malleable bundles. Instead of dedicating a large packing cube to these tiny items, shove them into the empty corners and crevices around your larger gear.
You can stuff socks inside your spare hiking boots to maintain the shoe’s shape and utilize otherwise wasted volume. Tuck a few pairs into the side pockets or lid compartment for quick access during long travel days. Filling these dead spaces ensures every single inch of capacity gets utilized effectively while keeping your load stable.
Step 6 – Pack Heavy Layers at the Bottom and Middle
Weight distribution determines your physical comfort on the trail, making careful placement completely non-negotiable. Place your heavier folded items, like thick jeans and bulky sweaters, in the middle section of the bag, sitting closest to your spine. You should stuff your sleeping bag and soft pajamas at the absolute bottom to act as a shock-absorbing base.
Keeping the heaviest weight centered and close to your body aligns your center of gravity and prevents shoulder strain. If you place heavy items at the top or far away from your back, the bag will aggressively pull you backward. Proper weight placement makes a heavy load feel significantly lighter and much more manageable.
Step 7 – Keep Rain Gear and Warm Layers on Top
Weather conditions change rapidly when you explore the outdoors, so you must keep protective garments readily available. Fold your waterproof shell jacket, windbreaker, and a warm insulating layer, placing them at the very top of your main compartment. You should never bury these crucial emergency garments beneath your packing cubes or heavy sweaters.
When a sudden rainstorm hits the trail, you need to grab your waterproof jacket within seconds without unpacking your entire setup. Learning how to pack clothes in a backpack correctly means prioritizing accessibility for your most important environmental defenses. Keep your rain gear in the top lid or outer mesh pocket for ultimate convenience and peace of mind during unpredictable weather.
Step 8 – Compress Your Load with Straps
Once you have placed all your garments inside the main compartment, you must secure the load to prevent shifting. Close the zippers completely and pull the exterior compression straps tight across the sides of your bag. Cinching these straps down squeezes out trapped air and pulls the entire mass closer to your body.
A tightly compressed bag feels much more stable on your shoulders and prevents items from bouncing around as you walk. You can also use internal compression straps if your travel bag features them, strapping down your packing cubes before closing the lid. Compressing your gear reduces the overall profile of your bag, making it easier to maneuver through crowded train stations or dense forest trails.
Common Mistakes When Packing Clothes
Many beginners completely ruin their outdoor experience by committing a few easily avoidable packing errors. The most frequent mistake involves overpacking unnecessary items that add agonizing weight to your shoulders. People often bring three pairs of jeans when one pair of durable hiking pants would suffice for the entire week.
Another major blunder is placing heavy boots or bulky items at the very top of the bag. This top-heavy arrangement destroys your balance and heavily strains your lower back. Many travelers also ignore the crucial step of protecting their garments from moisture. Failing to use waterproof stuff sacks or a pack liner guarantees that a sudden downpour will soak your only warm sweater.
Additionally, beginners frequently try to fold lightweight shirts instead of rolling them, which wastes massive amounts of internal volume and leaves fabrics severely wrinkled. Finally, packing without any organizational system leads to a chaotic mess. When you toss loose items directly into the main compartment, you inevitably have to dump everything out onto the dirty ground just to find a clean pair of socks. Avoiding these mistakes ensures a smooth, comfortable, and highly organized journey.
Expert Tips
Experienced backpackers rely on a few clever tricks to make life on the trail remarkably easier. Always choose merino wool or synthetic fabrics over cotton, as they resist odors and dry incredibly fast. You can wear a high-quality merino wool shirt for several days without it smelling, drastically reducing the number of garments you need to carry.
We highly suggest color-coding your packing cubes so you can instantly identify your tops, bottoms, and undergarments without opening them. Wear your heaviest, bulkiest clothing—like thick hiking boots and a heavy winter coat—during your travel days to save massive amounts of internal space. Finally, always bring a designated dry bag for your dirty laundry to prevent foul odors from contaminating your clean apparel.
Frequently Asked Questions
Should I roll or fold my shirts?
You should almost always roll your lightweight shirts and synthetic base layers. Rolling squeezes out trapped air, maximizes your internal space, and minimizes deep wrinkles in the fabric. However, you should fold thick, bulky items like heavy wool sweaters and stiff denim jeans. Rolling these heavy fabrics creates awkward, bulky cylinders that waste precious volume and disrupt weight distribution.
How do I keep my clean and dirty laundry separate?
Bring a dedicated, lightweight dry bag or a sealable stuff sack specifically for your dirty garments. As soon as you finish wearing an item, place it directly into this isolation bag. This barrier prevents sweat, dirt, and foul odors from transferring to your fresh apparel. You can then compress the dirty laundry bag to save valuable space.
Do packing cubes actually save space?
Packing cubes absolutely save space by keeping your garments tightly compressed and structurally organized. They act as miniature drawers, preventing your rolled shirts from unrolling and shifting into empty gaps. More importantly, cubes save you immense amounts of time. You avoid tearing your entire setup apart just to locate one specific pair of thermal underwear.
Where should I put my heavy shoes?
You should place heavy hiking boots or spare shoes in the middle of your bag, keeping them positioned as close to your spine as possible. Never place heavy footwear at the very top, as this creates a top-heavy load that pulls you backward. Always wrap your dirty shoes in a plastic bag to protect your clean apparel.
How can I prevent my clothes from getting wet?
Line the inside of your main compartment with a heavy-duty plastic trash bag or a specialized waterproof pack liner. You should also store your most critical warm layers, like your sleeping clothes and down jacket, inside individual waterproof dry sacks. Always carry an exterior rain cover to shield the outside of your bag during heavy downpours.
Conclusion
Organizing your gear properly dictates whether your outdoor adventure feels like an effortless journey or a painful struggle. By carefully selecting your wardrobe, rolling your lightweight fabrics, and utilizing packing cubes, you completely optimize your carrying capacity. Placing your heaviest items close to your spine protects your posture, while keeping rain gear at the top ensures you remain prepared for sudden storms. Taking the time to master these fundamental techniques completely removes the stress of living out of a bag.
Now that you understand exactly how to pack clothes in a backpack, you can tackle your next camping trip with supreme confidence. You will never again have to dump your belongings onto the dirt just to find a clean shirt. Grab your favorite travel bag, gather your essential garments, and practice these straightforward steps before your departure date. Your shoulders will thank you, your gear will stay protected, and you will be fully prepared to enjoy the great outdoors.

About Caleb
Caleb Merritt is a Virginia-based outdoor writer and gear analyst who has spent over a decade sleeping on the ground, crossing mountain passes, and obsessively shaving grams off his pack weight. He holds a Bachelor of Science in Environmental Science from James Madison University, where he also served as president of the university’s outdoor recreation club. After graduating, he spent three years as a wilderness educator with a backcountry youth program in the Shenandoah Valley — teaching Leave No Trace ethics, backcountry navigation, and campcraft — before moving into full-time writing in 2018.
His work focuses on one core belief: the best gear is the gear you understand. Whether he’s doing a side-by-side weight comparison of ultralight shelters or writing a beginner’s guide to building a sub-20-lb base weight kit, Caleb writes with the same directness you’d expect from a trusted trail partner. He has logged more than 4,000 miles across iconic routes including the John Muir Trail, the Wind River Range, Vermont’s Long Trail, and the Collegiate Peaks Loop in Colorado.
Areas of Expertise
- Ultralight backpacking systems and base weight optimization
- Tent, tarp, and shelter testing across three-season and shoulder-season conditions
- Sleeping bag and quilt temperature rating verification
- Backpacking nutrition, meal planning, and calorie-per-ounce analysis
- Leave No Trace principles and wilderness ethics
- Campfire safety, bear country protocols, and water treatment methods
- Gear care, repair, and long-term durability assessment
Education
James Madison University — B.S. in Environmental Science, 2015
During his time at JMU, Caleb served as President of the Outdoor Recreation Club, where he planned and led more than 30 backcountry trips annually across the Blue Ridge Mountains and Appalachian Trail corridor. The role sharpened his ability to assess gear performance under real conditions, manage group safety in remote environments, and develop the kind of practical trail knowledge that no classroom can teach.
Professional Experience
Gear Writer & Senior Contributor — [campeox.com]
Produces in-depth gear reviews, buyer’s guides, and how-to content across backpacking, camping, and ultralight hiking categories. Tests all gear in real field conditions before publishing recommendations.
Wilderness Educator & Trip Leader — Shenandoah Backcountry Youth Program — 2015–2018 Led multi-day backcountry expeditions for teens and young adults throughout Shenandoah National Park and George Washington National Forest. Taught LNT principles, orienteering, first aid awareness, and campcraft fundamentals.
Outdoor Recreation Club President — James Madison University — 2013–2015 Organized and led university-sponsored hiking, backpacking, and camping trips in the Blue Ridge Mountains and Appalachian Trail corridor. Managed club budget, safety protocols, and trip logistics for a membership of 120+ students.
Editorial Standards
Every piece of gear Caleb recommends has been personally tested in the field — not just unboxed and described. His review process includes a minimum of two overnight trips per shelter, a full-season evaluation for sleep systems, and side-by-side comparisons wherever possible. He does not accept payment for positive reviews. Affiliate relationships, where they exist, are always disclosed in accordance with FTC guidelines.
All factual claims about gear specifications, trail distances, and safety recommendations are cross-referenced against manufacturer data sheets and established sources such as the Leave No Trace Center for Outdoor Ethics and the American Hiking Society before publication.




