Making your own gear transforms the way you experience the outdoors. Instead of settling for generic bags that dig into your shoulders or lack the right pockets, you can create something perfectly tailored to your body and your adventures. Many outdoor enthusiasts feel intimidated by sewing heavy fabrics or working with rugged hardware.
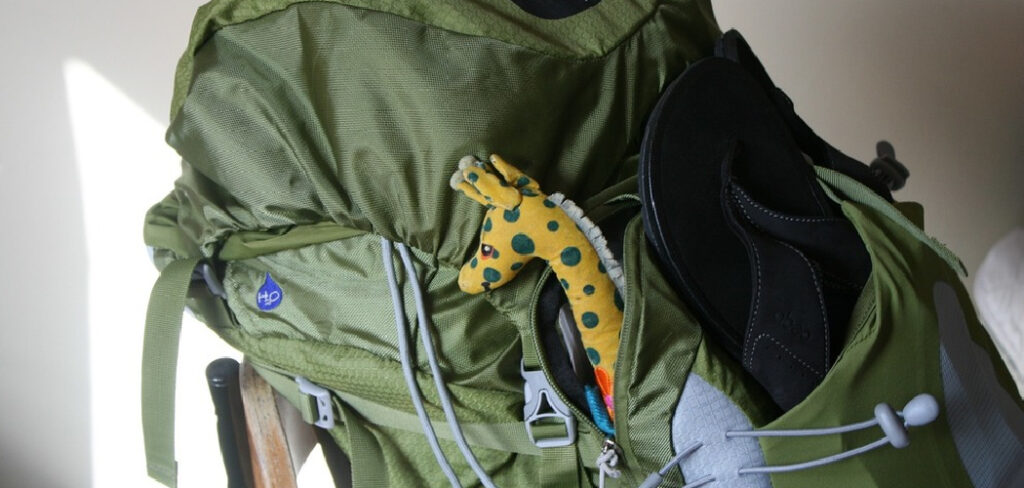
However, mastering the basics of bag making is much easier than it looks. We have put together this comprehensive guide to show you exactly how to craft traveler’s backpack from scratch. You will learn everything from selecting the right waterproof canvas to stitching durable seams that withstand the elements. By the end of this expert guide, you will have the confidence and knowledge to build a reliable, custom pack for your next journey.
Why Learning to Craft a Backpack Matters
Understanding the construction of your gear gives you a massive advantage in the wild. When you build your own pack, you know precisely where the stress points are and how to repair them if a strap snaps miles away from civilization. Campers and outdoor beginners often struggle with commercial bags that fail to distribute weight properly.
Crafting your own solution allows you to customize the strap padding, adjust the torso length, and place pockets exactly where you need your water bottle or compass. Beyond the practical benefits, creating your own outdoor equipment builds immense self-reliance. You stop depending on expensive brands and start relying on your own hands. This skill saves you money over time and ensures you always carry a bag perfectly suited to your specific camping style.
Tools and Materials You’ll Need
Building a durable bag requires the right supplies to handle heavy fabrics and outdoor wear. Before you begin cutting or stitching, gather these essential items to ensure a smooth crafting process.
- Heavy-duty sewing machine capable of piercing canvas or leather
- Two yards of waterproof waxed canvas or Cordura nylon for the main body
- Heavyweight bonded nylon thread for UV and rot resistance
- Fabric shears and a rotary cutter for precise measuring
- Webbing straps (nylon or polyester) for shoulders and load lifters
- Heavy-duty plastic or metal buckles, sliders, and D-rings
- Closed-cell foam for padding the shoulder straps and back panel
- Wonder clips or binder clips to hold thick fabric layers together without pinning
- Optional: A leather punch and rivets for reinforcing heavy stress points with extra flair
9 Step-by-Step Guide on How to Craft Traveler’s Backpack
Step 1 – Measure and Cut Your Fabric
Before taking your fabric to the sewing machine, you must measure and cut your base materials accurately. Lay your waxed canvas or Cordura nylon flat on a large cutting mat. Use a sharp rotary cutter and an acrylic ruler to slice out the main body panels, the bottom base, and the shoulder straps.
Leaving a consistent seam allowance of about half an inch around every single piece ensures your bag maintains its intended size after sewing. Take your time during this phase, as rushed cutting leads to crooked seams and mismatched panels. Mark your center points on the top and bottom of each panel with tailors chalk. These small chalk marks will help you align the heavy fabric pieces perfectly when you move on to the actual assembly process.
Step 2 – Prepare the Base and Back Panel
The foundation of any great bag rests in its base and back panel. You need these sections to be incredibly rigid and resilient, as they take the brunt of the weight and abrasion. Take your bottom fabric panel and reinforce it by sewing a second layer of canvas directly over it. Some crafters even slide a thin sheet of plastic between these layers for ultimate stiffness.
Next, move to the back panel where your spine will rest. Cut a piece of closed-cell foam to match the panel dimensions, leaving room for the seam allowances. Stitch a piece of breathable mesh fabric over the foam, securing it to the back panel canvas. This creates a comfortable, padded barrier that prevents bulky items inside the bag from poking into your back on the trail.
Step 3 – Construct the Padded Shoulder Straps
Comfortable straps dictate how much you will actually enjoy wearing your finished creation out in the woods. Cut two long, curved pieces of fabric for each shoulder strap to match the natural slope of your chest. Sandwich a dense piece of closed-cell foam between the top and bottom fabric layers for each strap.
Use your heavy-duty sewing machine to stitch a border around the foam, locking it firmly into place. Once the foam is secured, sew a strip of nylon webbing down the center of each strap. This webbing adds crucial structural integrity and provides a place to attach small D-rings for hanging your compass or flashlight. Finish the raw edges of the straps with a sturdy binding tape to prevent fraying and give the shoulder supports a polished, professional appearance.
Step 4 – Attach the Hardware and Webbing
Hardware application is where your flat pieces of fabric finally start looking like functional outdoor gear. Learning how to craft traveler’s backpack requires careful attention to where you place your tension locks, D-rings, and buckles. Take your webbing straps and loop them through your plastic or metal sliders.
Fold the ends over and stitch them down with a tight box-and-X stitch pattern. This specific stitch guarantees the webbing will not pull loose under heavy loads. Attach the lower webbing anchor points directly to the bottom corners of your back panel. Make sure you use heavy bonded nylon thread here, as standard cotton thread will quickly snap under the tension of a fully loaded pack. Double-check the orientation of your buckles before sewing them down to avoid twisting the straps later.
Step 5 – Assemble the Front and Side Pockets
Accessible storage makes a massive difference when you need to grab items quickly during a hike. Grab the fabric pieces you cut for your exterior pockets and hem the top edges so they look clean and remain durable. If you want elastic side pockets for water bottles, sew a channel along the top edge and thread a thick piece of shock cord through it.
Pin these pockets to the front and side panels of your main bag body using wonder clips. Sew the pockets securely onto the panels, running a double line of stitching along the bottom and sides for extra reinforcement. Leave the top edges open, but consider adding a small patch of hook-and-loop fastener or a metal snap to keep the front pocket closed when you bend over on the trail.
Step 6 – Join the Main Body Panels
Now you get to see your project take a three-dimensional shape. Take the front panel, the two side panels, and the padded back panel, and align their edges with the right sides facing inward. Use your wonder clips to hold the stiff fabric layers together, as normal sewing pins will bend or break against the heavy canvas. Slowly run these joined panels through your sewing machine, staying perfectly true to your half-inch seam allowance.
Take your time maneuvering the bulky fabric under the presser foot. Once the four walls of the bag are connected, carefully align the reinforced bottom base panel with the lower edges of the walls. Sew around the perimeter of the base, pivoting the needle exactly at the corners to create crisp, squared edges that help the bag stand upright.
Step 7 – Bind the Internal Seams for Durability
Raw fabric edges left exposed inside the main compartment will eventually fray and ruin your hard work. To prevent this, you must bind the interior seams using a strong grosgrain ribbon or a dedicated binding tape. Cut a length of binding tape slightly longer than the seam you want to cover. Fold the tape in half lengthwise over the raw edges of the fabric. Stitch straight down the center of the binding tape, catching both the front and back sides simultaneously.
Repeat this process for every internal seam, paying special attention to the corners where multiple layers of heavy fabric intersect. This extra step significantly extends the lifespan of your gear and gives the interior compartment a clean, commercial-quality finish that you can be incredibly proud of.
Step 8 – Construct the Roll-Top or Zipper Closure
Keeping the rain and dirt out of your gear requires a secure closure system at the top of the bag. A roll-top closure offers the best waterproofing and is quite simple for beginners to construct. Hem the top raw edges of your assembled main body. Sew a strip of nylon webbing along the front and back of the top opening, leaving a few inches of webbing hanging off the sides. Attach side-release buckles to these hanging ends.
To close the bag, you simply press the top edges together, roll them down three or four times, and snap the buckles together. If you prefer a zippered top, install a heavy-duty waterproof zipper along the top opening instead. Just ensure you sew a small fabric flap over the zipper teeth to block incoming rain.
Step 9 – Attach the Straps and Reinforce Stress Points
The final assembly step demands the most robust stitching of the entire project. You must attach your beautifully padded shoulder straps to the top of the back panel. Lay the raw top ends of the straps flat against the back panel, right below the top closure. Sew across them multiple times using a tight zigzag stitch or a reinforced box stitch.
This connection point carries the entire weight of your gear, so do not hesitate to go over it three or four times with your machine. Add load-lifter straps if desired, connecting the top of the shoulder straps to the top of the bag frame. Understanding how to craft traveler’s backpack is ultimately about mastering these crucial load-bearing connections, ensuring your custom gear survives years of intense outdoor exploration.
Common Mistakes When Crafting a Backpack
Rushing the planning phase is the most frequent error new bag makers commit. People often forget to pre-wash and preshrink their canvas, leading to a warped bag the first time it gets caught in the rain. Always prepare your materials to match the conditions they will face outside.
Another major mistake involves using standard all-purpose polyester thread instead of bonded nylon. Standard thread simply lacks the tensile strength to hold thick layers of canvas together under stress. When you load the bag with heavy gear, weak thread will snap at the shoulder straps and base corners. You must invest in heavy-duty thread and the appropriate thick needles (like size 16 or 18) to penetrate the rugged materials without breaking.
Finally, beginners often underestimate the bulk of multiple fabric layers at the seams. When four pieces of canvas and a layer of foam meet at a corner, a standard home sewing machine will stall or skip stitches. Failing to trim or “grade” your seam allowances creates massive lumps that are impossible to sew over smoothly. You must trim away excess fabric on the inner layers to reduce the thickness before you attempt to stitch through the final intersection.
Expert Tips
Achieving a professional look requires attention to the smallest details. Always use a walking foot attachment on your sewing machine when working with heavy canvas or foam. This specialized foot feeds the upper and lower layers of fabric through the machine at the exact same speed, preventing the top layer from shifting and creating ugly puckers.
Melt the cut ends of your nylon webbing with a lighter before sewing them down. This seals the plastic fibers and completely eliminates fraying over the lifetime of the bag. When sewing thick corners, ditch the machine pedal momentarily. Turn the handwheel manually to push the needle through the densest fabric layers. This gives you total control, prevents broken needles, and ensures every single stitch lands exactly where you want it.
Frequently Asked Questions
What is the best fabric for a beginner to use?
Waxed canvas and 500D Cordura nylon are the most forgiving fabrics for new makers. Waxed canvas holds its shape beautifully, making it easy to cut and sew without slipping. Cordura nylon offers extreme durability and water resistance but requires slightly more care to keep the slippery panels aligned during the sewing process. Both materials easily withstand rugged outdoor environments.
Can a regular home sewing machine handle this project?
Yes, most standard metal-frame home sewing machines can handle canvas and nylon if properly equipped. You must install a heavy-duty needle, specifically a size 90/14 or 100/16 denim needle. You should also lengthen your stitch length to accommodate the thicker fabric. However, very cheap plastic machines might struggle with the thickest corner seams.
How do I waterproof the seams of my bag?
Even if you use waterproof canvas, water can still seep through the tiny holes created by your sewing needle. You can solve this by applying a liquid seam sealer directly to the internal stitched seams. Alternatively, you can run a strip of specialized waterproof seam tape over the stitches and apply heat with an iron to melt it into place securely.
How long does it take to make a bag from scratch?
A first-time crafter should expect to spend roughly ten to fifteen hours completing a fully featured bag. Cutting the fabric and preparing the foam straps usually takes up the first evening. Sewing the panels, binding the interior seams, and attaching the heavy hardware will take another full day or a weekend of focused work.
How do I wash and maintain my finished gear?
Never put a waxed canvas or heavily structured outdoor bag in a washing machine, as the agitation destroys the fabric coatings and bends the foam. Instead, wait for the mud to dry and brush it off with a stiff bristle brush. Spot clean stubborn stains with cold water and a mild soap, then hang the bag in a well-ventilated area to air dry completely.
Conclusion
Building your own outdoor gear rewards you with a deep sense of accomplishment and a profound understanding of what keeps you safe on the trail. You no longer have to compromise on pocket placement, strap length, or fabric durability. By taking control of the manufacturing process, you guarantee that your equipment directly matches your unique physical needs and your specific adventure goals.
The process requires patience, especially when measuring panels and muscling thick seams through your machine, but the effort always pays off. Now that you understand how to craft traveler’s backpack, you can experiment with different sizes, colors, and closure systems. Gather your rugged canvas, thread your heavy-duty needle, and start building the gear that will accompany you on your greatest journeys. With these foundational skills in place, there is absolutely no limit to the incredible, customized equipment you can create for your future outdoor excursions.

About Caleb
Caleb Merritt is a Virginia-based outdoor writer and gear analyst who has spent over a decade sleeping on the ground, crossing mountain passes, and obsessively shaving grams off his pack weight. He holds a Bachelor of Science in Environmental Science from James Madison University, where he also served as president of the university’s outdoor recreation club. After graduating, he spent three years as a wilderness educator with a backcountry youth program in the Shenandoah Valley — teaching Leave No Trace ethics, backcountry navigation, and campcraft — before moving into full-time writing in 2018.
His work focuses on one core belief: the best gear is the gear you understand. Whether he’s doing a side-by-side weight comparison of ultralight shelters or writing a beginner’s guide to building a sub-20-lb base weight kit, Caleb writes with the same directness you’d expect from a trusted trail partner. He has logged more than 4,000 miles across iconic routes including the John Muir Trail, the Wind River Range, Vermont’s Long Trail, and the Collegiate Peaks Loop in Colorado.
Areas of Expertise
- Ultralight backpacking systems and base weight optimization
- Tent, tarp, and shelter testing across three-season and shoulder-season conditions
- Sleeping bag and quilt temperature rating verification
- Backpacking nutrition, meal planning, and calorie-per-ounce analysis
- Leave No Trace principles and wilderness ethics
- Campfire safety, bear country protocols, and water treatment methods
- Gear care, repair, and long-term durability assessment
Education
James Madison University — B.S. in Environmental Science, 2015
During his time at JMU, Caleb served as President of the Outdoor Recreation Club, where he planned and led more than 30 backcountry trips annually across the Blue Ridge Mountains and Appalachian Trail corridor. The role sharpened his ability to assess gear performance under real conditions, manage group safety in remote environments, and develop the kind of practical trail knowledge that no classroom can teach.
Professional Experience
Gear Writer & Senior Contributor — [campeox.com]
Produces in-depth gear reviews, buyer’s guides, and how-to content across backpacking, camping, and ultralight hiking categories. Tests all gear in real field conditions before publishing recommendations.
Wilderness Educator & Trip Leader — Shenandoah Backcountry Youth Program — 2015–2018 Led multi-day backcountry expeditions for teens and young adults throughout Shenandoah National Park and George Washington National Forest. Taught LNT principles, orienteering, first aid awareness, and campcraft fundamentals.
Outdoor Recreation Club President — James Madison University — 2013–2015 Organized and led university-sponsored hiking, backpacking, and camping trips in the Blue Ridge Mountains and Appalachian Trail corridor. Managed club budget, safety protocols, and trip logistics for a membership of 120+ students.
Editorial Standards
Every piece of gear Caleb recommends has been personally tested in the field — not just unboxed and described. His review process includes a minimum of two overnight trips per shelter, a full-season evaluation for sleep systems, and side-by-side comparisons wherever possible. He does not accept payment for positive reviews. Affiliate relationships, where they exist, are always disclosed in accordance with FTC guidelines.
All factual claims about gear specifications, trail distances, and safety recommendations are cross-referenced against manufacturer data sheets and established sources such as the Leave No Trace Center for Outdoor Ethics and the American Hiking Society before publication.