Picture this: you are navigating a beautiful forest trail, capturing memories on your smartphone, when a low-battery warning suddenly flashes across the screen. Losing power while outdoors or traveling causes unnecessary stress. Modern smart bags solve this problem by keeping your essential devices fully juiced while you stay on the move.
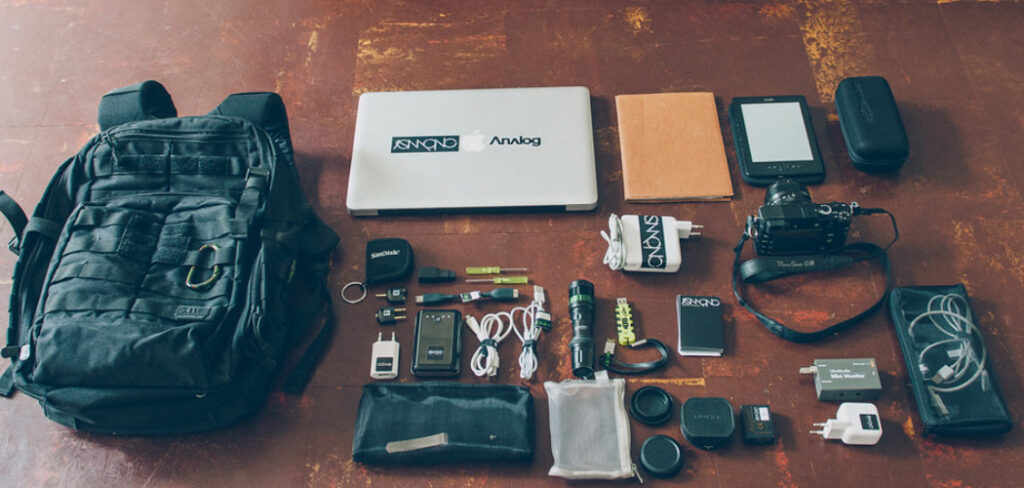
Figuring out how to use backpack with USB charging port might seem confusing at first glance, but the setup process takes only a few minutes. You just need a solid power bank and the right cables to turn your everyday carry into a mobile power station. This comprehensive guide walks you through the exact steps needed to master your smart bag. The purpose of this guide is to teach you how to properly connect, secure, and operate your integrated charging system safely.
Why You Need to Know How to Use USB Backpack
Learning this specific skill provides massive benefits for campers, hikers, and outdoor beginners. When you venture away from traditional wall outlets, your backpack becomes your only lifeline to the digital world. Keeping your devices charged ensures you maintain access to offline maps, GPS navigation, and emergency communication tools. A dead phone battery in the wilderness presents a serious safety risk if you lose your way or suffer an injury.
Understanding your smart bag mechanics also prevents damage to the internal electronics during unpredictable weather. You avoid fumbling with tangled cords or dropping expensive battery packs on rocky terrain. Proper setup keeps your hands entirely free for holding trekking poles, drinking water, or bracing yourself on steep trails. Mastering this simple technology builds your outdoor confidence and lets you focus entirely on the adventure ahead rather than worrying about your battery percentage.
Tools and Materials You’ll Need
Before you start setting up your bag, gather the necessary equipment. Having everything ready ensures a smooth and safe connection process.
- A compatible backpack featuring a built-in exterior USB port and interior connecting cable
- A fully charged portable power bank with a standard USB-A output port
- The specific charging cable designed for your smartphone, GPS, or camera
- A clean microfiber cloth to gently wipe any dust or dirt from the connection points
- Optional: A portable solar panel carabiner attachment for recharging your battery pack during long daytime hikes
9 Step-by-Step Guide on How To Use Backpack With USB Charging Port
Step 1 – Locate the Internal Charging Cable
Open the main compartment of your bag and look for a small zipper pocket or specialized pouch lining the interior wall. Reach inside this hidden section to find the built-in connecting wire. You must handle this wire gently to avoid fraying the delicate connection points near the fabric seam.
Understanding how to use backpack with USB charging port begins with identifying this critical piece of hardware. Pull the cord out just enough to examine the metal connector piece. You should see a standard male USB plug waiting to connect to your portable battery. Inspect the metal tip carefully to ensure no loose threads or debris block the connection. Keeping this internal cord clean prevents short circuits and guarantees a steady flow of electricity.
Step 2 – Select the Right Power Bank
Choosing the correct portable battery makes a huge difference in your overall experience. Pick a power bank that offers at least 10,000 milliampere-hours of capacity for weekend camping trips. This size provides enough juice to recharge a standard smartphone two or three times.
Feel the weight of the battery in your hands to ensure it does not add unnecessary bulk to your load. Look for a slim, rectangular design that slips easily into the designated interior pocket. Make sure the output ports match the internal cord you located in the previous step. Verify the battery shows a full charge by pressing the small indicator button on its side.
Step 3 – Connect the Internal Cable to Your Power Bank
Hold your fully charged battery pack firmly in one hand and grasp the internal cord with your other hand. Line up the internal metal plug with the output port on your portable battery. Push the plug straight into the slot until you feel a firm click indicating a solid connection.
Avoid forcing the plug upside down, as this bends the internal pins and ruins the connection permanently. Once plugged in, wrap your fingers around the joint to check for any loose wiggling. A tight fit ensures the cord will not slip out while you walk over uneven terrain. Most batteries automatically turn on once connected, but press the manual power button if your specific model requires it.
Step 4 – Secure the Power Bank in the Interior Pouch
Slide the connected battery carefully into the designated interior sleeve or mesh pocket. You want the device to sit snugly against the padding so it does not bounce around while you hike. Bouncing objects pull on the delicate wires and create a frustrating disconnect right when you need power the most.
Zip the interior pocket completely shut to lock the battery in place. Smooth out any kinks or sharp bends in the wire before closing the compartment entirely. A well-secured battery shifts the weight closer to your center of gravity, which improves your overall balance on the trail. Close the main compartment of the bag securely.
Step 5 – Inspect the External USB Port
Turn the bag around to examine the outside surface near the lower side seams or shoulder straps. Find the plastic housing that protects the exterior charging port. Run your thumb over the plastic casing to check for cracks or missing weather flaps. Outdoor bags usually feature a small rubber flap covering the sensitive metal contacts to block moisture and dirt. Flip this protective flap open and peek inside the slot. Blow gently into the opening to clear away any tiny dust particles or pocket lint that accumulated during storage. A clean external port guarantees optimal charging speed for your phone.
Step 6 – Plug Your External Device Cable Into the Port
Take the specific charging cord you normally use for your smartphone or tablet. Hold the larger end of this external wire and align it with the exterior port on the bag. Push the connector firmly into the plastic housing until it stops moving. You should feel a slight resistance followed by a solid seating sensation. Leave the rest of the cord dangling freely for a moment while you double-check the connection. Do not yank the cord sideways, as this specific angle puts intense pressure on the plastic housing. The cord should stick straight out from the side of the bag without drooping unnaturally.
Step 7 – Connect Your Smartphone or GPS Device
Grab your smartphone, GPS tracker, or camera and hold it comfortably in your hand. Take the smaller end of your external cord and plug it directly into the bottom of your electronic device. Look at your device screen immediately to verify the battery icon shows an active charging status. You should hear a soft chime or feel a short vibration confirming the electrical current is flowing properly. If the screen remains dark, gently push the connections tighter on both the exterior port and the device itself. Seeing that small lightning bolt icon appear brings a wave of relief during a long trek.
Step 8 – Route the External Cable Safely While Walking
Thread the loose cord through your jacket zipper or tuck it under your backpack strap to keep it from snagging on tree branches. Letting a long cord swing wildly beside your legs creates a dangerous tripping hazard on rocky paths. Slip your actively charging phone into your front pants pocket or a secure chest pouch. Adjust the length of the wire so you maintain full range of motion in your arms and shoulders. You should be able to turn your head and torso comfortably without yanking the cord out of the exterior port. Proper routing keeps the setup completely out of your way.
Step 9 – Disconnect and Store Components Properly
Once your device reaches full battery capacity, carefully unplug the phone from the cord. Pull the external wire straight out of the outside port and immediately snap the rubber weather flap closed to block out rain. Open the main compartment to retrieve your portable battery. Unplug the battery and tuck the internal cord back into its hidden pocket. Explaining how to use a backpack with USB charging port always ends with proper storage techniques. Coil your external wire loosely to prevent internal wire breakage and stash it in a dry side pocket. Taking everything apart prolongs the lifespan of your electronics.
Common Mistakes When Using a USB Charging Backpack
Failing to properly secure the battery pack inside the bag ranks as the most frequent mistake beginners make. When you leave a heavy battery loose in the main compartment, it thrashes against your other gear and violently yanks the internal cord out of its socket. This constant pulling eventually snaps the delicate wires hidden inside the fabric lining. You must always use the dedicated elastic sleeve or zippered pouch designed specifically to hold the battery in place.
Another widespread error involves neglecting the external rubber weather flap during rainy conditions. Water easily seeps into an exposed exterior port and travels straight down the wire directly into your expensive battery pack. This moisture causes immediate short circuits and can permanently destroy your electronics. You must cultivate the habit of snapping that tiny rubber cover completely shut the second you finish charging your phone.
Many people also make the mistake of leaving the internal cord plugged into the battery when storing the bag away for the season. Keeping the connection active slowly drains the battery capacity over time. It also bends the internal connector at an unnatural angle while the bag sits crushed in a closet. Always separate the components completely and store the battery in a cool, dry place inside your house rather than leaving it trapped in the dark bag.
Expert Tips
Invest in a durable, braided nylon external cord instead of cheap plastic alternatives. Braided cords resist tangling and handle the constant bending that occurs while you walk outdoors. They rarely fray at the connector base, saving you from replacing cables halfway through a camping trip.
Always pack your battery inside a specialized waterproof dry bag before placing it into the designated interior sleeve. Condensation builds up rapidly inside a hot bag during summer hikes, and this extra layer of plastic stops moisture from reaching the internal battery cells. You should also routinely test the entire system at home before leaving for a trip. Discovering a broken wire in your living room causes minor annoyance, but discovering it on a mountain peak creates a severe problem.
Frequently Asked Questions
Can I wash my bag if it has built-in electronic ports?
You can clean the bag, but you must strictly wash it by hand. Never throw a smart bag into a washing machine or submerge it completely underwater. Wipe the exterior fabric with a damp cloth and mild soap. Ensure the external port remains completely dry during the cleaning process to protect the internal wiring.
Do these bags come with a battery included?
Most manufacturers do not include the actual power bank with your purchase. You receive the bag, the exterior port, and the interior connecting cord. You need to supply your own portable battery to provide the actual electricity. This design lets you choose a battery size that fits your specific travel needs.
What happens if the internal wire breaks or frays?
A broken internal wire usually requires a replacement from the original manufacturer. Some high-end brands allow you to easily unclip and swap the internal cord without tearing the fabric. If the cord is sewn directly into the lining, you might need to contact customer service for a warranty repair.
Does the exterior port work with all types of phones?
The exterior port features a universal standard connection that works with virtually any electronic device. The compatibility depends entirely on the external cable you plug into it. Whether you carry an older device or the newest smartphone, simply use your matching charging cord to connect successfully.
How fast will my phone actually charge while walking?
The charging speed relies heavily on the quality and output capability of your internal battery pack. Standard power banks deliver a slow, steady trickle charge ideal for maintaining battery life while using GPS. If you want rapid charging speeds, you must purchase a high-output battery pack specifically designed for fast charging.
Conclusion
Staying connected while exploring the great outdoors no longer requires bulky solar panels or desperate searches for wall outlets. By following the detailed steps outlined above, you can confidently turn your smart bag into a reliable, mobile power station. You learned how to secure the battery, protect the delicate ports from water damage, and route your cables safely while hiking. Mastering this setup grants you peace of mind, knowing your navigation tools and emergency contacts remain accessible at all times.
Remember to routinely clean the connection points and store your battery separately when you return home from your adventures. Take five minutes tonight to practice connecting your gear so you feel completely prepared for your next outdoor excursion. Now that you understand how to use backpack with USB charging port, you can confidently hit the trails and capture every breathtaking moment without ever fearing a dead battery again. Get out there, stay fully charged, and enjoy the journey safely.

About Caleb
Caleb Merritt is a Virginia-based outdoor writer and gear analyst who has spent over a decade sleeping on the ground, crossing mountain passes, and obsessively shaving grams off his pack weight. He holds a Bachelor of Science in Environmental Science from James Madison University, where he also served as president of the university’s outdoor recreation club. After graduating, he spent three years as a wilderness educator with a backcountry youth program in the Shenandoah Valley — teaching Leave No Trace ethics, backcountry navigation, and campcraft — before moving into full-time writing in 2018.
His work focuses on one core belief: the best gear is the gear you understand. Whether he’s doing a side-by-side weight comparison of ultralight shelters or writing a beginner’s guide to building a sub-20-lb base weight kit, Caleb writes with the same directness you’d expect from a trusted trail partner. He has logged more than 4,000 miles across iconic routes including the John Muir Trail, the Wind River Range, Vermont’s Long Trail, and the Collegiate Peaks Loop in Colorado.
Areas of Expertise
- Ultralight backpacking systems and base weight optimization
- Tent, tarp, and shelter testing across three-season and shoulder-season conditions
- Sleeping bag and quilt temperature rating verification
- Backpacking nutrition, meal planning, and calorie-per-ounce analysis
- Leave No Trace principles and wilderness ethics
- Campfire safety, bear country protocols, and water treatment methods
- Gear care, repair, and long-term durability assessment
Education
James Madison University — B.S. in Environmental Science, 2015
During his time at JMU, Caleb served as President of the Outdoor Recreation Club, where he planned and led more than 30 backcountry trips annually across the Blue Ridge Mountains and Appalachian Trail corridor. The role sharpened his ability to assess gear performance under real conditions, manage group safety in remote environments, and develop the kind of practical trail knowledge that no classroom can teach.
Professional Experience
Gear Writer & Senior Contributor — [campeox.com]
Produces in-depth gear reviews, buyer’s guides, and how-to content across backpacking, camping, and ultralight hiking categories. Tests all gear in real field conditions before publishing recommendations.
Wilderness Educator & Trip Leader — Shenandoah Backcountry Youth Program — 2015–2018 Led multi-day backcountry expeditions for teens and young adults throughout Shenandoah National Park and George Washington National Forest. Taught LNT principles, orienteering, first aid awareness, and campcraft fundamentals.
Outdoor Recreation Club President — James Madison University — 2013–2015 Organized and led university-sponsored hiking, backpacking, and camping trips in the Blue Ridge Mountains and Appalachian Trail corridor. Managed club budget, safety protocols, and trip logistics for a membership of 120+ students.
Editorial Standards
Every piece of gear Caleb recommends has been personally tested in the field — not just unboxed and described. His review process includes a minimum of two overnight trips per shelter, a full-season evaluation for sleep systems, and side-by-side comparisons wherever possible. He does not accept payment for positive reviews. Affiliate relationships, where they exist, are always disclosed in accordance with FTC guidelines.
All factual claims about gear specifications, trail distances, and safety recommendations are cross-referenced against manufacturer data sheets and established sources such as the Leave No Trace Center for Outdoor Ethics and the American Hiking Society before publication.