Nothing halts a great bike ride or bikepacking trip quite like a broken drivetrain component. When your bike stops shifting correctly, you might feel tempted to walk it straight to a local repair shop. However, taking control of your own bike maintenance saves you money and builds immense confidence. Understanding the mechanics of your drivetrain gives you a massive advantage when mechanical issues strike far from home.
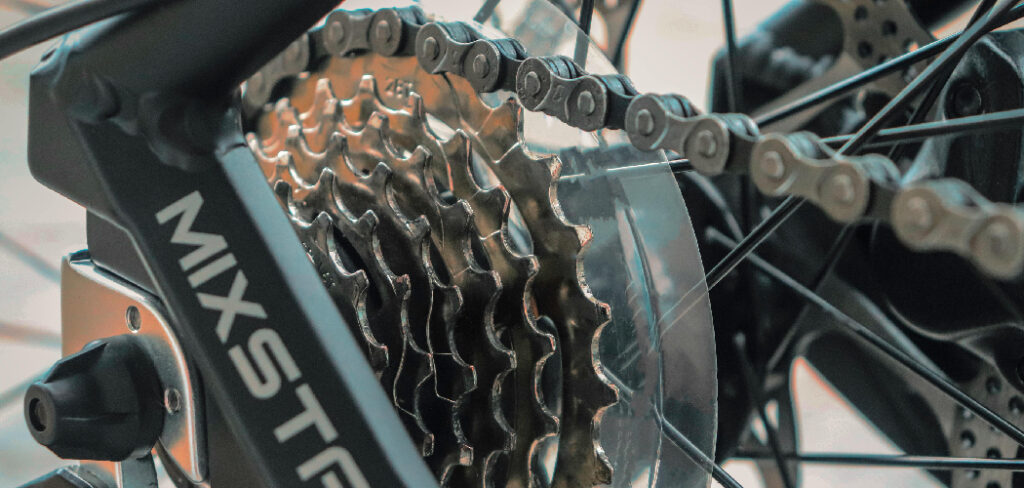
You do not need to be a professional mechanic to swap out this crucial part. With a little patience and the right instructions, anyone can learn how to mount rear derailleur assemblies safely and securely. You just need to follow a logical sequence and pay close attention to a few small details. This guide exists to walk you through the entire process from start to finish, ensuring your bike shifts perfectly on your next ride.
Why This Skill Matters
Learning to replace drivetrain components offers massive benefits for outdoor beginners and avid campers alike. When you take your bicycle into remote areas, you leave the safety net of local bike shops far behind. A rogue stick on the trail can quickly snap your shifting mechanism, leaving you stranded miles from your campsite. Knowing how to fix this issue turns a potential disaster into a minor delay.
Beyond emergency repairs, handling your own maintenance builds a deeper connection with your equipment. You will start to notice small tuning issues before they become major mechanical failures. This proactive approach to gear maintenance keeps your bike running smoothly and extends the life of your expensive drivetrain components. Ultimately, mastering this repair gives you the freedom to explore off-grid locations with total peace of mind.
Tools and Materials You Will Need
Gathering everything before you start keeps the process smooth and prevents frustration. You only need a few basic tools to complete this job correctly.
- A set of metric Allen wrenches (specifically 4mm and 5mm sizes)
- A high-quality chain tool for breaking and resizing your chain
- A new shifter cable and fresh cable housing
- Sharp cable cutters to ensure clean cuts without fraying
- A clean rag to wipe down the frame and parts
- Bicycle-specific grease for the mounting bolt
- A replacement derailleur compatible with your drivetrain
- A bike repair stand (optional, but highly recommended for convenience and comfort)
8 Step-by-Step Guide on How To Mount Rear Derailleur
Step 1 – Prepare the Bicycle and Remove the Old Chain
Start by shifting your bike into the smallest cog on the rear cassette. This releases the tension on your shift cable and makes the entire mechanism easier to handle. Next, you need to remove the chain from the drivetrain completely. Use your chain breaker tool to push a pin out of the chain, or locate the master link if your chain has one.
Once you break the chain, carefully pull it through the jockey wheels and set it aside. Removing the chain first prevents it from snapping back and pinching your fingers during the repair. It also gives you a clear, unobstructed view of the mounting area. Wipe down the entire dropout area with your clean rag to remove old grease and trail dirt.
Step 2 – Disconnect the Shift Cable from the Mechanism
Locate the pinch bolt that holds your shift cable tightly to the shifting mechanism. Use your 4mm or 5mm Allen wrench to loosen this bolt just enough to pull the cable free. You do not need to remove the pinch bolt entirely. Slide the cable out of the groove and pull it completely clear of the area.
If your cable looks frayed, rusted, or kinked, this is the perfect time to discard it. Leaving a damaged cable in place will ruin your shifting performance later. Check the cable housing for cracks or sharp bends that might cause unwanted friction. Pulling the cable out of the way ensures it will not get tangled while you unbolt the main body of the unit.
Step 3 – Unbolt and Remove the Old Unit
Grab your 5mm Allen wrench and locate the main mounting bolt attaching the unit to your frame’s derailleur hanger. Turn the wrench counter-clockwise to loosen the bolt. Support the weight of the mechanism with your free hand so it does not drop and scratch your frame.
Keep unscrewing until the threads disengage completely from the frame hanger. Carefully pull the old unit away and set it on your workbench. Take a moment to inspect the frame’s metal hanger for any obvious bends or deep gouges. A bent hanger will make it impossible to tune your gears correctly, no matter how perfectly you follow the instructions on how to mount rear derailleur assemblies.
Step 4 – Clean and Grease the Frame Hanger
A clean mounting surface guarantees a tight, secure fit for your new component. Use your rag to thoroughly wipe the threads inside the frame hanger. Remove any grit, sand, or old thread locker that might cause your new bolt to seize up.
Once the threads look perfectly clean, apply a small dab of bicycle grease directly to the threads of your new unit’s mounting bolt. This grease prevents the metal parts from fusing together over time due to sweat and rain. It also ensures you can tighten the bolt smoothly to the correct torque specification. Skipping this minor step often leads to annoying creaks and extremely difficult removals in the future.
Step 5 – Position the New Component Correctly
Pick up your fresh component and locate the small B-tension tab sitting near the main mounting bolt. This little metal lip needs to sit behind the corresponding notch on your frame hanger. Line up the mounting bolt with the threaded hole on the frame while keeping an eye on that tab.
Gently begin threading the bolt clockwise into the hanger using your fingers. Never force the bolt if you feel resistance, as cross-threading will permanently ruin the frame hanger. You want the threads to engage smoothly and easily. Double-check that the B-tension tab clears the hanger notch before you tighten anything down with your wrench.
Step 6 – Secure the Mounting Bolt
Once the threads are safely engaged and the alignment tab sits correctly, grab your 5mm Allen wrench. Tighten the mounting bolt clockwise until it feels snug against the frame. Most manufacturers recommend tightening this bolt to around 8 to 10 Newton meters of torque.
If you do not own a torque wrench, aim for a firm tightness that does not require straining your entire arm. The unit should pivot freely backward and forward on its internal spring without any side-to-side wobble. Knowing how to mount rear derailleur units tightly without over-torquing the bolt is a skill that comes with practice. Give the main body a gentle tug to ensure it sits perfectly flush against the frame hanger.
Step 7 – Reinstall the Chain and Shift Cable
Thread your chain back through the frame, around the cassette, and carefully through the two jockey wheels on your new component. Make sure the chain passes precisely over the rollers without rubbing against the metal cage tabs. Reconnect the chain using your master link or a fresh chain pin.
Next, route your shift cable down through the barrel adjuster and pull it taut under the pinch bolt. Make sure the cable rests precisely in the machined groove before you clamp it down. Tighten the pinch bolt firmly to anchor the cable in place. Snip off any excess cable wire and crimp a small metal end cap onto the tip to prevent ugly fraying.
Step 8 – Adjust the Limit Screws and Tension
The final phase requires setting your high and low limit screws to prevent the chain from falling off the cassette. Manually push the mechanism to ensure the jockey wheels align perfectly with the largest and smallest cogs. Turn the screws labeled H and L until the movement stops exactly under those outer gears.
Finally, pedal the bike and click through your shifter to check the cable tension. Use the barrel adjuster to fine-tune the shifting until the chain jumps smoothly between every single gear. Listen for any clicking or hesitation, twisting the barrel adjuster a quarter turn at a time to resolve it. Your installation is complete once the chain glides silently across the entire cassette.
Common Mistakes
Many beginners accidentally cross-thread the main mounting bolt when rushing the installation process. Pushing the bolt in at a slight angle and forcing it with a wrench strips the delicate threads inside the frame hanger. Always start threading the bolt by hand to ensure a smooth, straight entry before ever applying a tool.
Another frequent error involves routing the chain incorrectly through the pulley cage. People often thread the chain on the wrong side of the small metal tab located between the two jockey wheels. This mistake causes a terrible grinding noise and wears down the chain rapidly as you pedal. Always visually verify the chain path before reconnecting your master link.
Finally, failing to position the B-tension tab correctly behind the hanger notch ruins the shifting geometry. If the tab gets crushed against the frame instead of sitting behind the shelf, the upper jockey wheel will collide with the cassette. You must pay close attention to this small alignment detail before tightening the main bolt down.
Expert Tips
Professional mechanics always replace the shift cable and housing whenever installing a new drivetrain component. Old, gritty housing creates internal friction that masks your careful adjustments and makes shifting feel sluggish. Spending a few extra dollars on fresh cables guarantees the crisp, responsive shifting you expect from new parts.
You should also invest in an alignment gauge if you plan on doing your own repairs long-term. Even a brand-new component will shift terribly if the metal hanger attached to your frame is slightly bent. Checking the hanger alignment before installing the new part saves hours of frustrating tuning attempts. Take your time dialing in the limit screws without any cable tension attached, as this isolates the mechanical boundaries perfectly.
Frequently Asked Questions
Can I mix different brands of drivetrain components?
You generally cannot mix shifters and shifting mechanisms from different brands like Shimano and SRAM. Each manufacturer uses a specific cable pull ratio that dictates how far the mechanism moves with each click. Mixing brands will result in terrible shifting performance because the spacing will not line up with your cassette cogs. Always match your brands and speed counts exactly.
Do I need a torque wrench for this installation?
While a torque wrench provides exact numbers, you can install this part safely without one if you are careful. The mounting bolt requires a firm, snug fit without applying your full body weight. Using a standard length Allen wrench and stopping when you feel solid resistance usually achieves the correct tightness safely.
Why is my chain rubbing after installation?
A rubbing chain usually means you routed it incorrectly through the derailleur cage during reassembly. Check the small metal tabs located between the two pulley wheels to see if the chain is dragging across them. If the routing is correct, your limit screws might need adjustment to perfectly center the jockey wheels under your gears.
Should I grease the threads before installation?
You should always apply a small amount of bicycle-specific grease or anti-seize to the mounting bolt threads. This prevents galvanic corrosion between the steel bolt and the aluminum frame hanger. Greasing the threads ensures you can easily remove the component years later when it eventually needs replacement or servicing.
How do I know if my frame hanger is bent?
If you struggle to get your gears to shift smoothly despite setting perfect cable tension, your hanger is likely bent. You might visually notice the pulley cage angling slightly toward the wheel spokes instead of hanging perfectly straight. A local shop can check this quickly, or you can purchase a dedicated alignment tool to measure it yourself.
Conclusion
Taking charge of your bicycle maintenance empowers you to ride further and explore with greater confidence. Replacing drivetrain components might seem intimidating at first glance, but it truly boils down to a sequence of simple, logical steps. By gathering the proper tools and paying attention to alignment details, you eliminate the mystery behind modern bicycle mechanics. You no longer have to rely solely on crowded repair shops to keep your equipment running in peak condition.
Every time you hit the trail with gears you tuned yourself, you build trust in your own mechanical abilities. Remember to double-check your chain routing, grease your threads, and set your limit screws carefully before riding. Knowing how to mount rear derailleur assemblies gives you a permanent, valuable skill that applies to almost every bicycle you will ever own. Keep practicing these adjustments, stay patient with the process, and enjoy the crisp, silent shifting on your next great outdoor adventure.

About Caleb
Caleb Merritt is a Virginia-based outdoor writer and gear analyst who has spent over a decade sleeping on the ground, crossing mountain passes, and obsessively shaving grams off his pack weight. He holds a Bachelor of Science in Environmental Science from James Madison University, where he also served as president of the university’s outdoor recreation club. After graduating, he spent three years as a wilderness educator with a backcountry youth program in the Shenandoah Valley — teaching Leave No Trace ethics, backcountry navigation, and campcraft — before moving into full-time writing in 2018.
His work focuses on one core belief: the best gear is the gear you understand. Whether he’s doing a side-by-side weight comparison of ultralight shelters or writing a beginner’s guide to building a sub-20-lb base weight kit, Caleb writes with the same directness you’d expect from a trusted trail partner. He has logged more than 4,000 miles across iconic routes including the John Muir Trail, the Wind River Range, Vermont’s Long Trail, and the Collegiate Peaks Loop in Colorado.
Areas of Expertise
- Ultralight backpacking systems and base weight optimization
- Tent, tarp, and shelter testing across three-season and shoulder-season conditions
- Sleeping bag and quilt temperature rating verification
- Backpacking nutrition, meal planning, and calorie-per-ounce analysis
- Leave No Trace principles and wilderness ethics
- Campfire safety, bear country protocols, and water treatment methods
- Gear care, repair, and long-term durability assessment
Education
James Madison University — B.S. in Environmental Science, 2015
During his time at JMU, Caleb served as President of the Outdoor Recreation Club, where he planned and led more than 30 backcountry trips annually across the Blue Ridge Mountains and Appalachian Trail corridor. The role sharpened his ability to assess gear performance under real conditions, manage group safety in remote environments, and develop the kind of practical trail knowledge that no classroom can teach.
Professional Experience
Gear Writer & Senior Contributor — [campeox.com]
Produces in-depth gear reviews, buyer’s guides, and how-to content across backpacking, camping, and ultralight hiking categories. Tests all gear in real field conditions before publishing recommendations.
Wilderness Educator & Trip Leader — Shenandoah Backcountry Youth Program — 2015–2018 Led multi-day backcountry expeditions for teens and young adults throughout Shenandoah National Park and George Washington National Forest. Taught LNT principles, orienteering, first aid awareness, and campcraft fundamentals.
Outdoor Recreation Club President — James Madison University — 2013–2015 Organized and led university-sponsored hiking, backpacking, and camping trips in the Blue Ridge Mountains and Appalachian Trail corridor. Managed club budget, safety protocols, and trip logistics for a membership of 120+ students.
Editorial Standards
Every piece of gear Caleb recommends has been personally tested in the field — not just unboxed and described. His review process includes a minimum of two overnight trips per shelter, a full-season evaluation for sleep systems, and side-by-side comparisons wherever possible. He does not accept payment for positive reviews. Affiliate relationships, where they exist, are always disclosed in accordance with FTC guidelines.
All factual claims about gear specifications, trail distances, and safety recommendations are cross-referenced against manufacturer data sheets and established sources such as the Leave No Trace Center for Outdoor Ethics and the American Hiking Society before publication.