Nothing ruins the look of a fresh pair of sneakers or sturdy hiking boots quite like dirty, mud-caked strings tying them together. Whether you just returned from a long weekend camping trip or simply want to refresh your everyday walking shoes, restoring those strings makes a massive difference in your footwear’s overall appearance.
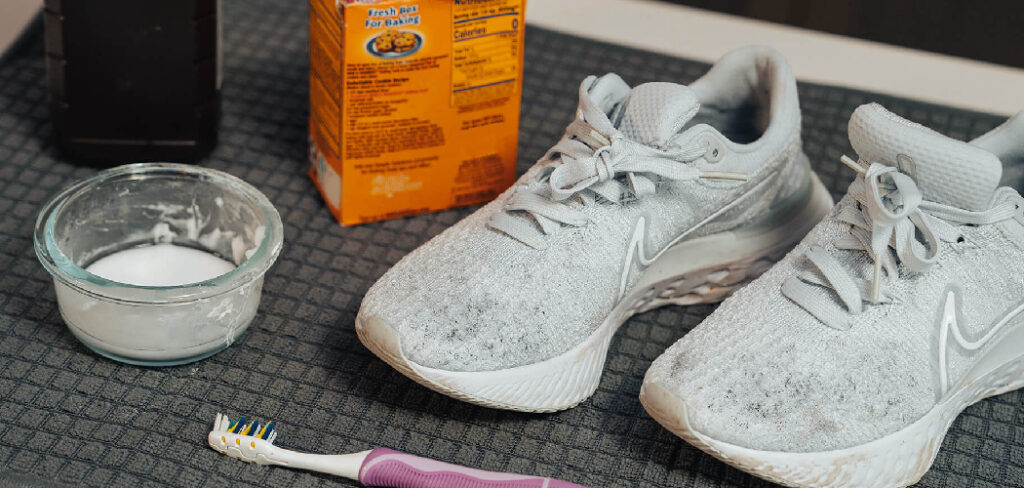
Figuring out exactly how to clean your shoelaces might seem like an afterthought, but it is actually a vital skill for anyone who wants their gear to last longer and look better. You do not need expensive specialized equipment to achieve a crisp, like-new finish. A few common household items and the right technique will completely transform them. This guide will walk you through the precise steps, common pitfalls, and expert methods to completely revitalize your footwear accessories.
Why Clean Shoelaces Matter for Outdoor Beginners
For campers, hikers, and outdoor enthusiasts, gear maintenance goes far beyond aesthetics. Your boots take a beating on the trail, absorbing dirt, muddy water, and abrasive grit. When you ignore your laces, that fine grit works its way into the woven fibers. Over time, the constant friction of tying and untying grinds those particles deeper, acting like microscopic sandpaper that slowly tears the fabric apart.
Eventually, neglected strings will snap when you pull them tight, which is the absolute last thing you want while miles away from your campsite. Keeping them washed preserves their structural integrity and elasticity. Clean fibers hold knots much more securely than stiff, mud-crusted ones. Plus, taking care of the small details builds a strong foundation of respect for your outdoor equipment, ensuring everything you own stays reliable when you need it most.
Tools and Materials You’ll Need
Gathering the right supplies makes the washing process incredibly smooth and efficient. You probably already have everything required hiding in your bathroom or kitchen cabinets. Set up your workspace near a sink with the following items ready to go:
- A small bowl or basin for holding water and cleaning liquid
- Mild laundry detergent or standard liquid dish soap
- A soft-bristled tool, like an old toothbrush or a specialized sneaker brush
- Warm water for mixing and rinsing
- A dry, highly absorbent microfiber towel or thick cotton rag
- Baking soda (Optional: highly recommended for brightening white strings and eliminating stubborn odors)
8 Step-by-Step Guide on How to Clean Your Shoelaces
Step 1 – Removing the Laces Carefully
You must completely separate the strings from your shoes before attempting any washing. Leaving them threaded through the eyelets prevents you from reaching the hidden sections that gather the most grime. Carefully unlace your boots or sneakers from the top down, gently pulling the aglets through each hole.
If you encounter hard, dried mud clogging an eyelet, do not forcefully yank the string out. Pulling too hard can strip the plastic aglet right off the end, which leads to immediate fraying. Instead, wiggle the tip gently to break up the dried dirt. Once you free both strings, lay them flat on a table to inspect them for severe damage, deep stains, or weak spots.
Step 2 – Brushing Off Loose Dirt
Before introducing any water to the fabric, you need to eliminate as much dry debris as possible. Wetting thick mud only pushes the dark pigments deeper into the woven fibers, creating a much larger stain. Take your dry, soft-bristled toothbrush and run it briskly along the entire length of the fabric.
Apply moderate pressure, moving the bristles in one consistent direction to flick away the dried soil. Pay special attention to the areas that were laced tightest against the shoe’s tongue, as these spots accumulate dense pockets of grit. If you are working with thick hiking boot laces, stretch the material slightly while brushing to dislodge sand trapped inside the inner weave.
Step 3 – Preparing the Cleaning Solution
Creating the right chemical mixture ensures you lift dirt without damaging the synthetic or cotton fibers. Fill your small bowl with about two cups of warm water. Avoid using boiling hot water, as extreme heat can melt the plastic aglets or cause brightly colored fabrics to bleed and fade.
Squeeze in roughly one tablespoon of mild laundry detergent or liquid dish soap. If you are learning how to clean your shoelaces for the first time, simple dish soap works incredibly well because it aggressively breaks down the oily residues left behind by asphalt and trail dirt. Stir the soapy water vigorously with your toothbrush until a thick layer of suds forms on the surface.
Step 4 – Soaking for Deep Penetration
Submerge the dirty strings completely into your prepared soapy basin. Push them down until every inch of the fabric absorbs the warm liquid. This soaking phase does the heavy lifting for you, allowing the surfactants in the soap to surround and detach deeply embedded soil particles.
Leave the bowl completely undisturbed for at least twenty minutes. For heavily soiled gear that survived a stormy weekend in the woods, you might want to extend this soaking time to an hour. Watch as the water slowly turns brown—that is visual proof the soap is actively drawing the grime out of the tight weave.
Step 5 – Scrubbing Stubborn Stains
After a thorough soak, pull the strings out of the murky water and place them flat on your clean sink counter. Dip your toothbrush back into the soapy water to load up the bristles. Hold one end of the string firmly against the counter and scrub the fabric using short, aggressive strokes.
Work your way down the entire length, flipping the material over to ensure you scrub both sides evenly. The friction from the bristles will lift any remaining discoloration. If you notice a stubborn grease stain refusing to budge, dab a tiny drop of pure detergent directly onto the spot, massage it in with your thumb, and scrub again.
Step 6 – Rinsing Away Soap Residue
Once you are satisfied with the stain removal, it is time to flush out the detergent. Leaving soap trapped in the fibers will dry into a stiff, sticky residue that acts as a magnet for future dust. Turn on your sink faucet, adjusting the temperature to a lukewarm flow.
Hold the strings directly under the running water, squeezing them repeatedly as the water rushes over the fabric. You will see cloudy, soapy water draining out at first. Keep massaging the material under the stream until the water runs completely clear and the fabric no longer feels slippery or slimy between your fingertips.
Step 7 – Squeezing Out Excess Water
You must remove as much moisture as possible before moving on to the drying phase. Do not grab the strings and wring them out with a violent twisting motion. Twisting tightly stretches the woven fibers and permanently distorts their shape, leaving you with lumpy, uneven strings.
Instead, lay your microfiber towel flat and place the wet strings right in the center. Fold the thick towel over the fabric and press down firmly with the palms of your hands. The microfiber will instantly wick away the bulk of the moisture. Roll the towel up like a tight burrito and give it one final, gentle squeeze.
Step 8 – Air Drying Properly
The final and most crucial action is allowing the material to dry safely. Hang the damp strings over a towel rack, a shower rod, or a clothesline in a well-ventilated room. Gravity will pull the remaining moisture down, helping the fabric dry straight and true.
Never toss them into your mechanical clothes dryer. The intense, tumbling heat will warp the synthetic fibers, shrink cotton varieties, and completely destroy the plastic aglets on the tips. Understanding exactly how to clean your shoelaces includes practicing patience. Depending on the thickness of the weave, they should feel completely dry to the touch and ready to re-lace within a few hours.
Common Mistakes When Handling Footwear Accessories
Many people accidentally ruin their favorite footwear accessories by making simple, avoidable errors during the washing process. The most frequent mistake is using pure, undiluted bleach on white strings. While bleach seems like a logical choice for whitening, the harsh chemical reaction actually causes the delicate fibers to turn a permanent, sickly yellow over time. It also weakens the structural integrity of the weave, making them highly susceptible to snapping.
Another major error involves ignoring the aglets. Vigorously scrubbing those small plastic tips with a hard brush will scrape them right off, leaving the ends to fray uncontrollably. Once an aglet is gone, threading the string back through an eyelet becomes an incredibly frustrating chore.
Finally, people frequently try to speed up the drying process using hair dryers or radiators. Direct, concentrated heat melts the synthetic blends commonly used in modern outdoor gear. It can also warp the shape, leaving the fabric permanently curled. Air drying remains the only safe method to preserve the original length, color, and strength of the material. Rushing the process almost always results in a trip to the store for a replacement pair.
Expert Tips for Lasting Freshness
To elevate your washing routine, consider incorporating a baking soda paste for brilliant whites. Mix equal parts baking soda and water until it forms a thick, spreadable paste. Coat your white strings in this mixture before the scrubbing phase and let it sit in direct sunlight for an hour. The combination of baking soda and natural UV light naturally bleaches out tough organic stains like grass and mud.
If you hate washing them by hand, you can use a washing machine, but you must take precautions. Always place the strings inside a specialized mesh delicates bag or a zippered pillowcase before running the cycle. Loose strings will inevitably wrap around the washing machine agitator, causing damage to both the machine and the fabric. Wash them on a delicate, cold-water cycle alongside soft items like towels to provide gentle friction without harsh tangling.
Frequently Asked Questions
Can I put dirty shoelaces in the washing machine?
Yes, you can absolutely use a washing machine, but you must secure them first. Place the unlaced strings into a tightly zippered mesh laundry bag or a tied-off pillowcase. This prevents them from wrapping around the machine’s central agitator or slipping into drainage holes. Always use a gentle cycle with cold water to prevent shrinking or damaging the plastic tips.
How do I get white laces bright again without bleach?
Baking soda combined with hydrogen peroxide works wonders for restoring a bright white finish. Mix one tablespoon of baking soda with a splash of hydrogen peroxide to form a paste. Coat the fabric thoroughly, scrub it in with a soft brush, and let it sit for thirty minutes before rinsing. This gentle chemical reaction lifts dark stains without turning the fibers yellow.
Why do my laces feel stiff after I wash them?
Stiffness usually happens because excess soap remains trapped inside the woven fibers. When the soapy water evaporates, it leaves behind a rigid, crusty film. To fix this issue, you need to rinse the fabric much more thoroughly under warm running water. Massage the material until the water runs completely clear and all slippery textures vanish.
How often should I wash my shoelaces?
For casual, everyday sneakers, washing them once every two or three months keeps them looking fresh. However, if you wear hiking boots on muddy trails, you should wash them immediately after returning from your trip. Leaving wet mud to dry onto the fabric degrades the structural strength and makes stains much harder to remove later.
What should I do if the plastic aglet breaks off?
If you lose an aglet, you can easily repair the frayed end using household items. Wrap the tip tightly with a piece of clear adhesive tape, twisting it into a sharp point. Alternatively, you can apply a small drop of clear nail polish or super glue to the frayed end, twisting the fibers together until it hardens into a durable tip.
Conclusion
Taking the time to refresh your footwear accessories is a simple, highly rewarding task that breathes instant life back into your favorite shoes. You do not need professional services or expensive chemical cleaners to achieve excellent results. By removing loose dirt, using a mild soapy soak, scrubbing with care, and allowing the fabric to air dry naturally, you protect your outdoor gear from premature wear and tear.
Whether you are prepping your hiking boots for the next big mountain trail or just tidying up your daily walking sneakers, mastering this easy maintenance routine pays off immensely. The next time you notice your footwear looking a bit tired and dull, do not immediately rush out to buy replacements. Knowing exactly how to clean your shoelaces empowers you to restore their original bright, sturdy condition right at your bathroom sink. Grab your soft brush, mix up some warm soapy water, and give those dirty strings the deep wash they desperately need.

About Caleb
Caleb Merritt is a Virginia-based outdoor writer and gear analyst who has spent over a decade sleeping on the ground, crossing mountain passes, and obsessively shaving grams off his pack weight. He holds a Bachelor of Science in Environmental Science from James Madison University, where he also served as president of the university’s outdoor recreation club. After graduating, he spent three years as a wilderness educator with a backcountry youth program in the Shenandoah Valley — teaching Leave No Trace ethics, backcountry navigation, and campcraft — before moving into full-time writing in 2018.
His work focuses on one core belief: the best gear is the gear you understand. Whether he’s doing a side-by-side weight comparison of ultralight shelters or writing a beginner’s guide to building a sub-20-lb base weight kit, Caleb writes with the same directness you’d expect from a trusted trail partner. He has logged more than 4,000 miles across iconic routes including the John Muir Trail, the Wind River Range, Vermont’s Long Trail, and the Collegiate Peaks Loop in Colorado.
Areas of Expertise
- Ultralight backpacking systems and base weight optimization
- Tent, tarp, and shelter testing across three-season and shoulder-season conditions
- Sleeping bag and quilt temperature rating verification
- Backpacking nutrition, meal planning, and calorie-per-ounce analysis
- Leave No Trace principles and wilderness ethics
- Campfire safety, bear country protocols, and water treatment methods
- Gear care, repair, and long-term durability assessment
Education
James Madison University — B.S. in Environmental Science, 2015
During his time at JMU, Caleb served as President of the Outdoor Recreation Club, where he planned and led more than 30 backcountry trips annually across the Blue Ridge Mountains and Appalachian Trail corridor. The role sharpened his ability to assess gear performance under real conditions, manage group safety in remote environments, and develop the kind of practical trail knowledge that no classroom can teach.
Professional Experience
Gear Writer & Senior Contributor — [campeox.com]
Produces in-depth gear reviews, buyer’s guides, and how-to content across backpacking, camping, and ultralight hiking categories. Tests all gear in real field conditions before publishing recommendations.
Wilderness Educator & Trip Leader — Shenandoah Backcountry Youth Program — 2015–2018 Led multi-day backcountry expeditions for teens and young adults throughout Shenandoah National Park and George Washington National Forest. Taught LNT principles, orienteering, first aid awareness, and campcraft fundamentals.
Outdoor Recreation Club President — James Madison University — 2013–2015 Organized and led university-sponsored hiking, backpacking, and camping trips in the Blue Ridge Mountains and Appalachian Trail corridor. Managed club budget, safety protocols, and trip logistics for a membership of 120+ students.
Editorial Standards
Every piece of gear Caleb recommends has been personally tested in the field — not just unboxed and described. His review process includes a minimum of two overnight trips per shelter, a full-season evaluation for sleep systems, and side-by-side comparisons wherever possible. He does not accept payment for positive reviews. Affiliate relationships, where they exist, are always disclosed in accordance with FTC guidelines.
All factual claims about gear specifications, trail distances, and safety recommendations are cross-referenced against manufacturer data sheets and established sources such as the Leave No Trace Center for Outdoor Ethics and the American Hiking Society before publication.