Paracord might be the most useful thing in your pack that you never think about. This lightweight, super-strong cordage can rig a shelter, fix a broken strap, or hang your food out of a bear’s reach. Learning how to use paracord when hiking turns a simple bundle of rope into a toolkit for almost any trail problem.
Originally built for parachutes, 550 cord earns its name from a tensile strength of around 550 pounds, so it handles serious loads without snapping. For beginners, mastering a few knots and uses builds real confidence in the backcountry. This guide walks first-time hikers through practical, hands-on ways to carry and use paracord, so you’re ready for repairs, shelter, and emergencies wherever the trail takes you.
Why Learning Paracord Skills Matters on the Trail
Paracord solves problems you can’t always predict. A snapped bootlace, a torn tent, or a sudden need for shelter can turn a fun hike into a stressful one. With a few feet of survival cord and a couple of knots, you handle these setbacks calmly.
For campers and outdoor beginners, this skill delivers huge value for almost no weight. A 50-foot hank weighs next to nothing yet unlocks dozens of uses, from tarp rigging to gear lashing.
There’s a safety side too. In an emergency, paracord can build a splint, create a tourniquet in a pinch, or mark a trail. Knowing your cordage means you carry less specialized gear and adapt on the fly, which is exactly what smart outdoor safety looks like.
Tools and Materials You’ll Need
Gather a few basics before you head out, and keep them easy to reach in your pack:
- Genuine 550 paracord (at least 50 feet), ideally labeled Type III with seven inner strands
- A sharp knife or scissors to cut cord cleanly
- A lighter or matches to melt and seal cut ends so they don’t fray
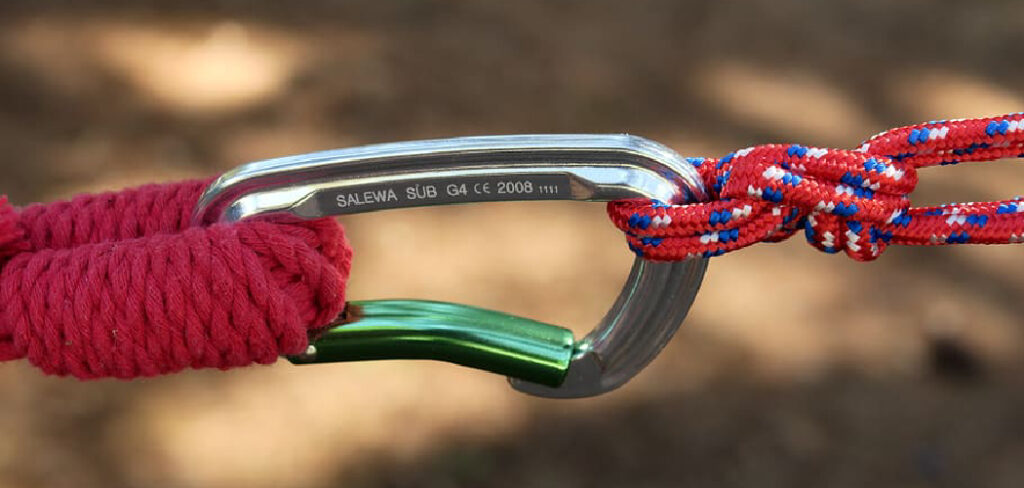
- A pair of small carabiners for quick attachment and adjustable tension
- A tarp or emergency blanket if you plan to practice shelter setups
- Work gloves to protect your hands when pulling cord tight
- Optional: a cord winder or small spool to keep your paracord tangle-free and ready to deploy
Test your cord at home first. Genuine 550 cord holds its rating, while cheap knockoffs snap under strain. A little quality control now saves you real trouble later on the trail.
7 Step-by-Step Guide on How to Use Paracord When Hiking
Step 1 – Choose and Prepare Your Paracord
Start with the right cordage before you ever leave home. Pick genuine Type III 550 cord, which packs seven inner strands inside a woven sheath for maximum tensile strength.
Cut the length you need with a sharp knife, then hold a flame to each raw end for a second or two. The nylon melts and seals, stopping the frayed unraveling that ruins cheap rope.
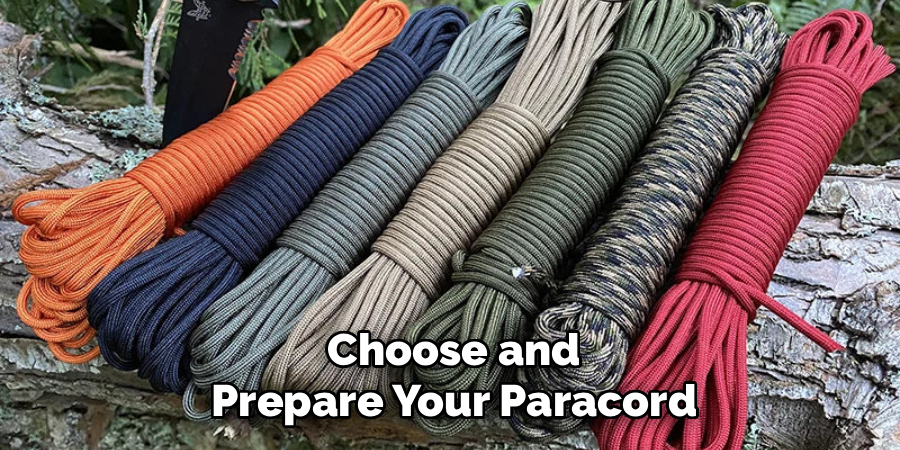
Feel the difference between quality cord and flimsy imitations. Real 550 feels smooth yet firm, with a springy core you can pull apart for fine tasks. Learning how to use paracord when hiking begins with trusting your material, so buy from reputable brands and test a short piece under load in your backyard first.
Step 2 – Learn the Essential Knots
A few reliable paracord knots handle almost everything you’ll face outdoors. Focus on three to start: the bowline for a fixed loop, the taut-line hitch for adjustable tension, and the square knot for joining two ends.
Practice them at home until your fingers move without thinking. Sit on the couch, tie each knot ten times, and feel the rope slide and cinch into place.
The taut-line hitch shines for tarp rigging, since you can slide it to tighten or loosen a guy line. The bowline never jams, even under heavy strain, so it’s perfect for hanging gear. Muscle memory matters here. When rain falls and your fingers go cold, well-practiced knots come together fast and hold firm.
Step 3 – Set Up a Shelter or Tarp
When weather rolls in, paracord becomes your shelter’s backbone. String a ridgeline between two trees using a bowline on one end and a taut-line hitch on the other, so you can pull it drum-tight.
Drape your tarp over the line, then run guy lines from each corner to stakes or rocks on the ground. The taut-line hitch lets you fine-tune the tension until the fabric stops flapping in the wind.
Listen for that satisfying quiet when a tarp sits taut and stable. A loose setup snaps and sags, letting rain pool and drip through. Angle one side lower to shed water, and you’ll stay dry through a surprise downpour. This is one of the most rewarding uses of cordage in the field.
Step 4 – Hang Your Food and Gear
Keeping food away from animals protects both you and the wildlife. Toss one end of your paracord over a sturdy branch about 15 feet up, then tie your food bag to the line.
Hoist the bag until it hangs at least 10 feet off the ground and several feet from the trunk. Secure the working end to a nearby tree with a couple of half hitches.
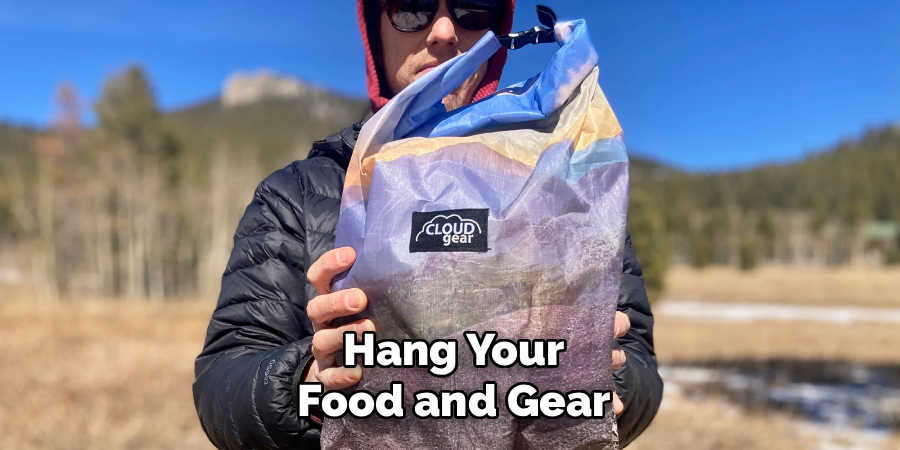
You’ll feel the cord bite into your palms as you haul, so gloves help here. A proper bear hang keeps curious critters from raiding your snacks overnight. The same trick works for drying wet socks or hanging a lantern around camp. Strong, thin cordage makes these small jobs simple and keeps your gear organized and off the damp ground.
Step 5 – Handle Quick Gear Repairs
Gear fails at the worst moments, and paracord bridges the gap. A snapped backpack strap, a broken shoelace, or a cracked tent pole all yield to a bit of clever lashing.
For a busted strap, thread cord through the anchor points and tie it off snugly. For a split pole, splint it with a stick and wrap cord tightly around both, cinching it like a bandage.
Pull the inner strands out for finer work, like stitching a torn seam or replacing a zipper pull. These thin threads are surprisingly strong. Feel how a firm wrap restores stability to wobbly gear, letting you finish your hike instead of turning back. Knowing how to use paracord when hiking means you improvise repairs that keep you moving forward.
Step 6 – Create Emergency Solutions
When things go sideways, cordage can genuinely help. For a sprained ankle, lash a splint from two straight sticks and wraps of cord to steady the joint until you reach help.
You can build a makeshift stretcher, rig a sling for an injured arm, or fashion a tourniquet from the sheath in dire situations. Practice these before you need them, because fumbling under stress wastes precious time.
Paracord also marks a trail. Tie bright pieces to branches so rescuers, or you, can follow the path back. The gentle tug of a secure knot brings reassurance when nerves run high. Treat your survival cord as a genuine safety tool, not just camp convenience, and it may one day get you out of a serious jam.
Step 7 – Store and Manage Your Cord
Tangled cord is useless cord, so storage matters more than beginners expect. Wind your paracord into a tidy hank or wrap it around a small spool after each use.
A quick-deploy chain sinnet works well too. This series of loops holds a long length compactly, then pulls free in seconds when you need it. Practice unspooling until it flows smoothly.
Keep your cord dry between trips, since trapped moisture can weaken fibers and breed mildew over time. Store it in an outer pocket where you can grab it fast during a rainstorm or repair. Feel the neat coil in your hand and know that a few organized feet of cordage stand ready for whatever the trail throws at you.
Common Mistakes When Using Paracord on the Trail
Beginners tend to repeat the same avoidable errors, and knowing them saves you frustration. The biggest mistake is buying fake paracord. Plenty of cheap “550 cord” lacks the seven inner strands and snaps far below its claimed rating. Always buy genuine Type III from a trusted brand and test it before you rely on it.
Another common slip is neglecting to seal cut ends. Skip the flame, and your cord frays into a useless, unraveling mess within a few uses. A two-second melt with a lighter locks the fibers and extends the cord’s life dramatically.
Many hikers also carry paracord without learning any knots. A rope you can’t tie securely is just extra weight. Practice a few core knots at home so your hands know them cold, literally, when fingers stiffen in bad weather.
Poor storage trips people up too. A tangled ball wastes time you may not have during an emergency. Wind it neatly instead. Finally, some beginners overload their cord, expecting one thin line to hold impossible weight. Respect the tensile strength limits, double up strands for heavy loads, and your cordage will never let you down.
Expert Tips
Want to get more from every foot of cord? Carry paracord woven into a bracelet or belt. You’ll always have 10 to 15 feet on hand without thinking about it, ready to unravel the moment you need cordage.
Learn to gut your cord for detailed work. The thin inner strands make excellent fishing line, dental floss, or thread for stitching gear. One length of 550 cord holds surprising versatility inside its sheath.
Color matters more than you’d guess. Choose bright orange or reflective cord so you spot it easily and can use it as emergency trail markers. Finally, always cut a little more than you think you need. Extra length gives you options, and trimming down is far easier than wishing you had more.
Frequently Asked Questions
How much paracord should I bring on a hike?
For a day hike, 25 to 50 feet covers most needs, like quick repairs and hanging gear. For overnight or backcountry trips, carry 50 to 100 feet so you can rig a shelter and still handle emergencies. Paracord weighs very little, so a bit extra never hurts. A woven bracelet adds another 10 feet you’ll always have on you.
What’s the difference between real and fake 550 cord?
Genuine Type III 550 cord contains seven inner strands, each made of two or three plies, wrapped in a tough nylon sheath. It reliably holds around 550 pounds. Fake versions often have fewer strands, cotton fillers, or thin cores, and they snap well below that rating. Always buy from reputable brands and test a piece under load before trusting it on the trail.
Do I really need to know knots to use paracord?
Yes, knots unlock most of paracord’s usefulness. Without them, your cord is just a floppy line you can’t secure. Learn three basics: the bowline, the taut-line hitch, and the square knot. These handle shelters, gear hanging, and joining lengths. Practice at home until they feel automatic, so you can tie them quickly even when your hands are cold or wet on the trail.
Can paracord be used in a real emergency?
Absolutely. Paracord builds splints, slings, and makeshift stretchers, and it can secure a tourniquet in dire situations. The inner strands work as fishing line, suture thread, or snare cord. You can also cut bright pieces to mark a trail for rescuers. Practice these techniques before you need them, since improvising confidently under stress could genuinely help you or a companion get to safety.
How do I keep my paracord from fraying?
Seal every cut end with heat. Hold a lighter or match to the nylon for a second or two until it melts, then let it cool into a solid tip. This fuses the fibers and stops the sheath from unraveling. For extra durability, roll the softened end gently between your fingers, but be careful, since melted nylon gets very hot and can burn skin.
Conclusion
Paracord earns its place in your pack many times over. This lightweight cordage rigs shelters, repairs broken gear, hangs your food, and even helps in emergencies, all from a simple bundle of rope. The key is preparation. Buy genuine 550 cord, seal your cut ends, and practice a few core knots until your fingers know them without thinking.
On the trail, use the taut-line hitch for tarp rigging, the bowline for secure loops, and clever lashing for quick repairs. Store your cord neatly so it deploys fast when a storm rolls in or a strap snaps. Respect its tensile strength, double up for heavy loads, and you’ll rarely be caught without a solution.
Now that you understand how to use paracord when hiking, you’re ready to face the trail with real confidence. A few feet of survival cord transforms into a shelter, a repair kit, and a safety line whenever you need it. Pack it smart, practice your knots, and head out knowing you’re prepared for whatever the adventure brings.

About Caleb
Caleb Merritt is a Virginia-based outdoor writer and gear analyst who has spent over a decade sleeping on the ground, crossing mountain passes, and obsessively shaving grams off his pack weight. He holds a Bachelor of Science in Environmental Science from James Madison University, where he also served as president of the university’s outdoor recreation club. After graduating, he spent three years as a wilderness educator with a backcountry youth program in the Shenandoah Valley — teaching Leave No Trace ethics, backcountry navigation, and campcraft — before moving into full-time writing in 2018.
His work focuses on one core belief: the best gear is the gear you understand. Whether he’s doing a side-by-side weight comparison of ultralight shelters or writing a beginner’s guide to building a sub-20-lb base weight kit, Caleb writes with the same directness you’d expect from a trusted trail partner. He has logged more than 4,000 miles across iconic routes including the John Muir Trail, the Wind River Range, Vermont’s Long Trail, and the Collegiate Peaks Loop in Colorado.
Areas of Expertise
- Ultralight backpacking systems and base weight optimization
- Tent, tarp, and shelter testing across three-season and shoulder-season conditions
- Sleeping bag and quilt temperature rating verification
- Backpacking nutrition, meal planning, and calorie-per-ounce analysis
- Leave No Trace principles and wilderness ethics
- Campfire safety, bear country protocols, and water treatment methods
- Gear care, repair, and long-term durability assessment
Education
James Madison University — B.S. in Environmental Science, 2015
During his time at JMU, Caleb served as President of the Outdoor Recreation Club, where he planned and led more than 30 backcountry trips annually across the Blue Ridge Mountains and Appalachian Trail corridor. The role sharpened his ability to assess gear performance under real conditions, manage group safety in remote environments, and develop the kind of practical trail knowledge that no classroom can teach.
Professional Experience
Gear Writer & Senior Contributor — [campeox.com]
Produces in-depth gear reviews, buyer’s guides, and how-to content across backpacking, camping, and ultralight hiking categories. Tests all gear in real field conditions before publishing recommendations.
Wilderness Educator & Trip Leader — Shenandoah Backcountry Youth Program — 2015–2018 Led multi-day backcountry expeditions for teens and young adults throughout Shenandoah National Park and George Washington National Forest. Taught LNT principles, orienteering, first aid awareness, and campcraft fundamentals.
Outdoor Recreation Club President — James Madison University — 2013–2015 Organized and led university-sponsored hiking, backpacking, and camping trips in the Blue Ridge Mountains and Appalachian Trail corridor. Managed club budget, safety protocols, and trip logistics for a membership of 120+ students.
Editorial Standards
Every piece of gear Caleb recommends has been personally tested in the field — not just unboxed and described. His review process includes a minimum of two overnight trips per shelter, a full-season evaluation for sleep systems, and side-by-side comparisons wherever possible. He does not accept payment for positive reviews. Affiliate relationships, where they exist, are always disclosed in accordance with FTC guidelines.
All factual claims about gear specifications, trail distances, and safety recommendations are cross-referenced against manufacturer data sheets and established sources such as the Leave No Trace Center for Outdoor Ethics and the American Hiking Society before publication.