You’re deep on a trail, sun on your back, when a sudden sharp sting hits your ankle. You look down and spot a snake slipping away into the brush. Your heart races. What now? A snake bite is scary, but panic makes things worse. Knowing how to treat a snake bite while hiking can keep you calm, protect the wound, and get you to help faster.
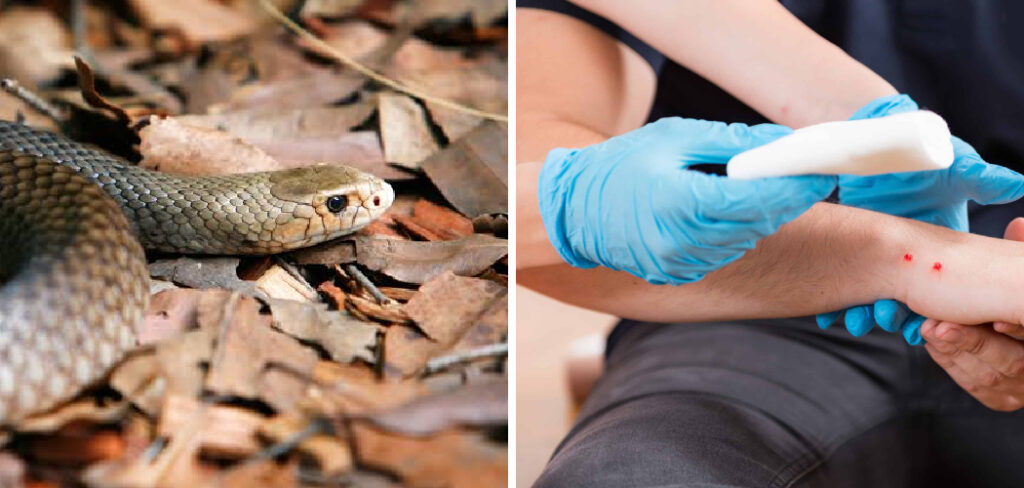
Most bites happen far from the nearest road, so the choices you make in those first few minutes really matter. The right moves slow the venom’s spread and buy precious time. This guide walks you through everything, step by step, from staying calm to getting emergency care, so you can respond with confidence if a snake ever strikes.
Why Treating a Snake Bite While Hiking Matters
Snakes live in nearly every wild place you’ll hike, from desert washes to shady forests. Most want nothing to do with you, but accidents happen when a foot lands too close. For campers and outdoor beginners, knowing snakebite first aid isn’t just handy, it can save a life.
A venomous bite is a true emergency. The venom can damage tissue, affect your blood, and, in rare cases, become deadly without treatment. The faster you act, the better your odds of a full recovery.
Learning this skill also steadies your nerves. When you know what to do, you stop panicking and start helping. That calm response keeps your heart rate down, which actually slows how fast venom moves through your body. Preparation turns fear into action.
Tools and Materials You’ll Need
You don’t need fancy gear to handle a snake bite well. A few simple items in your pack cover the basics, and most fit in a small first-aid kit.
- A charged phone or satellite communicator to call for help
- A permanent marker or pen to mark swelling and note the time
- Clean water and mild soap to gently wash the wound
- Sterile gauze and medical tape to lightly cover the bite
- An elastic bandage for certain bites, if you’re trained to use one
- A watch or phone clock to track symptoms over time
- A whistle to signal rescuers if you can’t move
One optional item worth packing is a small notepad. Jotting down the time of the bite, symptoms, and any changes gives medical teams a clear picture the moment you reach them.
Step-by-Step Guide on How to Treat a Snake Bite While Hiking
When a snake strikes, every second counts. Follow these steps in order, and remember that knowing how to treat a snake bite while hiking comes down to staying calm and moving toward help quickly.
Step 1 – Move Away From the Snake
The moment you’re bitten, back away slowly from the snake. It may still be nearby, and a second bite is the last thing you need. Give it plenty of space to retreat.
Don’t try to catch it, kill it, or take a close-up photo. Chasing the snake wastes time and puts you at real risk. If you can safely note its color and pattern from a distance, that’s enough.
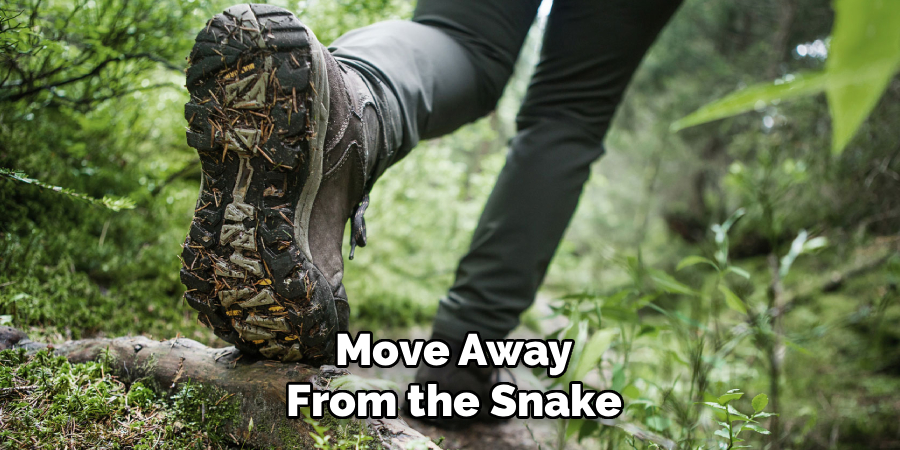
Find a safe spot a few feet away and sit down. Your legs may feel shaky and your pulse may pound in your ears. That’s normal. Take a slow breath and focus on the next steps rather than the fear.
Step 2 – Stay Calm and Still
Your instinct will be to rush, but movement pumps venom through your body faster. The calmer and stiller you stay, the slower it spreads.
Sit or lie down in a comfortable position. Breathe slowly and deeply, counting each breath if it helps quiet your mind. You might feel your heart hammering, but steady breathing helps bring it down.
If you’re with others, ask someone to stay by your side and keep you calm. A reassuring voice makes a huge difference when you’re scared.
Try to limit any unnecessary walking. If you must move to reach safety, walk slowly and rest often. Your goal is to keep your effort as low as possible.
Step 3 – Call for Emergency Help
Get help on the way as soon as you can. Dial your local emergency number, and if you have no signal, use a satellite communicator or send someone to find one.
Speak clearly. Share your location, the time of the bite, and any details about the snake. Rescuers need this to plan the fastest response and prepare the right antivenom.
If you’re alone and truly stuck, blow a whistle in bursts of three to signal for help. Sound carries far in the wilderness.
Stay on the line if you can. The dispatcher may guide you through wilderness medicine basics while help travels your way. Their calm instructions can steady your own nerves too.
Step 4 – Remove Tight Items Right Away
Snake bites swell fast, sometimes within minutes. Anything snug on the bitten limb can cut off circulation as the tissue puffs up.
Slip off rings, watches, bracelets, and anklets near the bite. Loosen tight boot laces or roll down a sock if the bite is on your leg or foot. Do this quickly, before swelling makes it impossible.
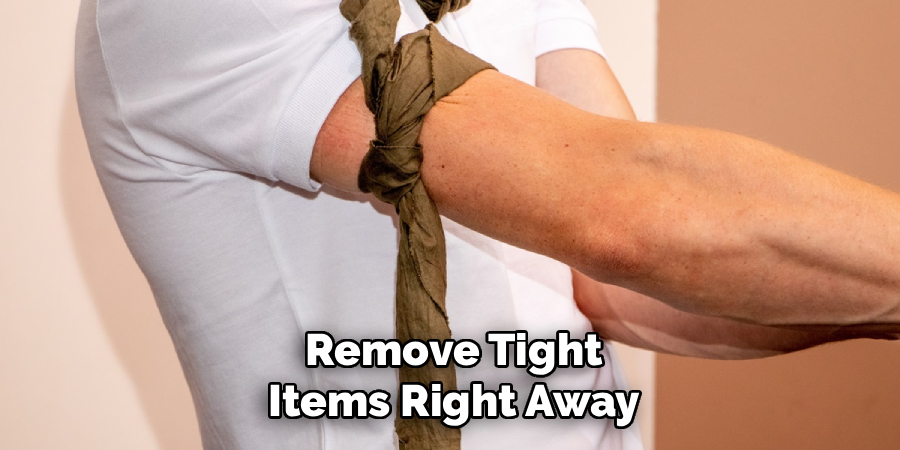
You may notice the skin around the bite growing warm, red, and tender. That’s a sign swelling is starting. Getting jewelry and tight gear off now prevents painful pressure later.
Set these items somewhere safe in your pack so you don’t lose them. Then keep the limb still and move on to caring for the wound itself.
Step 5 – Position the Bite Correctly
Keep the bitten limb at or slightly below heart level. This slows venom from traveling toward your core while avoiding extra pooling of blood in the wound.
If the bite is on your arm, let it rest gently in your lap. If it’s on your leg, sit with the leg extended and relaxed. Avoid raising it high above your heart.
Try not to use the limb at all. Every muscle movement helps venom move, so treat that arm or leg as though it’s in a sling.
Prop yourself into a stable, restful position. You might feel throbbing pain spreading from the bite. Stay put, breathe, and let your body do less while help gets closer.
Step 6 – Gently Clean and Cover the Wound
Rinse the bite lightly with clean water and a little mild soap if you have it. Pat the area with sterile gauze, but don’t scrub hard. Aggressive cleaning can push venom deeper or damage tissue.
Cover the wound loosely with clean gauze and a strip of medical tape. This keeps dirt out while you wait for rescue.
You may see two puncture marks, some oozing, or a darkening bruise around them. That’s expected with a snakebite, so don’t be alarmed.
Skip old remedies like cutting the wound or trying to suck out venom. Those tricks don’t work and often cause more harm. Simple wound care is all you need right now.
Step 7 – Mark and Track the Swelling
Grab your marker and draw a line at the edge of the swelling. Write the time next to it. As the swelling grows, mark the new edge every fifteen minutes with a fresh time.
This simple record shows medical teams how fast the venom is spreading. It’s one of the most useful things you can do while you wait.
Watch for other symptoms too. Note nausea, dizziness, blurred vision, tingling lips, or trouble breathing. Jot down when each starts.
You might feel your mouth going dry or your heartbeat quickening. Record it all. These details help doctors decide how much antivenom you need and how urgently, which makes your treatment faster and safer.
Step 8 – Get to Medical Care Quickly
The only real cure for a venomous bite is professional treatment, so reaching a hospital is your top priority. Let rescuers come to you if you’ve called for help and moving is risky.
If you must self-evacuate, go slowly and rest often. Have a companion carry your pack so you exert as little as possible. Sip water, but avoid alcohol and caffeine, which can affect your circulation.
Keep talking through your symptoms with whoever is helping you. Watching your body closely is a core part of how to treat a snake bite while hiking safely until you reach care.
Once you arrive, hand over your notes and let the medical team take charge.
Common Mistakes When Treating a Snake Bite While Hiking
Even level-headed hikers make errors under pressure, and a few show up again and again. The biggest one is trying to suck out the venom. Movies made this famous, but it simply doesn’t work. You can’t remove enough venom to matter, and you risk infecting the wound with bacteria from your mouth. Skip it entirely.
Another dangerous mistake is applying a tourniquet. Cutting off blood flow to trap venom in one spot can actually concentrate the damage and cost you a limb. Modern wilderness medicine advises against tight tourniquets for nearly all snakebites.
Many people also waste time chasing or killing the snake. This puts you at risk of a second bite and delays the help you desperately need. A quick glance at its color is all doctors want, and even that isn’t essential.
Ice is another common misstep. Packing the bite in cold can worsen tissue damage rather than help. Leave the wound at a natural temperature.
Finally, some hikers push through and keep walking hard, thinking speed matters most. But heavy exertion spreads venom faster. Slow, steady movement paired with a quick emergency call beats a frantic sprint every time.
Expert Tips
The best way to survive a snake bite is to prevent one. Watch where you step and place your hands, especially around rocks, logs, and tall grass where snakes rest. Wear sturdy boots and long pants on brushy trails.
Learn which venomous snakes live in the areas you hike. Knowing their habits helps you avoid the spots they favor, like sunny ledges in the morning.
Always tell someone your route and expected return time before you head out. If something goes wrong, they’ll know when and where to send help.
Finally, carry a reliable way to communicate. In remote country, a satellite messenger can be the difference between a quick rescue and a long, dangerous wait. Preparation is your strongest tool on any trail.
Frequently Asked Questions
Should I suck out the venom from a snake bite?
No, never try to suck out venom. It doesn’t remove enough to help and can introduce harmful bacteria into the wound. This old trick also wastes precious time you should spend calling for help and keeping still. Focus instead on staying calm, cleaning the bite gently, and getting to medical care where antivenom can actually treat you.
How can I tell if a snake was venomous?
It’s often hard to know for sure, so treat every bite as potentially dangerous. Signs of a venomous bite include intense pain, rapid swelling, bruising, and symptoms like nausea or dizziness. Don’t waste time hunting the snake to identify it. Note its color from a safe distance if you can, then focus on first aid and reaching a hospital quickly.
Is it safe to walk after a snake bite?
Walking should be a last resort, since movement spreads venom faster. If rescuers can reach you, stay put and keep the limb still. If you absolutely must move to get help, walk slowly, rest often, and let a companion carry your gear. Keep the bitten limb relaxed and near heart level as you go, and avoid any hard exertion.
Should I use a tourniquet on a snake bite?
No, avoid tight tourniquets. They cut off blood flow and can concentrate venom in one area, leading to serious tissue damage or even loss of the limb. Instead, remove tight jewelry and clothing near the bite, keep the limb still, and position it at heart level. Then get professional help as fast as you safely can for proper treatment.
How long do I have to get treatment after a bite?
Time matters, but you usually have a window of hours, not minutes, for most bites. That said, the sooner you reach antivenom, the better your recovery. Symptoms can worsen quickly, so treat every venomous bite as urgent. Call for help right away, track your symptoms, and head toward medical care without delay while keeping your movement and exertion low.
Conclusion
A snake bite on the trail is frightening, but your response can make all the difference. Now that you understand how to treat a snake bite while hiking, you can act with a clear head instead of panic. Move away from the snake, stay calm and still, call for help, and get to medical care as fast as you safely can. Those simple steps slow the venom and protect you until professionals take over.
Remember what to skip too. No cutting, no sucking, no tourniquets, and no chasing the snake. These old myths only make things worse. Gentle wound care, careful positioning, and steady tracking of your symptoms are what truly help.
The wilderness rewards those who prepare. Pack a small kit, learn the snakes in your area, and always share your plans before you set out. With this knowledge in your back pocket, you can hike farther and explore wilder places knowing you’re ready for the unexpected. Stay alert, stay calm, and enjoy every mile of the trail ahead.

About Caleb
Caleb Merritt is a Virginia-based outdoor writer and gear analyst who has spent over a decade sleeping on the ground, crossing mountain passes, and obsessively shaving grams off his pack weight. He holds a Bachelor of Science in Environmental Science from James Madison University, where he also served as president of the university’s outdoor recreation club. After graduating, he spent three years as a wilderness educator with a backcountry youth program in the Shenandoah Valley — teaching Leave No Trace ethics, backcountry navigation, and campcraft — before moving into full-time writing in 2018.
His work focuses on one core belief: the best gear is the gear you understand. Whether he’s doing a side-by-side weight comparison of ultralight shelters or writing a beginner’s guide to building a sub-20-lb base weight kit, Caleb writes with the same directness you’d expect from a trusted trail partner. He has logged more than 4,000 miles across iconic routes including the John Muir Trail, the Wind River Range, Vermont’s Long Trail, and the Collegiate Peaks Loop in Colorado.
Areas of Expertise
- Ultralight backpacking systems and base weight optimization
- Tent, tarp, and shelter testing across three-season and shoulder-season conditions
- Sleeping bag and quilt temperature rating verification
- Backpacking nutrition, meal planning, and calorie-per-ounce analysis
- Leave No Trace principles and wilderness ethics
- Campfire safety, bear country protocols, and water treatment methods
- Gear care, repair, and long-term durability assessment
Education
James Madison University — B.S. in Environmental Science, 2015
During his time at JMU, Caleb served as President of the Outdoor Recreation Club, where he planned and led more than 30 backcountry trips annually across the Blue Ridge Mountains and Appalachian Trail corridor. The role sharpened his ability to assess gear performance under real conditions, manage group safety in remote environments, and develop the kind of practical trail knowledge that no classroom can teach.
Professional Experience
Gear Writer & Senior Contributor — [campeox.com]
Produces in-depth gear reviews, buyer’s guides, and how-to content across backpacking, camping, and ultralight hiking categories. Tests all gear in real field conditions before publishing recommendations.
Wilderness Educator & Trip Leader — Shenandoah Backcountry Youth Program — 2015–2018 Led multi-day backcountry expeditions for teens and young adults throughout Shenandoah National Park and George Washington National Forest. Taught LNT principles, orienteering, first aid awareness, and campcraft fundamentals.
Outdoor Recreation Club President — James Madison University — 2013–2015 Organized and led university-sponsored hiking, backpacking, and camping trips in the Blue Ridge Mountains and Appalachian Trail corridor. Managed club budget, safety protocols, and trip logistics for a membership of 120+ students.
Editorial Standards
Every piece of gear Caleb recommends has been personally tested in the field — not just unboxed and described. His review process includes a minimum of two overnight trips per shelter, a full-season evaluation for sleep systems, and side-by-side comparisons wherever possible. He does not accept payment for positive reviews. Affiliate relationships, where they exist, are always disclosed in accordance with FTC guidelines.
All factual claims about gear specifications, trail distances, and safety recommendations are cross-referenced against manufacturer data sheets and established sources such as the Leave No Trace Center for Outdoor Ethics and the American Hiking Society before publication.