Nothing ruins a peaceful night in the backcountry faster than a curious raccoon rummaging through your snacks or a bear sniffing around your tent. Learning how to store food while hiking keeps your meals safe, protects local wildlife, and helps you sleep soundly under the stars.
Whether you’re packing trail snacks for a day hike or full backcountry meals for a week-long trek, smart food storage matters more than most beginners realize. The good news? It’s simpler than it sounds once you know the basics. This guide walks you through the tools, steps, and habits you need to keep your food secure, your camp clean, and the animals around you wild and healthy.
Why Proper Food Storage Matters on the Trail
Food storage isn’t just about protecting your dinner. It’s about safety, for you and for the animals sharing the trail.
When wildlife gets a taste of human food, they learn to associate people with easy meals. That’s a problem. A bear that raids campsites often ends up relocated or euthanized. Poor storage habits literally cost animals their lives.
There’s a saying among rangers: “A fed bear is a dead bear.” Keeping your food sealed and secured breaks that cycle.
For beginner campers, good habits also mean fewer sleepless nights and fewer ruined trips. You’ll avoid chewed-through packs, scattered supplies, and midnight visitors. Mastering camp food safety early builds confidence and makes every future adventure smoother and more enjoyable.
Tools and Materials You’ll Need
Getting started doesn’t require a mountain of gear. A few key items handle most situations. First, grab a bear canister, a hard-sided container that animals can’t open or crush. Many popular parks now require them, so check regulations before you go. If you’re hiking where hangs are allowed, pack a lightweight food bag along with 50 feet of sturdy cord and a small carabiner for setting up a bear hang.
Odor-proof bags are worth their weight, since they trap smells that attract animals from surprising distances. Add a few resealable zip bags to organize snacks and prevent leaks.
One optional but handy item is a small kitchen scale at home, which helps you portion backcountry meals so you carry only what you’ll eat.
7 Step-by-Step Guide on How to Store Food While Hiking
Step 1 – Plan and Portion Before You Leave
Smart storage starts at your kitchen table, long before you hit the trail. Lay out every meal and snack for your trip, then repackage bulky items into compact, resealable bags. This cuts weight and shrinks the space your food takes up.
Portioning also reduces waste. When you pack exactly what you need, you won’t lug extra weight or scramble to store leftovers in the wilderness. Label each bag by day or meal so you stay organized.
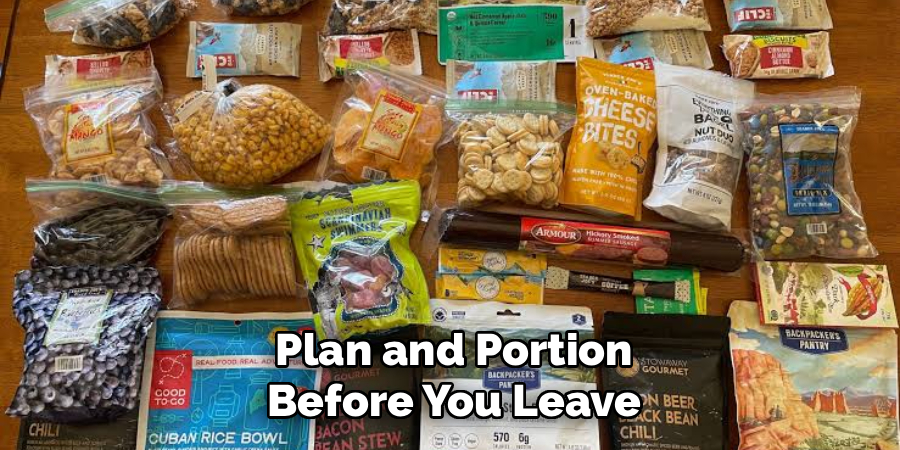
Think about smell, too. Strong-smelling foods like tuna or bacon draw more attention from wildlife. If you bring them, seal them tightly. A little prep now saves major headaches once you’re deep in the backcountry.
Step 2 – Choose the Right Storage Container
Your storage method depends on where you’re headed. In areas with heavy bear activity, a bear canister is often the only approved choice, and rangers may turn you away without one.
Pick a canister sized for your trip length. A two-day weekend needs far less capacity than a week-long expedition. Test-pack it at home so you know everything fits before you’re standing at the trailhead.
If canisters aren’t required, a durable food bag paired with odor-proof liners works well for a bear hang. The key is matching your gear to the environment. Knowing how to store food while hiking means reading regulations and terrain, then choosing tools that fit both.
Step 3 – Keep Food Away From Your Sleeping Area
Where you store food matters as much as how you store it. Set up your kitchen and storage spot at least 200 feet, roughly 70 steps, from your tent.
This distance creates a buffer. If an animal comes sniffing, it heads toward the food, not toward you while you sleep. Picture your campsite as a triangle: tent, cooking area, and food storage each sit at a separate corner.
Downwind placement helps too. You don’t want cooking smells drifting straight into your sleeping bag. Choose your storage location before dark, since fumbling around with a headlamp makes the whole process harder and easier to get wrong.
Step 4 – Set Up a Proper Bear Hang
If you’re using a food bag instead of a canister, a bear hang keeps it out of reach. Find a sturdy tree branch at least 15 feet high and 4 feet out from the trunk.
Tie a small weight, like a rock in a sock, to the end of your cord. Toss it over the branch, then hoist your bag until it hangs about 12 feet off the ground and 6 feet below the branch.
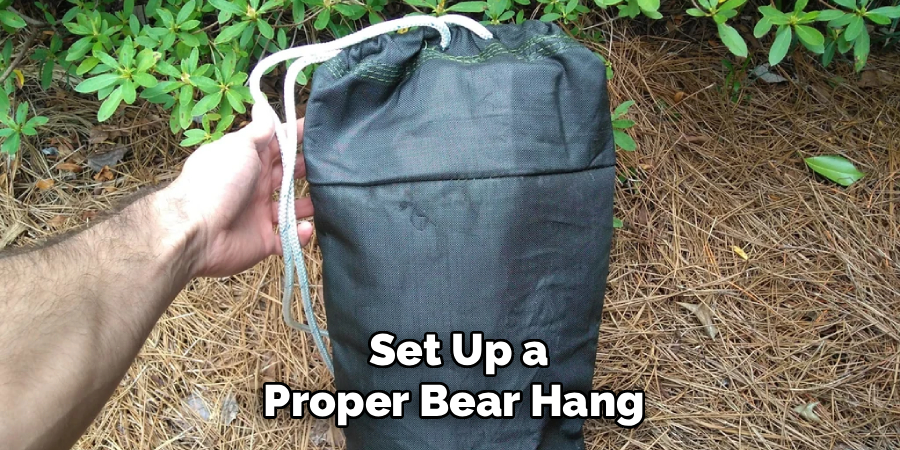
This spacing keeps bears from reaching the bag by climbing or swatting. It takes practice, so try it in your backyard first. A sloppy hang gives clever animals an easy target and undoes all your hard work.
Step 5 – Seal and Store Scented Items Too
Food isn’t the only thing that attracts wildlife. Toothpaste, sunscreen, lip balm, deodorant, and even trash carry scents that draw curious noses.
Treat these items like food. Tuck them into your canister or hang them with your food bag. Never leave a scented tube tucked in your tent pocket, no matter how convenient it feels.
Odor-proof bags shine here, sealing in smells that would otherwise waft across your campsite. Collect all your wrappers and food scraps in a dedicated trash bag, then store it with everything else. This habit protects your camp and keeps you practicing solid wildlife-proof storage from the moment you arrive until you pack out.
Step 6 – Cook and Clean With Care
Cooking creates strong smells that linger. Prepare meals in your designated kitchen area, well away from where you’ll sleep.
Eat everything you cook, and avoid dumping leftover broth or crumbs near camp. Strain any food bits from dishwater, pack them out with your trash, and scatter the strained water far from your site.
Wipe down your cooking gear before storing it, since dried sauce and grease still smell tempting to animals. Change out of clothes that caught splatters if you can, and store those with your food too.
Clean habits during meals make a huge difference. A tidy kitchen means fewer scents lingering overnight and far less chance of unwanted company.
Step 7 – Store Everything Before Dark
Wildlife often becomes more active at dusk and through the night. Get all your food, trash, and scented items secured while you still have daylight.
Rushing this task in the dark leads to mistakes, like a weak hang or a canister left half-open. Make storage your last camp chore before relaxing for the evening.
Do one final sweep of your site. Check pockets, the ground around your kitchen, and your pack for stray snacks or wrappers. Even a single granola bar left behind can attract animals.
Once everything’s locked away, you can settle in and enjoy the quiet. Consistency here builds the habits that keep every trip safe.
Common Mistakes Beginners Make With Trail Food Storage
Even careful hikers slip up, and a few mistakes show up again and again.
The most common one is keeping food or snacks inside the tent. It feels convenient to grab a midnight bite, but that habit invites animals right to where you sleep. Even a wrapped candy bar in your pack pocket sends out a scent trail. Always move food to your storage spot before bed.
Another frequent error is a lazy bear hang. Beginners often toss the bag over a branch that’s too low or too close to the trunk. A bear simply climbs up, reaches out, or snaps a thin branch. If you can’t hang it properly, a canister is the safer bet.
Many people also forget about non-food scented items. Toothpaste, bug spray, and lip balm all smell interesting to wildlife, yet they get left in tents constantly. Treat every scented product like food.
Finally, folks underestimate cleanup. Crumbs, spilled soup, and greasy pots leave lingering odors that draw animals long after dinner ends. Sloppy dishwashing near camp is a recipe for a nighttime visit you won’t enjoy.
Expert Tips
Seasoned backpackers rely on a few tricks that make storage easier. Line your bear canister with an odor-proof bag for a double layer of scent control, especially on longer trips.
Pack your food from most-needed to least-needed, so the items you’ll eat first sit right on top. This saves you from unloading the whole canister at every meal.
Keep a dedicated stuff sack just for trash. Separating garbage from fresh food prevents cross-contamination and keeps things organized. On group trips, assign one person to double-check storage each night, since a second set of eyes catches loose snacks and weak hangs before they become a problem.
Frequently Asked Questions
Do I really need a bear canister for every hike?
Not always. Bear canisters are required in many national parks and high-traffic wilderness areas, but not everywhere. Check the specific regulations for your destination before you leave. In regions with fewer bears or approved hanging spots, a food bag with a proper bear hang may be enough. When in doubt, a canister is the safest, most reliable choice.
How far should food be from my tent?
Aim for at least 200 feet, which is roughly 70 adult steps, between your food storage and your sleeping area. Position your cooking spot separately too, forming a triangle between tent, kitchen, and storage. This distance keeps animals drawn to food away from where you sleep. Setting it up before dark makes the whole process much easier and safer.
What foods attract animals the most?
Strong-smelling foods top the list, including bacon, fish, cured meats, and anything greasy or heavily spiced. Sweet items like candy and dried fruit also draw attention. Honestly, though, animals investigate almost any food scent. That’s why sealing everything in odor-proof bags and storing it properly matters more than avoiding specific foods altogether.
Can I store food in my backpack overnight?
It’s not a good idea unless your pack sits inside a bear canister or a proper hang. Animals easily chew through fabric to reach food, and a damaged pack can end your trip early. Always remove food and scented items from your bag before bed, then store them in your approved container away from camp.
What do I do with food wrappers and trash?
Pack out everything you bring in. Collect wrappers, scraps, and leftover food in a dedicated trash bag, then store it alongside your food in your canister or hang. Never bury trash or toss it into bushes, since animals dig it up and the smell lingers. Leaving no trace keeps campsites clean and wildlife wild.
Conclusion
Keeping your food safe on the trail comes down to a handful of simple, repeatable habits. Plan your meals, pick the right container, store everything far from your tent, and clean up thoroughly after each meal. Learning how to store food while hiking protects your snacks, shields wildlife from harm, and gives you peace of mind every night in the backcountry.
Don’t feel overwhelmed if it seems like a lot at first. Each step becomes second nature after a trip or two. Practice your bear hang at home, test-pack your canister, and build a routine you can trust in the dark.
The reward is worth the effort. You’ll wake up to an untouched camp, healthy wildlife nearby, and the freedom to focus on what brought you outdoors in the first place. So pack smart, store carefully, and hit the trail with confidence. The wilderness is waiting, and now you’re ready to enjoy it responsibly.

About Caleb
Caleb Merritt is a Virginia-based outdoor writer and gear analyst who has spent over a decade sleeping on the ground, crossing mountain passes, and obsessively shaving grams off his pack weight. He holds a Bachelor of Science in Environmental Science from James Madison University, where he also served as president of the university’s outdoor recreation club. After graduating, he spent three years as a wilderness educator with a backcountry youth program in the Shenandoah Valley — teaching Leave No Trace ethics, backcountry navigation, and campcraft — before moving into full-time writing in 2018.
His work focuses on one core belief: the best gear is the gear you understand. Whether he’s doing a side-by-side weight comparison of ultralight shelters or writing a beginner’s guide to building a sub-20-lb base weight kit, Caleb writes with the same directness you’d expect from a trusted trail partner. He has logged more than 4,000 miles across iconic routes including the John Muir Trail, the Wind River Range, Vermont’s Long Trail, and the Collegiate Peaks Loop in Colorado.
Areas of Expertise
- Ultralight backpacking systems and base weight optimization
- Tent, tarp, and shelter testing across three-season and shoulder-season conditions
- Sleeping bag and quilt temperature rating verification
- Backpacking nutrition, meal planning, and calorie-per-ounce analysis
- Leave No Trace principles and wilderness ethics
- Campfire safety, bear country protocols, and water treatment methods
- Gear care, repair, and long-term durability assessment
Education
James Madison University — B.S. in Environmental Science, 2015
During his time at JMU, Caleb served as President of the Outdoor Recreation Club, where he planned and led more than 30 backcountry trips annually across the Blue Ridge Mountains and Appalachian Trail corridor. The role sharpened his ability to assess gear performance under real conditions, manage group safety in remote environments, and develop the kind of practical trail knowledge that no classroom can teach.
Professional Experience
Gear Writer & Senior Contributor — [campeox.com]
Produces in-depth gear reviews, buyer’s guides, and how-to content across backpacking, camping, and ultralight hiking categories. Tests all gear in real field conditions before publishing recommendations.
Wilderness Educator & Trip Leader — Shenandoah Backcountry Youth Program — 2015–2018 Led multi-day backcountry expeditions for teens and young adults throughout Shenandoah National Park and George Washington National Forest. Taught LNT principles, orienteering, first aid awareness, and campcraft fundamentals.
Outdoor Recreation Club President — James Madison University — 2013–2015 Organized and led university-sponsored hiking, backpacking, and camping trips in the Blue Ridge Mountains and Appalachian Trail corridor. Managed club budget, safety protocols, and trip logistics for a membership of 120+ students.
Editorial Standards
Every piece of gear Caleb recommends has been personally tested in the field — not just unboxed and described. His review process includes a minimum of two overnight trips per shelter, a full-season evaluation for sleep systems, and side-by-side comparisons wherever possible. He does not accept payment for positive reviews. Affiliate relationships, where they exist, are always disclosed in accordance with FTC guidelines.
All factual claims about gear specifications, trail distances, and safety recommendations are cross-referenced against manufacturer data sheets and established sources such as the Leave No Trace Center for Outdoor Ethics and the American Hiking Society before publication.