Planning an outdoor adventure involves more than just picking a beautiful destination on a map. Carrying your gear comfortably can entirely make or break your wilderness trip. If you load your bag haphazardly, you will quickly feel the painful strain on your shoulders and lower back. Knowing exactly how to pack a rucksack for camping changes everything about your trail experience. A well-organized bag balances the heavy weight onto your strong hips, keeps essential items easily accessible, and protects your sensitive gear from unexpected weather.
This ensures you can hike further and enjoy the wilderness without constant discomfort. Whether you are heading out for a single night or planning a rugged multi-day trek, arranging your equipment correctly remains a foundational outdoor skill. This expert beginner-friendly guide will teach you the exact methods for organizing your gear for a successful camping trip.
Why Packing Properly Matters
Understanding proper weight distribution completely transforms your trail experience from an exhausting chore into an enjoyable hike. Beginners often mistakenly toss heavy items directly into the top of their bags, which pulls them backward and forces their shoulders to bear the brunt of the load. This imbalance leads to rapid fatigue, sore muscles, and a higher risk of stumbling on loose rocks. Placing weight correctly low and close to your back transfers the heavy load directly to your strong leg muscles through the padded hip belt.
A smartly organized bag also saves you immense frustration when conditions deteriorate. When rain suddenly pours down, knowing exactly where your waterproof jacket sits prevents your spare warm clothes from getting soaked. Organizing your gear with clear intention allows you to access snacks, clean water, and navigation tools without unpacking everything onto the muddy ground. Mastering this crucial skill gives you tremendous physical comfort and mental confidence on any trail.
Tools and Materials You Will Need
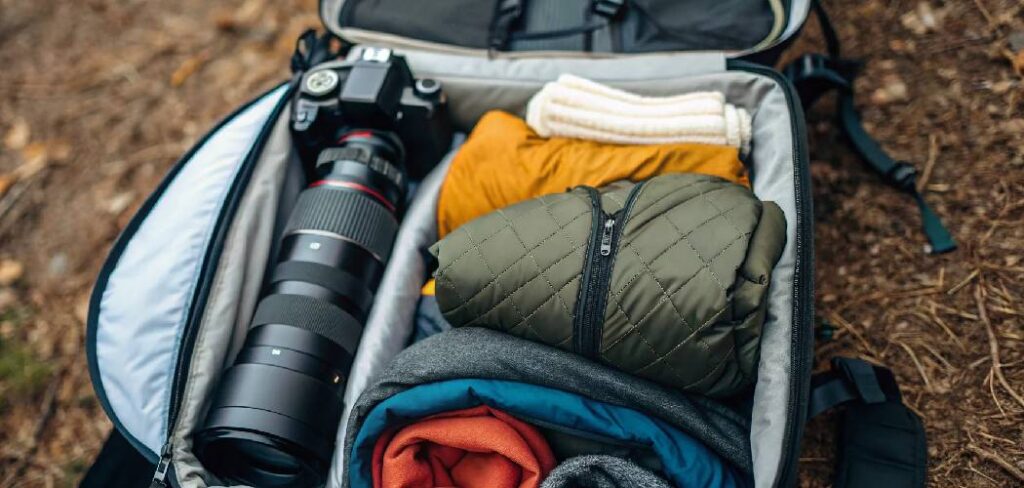
Before loading up, gather all your gear and lay it out cleanly on your floor. Grouping similar items together helps you visualize exactly what needs to fit inside your bag and prevents you from leaving important gear behind. Here are the essentials you will need:
- A properly fitted backpack with a sturdy hip belt and an internal support frame.
- Waterproof stuff sacks or lightweight dry bags to organize clothing and protect delicate electronics.
- Your complete sleep system, including a sleeping bag, sleeping pad, and lightweight tent.
- Cooking supplies, a portable camping stove, fuel canisters, and all your planned meals.
- Hydration gear such as durable water bottles or a large hydration bladder.
- Navigation tools, a comprehensive first aid kit, a bright headlamp, and spare batteries.
- Weather-appropriate clothing, including a protective rain shell and extra dry socks.
- Optional: Adjustable trekking poles to help distribute your carrying weight and dramatically improve your balance on uneven terrain.
Step-by-Step Guide on Packing Your Rucksack
Step 1 – Line the Inside of Your Bag
Before adding a single piece of gear, you must protect your belongings from creeping moisture. A heavy-duty plastic trash bag or a dedicated waterproof pack liner provides a crucial barrier against sudden downpours and damp ground. Push the liner all the way down into the extreme bottom corners of your main compartment.
Smooth out any large wrinkles to maximize the internal volume for your gear. Leaving trapped air underneath the plastic liner makes packing dense items much harder later on. This simple protective layer acts as your last line of defense if your external rain cover fails or if you accidentally drop your bag into a shallow stream. Outdoor conditions change rapidly, so this small preventative measure ensures your warm layers and down sleeping bag remain completely dry.
Step 2 – Pack Your Sleep System at the Bottom
Your sleeping bag goes into the bag first because it forms a soft, highly stable base for the rest of your heavy equipment. Stuff it firmly into the absolute bottom of your main compartment. If your backpack features a separate bottom compartment, use that zippered section for easy access.
Press the sleeping bag down hard with your fists to eliminate any dead air space. Next, tuck your inflatable sleeping pad alongside or right above the compressed sleeping bag. Placing these bulky, lightweight items at the very bottom creates a solid foundation that helps the whole bag stand upright on its own. You will not need these specific items until you reach your campsite at night, so keeping them buried deep out of the way makes perfect logical sense.
Step 3 – Place Heavy Items Against Your Spine
Now comes the absolute most critical phase for your physical comfort on the hiking trail. Your heaviest gear must sit as close to the center of your back as physically possible. This heavy category includes your tent body, cooking stove, full fuel canisters, and dense food bags.
Positioning these dense items mid-back keeps your natural center of gravity incredibly stable. If you place heavy items too far away from your spine, the bag will constantly pull your shoulders backward. As you figure out how to pack a rucksack for camping, remember that maintaining a neutral center of gravity prevents severe muscle strain. Wedge these dense objects firmly against each other so they do not shift around while you walk over rocks.
Step 4 – Fill the Empty Gaps with Soft Clothing
A properly packed bag should feel completely solid, with absolutely no loose items rattling around inside the main compartment. Use your extra clothing to effectively fill in the awkward structural gaps between your tent, food bags, and hard cooking gear. Roll your spare shirts, warm fleece jackets, and extra socks tightly, then shove them securely into the empty internal spaces.
This specific technique prevents your heavy equipment from shifting side to side when you navigate steep terrain. Wrapping your metal cooking pots in spare clothing also completely silences annoying clanking noises as you hike. Treating your soft layers like mortar between heavy bricks stabilizes the entire load perfectly. Make sure you press down firmly on these clothes to compress them, maximizing every single inch of available space.
Step 5 – Store Lighter Essentials Near the Top
The upper section of your main compartment should hold medium-weight and light items that you might need before fully setting up camp. Pack your water filter, camp towel, and lightweight insulating layers near the top of the internal space. Storing your fleece or down jacket here allows you to grab it quickly when taking a break in suddenly chilly weather.
Make sure you tightly close the main compartment drawstrings securely over these accessible items. Keeping lighter gear up high prevents your bag from becoming dangerously top-heavy, which can easily make you feel wobbly on uneven ground. When you learn how to pack a rucksack for camping, mastering this vertical weight distribution keeps you agile and totally safe on challenging rocky trails.
Step 6 – Organize Your Top Lid for Quick Access
Your backpack’s top lid, often called the brain, serves as the absolute perfect spot for small items you need constantly throughout the day. Store your trail map, compass, headlamp, lip balm, and sunglasses securely in this easily accessible zippered pocket. Keeping your first aid kit right near the top zipper ensures you can treat sudden blisters or small scrapes immediately without digging through your main gear.
Add your daily trail snacks to this compartment so you can refuel easily on the go. Organizing this section carefully means you never have to put your heavy bag down in the mud just to find a quick energy bar. Keep this area tidy and avoid overloading it, as a massive top lid can awkwardly press forward against the back of your neck.
Step 7 – Utilize Exterior Pockets Wisely
Modern backpacks feature stretchy mesh pockets on the front and sides, which are incredibly useful for storing wet or frequently used items. Slide your tall water bottles securely into the side pockets, ensuring you can reach them comfortably while walking. If your rain fly or ground tarp gets completely soaked during the night, stuff it directly into the front mesh pocket rather than mixing it with your dry gear inside.
The open-air mesh pocket allows moisture to evaporate safely away from your dry sleeping bag. You can also slip your digging trowel and bathroom kit cleanly into an external side pocket for extremely fast deployment. Just be incredibly careful not to place heavy items here, as that will instantly pull weight away from your core and ruin your balance.
Step 8 – Attach the Rain Cover and Adjust the Straps
Once all your gear is securely stowed inside, securely buckle the external compression straps on the sides of the bag. Pull these straps tightly to squish the bag down and bring the internal load as close to your spine as possible. A tightly compressed bag moves cleanly with your body rather than swaying independently with every step.
Next, tuck your waterproof rain cover cleanly into a small exterior pocket so you can deploy it in seconds if the sky turns dark. Finally, put the heavy backpack on and correctly adjust the suspension system. Start by tightening the padded hip belt securely over your hip bones, then adjust the shoulder straps, load lifters, and sternum strap. The weight should rest entirely on your hips, leaving your shoulders completely free from painful downward pressure.
Common Mistakes When Packing a Rucksack
One of the most frequent errors beginners make is constantly hanging gear off the outside of their bag. Dangling metal mugs, foam sleeping pads, and extra camp shoes swing wildly as you walk, throwing off your balance and snagging dangerously on low tree branches. Everything should fit cleanly inside the bag to maintain a highly streamlined profile.
Another major mistake involves placing heavy water bottles or dense food supplies near the absolute top of the bag. This creates a dangerously top-heavy load that strains your neck and dramatically increases your risk of falling on steep descents. Weight must always sit low and incredibly close to your back. Many new hikers also fail to waterproof their gear adequately before a trip. Relying solely on a backpack’s external nylon fabric will result in a soaked sleeping bag during heavy rain.
Using internal dry bags or a thick plastic liner is absolutely essential for keeping your vital equipment safe. Finally, forgetting to pack items in chronological order causes massive headaches on the trail. Burying your rain jacket at the absolute bottom of your bag guarantees you will get completely soaked while frantically unpacking everything during a sudden afternoon thunderstorm. Keep weather protection right at the top where it is instantly reachable. Ignoring these simple organizational rules quickly turns a beautiful nature hike into an exhausting, uncomfortable struggle against your own equipment.
Expert Tips
Seasoned backpackers always organize their gear using brightly color-coded stuff sacks. Using a blue sack exclusively for clothes and a red sack for cooking gear allows you to find exactly what you need in near total darkness. Try packing your daily food portions in a dedicated waterproof bag to keep strong smells totally contained and isolated from your clean clothing.
You should also seriously consider weighing your heavy items on a kitchen scale before leaving home. Shaving off a few extra pounds by repackaging bulk food into lighter plastic bags makes a highly noticeable difference on long uphill climbs. Another professional trick involves packing your rigid tent poles vertically alongside the inside edge of your backpack rather than keeping them folded inside the tent body. This distributes the rigid weight evenly and frees up valuable space precisely in the middle of your pack.
Frequently Asked Questions
How heavy should my backpack be for a multi-day trip?
Your fully loaded backpack should generally not exceed twenty percent of your total body weight. Keeping your gear lightweight prevents severe joint fatigue and allows you to cover much more distance comfortably. Focus strictly on carrying only the absolute essentials and invest in lighter sleeping bags and tents if you plan to hike frequently. Weigh your fully loaded bag at home to ensure you stay firmly within a safe limit.
Where should I pack my tent inside my bag?
You should place your folded tent body directly in the middle section of your bag, positioned as close to your back as possible. This central location keeps the heavy fabric from pulling your body completely off balance. You can securely store the rigid tent poles vertically down the inside side panel of your pack. This method maximizes your internal space and keeps the heavy tent securely anchored near your spine.
Is a hydration bladder better than carrying water bottles?
Hydration bladders offer excellent convenience because the drinking tube allows you to sip water continuously without ever stopping. They also center the heavy water weight perfectly against your mid-back for great balance. However, traditional water bottles are much easier to refill at shallow streams and rarely suffer from catastrophic hidden leaks. Many hikers prefer using a bladder for drinking while hiking and keeping one small bottle for mixing electrolyte drinks at camp.
How do I protect my gear from heavy rain?
Never blindly trust your backpack material to be completely waterproof, even if the manufacturer heavily claims it is. You must line the inside of your main compartment with a thick plastic contractor bag to actively block moisture. Use dedicated roll-top dry bags for your down sleeping bag and spare dry clothing. Always carry an external rain cover to physically shield the outside fabric from absorbing heavy water weight during a severe storm.
What is the best way to adjust my backpack straps?
Always start adjusting your loaded backpack entirely from the bottom up. Position the thickly padded hip belt securely over your hip bones and tighten it until it supports most of the weight. Next, pull the shoulder straps down gently until they wrap comfortably around your shoulders without digging in at all. Finally, adjust the load lifter straps near your collarbone to pull the bag tight against your back, and clip the sternum strap.
Conclusion
Heading out into the wilderness should be a rewarding and deeply rejuvenating experience, not an exhausting exercise in enduring shoulder pain. Taking the vital time to organize your equipment strategically transforms your entire journey. When your gear sits perfectly balanced on your hips, you walk with much better posture and navigate tricky terrain with much greater confidence. Knowing exactly how to pack a rucksack for camping gives you the immense freedom to focus on the beautiful scenery rather than constantly shifting a lopsided bag.
Start by gathering all your equipment and practicing your packing routine in your living room before you ever hit the trail. Experiment with different gear placements until the heavy bag feels like a completely natural extension of your body. Remember to keep heavy items perfectly centered, protect your sensitive sleep system from water, and keep your snacks and rain gear easily accessible. With these foundational skills fully mastered, you are completely ready to shoulder your load and embark on an incredible outdoor adventure.
About Caleb
Caleb Merritt is a Virginia-based outdoor writer and gear analyst who has spent over a decade sleeping on the ground, crossing mountain passes, and obsessively shaving grams off his pack weight. He holds a Bachelor of Science in Environmental Science from James Madison University, where he also served as president of the university’s outdoor recreation club. After graduating, he spent three years as a wilderness educator with a backcountry youth program in the Shenandoah Valley — teaching Leave No Trace ethics, backcountry navigation, and campcraft — before moving into full-time writing in 2018.
His work focuses on one core belief: the best gear is the gear you understand. Whether he’s doing a side-by-side weight comparison of ultralight shelters or writing a beginner’s guide to building a sub-20-lb base weight kit, Caleb writes with the same directness you’d expect from a trusted trail partner. He has logged more than 4,000 miles across iconic routes including the John Muir Trail, the Wind River Range, Vermont’s Long Trail, and the Collegiate Peaks Loop in Colorado.
Areas of Expertise
- Ultralight backpacking systems and base weight optimization
- Tent, tarp, and shelter testing across three-season and shoulder-season conditions
- Sleeping bag and quilt temperature rating verification
- Backpacking nutrition, meal planning, and calorie-per-ounce analysis
- Leave No Trace principles and wilderness ethics
- Campfire safety, bear country protocols, and water treatment methods
- Gear care, repair, and long-term durability assessment
Education
James Madison University — B.S. in Environmental Science, 2015
During his time at JMU, Caleb served as President of the Outdoor Recreation Club, where he planned and led more than 30 backcountry trips annually across the Blue Ridge Mountains and Appalachian Trail corridor. The role sharpened his ability to assess gear performance under real conditions, manage group safety in remote environments, and develop the kind of practical trail knowledge that no classroom can teach.
Professional Experience
Gear Writer & Senior Contributor — [Your Website Name]
Produces in-depth gear reviews, buyer’s guides, and how-to content across backpacking, camping, and ultralight hiking categories. Tests all gear in real field conditions before publishing recommendations.
Wilderness Educator & Trip Leader — Shenandoah Backcountry Youth Program — 2015–2018 Led multi-day backcountry expeditions for teens and young adults throughout Shenandoah National Park and George Washington National Forest. Taught LNT principles, orienteering, first aid awareness, and campcraft fundamentals.
Outdoor Recreation Club President — James Madison University — 2013–2015 Organized and led university-sponsored hiking, backpacking, and camping trips in the Blue Ridge Mountains and Appalachian Trail corridor. Managed club budget, safety protocols, and trip logistics for a membership of 120+ students.
Editorial Standards
Every piece of gear Caleb recommends has been personally tested in the field — not just unboxed and described. His review process includes a minimum of two overnight trips per shelter, a full-season evaluation for sleep systems, and side-by-side comparisons wherever possible. He does not accept payment for positive reviews. Affiliate relationships, where they exist, are always disclosed in accordance with FTC guidelines.
All factual claims about gear specifications, trail distances, and safety recommendations are cross-referenced against manufacturer data sheets and established sources such as the Leave No Trace Center for Outdoor Ethics and the American Hiking Society before publication.