You love hitting the water, but your vessel has seen better days. Scratches, sun fading, and general wear can make even the best boat look tired and weathered. If you are wondering how to paint a kayak, you are in the right place. Restoring your watercraft is easier than you might think, and it saves you the hefty cost of buying a brand-new one.
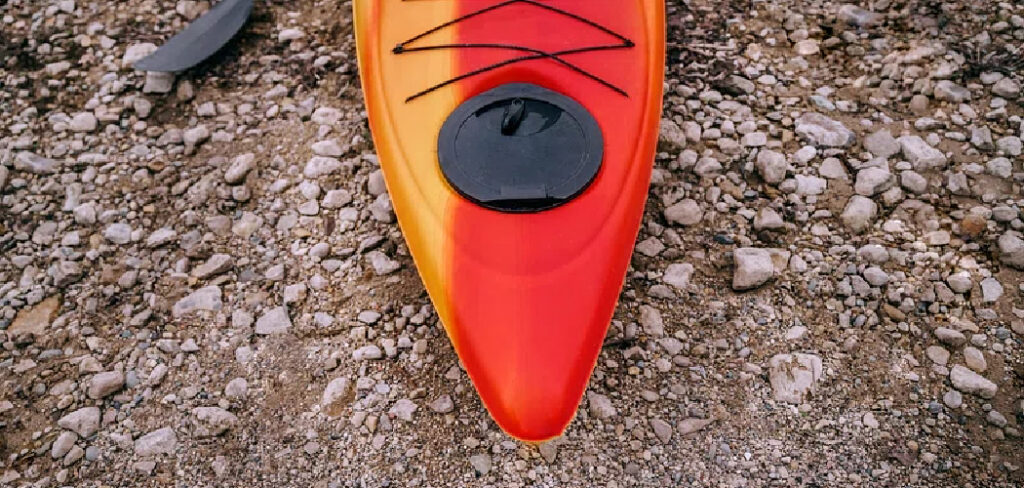
Whether you are planning a peaceful weekend camping at a remote lake or a thrilling river run, having a sharp-looking boat adds a layer of pride to the fun. This comprehensive guide will walk you through everything you need to know to give your plastic or fiberglass boat a fresh, highly durable finish. Grab your supplies, and let us get that vessel ready for your next big adventure.
Why You Should Refresh Your Watercraft
Over time, harsh UV rays, rocky shores, and constant transport take a significant toll on your hull. Adding a fresh coat of color does more than just boost the aesthetic appeal of your gear. It actually provides a crucial protective barrier against the elements, extending the overall lifespan of your vessel. When you take the time to restore the exterior surface, you seal up minor abrasions that could otherwise trap dirt or degrade the material further.
Furthermore, a custom color job allows you to stand out on the water, greatly improving your visibility and safety during low-light conditions. Personalizing your vessel makes every camping trip or travel excursion feel uniquely yours. It is an incredibly rewarding weekend project that builds a deeper connection with your outdoor gear, ensuring you are always ready to paddle out in style.
How to Paint a Kayak
Step 1: Gather Your Supplies and Prepare the Workspace
Before touching your boat, you must set up a proper environment. Working outdoors on a mild, dry day is ideal, but a well-ventilated garage works perfectly too. You will want to elevate the vessel on two sturdy sawhorses so you can easily reach every angle without straining your back. Collect all your materials beforehand to maintain a smooth workflow. You will need a gentle dish soap, coarse and fine-grit sandpaper, marine-grade primer, your chosen color topcoat, and a clear marine sealant. Having everything within arm’s reach ensures you will not have to stop mid-project. Wearing protective gear, like a basic dust mask and safety glasses, is highly recommended to keep fine particles and strong fumes away from your face.
Step 2: Wash the Hull Thoroughly to Remove Grime
Your vessel spends hours cutting through murky lake water, accumulating algae, salt, and stubborn dirt. Paint refuses to stick to a dirty surface, so a deep clean is absolutely mandatory. Mix warm water with a heavy-duty degreasing dish soap in a large bucket. Use a rough sponge or a medium-bristle brush to scrub every inch of the hull, paying special attention to the underside and waterlines. Rinse the entire boat down with a high-pressure hose to wash away the soapy residue. Let the plastic or fiberglass dry completely in the sun before moving forward. Even a single drop of trapped moisture can ruin the adhesion of your primer, so use a clean microfiber towel to wipe down any hidden crevices.
Step 3: Repair Deep Scratches and Gouges
Rocky riverbeds and rough sandy shores inevitably leave lasting marks on the bottom of your watercraft. Before applying any color, you must address these physical imperfections. Run your bare hand over the hull to identify any deep gouges that snag your skin. For fiberglass models, use a standard marine epoxy filler to pack the holes tightly. If you own a high-density polyethylene boat, you might need to use a plastic welding kit to melt matching plastic into the deep cracks. Smooth the repaired spots with a putty knife and let the filler cure entirely according to the package instructions. Taking this extra precaution ensures your final finish looks completely seamless and professional.
Step 4: Sand the Entire Surface Evenly
A crucial part of learning how to paint a kayak successfully involves proper sanding technique. Most recreational boats feature a slick, glossy exterior that actively repels liquids. You have to rough up this barrier so your new coating has something to grab onto. Start with a medium 120-grit sandpaper and firmly rub down the entire exterior. You are not trying to thin out the walls; you just want to remove the glossy sheen and create a dull, textured finish. Follow up with a finer 220-grit paper to smooth out the roughest scratches, creating a perfectly balanced canvas. Be patient and systematic, working from the bow to the stern in overlapping circles.
Step 5: Wipe Down with a Chemical Solvent
Once the sanding phase is complete, your boat will be covered in a thick layer of fine plastic or fiberglass dust. Brushing it off is simply not enough. You need to wipe the entire vessel down with a strong chemical solvent, such as rubbing alcohol or mineral spirits. Dampen a clean, lint-free rag with the solvent and methodically wipe the hull from front to back. This step eliminates microscopic dust particles and dissolves any lingering oils left behind by your bare hands. Give the solvent about ten to fifteen minutes to evaporate completely, leaving a pristine, ready-to-coat exterior. Skipping this chemical wipe often leads to frustrating bubbles and peeling down the road.
Step 6: Apply a High-Quality Marine Primer
A strong foundation dictates the longevity of your customized gear. Spraying color directly onto bare plastic or fiberglass usually results in peeling after just one camping trip. Apply a high-quality marine primer designed specifically for the material of your vessel. Hold the spray can about eight to ten inches away from the hull and apply the primer using smooth, sweeping motions. Focus on applying a thin, even layer rather than trying to achieve full opacity on the first pass. Allow the first coat to dry completely, then add a second light layer to ensure maximum adhesion. A well-primed boat acts like a magnet for your final topcoat, preventing chips and flakes.
Step 7: Paint the Colorful Base Coats
Now comes the most exciting phase of the restoration process. Choose a durable marine-grade paint that flexes slightly, accommodating the natural bending of the boat in rough water. Using the same sweeping technique you practiced with the primer, apply your first layer of color. Keep the application incredibly thin to prevent ugly drips and runs from forming along the curved sides. You will likely need three or four thin coats to achieve a vibrant, solid color. Wait at least one full hour between each application, giving the solvents enough time to flash off and harden properly. Patience during this colorful stage directly translates to a showroom-quality finish that turns heads.
Step 8: Seal Everything with a Clear Protective Topcoat
Your beautiful new color needs a heavy-duty shield to survive harsh UV rays and submerged obstacles. After your final base coat has cured for at least twenty-four hours, it is time to apply a clear marine polyurethane sealant. This transparent topcoat provides a hard, glossy shell that locks in the color and blocks out moisture. Spray two to three light coats of the clear sealer, allowing ample drying time between each pass. Once the final layer is applied, leave the vessel in a dry, warm environment for several days so the protective shell can cure completely solid. This final layer guarantees your hard work stands up to seasons of rigorous paddling.
Frequently Asked Questions
What Kind Of Paint Is Best For Plastic Kayaks?
For high-density polyethylene, you need a specialized product that bonds chemically to slick surfaces. Look for flexible marine-grade aerosols or paints formulated specifically for plastics.
- Krylon Fusion: Bonds beautifully without heavy sanding.
- Rust-Oleum Marine: Offers incredible durability.
Avoid standard house paints or rigid enamels, as they will quickly crack and peel off the moment the hull flexes in the water.
Do I Really Need To Use A Primer?
Yes, using a primer is absolutely vital for a long-lasting finish, especially on slick plastic surfaces. Primer acts as a specialized glue that bonds firmly to the sanded hull while providing a porous layer for the topcoat to grip. Without it, your beautiful new color will likely start flaking off the very first time you drag it across a sandy beach.
How Long Will A DIY Paint Job Last?
A meticulously executed do-it-yourself finish can easily last three to five years before needing a touch-up. The lifespan heavily depends on your preparation quality and how you store the vessel. Keeping your gear stored indoors away from direct sunlight and avoiding dragging the hull over sharp rocks will dramatically extend the life of your fresh coat.
Can I Use Spray Paint On My Boat?
Spray paint is actually the preferred method for most beginners due to its ease of use and smooth finish. High-quality marine spray aerosols provide an even application without leaving thick, visible brush strokes behind. Just remember to use multiple thin layers rather than one thick layer to avoid messy drips along the sides of the hull.
How Long Should I Wait Before Taking It On The Water?
While the surface might feel dry to the touch within a few hours, the chemical curing process takes much longer. You should wait a minimum of three to five days before exposing the hull to water. Rushing this curing period can cause the layers to bubble, soften, or completely wash away during your first paddling trip.
Conclusion
Restoring your favorite watercraft does not have to be an intimidating chore. By dedicating a weekend to proper cleaning, careful sanding, and applying thin, even coats, you can completely transform the look of your vessel. Remember that patience during the preparation phase is the ultimate secret to achieving a professional, long-lasting finish. Now that you understand how to paint a kayak, it is time to pick out your favorite colors and get to work. Breathe new life into your gear, and get ready to hit the local lakes and rivers with a boat you can truly be proud of.

About Caleb
Caleb Merritt is a Virginia-based outdoor writer and gear analyst who has spent over a decade sleeping on the ground, crossing mountain passes, and obsessively shaving grams off his pack weight. He holds a Bachelor of Science in Environmental Science from James Madison University, where he also served as president of the university’s outdoor recreation club. After graduating, he spent three years as a wilderness educator with a backcountry youth program in the Shenandoah Valley — teaching Leave No Trace ethics, backcountry navigation, and campcraft — before moving into full-time writing in 2018.
His work focuses on one core belief: the best gear is the gear you understand. Whether he’s doing a side-by-side weight comparison of ultralight shelters or writing a beginner’s guide to building a sub-20-lb base weight kit, Caleb writes with the same directness you’d expect from a trusted trail partner. He has logged more than 4,000 miles across iconic routes including the John Muir Trail, the Wind River Range, Vermont’s Long Trail, and the Collegiate Peaks Loop in Colorado.
Areas of Expertise
- Ultralight backpacking systems and base weight optimization
- Tent, tarp, and shelter testing across three-season and shoulder-season conditions
- Sleeping bag and quilt temperature rating verification
- Backpacking nutrition, meal planning, and calorie-per-ounce analysis
- Leave No Trace principles and wilderness ethics
- Campfire safety, bear country protocols, and water treatment methods
- Gear care, repair, and long-term durability assessment
Education
James Madison University — B.S. in Environmental Science, 2015
During his time at JMU, Caleb served as President of the Outdoor Recreation Club, where he planned and led more than 30 backcountry trips annually across the Blue Ridge Mountains and Appalachian Trail corridor. The role sharpened his ability to assess gear performance under real conditions, manage group safety in remote environments, and develop the kind of practical trail knowledge that no classroom can teach.
Professional Experience
Gear Writer & Senior Contributor — [campeox.com]
Produces in-depth gear reviews, buyer’s guides, and how-to content across backpacking, camping, and ultralight hiking categories. Tests all gear in real field conditions before publishing recommendations.
Wilderness Educator & Trip Leader — Shenandoah Backcountry Youth Program — 2015–2018 Led multi-day backcountry expeditions for teens and young adults throughout Shenandoah National Park and George Washington National Forest. Taught LNT principles, orienteering, first aid awareness, and campcraft fundamentals.
Outdoor Recreation Club President — James Madison University — 2013–2015 Organized and led university-sponsored hiking, backpacking, and camping trips in the Blue Ridge Mountains and Appalachian Trail corridor. Managed club budget, safety protocols, and trip logistics for a membership of 120+ students.
Editorial Standards
Every piece of gear Caleb recommends has been personally tested in the field — not just unboxed and described. His review process includes a minimum of two overnight trips per shelter, a full-season evaluation for sleep systems, and side-by-side comparisons wherever possible. He does not accept payment for positive reviews. Affiliate relationships, where they exist, are always disclosed in accordance with FTC guidelines.
All factual claims about gear specifications, trail distances, and safety recommendations are cross-referenced against manufacturer data sheets and established sources such as the Leave No Trace Center for Outdoor Ethics and the American Hiking Society before publication.