Your reliable outdoor gear goes through a lot, taking on dirt, sweat, and unpredictable weather on every adventure. Eventually, you will notice that your favorite pack looks dull and smells like damp earth. Knowing how to wash patagonia backpack properly extends its life and keeps the fabric performing as it should. Many beginners feel nervous about washing specialized technical gear, fearing they might ruin water-resistant coatings or damage the zippers.
You do not need to worry, because the process is straightforward and completely safe when you follow the right steps. Regular maintenance actually protects the material and saves you money in the long run. By using simple household items and a little patience, you can restore your pack to its original glory. This guide will walk you through the entire process from preparation to drying, ensuring you have the confidence to maintain your gear properly.
Why Maintain Your Outdoor Gear
Learning this essential maintenance skill helps campers and outdoor beginners protect their investment. Technical fabrics rely on clean fibers to maintain their durability and weather resistance. When dirt and sweat build up, they slowly degrade the synthetic materials and compromise the protective coatings. Clean gear simply functions better and lasts much longer than neglected equipment.
Beyond just extending the lifespan of your equipment, a clean bag performs better on the trail. Dirty zippers catch and break, while clogged mesh back panels lose their breathability, making your hike uncomfortable. Taking the time to care for your equipment builds a deeper appreciation for your gear and ensures you are always ready for the next spontaneous trip. It transforms you from a casual user into a responsible outdoor enthusiast who knows how to handle their equipment.
Tools and Materials You’ll Need
Gathering your supplies before you begin makes the entire cleaning process smooth and stress-free. You do not need expensive specialty products to get excellent results. Simply clear a workspace near a sink or bathtub and prepare the following items:
- Mild, unscented liquid soap or specialized technical fabric cleaner
- Soft-bristled brush or an old, clean toothbrush
- Sponge or microfiber cloth for wiping down surfaces
- Large tub, deep sink, or bathtub for soaking the bag
- Dry, clean bath towels for pressing out excess water
- Optional: A handheld vacuum with a crevice tool for removing crumbs and loose dirt from the corners
10 Step-by-Step Guide on How To Wash Patagonia Backpack
Step 1 – Empty Every Pocket and Compartment
Begin by completely emptying out your bag, leaving absolutely nothing behind in the hidden pockets. We often forget about old snack wrappers, loose change, or small trail maps tucked away in the deepest corners. Unzip every single compartment, including the laptop sleeve, the small security pockets, and the side water bottle holders. Turn the bag upside down and give it a firm shake over a trash can to dislodge any loose debris.
Run your hands along the inside seams and corners to feel for hidden grit or sharp objects that could damage the fabric during the wash. If you have a handheld vacuum, run the crevice tool along the interior bottom edges to suck out stubborn sand and crumbs. Taking your time with this preparatory step prevents accidental damage and ensures a thorough clean.
Step 2 – Remove Removable Parts and Straps
Take a close look at your pack and detach any parts that can be removed. Many modern bags feature removable waist belts, sternum straps, or internal frames. Taking these pieces off allows you to clean the main body of the bag much more effectively. It also gives you better access to the hidden crevices where dirt loves to hide.
Wash these smaller detached components separately by hand. If your bag has an internal frame sheet or metal stays, carefully slide them out and set them aside, as they should never be submerged in water. Note how these pieces fit together so you can easily reassemble the bag later. Keeping the straps and frame separate makes the main bag much easier to maneuver in the water.
Step 3 – Brush Away Surface Dirt
Before getting the fabric wet, take your soft-bristled brush and gently sweep the exterior of the bag. Dry brushing is incredibly effective at removing caked-on mud, dry dirt, and loose dust that clings to the woven material. If you skip this step, the loose dirt will turn into muddy water and work its way deeper into the fabric fibers.
Pay special attention to the bottom panel of the bag, which usually absorbs the most impact and dirt. Sweep the brush along the seams and around the zippers where dust naturally accumulates. Use light, sweeping motions rather than harsh scrubbing to protect the durable water repellent coating. This dry cleaning phase significantly reduces the amount of effort required once you move to the washing stage.
Step 4 – Spot Treat Stubborn Stains
Inspect the bag closely for sap, grease, or deeply embedded mud stains that require extra attention. Apply a tiny drop of your mild soap directly to the stained area. Use your damp soft sponge or toothbrush to gently work the soap into the stain using circular motions. Let this concentrated soap sit on the fabric for about ten minutes to break down the grime.
Knowing how to wash patagonia backpack effectively means paying attention to these small, heavily soiled areas before doing a full wash. Tree sap can be particularly stubborn, sometimes requiring a specialized adhesive remover designed for fabrics. Never use harsh bleach or heavy stain removers, as they will strip the color and ruin the synthetic threads. Gentle persistence is the best approach for removing tough trail stains.
Step 5 – Prepare the Washing Bath
Fill your bathtub or a large basin with lukewarm water. The water should be comfortably warm to the touch, but never hot, as high temperatures can warp the synthetic materials and melt the protective sealants. Add a small amount of your mild soap to the running water and mix it around with your hands until lightly sudsy.
You only need about a tablespoon of soap for an entire bathtub. Too much soap will make the rinsing process incredibly frustrating and leave a sticky residue on your gear. Ensure the soap is fully dissolved in the water before you introduce the bag. Creating this gentle, soapy bath provides the perfect environment to lift dirt away from the fibers without causing any chemical damage.
Step 6 – Submerge and Agitate the Bag
Place the completely unzipped bag into the soapy water and press it down until it is fully submerged. You will see air bubbles escape from the various compartments as the fabric absorbs the water. Use your hands to gently agitate the bag, swishing it back and forth through the soapy bath.
Allow the bag to soak for about fifteen to twenty minutes to loosen the deep-seated sweat and dirt. During this soaking period, occasionally press down on the padded shoulder straps and back panel. These spongy areas hold a lot of sweat and require compression to push the soapy water through the foam. The water will likely turn dark and murky, which simply means your cleaning efforts are working perfectly.
Step 7 – Scrub the Mesh and Back Panel
After the soaking phase, take your soft brush and focus on the padded mesh areas of the back panel and shoulder straps. These sections absorb the most body oils and sweat during your hikes. Gently scrub the mesh using light, circular motions to lift the trapped grime.
Be careful not to press too hard, as aggressive brushing can cause the delicate mesh to snag or fray. Continue to dip your brush in the soapy water as you work your way across the padded zones. The goal is to refresh the foam underneath the mesh without damaging the outer layer. Taking your time here will remove any lingering odors and restore the breathability of the back panel.
Step 8 – Clean the Zippers Thoroughly
Zippers are the mechanical lifelines of your gear, and they need specific attention during the cleaning process. Take your clean toothbrush and dip it into the soapy water. Run the bristles along the zipper tracks, scrubbing both the inside and outside of the teeth.
This is a critical step when you learn how to wash patagonia backpack, because dirt and microscopic sand particles slowly grind away at the zipper sliders over time. Move the zipper sliders back and forth a few times while submerged to dislodge any hidden grit. If you notice any sticky spots, spend a little extra time brushing that specific section. Clean zippers operate smoothly and rarely catch on the surrounding fabric.
Step 9 – Rinse Away All Soap Residue
Drain the dirty, soapy water from your tub completely. Refill the tub with clean, cool water and submerge the bag once again. Swish the bag around forcefully to rinse the soap out of the fibers. You will need to drain and refill the tub two or three times until the water remains completely clear and no soap bubbles appear.
Pay extra attention to the padded straps and back panel, pressing down on them repeatedly to squeeze out the trapped soap. Leaving soap residue in the fabric attracts dirt faster and compromises the material’s water resistance. Take your time with the rinsing process, as it is arguably the most important step for maintaining the technical performance of your gear.
Step 10 – Press Out Water and Air Dry
Lift the heavy, wet bag out of the tub and let the excess water drain for a minute. Do not twist or wring the fabric, as this can tear the internal seams and warp the shape. Instead, lay the bag flat on a large, clean bath towel. Roll the towel up with the bag inside and press down firmly to absorb the excess moisture.
Finally, hang the bag upside down in a well-ventilated, shaded area. Keep all the zippers open to allow maximum airflow through the interior compartments. Never place the bag in direct sunlight or use a machine dryer, as extreme heat destroys the synthetic fibers. Let it air dry completely, which usually takes one to two full days, before packing it away for your next adventure.
Common Mistakes When Cleaning Your Bag
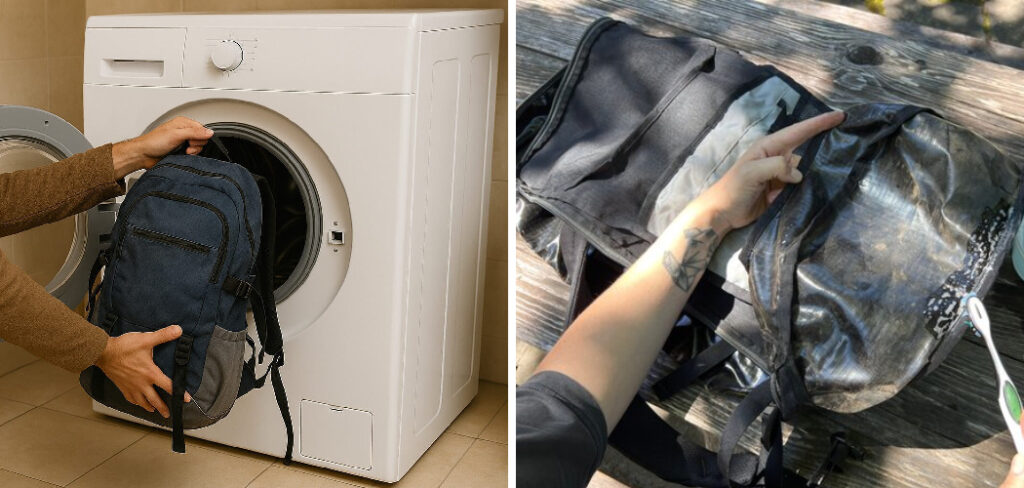
Many beginners ruin their outdoor gear by throwing it straight into the washing machine. The agitator inside a standard washing machine can easily rip straps, destroy buckles, and tear the internal polyurethane coating. Even a gentle cycle poses a significant risk to the structural integrity of a technical pack. Hand washing remains the only truly safe method to protect your investment.
Another frequent mistake involves using harsh household detergents or bleach. Standard laundry detergents contain brighteners and heavy perfumes that strip away the durable water repellent finish on outdoor fabrics. These harsh chemicals break down the synthetic threads and leave the material vulnerable to UV damage. Always stick to mild, unscented soaps or specialized gear cleaners to keep the fabric safe.
Finally, trying to speed up the drying process with heat causes permanent damage. Using a tumble dryer, a hair dryer, or leaving the bag on a hot radiator will melt the protective coatings and warp the foam padding. Heat causes the synthetic fibers to shrink unevenly, leaving you with a distorted and weakened bag. Patience is vital, so always allow your gear to dry naturally in the shade.
Expert Tips for Longevity
To keep your bag looking fresh between deep cleans, wipe down the exterior with a damp microfiber cloth after every dusty hike. This prevents dirt from deeply embedding into the fabric fibers over time. Storing your gear properly also makes a massive difference in its lifespan. Always ensure the bag is completely bone-dry before storing it in a closet to prevent mold and mildew growth.
You can also apply a spray-on durable water repellent treatment once the bag is clean and dry. Over time, the original factory coating wears off, causing water to soak into the fabric rather than bead up and roll away. Treating the exterior revitalizes this protective layer and keeps your gear weather-ready. Lastly, lubricate the clean zippers with a specialized zipper wax to keep them gliding smoothly for years.
Frequently Asked Questions
Can I put my bag in the washing machine?
You should never put your technical pack in a washing machine. The mechanical twisting and pulling motion can tear the shoulder straps, break the plastic buckles, and destroy the internal waterproof coatings. Hand washing in a bathtub or large basin is the only recommended method to safely clean your gear without causing permanent structural damage.
How often should I wash my outdoor pack?
You only need to deep clean your bag once or twice a year, depending on how frequently you use it. Washing it too often degrades the fabric and wears down the protective coatings. For regular maintenance, simply spot clean stains with a damp cloth and brush off dry dirt after every major trip to keep it in good condition.
What kind of soap is safe to use?
Always use a mild, unscented liquid soap or a cleaner specifically designed for technical outdoor fabrics. Avoid regular laundry detergents, bleach, and fabric softeners. These harsh household chemicals leave heavy residues, strip away water-resistant treatments, and break down the synthetic fibers over time, reducing the overall lifespan of your equipment.
How long does it take for the bag to dry?
Air drying typically takes between twenty-four to forty-eight hours, depending on the humidity and airflow in your drying space. The thick foam padding in the shoulder straps and back panel takes the longest to dry completely. Hang the bag upside down in a shaded, well-ventilated area, and ensure it is entirely dry before storing it.
Will washing remove the waterproofing?
Gentle hand washing with mild soap will not remove the factory waterproofing. However, aggressive scrubbing, harsh detergents, or machine washing will certainly strip the durable water repellent coating. If you notice water no longer beads up on the fabric after washing, you can easily restore it by applying a specialized waterproofing spray to the dry bag.
Conclusion
Taking the time to maintain your outdoor equipment ensures it will faithfully carry your supplies for many years to come. The process requires a bit of manual effort, but the resulting cleanliness and extended lifespan are well worth your afternoon. By avoiding harsh chemicals and machine washers, you protect the intricate synthetic fabrics and weather-resistant coatings that make your gear special.
Now that you understand how to wash patagonia backpack, you can tackle trail grime with total confidence. Do not let the fear of ruining your gear stop you from keeping it in top condition. Gather your simple supplies, fill up the tub, and give your trusted travel companion the care it deserves. A clean, well-maintained pack guarantees you are always prepared to hit the trail and embrace your next outdoor adventure comfortably.

About Caleb
Caleb Merritt is a Virginia-based outdoor writer and gear analyst who has spent over a decade sleeping on the ground, crossing mountain passes, and obsessively shaving grams off his pack weight. He holds a Bachelor of Science in Environmental Science from James Madison University, where he also served as president of the university’s outdoor recreation club. After graduating, he spent three years as a wilderness educator with a backcountry youth program in the Shenandoah Valley — teaching Leave No Trace ethics, backcountry navigation, and campcraft — before moving into full-time writing in 2018.
His work focuses on one core belief: the best gear is the gear you understand. Whether he’s doing a side-by-side weight comparison of ultralight shelters or writing a beginner’s guide to building a sub-20-lb base weight kit, Caleb writes with the same directness you’d expect from a trusted trail partner. He has logged more than 4,000 miles across iconic routes including the John Muir Trail, the Wind River Range, Vermont’s Long Trail, and the Collegiate Peaks Loop in Colorado.
Areas of Expertise
- Ultralight backpacking systems and base weight optimization
- Tent, tarp, and shelter testing across three-season and shoulder-season conditions
- Sleeping bag and quilt temperature rating verification
- Backpacking nutrition, meal planning, and calorie-per-ounce analysis
- Leave No Trace principles and wilderness ethics
- Campfire safety, bear country protocols, and water treatment methods
- Gear care, repair, and long-term durability assessment
Education
James Madison University — B.S. in Environmental Science, 2015
During his time at JMU, Caleb served as President of the Outdoor Recreation Club, where he planned and led more than 30 backcountry trips annually across the Blue Ridge Mountains and Appalachian Trail corridor. The role sharpened his ability to assess gear performance under real conditions, manage group safety in remote environments, and develop the kind of practical trail knowledge that no classroom can teach.
Professional Experience
Gear Writer & Senior Contributor — [campeox.com]
Produces in-depth gear reviews, buyer’s guides, and how-to content across backpacking, camping, and ultralight hiking categories. Tests all gear in real field conditions before publishing recommendations.
Wilderness Educator & Trip Leader — Shenandoah Backcountry Youth Program — 2015–2018 Led multi-day backcountry expeditions for teens and young adults throughout Shenandoah National Park and George Washington National Forest. Taught LNT principles, orienteering, first aid awareness, and campcraft fundamentals.
Outdoor Recreation Club President — James Madison University — 2013–2015 Organized and led university-sponsored hiking, backpacking, and camping trips in the Blue Ridge Mountains and Appalachian Trail corridor. Managed club budget, safety protocols, and trip logistics for a membership of 120+ students.
Editorial Standards
Every piece of gear Caleb recommends has been personally tested in the field — not just unboxed and described. His review process includes a minimum of two overnight trips per shelter, a full-season evaluation for sleep systems, and side-by-side comparisons wherever possible. He does not accept payment for positive reviews. Affiliate relationships, where they exist, are always disclosed in accordance with FTC guidelines.
All factual claims about gear specifications, trail distances, and safety recommendations are cross-referenced against manufacturer data sheets and established sources such as the Leave No Trace Center for Outdoor Ethics and the American Hiking Society before publication.