Investing in high-quality outdoor gear means taking proper care of it so it lasts for years of adventure. If you just returned from a long hike, a camping trip, or even a messy daily commute, you might be staring at your beloved canvas bag covered in scuffs, mud, and mystery stains.
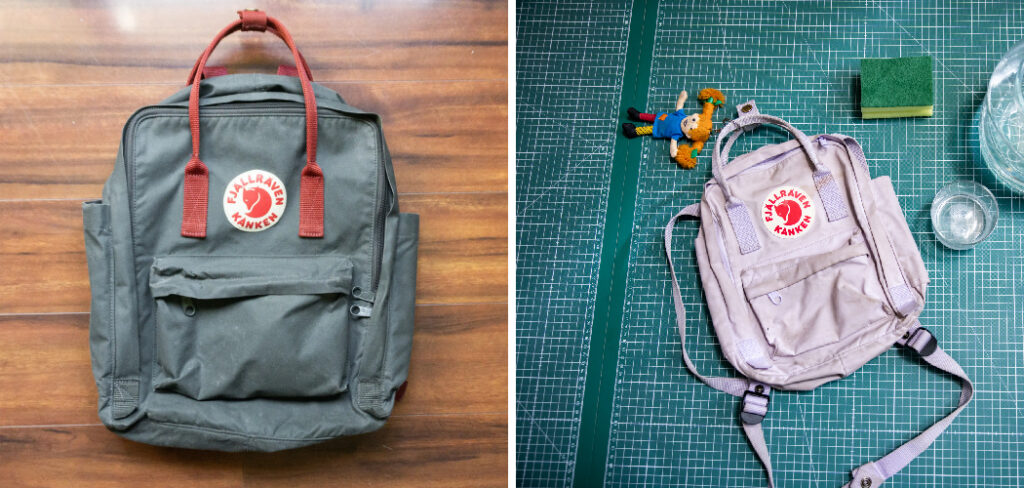
You are definitely not alone in wondering how to clean fjallraven backpack without ruining the signature Vinylon F fabric or fading its vibrant color. Washing these specific bags requires a gentle touch and the right technique, as throwing them into a washing machine will strip away their water resistance and leave them looking worn out. This comprehensive guide walks you through the exact steps, tools, and expert tips you need to safely hand wash your gear and restore it to its original glory.
Why Cleaning Your Fjallraven Kanken Matters
Learning this essential maintenance skill helps campers and outdoor beginners protect their investment while keeping their gear highly functional. When you spend time out on the trails, your bag naturally collects dirt, tree sap, sweat, and oils from your skin. Over time, these organic materials break down the fibers of the tough canvas and degrade the water-resistant coating that keeps your supplies dry during unexpected rain showers.
Regular cleaning removes these abrasive particles before they cause permanent damage to the seams and zippers. Furthermore, a clean bag prevents the growth of mold and mildew, which thrive in damp, dirty environments like a camping tent or a stuffy closet. By taking the time to wash your gear properly, you ensure the fabric remains strong, the zippers glide smoothly, and your outdoor companion stays reliable for every future excursion.
Tools and Materials You’ll Need
Before you start washing, gather all the necessary supplies. Having everything within reach makes the process smooth and prevents the fabric from drying out unevenly while you search for a brush.
- A large basin, bathtub, or clean sink
- Mild, non-bleach liquid detergent or baby shampoo
- A soft-bristled brush (a clean shoe brush or an old toothbrush works perfectly)
- A clean microfiber cloth or a soft sponge
- Lukewarm water
- Dry towels for pressing out moisture
- An old towel to lay down on your workspace
- Optional: A specialized canvas wax or waterproofing spray to reapply after the fabric dries completely
9 Step-by-Step Guide on How To Clean Fjallraven Backpack
Step 1 – Emptying the Compartments
Start by completely emptying every single pocket of your bag. Unzip the main compartment, the front pouch, and any side pockets to remove loose change, old receipts, trail mix crumbs, and hiking debris. Turn the bag upside down over a trash can or go outside to give it a vigorous shake. You want to dislodge all the loose dirt trapped in the bottom corners before water touches the fabric. Leaving small items inside, especially things like pens or lip balm, can cause disastrous stains once submerged. Check the hidden sleeves and padding areas carefully to ensure the bag is completely bare.
Step 2 – Dry Brushing the Exterior
Before introducing any water, take your soft-bristled brush and gently sweep away any dried mud or caked-on dust from the exterior. Brush in short, upward strokes along the bottom panel where dirt accumulates the most. This dry brushing step is crucial because getting thick dirt wet only pushes it deeper into the woven fibers, making it much harder to wash out later. Pay special attention to the seams and zipper tracks where fine grit loves to hide. Taking a few extra minutes to brush the dry fabric significantly reduces the amount of scrubbing you will need to do during the wet stages.
Step 3 – Preparing the Washing Station
Fill your clean sink, basin, or bathtub with a few inches of lukewarm water. Never use hot water, as high temperatures will permanently shrink the Vinylon F fabric and cause the vibrant dye to bleed out. Add just a few drops of your mild detergent or baby shampoo to the water and swirl it around with your hands until you see light suds forming. This gentle mixture is the safest foundation for anyone learning how to clean fjallraven backpack, as harsh chemicals will strip the protective finishes right off. Keep the water shallow so you can control the submersion process easily.
Step 4 – Spot Treating Tough Stains
Dip your soft sponge or microfiber cloth into the soapy water and ring out the excess. Target the most obvious stains first, such as mud splatters or grease marks, before washing the entire surface. Dab the soapy sponge directly onto the blemish and let the mild detergent sit on the stain for about two to three minutes. This short resting period allows the soap to break down the oils and lift the dirt away from the canvas. Do not rub the fabric aggressively back and forth, as this creates friction that damages the color and leaves a faded patch on your otherwise vibrant bag.
Step 5 – Scrubbing the Main Canvas
Once the spots are treated, dip your soft-bristled brush into the soapy water and begin washing the rest of the exterior. Work in small, circular motions across the front panel, moving systematically down to the sides and the bottom. Keep a light hand, letting the bristles do the work rather than applying heavy pressure. If you are researching how to clean fjallraven backpack thoroughly, remember that the straps hold a significant amount of sweat and body oils. Give the shoulder straps and top handles a gentle but thorough scrubbing to lift away any lingering odors and built-up grime from your outdoor trips.
Step 6 – Washing the Interior Lining
Do not neglect the inside of your bag, which often harbors spilled liquids, crushed snacks, and musty odors. Turn the bag inside out if the structure allows it, or simply pull the lining outward as much as possible. Use a clean, damp microfiber cloth dipped in the soapy water to wipe down the interior walls. Avoid using the brush on the inside, as the waterproof backing can be delicate and easily scratched by stiff bristles. Wipe along the bottom seams carefully to pick up any remaining sticky residues. Keep the moisture minimal here to ensure the interior dries quickly.
Step 7 – Rinsing Away the Soap
Drain the dirty, soapy water from your sink or basin and rinse the area clean. Refill it with fresh, cool water to begin the rinsing process. Submerge a clean sponge into the cool water and wipe down the entire bag, lifting away the detergent. You may need to rinse the sponge several times to get all the suds out of the fabric. Leaving dried soap residue on the canvas will create a cloudy, white film that attracts more dirt the next time you take it camping. Take your time wiping down every panel until the water squeezing out of your sponge runs completely clear.
Step 8 – Pressing Out Excess Moisture
Never twist, wring, or aggressively squeeze your bag to remove the water. Wringing out heavy canvas distorts the shape and damages the structural integrity of the seams. Instead, lay out a large, dry bath towel on a flat surface. Place your freshly rinsed bag flat on top of the towel. Take a second dry towel, lay it over the bag, and press down firmly with your hands. The towels will absorb the heavy moisture from the fabric without bending the stiff internal padding. Repeat this pressing motion with fresh towels until the bag stops dripping and feels merely damp to the touch.
Step 9 – Air Drying Properly
Hang the damp bag upside down in a well-ventilated, shaded area. Keep it far away from direct sunlight, as UV rays will rapidly fade the colors and weaken the wet fibers. Do not place it over a radiator, use a hair dryer, or put it in a tumble dryer, because artificial heat will warp the synthetic material permanently. Leave all the zippers completely open to promote maximum airflow through the interior compartments. Depending on the humidity in your home, it usually takes between twenty-four to forty-eight hours for the thick material to dry entirely. Wait until it is bone dry before packing it for your next trip.
Common Mistakes
Many beginners ruin their outdoor gear by making a few highly avoidable errors during the washing process. The most frequent mistake is throwing the bag into a washing machine. Even on a delicate cycle, the aggressive agitation and spinning will destroy the bag’s shape, strip the factory water resistance, and cause severe color fading.
Another major error involves using the wrong type of soap. Standard laundry detergents, bleach, and heavy chemical stain removers are entirely too harsh for Vinylon F fabric. They break down the fibers and leave chemical burns or bleached patches that cannot be repaired. Stick strictly to mild baby shampoo or gentle, color-safe liquid soaps.
Finally, people often fail to dry the gear correctly by hanging it out in the hot afternoon sun or tossing it into a clothes dryer to speed up the process. Heat shrinks the material and melts the protective coatings, while direct sunlight acts as a bleaching agent on wet dye. Always practice patience and allow the bag to air dry naturally in a cool, shaded environment to preserve its vibrant look and structural strength.
Expert Tips
To keep your gear looking fresh between deep washes, adopt a routine of quick spot cleaning. If you spill coffee or brush against a muddy car, wipe the area immediately with a damp cloth before the stain sets into the woven fibers.
Experts also recommend applying a specialized outdoor canvas wax after the bag is completely dry. Rubbing a thin layer of wax over the exterior and melting it in lightly with a warm iron or hairdryer restores the water-repellent barrier that naturally wears off over time.
Additionally, avoid overstuffing your pockets with heavy, sharp objects, which stretches the material and creates weak points that hold dirt. Storing your gear in a cool, dry closet rather than a damp basement or hot car trunk will drastically extend its lifespan and reduce the frequency of full submersions.
Frequently Asked Questions
Can I wash my bag in the washing machine?
You should absolutely never put your bag in a washing machine. The spinning and agitation will permanently destroy the fabric’s water resistance, wash out the vibrant dye, and ruin the structural shape of the padding. Always opt for a gentle hand wash in a sink or basin using mild soap and lukewarm water.
Why does my bag look faded after washing it?
Fading usually occurs because the water used was too hot, the detergent was too harsh, or the bag was left out in direct sunlight to dry. Hot water and aggressive chemicals strip the dye from the canvas fibers. To prevent fading, always use cool or lukewarm water and air dry in a fully shaded space.
How do I remove stubborn grease stains?
For tough oil or grease stains, apply a small drop of mild dish soap directly to the spot. Dish soap is specifically formulated to break down heavy oils safely. Let it sit for about five minutes, then gently dab the area with a wet sponge. Avoid scrubbing aggressively to protect the color.
Do I need to re-waterproof my gear after washing?
It is highly recommended to restore the water-resistant coating after a deep clean. Washing naturally lifts some of the protective finish over time. Once the fabric is completely dry, you can apply a specialized canvas wax or a high-quality waterproofing spray designed for outdoor gear to keep it safe from the rain.
How long does it take for the fabric to dry?
Drying times vary heavily based on the temperature and humidity of your environment. Generally, it takes between twenty-four and forty-eight hours for the thick canvas to dry completely. Hanging it upside down with all the zippers open in a well-ventilated room will help speed up the evaporation process significantly.
Conclusion
Taking proper care of your outdoor gear ensures it remains a dependable companion for all your future hikes, camping trips, and daily commutes. By avoiding washing machines, harsh detergents, and direct heat, you protect the unique fabric and the bold colors that make these bags so iconic. Remember to take your time with dry brushing, use lukewarm water, and gently spot treat stains rather than scrubbing aggressively.
Knowing exactly how to clean fjallraven backpack gives you the confidence to tackle muddy trails and rainy weather without worrying about permanently ruining your favorite gear. Make this simple hand-washing routine a regular part of your post-trip maintenance. With a little bit of patience and the right gentle techniques, your trusted canvas pack will stay vibrant, durable, and ready for whatever adventure you choose to embark on next.

About Caleb
Caleb Merritt is a Virginia-based outdoor writer and gear analyst who has spent over a decade sleeping on the ground, crossing mountain passes, and obsessively shaving grams off his pack weight. He holds a Bachelor of Science in Environmental Science from James Madison University, where he also served as president of the university’s outdoor recreation club. After graduating, he spent three years as a wilderness educator with a backcountry youth program in the Shenandoah Valley — teaching Leave No Trace ethics, backcountry navigation, and campcraft — before moving into full-time writing in 2018.
His work focuses on one core belief: the best gear is the gear you understand. Whether he’s doing a side-by-side weight comparison of ultralight shelters or writing a beginner’s guide to building a sub-20-lb base weight kit, Caleb writes with the same directness you’d expect from a trusted trail partner. He has logged more than 4,000 miles across iconic routes including the John Muir Trail, the Wind River Range, Vermont’s Long Trail, and the Collegiate Peaks Loop in Colorado.
Areas of Expertise
- Ultralight backpacking systems and base weight optimization
- Tent, tarp, and shelter testing across three-season and shoulder-season conditions
- Sleeping bag and quilt temperature rating verification
- Backpacking nutrition, meal planning, and calorie-per-ounce analysis
- Leave No Trace principles and wilderness ethics
- Campfire safety, bear country protocols, and water treatment methods
- Gear care, repair, and long-term durability assessment
Education
James Madison University — B.S. in Environmental Science, 2015
During his time at JMU, Caleb served as President of the Outdoor Recreation Club, where he planned and led more than 30 backcountry trips annually across the Blue Ridge Mountains and Appalachian Trail corridor. The role sharpened his ability to assess gear performance under real conditions, manage group safety in remote environments, and develop the kind of practical trail knowledge that no classroom can teach.
Professional Experience
Gear Writer & Senior Contributor — [campeox.com]
Produces in-depth gear reviews, buyer’s guides, and how-to content across backpacking, camping, and ultralight hiking categories. Tests all gear in real field conditions before publishing recommendations.
Wilderness Educator & Trip Leader — Shenandoah Backcountry Youth Program — 2015–2018 Led multi-day backcountry expeditions for teens and young adults throughout Shenandoah National Park and George Washington National Forest. Taught LNT principles, orienteering, first aid awareness, and campcraft fundamentals.
Outdoor Recreation Club President — James Madison University — 2013–2015 Organized and led university-sponsored hiking, backpacking, and camping trips in the Blue Ridge Mountains and Appalachian Trail corridor. Managed club budget, safety protocols, and trip logistics for a membership of 120+ students.
Editorial Standards
Every piece of gear Caleb recommends has been personally tested in the field — not just unboxed and described. His review process includes a minimum of two overnight trips per shelter, a full-season evaluation for sleep systems, and side-by-side comparisons wherever possible. He does not accept payment for positive reviews. Affiliate relationships, where they exist, are always disclosed in accordance with FTC guidelines.
All factual claims about gear specifications, trail distances, and safety recommendations are cross-referenced against manufacturer data sheets and established sources such as the Leave No Trace Center for Outdoor Ethics and the American Hiking Society before publication.