Picture this: you are miles away from civilization, packing up your campsite, when your trusty gear suddenly fails. The teeth separate, the slider jams, and your belongings spill out onto the dirt. A broken closure can ruin an otherwise perfect trip, leaving you frustrated and scrambling for a temporary fix.
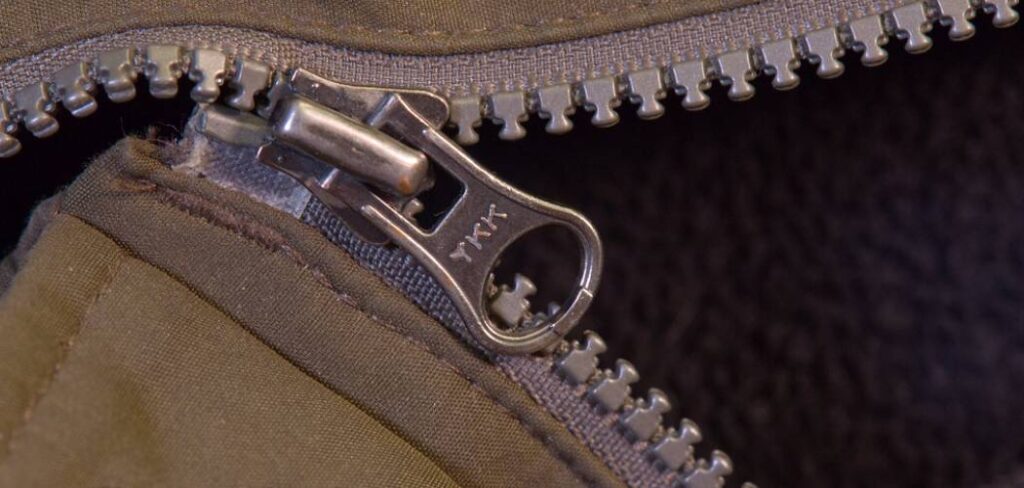
But you do not have to throw away your favorite bag just because the hardware gave out. Learning how to replace a zipper on a backpack is a practical skill that extends the life of your gear and saves you money. You can tackle this repair at home with a few basic supplies and a bit of patience. This guide provides a clear, step-by-step process to help you restore your bag and get back on the trail with confidence.
Why Repairing Your Backpack Zipper Matters
Understanding how to fix your gear is incredibly valuable for campers, hikers, and outdoor beginners. When you spend time in nature, your equipment endures rough conditions, heavy loads, and constant exposure to the elements. Hardware failures are bound to happen eventually. Being able to handle these repairs yourself means you never have to abandon a perfectly good piece of equipment just because of a minor malfunction.
Fixing your gear also promotes sustainability. The outdoor industry produces a massive amount of waste, and extending the lifespan of your bag keeps unnecessary textiles out of landfills. You will save a significant amount of money by repairing rather than replacing expensive outdoor equipment. More importantly, mastering this skill builds self-reliance. Knowing you can handle equipment issues gives you immense peace of mind during long excursions, allowing you to focus completely on enjoying your adventure.
Tools and Materials You’ll Need
Before you begin the repair process, gather all your supplies in a well-lit workspace. Having everything within reach will make the process much smoother and prevent frustration.
- Heavy-duty seam ripper
- Replacement zipper cut to the exact length of your bag’s opening
- Heavy-duty outdoor thread (upholstery or nylon thread works best)
- Sturdy sewing needles designed for thick fabrics
- Small needle-nose pliers
- Fabric scissors or thread snips
- Straight pins or fabric clips
- Thimble (optional, but highly recommended to protect your fingers when pushing needles through thick canvas)
9 Step-by-Step Guide on Backpack Zipper Installation
Step 1 – Remove the Damaged Hardware
Start by placing your bag on a flat, brightly lit table. Grab your heavy-duty seam ripper and carefully slide the sharp point under the stitches holding the old fabric tape in place. Apply gentle upward pressure to snap the thread, being extremely careful not to puncture the canvas of your bag.
Work your way down the entire length of the track on both sides. You will notice that outdoor gear often features double or triple stitching for durability, so this process takes some time. Pull away the loose threads as you go to keep your workspace tidy. Once all the stitches are broken, gently pull the old track away from the bag. Use your fingers to pick out any tiny, stubborn thread remnants left behind in the canvas.
Step 2 – Measure and Prepare the Area
With the old hardware completely removed, you need to prepare the opening for the new installation. Lay the edges of the bag flat and inspect the fabric where the old stitches used to be. Sometimes, thick canvas or nylon can become frayed or distorted after years of use. Smooth out the edges with your hands.
Take your replacement track and line it up against the opening to confirm the length is correct. The new fabric tape should extend slightly past the opening at both ends to ensure a secure fit. If the edges of your bag look frayed, you can apply a tiny amount of seam sealant or carefully melt the loose nylon fibers with a lighter to prevent further unraveling. Clean preparation guarantees a professional-looking repair.
Step 3 – Position the New Track
Carefully align one side of your new closure with the edge of the bag’s opening. The teeth should face outward, pointing away from the seam. You want the fabric tape of the zipper to sit perfectly flush against the inside edge of the bag. This positioning is crucial because knowing how to replace a zipper on a backpack correctly hinges on precise alignment.
If the track is uneven, your bag will look warped when closed. Take your time adjusting the placement. Ensure the slider is positioned at the very top or bottom, depending on how your bag naturally closes. Double-check that the track is not twisted or upside down. The fabric tape should lay entirely flat against the bag’s material without any bunching or awkward folds.
Step 4 – Secure the Fabric Tape in Place
Once you have the perfect alignment, you need to hold the track in place before sewing. Grab your straight pins or fabric clips. While pins are traditional, fabric clips are often much easier to use on thick materials like Cordura or heavy canvas, as they do not require piercing the fabric.
Space your clips or pins about one inch apart along the entire length of the seam. Press firmly to ensure the track does not shift. As you secure the tape, run your hand along the edge to feel for any bumps or uneven spots. The material must remain taut. Taking the time to properly pin the tape prevents slipping during the sewing process, which is the most common cause of crooked repairs and jammed sliders.
Step 5 – Thread Your Needle and Tie Off
Cut a length of heavy-duty nylon or upholstery thread about the length of your forearm. Using a piece that is too long will inevitably lead to frustrating tangles and knots, while a piece that is too short will require you to stop and re-thread constantly. Thread your heavy-duty needle and pull the thread through so you have equal lengths on both sides.
Tie a thick, secure double knot at the end of the thread. Outdoor bags take a lot of abuse, so a flimsy knot will quickly unravel under tension. Push the needle through a scrap piece of fabric first to ensure your knot holds firm. If you are working with extremely thick material, now is the time to slide your thimble onto your pushing finger for extra protection.
Step 6 – Sew the First Side
Push your needle up from the inside of the bag, forcing it through both the canvas and the zipper tape. This hides your starting knot on the interior of the bag. Pull the thread tight until the knot catches firmly. Begin sewing using a backstitch. A backstitch is incredibly strong and closely mimics the durability of a machine stitch.
To execute a backstitch, push the needle down through the fabric a short distance ahead of your starting point. Then, bring it back up halfway between the two points and push it down again just behind the previous stitch. Keep your stitches small, even, and tight. Maintain steady tension on the thread as you work your way down the entire length of the first side, removing clips as you go.
Step 7 – Secure the Ends and Switch Sides
When you reach the end of the first side, you need to create a strong anchor. The bottom of the track experiences the most stress when you yank the bag open. Make three or four tight stitches in the exact same spot to reinforce this high-tension area. Tie off your thread on the inside of the bag with a tight double knot and snip the excess.
Now, move to the second side of the opening. Zip the track closed to ensure the two sides align perfectly before you start pinning. This step is vital for learning how to replace a zipper on a backpack without creating a lopsided bag. Once you confirm the alignment is straight, unzip the track, pin the second side, and repeat the backstitching process from top to bottom.
Step 8 – Reinforce the Top and Bottom Stops
After both sides are fully stitched, turn your attention to the top and bottom stops. These are the areas where the slider rests when fully open or fully closed. Even with a strong backstitch, these specific points need extra reinforcement to handle the daily strain of packing and unpacking your gear.
Thread your needle again and create a small bar tack at the bottom end of the track. A bar tack is simply a series of tight, closely spaced stitches wrapping around the bottom of the teeth to prevent the slider from flying off the track. Create another dense cluster of stitches at the top ends of the fabric tape. This extra few minutes of sewing ensures your repair will withstand heavy outdoor use and overstuffed loads.
Step 9 – Test the Slider and Inspect the Seams
With all the sewing complete, it is time to test your handiwork. Grab the slider and pull it up and down the track several times. It should move smoothly without catching on any fabric or loose threads. If you feel any resistance, stop immediately and inspect the area. You might have sewn a stitch too close to the teeth.
Check your stitch tension along the inside and outside of the bag. The fabric should lay flat without any puckering. Trim away any stray threads that could eventually jam the slider. Finally, pack your bag with a few items to stretch the canvas and test the closure under a realistic load. If the track holds firm and zips effortlessly, your repair is complete and ready for the trail.
Common Mistakes When Replacing a Backpack Zipper
Rushing the removal process is a frequent error that leads to permanent damage. When using a seam ripper, people often get impatient and pull the fabric too hard, which tears the delicate canvas or nylon of the bag itself. You must let the sharp edge of the tool do the work, cutting the threads individually rather than ripping the fabric apart by force. Another major mistake is choosing the wrong thread for the repair. Standard cotton thread meant for lightweight clothing will snap under the tension of a fully loaded bag. You must use heavy-duty upholstery, nylon, or bonded polyester thread to ensure the seam can handle outdoor wear and tear.
Skipping the pinning phase is another critical misstep. Trying to hold the fabric tape in place with your fingers while sewing almost always results in a wavy, uneven track. This misalignment creates tension points that will eventually break the teeth or jam the slider. Furthermore, many beginners attempt to use a standard running stitch instead of a backstitch. A running stitch simply weaves in and out and lacks the structural integrity needed for luggage. Finally, failing to reinforce the bottom stop is a guaranteed way to lose your slider the first time you forcefully open your bag. Taking the time to add extra stitches at the stress points is absolutely essential.
Expert Tips
Achieving a factory-quality repair comes down to managing fabric tension and thread strength. To make pulling the needle through heavy canvas easier, run your thread over a block of beeswax before you start sewing. The wax coats the fibers, reducing friction and preventing the thread from tangling or fraying as you pull it through tough materials.
If you are replacing a closure on a waterproof or water-resistant bag, the needle holes you create will compromise the bag’s weatherproofing. To fix this, apply a thin layer of liquid seam sealer along the inside stitching once you are finished. Allow it to dry completely for twenty-four hours. This restores the watertight integrity of the seam, keeping your gear perfectly dry during unexpected rainstorms on the trail.
Frequently Asked Questions
What type of replacement zipper should I buy for a hiking bag?
You should purchase a heavy-duty, molded plastic or coil track designed specifically for outdoor gear. Look for a size #8 or #10, as these have larger, stronger teeth that resist dirt and handle heavy tension. Metal closures are generally not recommended for outdoor bags because they can rust and become incredibly stiff in freezing temperatures.
Can I do this repair with a sewing machine instead of by hand?
You can absolutely use a machine if it is capable of handling heavy fabrics. You will need a specialized zipper foot attachment to get the needle close enough to the teeth. You also must use heavy-duty needles, like denim or leather needles, to prevent them from snapping against the thick canvas of your bag.
How do I know what length to buy for my bag?
Measure the original track from the very top stop to the very bottom stop. Always buy a replacement that is at least one or two inches longer than your measurement. It is incredibly easy to cut a track down to the correct size, but you cannot add length to one that is too short.
Do I need to replace the whole track if only the slider is broken?
You do not always need to replace the entire track. If the teeth are perfectly intact and the fabric tape is not torn, you can often just replace the slider itself. You simply remove the top stop, slide a new metal pull onto the teeth, and sew a new stop into place.
How long does this repair typically take a beginner?
For someone doing this for the first time, the entire process usually takes about two to three hours. Removing the old stitches carefully takes the most time. It is a slow, methodical process, so you should set aside a quiet afternoon where you can focus on making small, even stitches without feeling rushed.
Read More About How to Fix a Camper Roof
Conclusion
Repairing your own outdoor equipment is an incredibly rewarding process that builds confidence and saves your hard-earned money. You do not need to be a professional tailor to fix a broken closure; you just need the right tools, tough materials, and a bit of focused patience. By following these detailed steps, you can breathe new life into your favorite hiking companion and keep it out of the landfill.
Remember to take your time during the removal process and rely on a strong backstitch to secure the new hardware. Proper alignment and heavy-duty thread are your best friends for this project. Now that you know exactly how to replace a zipper on a backpack, you are fully equipped to handle gear failures on your own. Grab your needle, thread, and replacement parts, and get your trusty bag ready for your next big adventure.

About Caleb
Caleb Merritt is a Virginia-based outdoor writer and gear analyst who has spent over a decade sleeping on the ground, crossing mountain passes, and obsessively shaving grams off his pack weight. He holds a Bachelor of Science in Environmental Science from James Madison University, where he also served as president of the university’s outdoor recreation club. After graduating, he spent three years as a wilderness educator with a backcountry youth program in the Shenandoah Valley — teaching Leave No Trace ethics, backcountry navigation, and campcraft — before moving into full-time writing in 2018.
His work focuses on one core belief: the best gear is the gear you understand. Whether he’s doing a side-by-side weight comparison of ultralight shelters or writing a beginner’s guide to building a sub-20-lb base weight kit, Caleb writes with the same directness you’d expect from a trusted trail partner. He has logged more than 4,000 miles across iconic routes including the John Muir Trail, the Wind River Range, Vermont’s Long Trail, and the Collegiate Peaks Loop in Colorado.
Areas of Expertise
- Ultralight backpacking systems and base weight optimization
- Tent, tarp, and shelter testing across three-season and shoulder-season conditions
- Sleeping bag and quilt temperature rating verification
- Backpacking nutrition, meal planning, and calorie-per-ounce analysis
- Leave No Trace principles and wilderness ethics
- Campfire safety, bear country protocols, and water treatment methods
- Gear care, repair, and long-term durability assessment
Education
James Madison University — B.S. in Environmental Science, 2015
During his time at JMU, Caleb served as President of the Outdoor Recreation Club, where he planned and led more than 30 backcountry trips annually across the Blue Ridge Mountains and Appalachian Trail corridor. The role sharpened his ability to assess gear performance under real conditions, manage group safety in remote environments, and develop the kind of practical trail knowledge that no classroom can teach.
Professional Experience
Gear Writer & Senior Contributor — [campeox.com]
Produces in-depth gear reviews, buyer’s guides, and how-to content across backpacking, camping, and ultralight hiking categories. Tests all gear in real field conditions before publishing recommendations.
Wilderness Educator & Trip Leader — Shenandoah Backcountry Youth Program — 2015–2018 Led multi-day backcountry expeditions for teens and young adults throughout Shenandoah National Park and George Washington National Forest. Taught LNT principles, orienteering, first aid awareness, and campcraft fundamentals.
Outdoor Recreation Club President — James Madison University — 2013–2015 Organized and led university-sponsored hiking, backpacking, and camping trips in the Blue Ridge Mountains and Appalachian Trail corridor. Managed club budget, safety protocols, and trip logistics for a membership of 120+ students.
Editorial Standards
Every piece of gear Caleb recommends has been personally tested in the field — not just unboxed and described. His review process includes a minimum of two overnight trips per shelter, a full-season evaluation for sleep systems, and side-by-side comparisons wherever possible. He does not accept payment for positive reviews. Affiliate relationships, where they exist, are always disclosed in accordance with FTC guidelines.
All factual claims about gear specifications, trail distances, and safety recommendations are cross-referenced against manufacturer data sheets and established sources such as the Leave No Trace Center for Outdoor Ethics and the American Hiking Society before publication.