Nothing ruins a beautiful outdoor adventure faster than a hot, painful spot on the back of your heel. You spend weeks planning a trip, packing your gear, and traveling to the perfect trailhead, only to have your day derailed by damaged feet. If you are new to the trails, you might think foot pain is just a normal part of the experience.
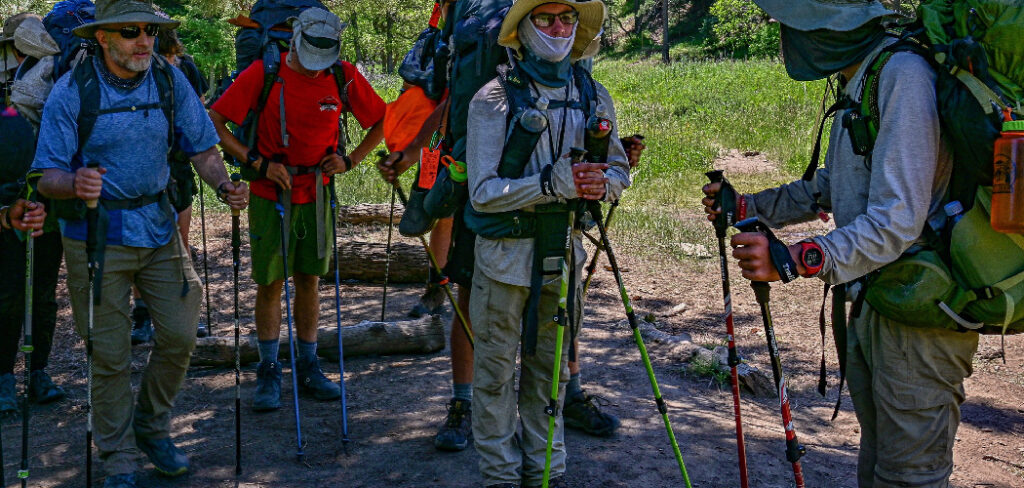
We are here to tell you that it does not have to be. Protecting your skin allows you to hike longer, enjoy the scenery, and finish the day with a smile. If you want to know how to avoid blisters when hiking, you need a mix of the right footwear, proper preparation, and on-trail awareness. Let us dive into the best strategies for keeping your feet happy and healthy.
Why You Need to Protect Your Feet on the Trail
Understanding why foot injuries happen is the first step toward preventing them entirely. Friction, moisture, and heat create the perfect storm for skin damage. When your boots rub against your heels or toes, the top layer of skin separates from the lower layers. Fluid then fills the gap, creating a painful pocket that makes every single step agonizing. Beginners often wear the wrong socks or poorly fitted shoes, trapping sweat and drastically increasing friction.
A simple two-mile nature walk can turn into a miserable ordeal if you ignore the early warning signs. Keeping your feet dry and secure is absolutely vital for any camping or travel experience. By taking a few proactive steps before and during your trek, you block friction at the source and guarantee your adventure remains memorable for the right reasons.
8 Step-by-Step Guide: How to Avoid Blisters When Hiking
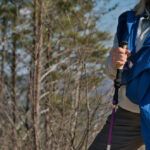
Step 1: Invest in Properly Fitted Footwear
Finding the right hiking boots makes a massive difference for your overall foot health. Shoes that fit too tightly will pinch your toes, while loose shoes allow your heel to slide continuously. This constant sliding creates immense friction that easily tears at your skin. Visit an outdoor retailer to get your feet measured by an expert.
Your feet naturally swell during a long day on the trail, so always shop for footwear in the late afternoon. You want enough room to wiggle your toes comfortably, but a snug fit around the heel and midfoot to lock everything securely in place. Take your time testing different brands.
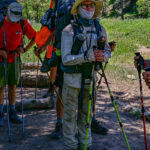
Step 2: Break in Your New Hiking Boots
Never take brand-new, stiff boots straight out of the box and onto a rugged mountain trail. Your shoes need time to soften and mold to the unique shape of your feet. Start by wearing your new footwear around your house for a few hours daily. Gradually increase the distance and unevenness of the terrain by walking around your neighborhood or a local park.
A solid break-in period allows the shoe materials to flex naturally with your specific stride, reducing stiff spots that rub against your heels. If you feel pinching during practice walks, you have plenty of time to adjust before your camping trip.
Step 3: Wear Moisture-Wicking Hiking Socks
Cotton socks are the absolute worst choice for long treks because they absorb sweat like a sponge. Wet skin softens incredibly fast, making it highly susceptible to tearing and severe friction damage. Instead, build your outdoor wardrobe around high-quality merino wool or synthetic blend socks.
These advanced materials pull moisture away from your foot so it can evaporate efficiently. Many experienced hikers also wear a thin liner sock underneath a thicker wool sock. The two layers rub against each other rather than dragging against your sensitive heel, keeping your internal shoe environment perfectly dry and protected from painful rubbing.
Step 4: Master Advanced Lacing Techniques
How you tie your shoelaces drastically impacts how your boots fit and function over long distances. If your heel slips upward, lock it down using a specific lacing method like the popular surgeon’s knot. These secure techniques tighten the ankle collar without restricting blood flow to the rest of your foot.
If your toes feel cramped during steep downhill descents, skip a set of lower eyelets to relieve forward pressure. Adjusting your laces throughout the day is a highly effective strategy. Since your feet swell as the hours pass, re-tie your shoes whenever the terrain or your personal comfort level changes.
Step 5: Keep Your Feet Clean and Dry
Trail dirt, sand, and tiny pebbles act exactly like sandpaper inside your shoes. If debris gets trapped in your socks, it will aggressively grind against your skin with every step you take. Consider wearing trail gaiters to seal off the top of your boots completely. Whenever you cross a creek or hike through rain, take immediate action to dry out your footwear. Remove wet boots and socks at the earliest opportunity. Wipe your skin down and allow everything to air dry in the sun. Packing an extra pair of dry socks is a mandatory rule for maintaining healthy feet.
Step 6: Apply Preventive Tape to Problem Areas
If you know your heels or toes are prone to irritation, stop the problem before you even start walking. Applying preventive barrier tape provides a slick, protective layer over highly vulnerable skin. Kinesiology tape or specialized moleskin work wonderfully for this specific purpose.
Clean and dry the area completely before applying the adhesive so it stays attached despite heavy sweat. Make absolutely sure the tape lays perfectly flat. Wrinkles or folded edges create the exact friction you desperately want to prevent. Smooth the edges down carefully to build an excellent defensive layer against the rugged trail.
Step 7: Address Hotspots Immediately on the Trail
A hotspot is your body sending you an urgent, fiery warning signal. You will feel a warm, tender area on your skin right before serious damage occurs. Beginners often ignore this sensation, hoping the pain will simply disappear. The moment you feel that burning sensation, stop walking and remove your shoe immediately. Inspect the area to see exactly what is causing the friction. Dry your foot, remove any trapped dirt, and apply a specialized hydrocolloid bandage directly over the red mark. Treating a hotspot early saves you from dealing with an agonizing open wound later in the day.
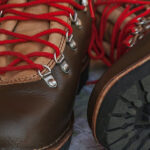
Step 8: Trim Your Toenails Before Every Trip
Overlooking basic foot hygiene causes severe discomfort on the downhill sections of a challenging trail. Long toenails slam repeatedly into the front of your boots as gravity pushes your body forward. This constant impact damages the delicate nail bed and generates intense friction. Grab clippers the night before your trip and trim your nails straight across.
File down sharp edges that might catch on your woolen socks. Keeping your nails short ensures your toes sit comfortably. Learning how to avoid blisters when hiking requires paying close attention to these vital grooming details before you even leave your house.
Frequently Asked Questions (FAQ)
What Is the Best Sock Material for Outdoor Treks?
The best material for trail socks is high-quality merino wool. Unlike traditional cotton, merino wool regulates temperature efficiently and wicks moisture far away from your skin.
- It keeps feet warm even when soaked.
- It naturally resists bad odors.
- It dries rapidly during your rest breaks.
Synthetic blends containing polyester are also excellent alternatives that provide outstanding durability.
Can Vaseline Prevent Foot Friction on the Trail?
Yes, applying lubricants like Vaseline or specialized anti-chafe balms can significantly reduce harsh friction. By lightly coating vulnerable areas such as the heel or between the toes, you allow your socks to glide smoothly over your skin. However, lubricants eventually wear off, so you must reapply them during long treks to maintain that protective, slick barrier.
Should I Pop a Blister if One Forms?
You should generally avoid popping them to prevent dangerous dirt and infections from entering the wound. The unbroken skin provides a sterile, natural bandage. However, if the fluid pocket is massive, highly painful, and likely to burst inside your boot naturally, draining it is acceptable.
- Wash your hands completely.
- Sterilize a needle with alcohol.
- Pierce the edge carefully and apply a bandage.
Are Trail Running Shoes Better Than Traditional Boots?
It depends entirely on your personal preference and your hiking environment. Trail runners are lightweight, highly breathable, and require almost no break-in period, which drastically lowers your chance of severe rubbing. Traditional boots offer superior ankle support and weather protection for rugged terrain. Beginners should try both styles in a store to see what feels better.
How Do Liner Socks Help Protect Your Feet?
Liner socks are ultra-thin garments worn directly under your primary woolen hiking socks. They essentially act as a defensive second skin. When you walk, the thick primary sock rubs against the smooth liner instead of dragging directly across your heel. This smart two-layer system transfers the harmful friction completely away from your sensitive body.
Conclusion
Preparing for a successful outdoor adventure means prioritizing your foot health above all else. By investing in properly fitted footwear, wearing high-quality merino wool socks, and treating minor hotspots before they escalate, you set yourself up for an incredible journey. Remember that your feet carry you through every single mile of the wilderness, so they deserve proper care and attention.
Taking preventative measures ensures you spend your valuable time admiring gorgeous landscapes rather than limping back to your campsite in absolute agony. Now that you understand the mechanics of friction and moisture, you are thoroughly prepared for your next big trek. Put these simple strategies into practice, discover how to avoid blisters when hiking, and hit the beautiful trails with total confidence. Your feet will definitely thank you!
About Caleb
Caleb Merritt is a Virginia-based outdoor writer and gear analyst who has spent over a decade sleeping on the ground, crossing mountain passes, and obsessively shaving grams off his pack weight. He holds a Bachelor of Science in Environmental Science from James Madison University, where he also served as president of the university’s outdoor recreation club. After graduating, he spent three years as a wilderness educator with a backcountry youth program in the Shenandoah Valley — teaching Leave No Trace ethics, backcountry navigation, and campcraft — before moving into full-time writing in 2018.
His work focuses on one core belief: the best gear is the gear you understand. Whether he’s doing a side-by-side weight comparison of ultralight shelters or writing a beginner’s guide to building a sub-20-lb base weight kit, Caleb writes with the same directness you’d expect from a trusted trail partner. He has logged more than 4,000 miles across iconic routes including the John Muir Trail, the Wind River Range, Vermont’s Long Trail, and the Collegiate Peaks Loop in Colorado.
Areas of Expertise
- Ultralight backpacking systems and base weight optimization
- Tent, tarp, and shelter testing across three-season and shoulder-season conditions
- Sleeping bag and quilt temperature rating verification
- Backpacking nutrition, meal planning, and calorie-per-ounce analysis
- Leave No Trace principles and wilderness ethics
- Campfire safety, bear country protocols, and water treatment methods
- Gear care, repair, and long-term durability assessment
Education
James Madison University — B.S. in Environmental Science, 2015
During his time at JMU, Caleb served as President of the Outdoor Recreation Club, where he planned and led more than 30 backcountry trips annually across the Blue Ridge Mountains and Appalachian Trail corridor. The role sharpened his ability to assess gear performance under real conditions, manage group safety in remote environments, and develop the kind of practical trail knowledge that no classroom can teach.
Professional Experience
Gear Writer & Senior Contributor — [campeox.com]
Produces in-depth gear reviews, buyer’s guides, and how-to content across backpacking, camping, and ultralight hiking categories. Tests all gear in real field conditions before publishing recommendations.
Wilderness Educator & Trip Leader — Shenandoah Backcountry Youth Program — 2015–2018 Led multi-day backcountry expeditions for teens and young adults throughout Shenandoah National Park and George Washington National Forest. Taught LNT principles, orienteering, first aid awareness, and campcraft fundamentals.
Outdoor Recreation Club President — James Madison University — 2013–2015 Organized and led university-sponsored hiking, backpacking, and camping trips in the Blue Ridge Mountains and Appalachian Trail corridor. Managed club budget, safety protocols, and trip logistics for a membership of 120+ students.
Editorial Standards
Every piece of gear Caleb recommends has been personally tested in the field — not just unboxed and described. His review process includes a minimum of two overnight trips per shelter, a full-season evaluation for sleep systems, and side-by-side comparisons wherever possible. He does not accept payment for positive reviews. Affiliate relationships, where they exist, are always disclosed in accordance with FTC guidelines.
All factual claims about gear specifications, trail distances, and safety recommendations are cross-referenced against manufacturer data sheets and established sources such as the Leave No Trace Center for Outdoor Ethics and the American Hiking Society before publication.