

Standing at the base of a snow-covered mountain should fill you with excitement, not anxiety about your gear. Your skis and boots get all the glory, but the bindings are the unsung heroes holding everything together. They keep you attached when you need control and release you safely when you take a tumble.
Understanding how to choose ski bindings is an essential skill for any winter sports enthusiast. Navigating the world of DIN settings, brake widths, and boot compatibility can feel overwhelming at first. You might look at a wall of mechanical metal and plastic parts and wonder where to begin.
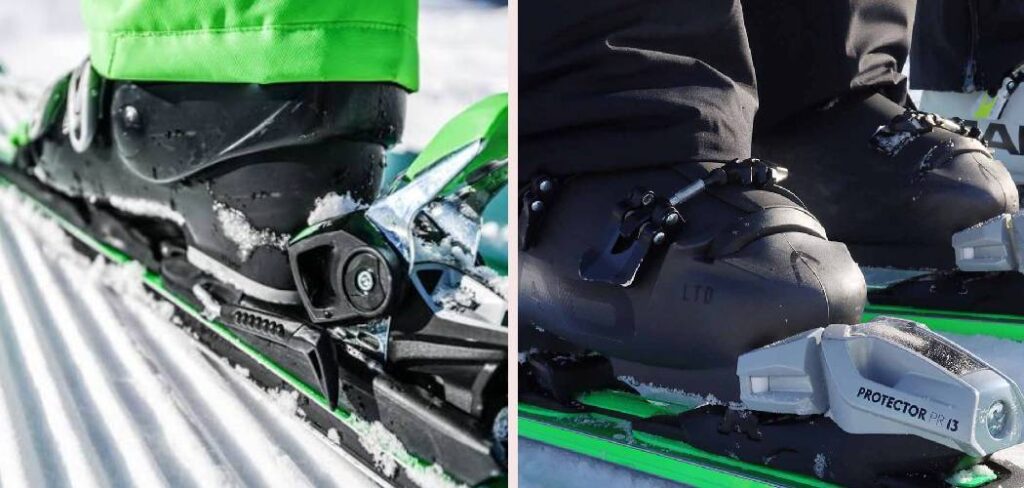
We created this guide to simplify the entire process for you. By the end of this read, you will feel completely confident evaluating your options and picking the perfect setup for your next mountain adventure. Let’s get started on finding the gear that keeps you safe and secure on the slopes.
Why Learning to Choose Ski Bindings Matters
Ski bindings serve as the critical interface between your body and your skis. When you carve down a groomed trail, they transmit your physical movements directly into the edges of your skis. If they are too loose, you risk ejecting prematurely and losing control at high speeds. If they are too tight, a simple fall can result in a serious leg injury because the ski acts as a lever against your knee.
Taking the time to understand this equipment gives you peace of mind. You will know exactly why a technician adjusts the springs a certain way and how that impacts your ride. This knowledge empowers you to ask the right questions at the ski shop.
Furthermore, having the right bindings drastically improves your performance. A properly matched binding transfers energy efficiently, letting you ski longer with less fatigue. It transforms a clunky, unresponsive setup into a smooth and thrilling ride down the mountain.
Tools and Materials You’ll Need
You do not need a full workshop to figure out your binding situation, but gathering a few key items will help. First, you need your ski boots. Bindings are designed to fit specific boot sole norms, so having your actual boots on hand is mandatory for a proper match.
Next, you should know the exact waist width of your skis. You can usually find this number printed right on the top sheet near the tail of the ski. A measuring tape can also help if the graphics have worn off over the years.
Finally, keep a notepad and pen nearby to write down your height, weight, age, and skier type. Ski technicians use these specific metrics to calculate your release settings. Having this information ready makes the selection process incredibly smooth.
Step-by-Step Guide on How to Choose Ski Bindings
Step 1: Determine Your Skier Type
The first phase of figuring out how to choose ski bindings involves an honest assessment of your abilities. Skiers generally fall into three categories: Type I for cautious beginners, Type II for moderate intermediate riders, and Type III for aggressive experts. Be totally honest with yourself here. Overestimating your skill level leads to bindings that will not release when you crash, while underestimating means you might pop out during a hard turn.
Step 2: Calculate Your DIN Range
DIN stands for Deutsches Institut für Normung, which is the industry scale for release force. You want a binding where your calculated DIN number falls right in the middle of the binding’s range. If your DIN is a 6, look for a binding that goes from 3 to 10. You should feel the heavy resistance of the metal springs as a technician turns the screwdriver to set this tension.
Step 3: Match the Brake Width to Your Skis
Ski brakes are the metal prongs that snap down into the snow to stop your ski from sliding away when you click out. You need the brake width to be equal to, or up to 15 millimeters wider than, the waist of your ski. If you force a narrow brake onto a fat powder ski, the metal arms will scrape against the icy snow when you carve.
Step 4: Check Boot Sole Compatibility
Modern ski boots come with different sole types, like traditional Alpine, GripWalk, or touring soles. You must verify that your binding accepts your specific boot sole. Pushing a touring boot into a traditional alpine binding will feel wrong immediately. The plastic will grind, and the safety release mechanism will fail to operate correctly.
Step 5: Consider the Binding Weight
Lighter skiers and those who hike up the mountain benefit greatly from lightweight composite bindings. Heavier, more aggressive skiers need the rugged durability of metal housings. When you lift a heavy metal binding in the shop, you can feel its solid, bombproof construction. Think about how much energy you want to expend dragging that weight up the chairlift all day.
Step 6: Evaluate Your Skiing Style and Terrain
Park skiers who hit massive jumps need bindings with high elasticity, meaning the binding can absorb a shock without releasing. Powder hounds learning how to choose ski bindings should look for options that sit a bit flatter on the ski. Your preferred terrain dictates the minor technical features that make a huge difference in how the ski flexes under your feet.
Step 7: Have a Certified Technician Mount Them
Never attempt to mount or adjust your bindings at home with a power drill. Take your skis, boots, and new bindings to a certified shop. You will hear the satisfying, heavy mechanical click as the technician tests the heel piece on the workbench. They use specialized jigs and testing machines to guarantee your safety on the snow.
Common Mistakes When Choosing Ski Bindings
Many beginners buy bindings solely based on the color or brand name. While a matching setup looks fantastic, aesthetics should never override safety and compatibility. Buying a bright red binding that maxes out at a DIN of 9 when you need a 10 is a recipe for disaster.
Another frequent error is ignoring the brake width. People often buy bindings on clearance online, only to realize the brakes are far too narrow for their modern all-mountain skis. Bending the brakes with pliers compromises the structural integrity of the metal and voids the warranty.
Lastly, some skiers reuse old bindings that are over a decade old. Manufacturers maintain a list of indemnified bindings that shops are legally allowed to work on. If your bindings are too old, the internal springs degrade, and no reputable technician will adjust them.
Expert Tips
Always lean toward buying a binding that accommodates your future progression. If you are a strong intermediate skier on the verge of becoming an advanced rider, buy a binding with a slightly higher DIN ceiling. This prevents you from having to purchase a completely new setup next season.
Pay attention to the stand height of the binding. A higher stand height gives you more leverage to roll the ski onto its edge on hardpack snow. A lower stand height provides a more stable, surfy feel in deep, soft powder.
Keep your bindings clean and free of road salt. When you transport your skis on a roof rack, the grime from the highway gets packed into the greased springs. Wiping them down with a warm, damp cloth after a trip extends their lifespan significantly.
Frequently Asked Questions
Can I mount ski bindings myself?
You should never attempt to mount your own ski bindings unless you are a certified technician with the proper jigs. The mounting process requires precise drilling into the core of the ski. A minor miscalculation can ruin the ski entirely and result in a binding that fails to release during a crash.
How long do ski bindings last?
Most modern ski bindings function safely for about 70 to 100 days on the snow, which translates to roughly five to ten years for the average recreational skier. The internal springs slowly lose their precise tension over time due to temperature changes and repeated stress. Shops keep a current list of approved models and will refuse to service gear that has aged out.
What happens if my DIN is set too low?
If your release settings are too low for your weight and ability, the binding will let go of your boot prematurely. You might be carving a normal turn or hitting a small bump when your ski suddenly pops off. This unexpected release often causes violent and unnecessary falls on otherwise easy terrain.
Are all ski bindings compatible with all ski boots?
No, the industry currently uses several different boot sole standards. Traditional alpine soles have flat, hard plastic bottoms, while GripWalk and touring soles feature rockered rubber treads for easier walking. You must carefully read the specifications of both your boot and the binding to ensure they lock together safely.
Do I need different bindings for powder skis?
You do not necessarily need a specialized binding type just for powder, but you absolutely need the correct brake width to fit the wider waist of a powder ski. Some riders prefer bindings with a lower profile for deep snow to feel more connected to the ski. Ultimately, a standard alpine binding works perfectly well in deep snow as long as it fits the ski dimensions.
Conclusion
Getting your gear dialed in is the most important step before you head to the mountains. When you finally understand how to choose ski bindings, you remove the guesswork from your winter preparations. You can confidently walk into a gear shop, speak the language of DIN settings and brake widths, and walk out with the perfect setup.
The connection between you and your skis dictates every turn, stop, and jump you make. By prioritizing safety, compatibility, and your true skill level, you set yourself up for incredible days on the slopes. Now that you have this knowledge, grab your boots, measure those skis, and get ready for a fantastic winter season.

About Caleb
Caleb Merritt is a Virginia-based outdoor writer and gear analyst who has spent over a decade sleeping on the ground, crossing mountain passes, and obsessively shaving grams off his pack weight. He holds a Bachelor of Science in Environmental Science from James Madison University, where he also served as president of the university’s outdoor recreation club. After graduating, he spent three years as a wilderness educator with a backcountry youth program in the Shenandoah Valley — teaching Leave No Trace ethics, backcountry navigation, and campcraft — before moving into full-time writing in 2018.
His work focuses on one core belief: the best gear is the gear you understand. Whether he’s doing a side-by-side weight comparison of ultralight shelters or writing a beginner’s guide to building a sub-20-lb base weight kit, Caleb writes with the same directness you’d expect from a trusted trail partner. He has logged more than 4,000 miles across iconic routes including the John Muir Trail, the Wind River Range, Vermont’s Long Trail, and the Collegiate Peaks Loop in Colorado.
Areas of Expertise
- Ultralight backpacking systems and base weight optimization
- Tent, tarp, and shelter testing across three-season and shoulder-season conditions
- Sleeping bag and quilt temperature rating verification
- Backpacking nutrition, meal planning, and calorie-per-ounce analysis
- Leave No Trace principles and wilderness ethics
- Campfire safety, bear country protocols, and water treatment methods
- Gear care, repair, and long-term durability assessment
Education
James Madison University — B.S. in Environmental Science, 2015
During his time at JMU, Caleb served as President of the Outdoor Recreation Club, where he planned and led more than 30 backcountry trips annually across the Blue Ridge Mountains and Appalachian Trail corridor. The role sharpened his ability to assess gear performance under real conditions, manage group safety in remote environments, and develop the kind of practical trail knowledge that no classroom can teach.
Professional Experience
Gear Writer & Senior Contributor — [campeox.com]
Produces in-depth gear reviews, buyer’s guides, and how-to content across backpacking, camping, and ultralight hiking categories. Tests all gear in real field conditions before publishing recommendations.
Wilderness Educator & Trip Leader — Shenandoah Backcountry Youth Program — 2015–2018 Led multi-day backcountry expeditions for teens and young adults throughout Shenandoah National Park and George Washington National Forest. Taught LNT principles, orienteering, first aid awareness, and campcraft fundamentals.
Outdoor Recreation Club President — James Madison University — 2013–2015 Organized and led university-sponsored hiking, backpacking, and camping trips in the Blue Ridge Mountains and Appalachian Trail corridor. Managed club budget, safety protocols, and trip logistics for a membership of 120+ students.
Editorial Standards
Every piece of gear Caleb recommends has been personally tested in the field — not just unboxed and described. His review process includes a minimum of two overnight trips per shelter, a full-season evaluation for sleep systems, and side-by-side comparisons wherever possible. He does not accept payment for positive reviews. Affiliate relationships, where they exist, are always disclosed in accordance with FTC guidelines.
All factual claims about gear specifications, trail distances, and safety recommendations are cross-referenced against manufacturer data sheets and established sources such as the Leave No Trace Center for Outdoor Ethics and the American Hiking Society before publication.




