

Hitting the open road in your RV brings endless freedom, but it also comes with a few messy chores. Managing your wastewater system is a crucial part of the adventure. If you ignore the holding tanks, you risk awful smells, clogs, and broken sensors. Fortunately, mastering this task is much easier than you might think. Whether you just bought your first rig or need a quick refresher, learning exactly how to clean black tank on camper will save you from major headaches down the road. We will walk you through the entire process, explaining what tools you need and the best techniques to keep your system fresh. Let us dive into the simple routine that keeps your RV trips pleasant and odor-free.
Why Cleaning Your Camper’s Black Tank Matters
Regular maintenance of your wastewater system goes far beyond just getting rid of bad smells. When waste and toilet paper sit in the holding tank too long, they harden into a solid mass often called a “poop pyramid.” This nasty buildup blocks the drainage valve, making it impossible to empty the system properly.
Additionally, solid debris frequently clings to the internal sensors. When this happens, your monitor panel might show the tank as full even when it is completely empty. A thoroughly flushed system prevents these stubborn clogs, extends the lifespan of your plumbing components, and ensures accurate sensor readings. By adopting a consistent flushing routine, you protect your investment and guarantee that your outdoor getaways remain comfortable and hygienic for everyone on board.
7 Step-by-Step Guide on How to Clean Black Tank on Camper
Step 1: Gather Your Protective Gear and Cleaning Supplies
Before you touch any valves or hoses, you must gather all the necessary equipment to ensure a sanitary process. You will definitely need a high-quality, transparent sewer hose elbow, which lets you see when the water runs clear. Grab a thick pair of disposable or dedicated rubber gloves to protect your hands from harmful bacteria. You also need a dedicated garden hose for rinsing out the system—never use your fresh drinking water hose for this task. Finally, keep some holding tank treatment pods or liquid fluid nearby to drop into the toilet after the job is done. Having everything within arm’s reach prevents you from scrambling around your campsite while dealing with open sewage valves.
Step 2: Connect the Sewer Hose Securely
Once you have your gloves firmly on your hands, take your heavy-duty sewer hose and connect it to the main discharge pipe on your RV. Double-check that the bayonet fitting locks tightly onto the camper’s waste outlet to prevent any catastrophic spills. Next, take the other end of the sewer hose and attach it firmly to the dump station hole or your campsite’s designated sewer connection. Always use a proper sewer ring or heavy rock to weigh down the dump station end so it does not pop out during the high-pressure release. A secure connection gives you peace of mind and guarantees that all the wastewater travels exactly where it belongs without contaminating the surrounding ground.
Step 3: Empty the Contents Completely
Now that everything is hooked up safely, it is time to release the waste. Reach for the valve handle designated for your solid waste—usually marked with a dark color or specifically labeled. Pull the handle straight out firmly but smoothly to open the gate. You will immediately hear the rush of liquid traveling down the ribbed hose. Allow the system to drain completely until the flow slows to a tiny trickle. Watching the clear elbow attachment at the dump station end helps you confirm that the main bulk of the waste has exited the plumbing. Be patient here and give gravity enough time to pull all the heavy solids out of the holding area before moving forward.
Step 4: Attach the Rinsing Hose
With the initial draining complete, you must flush the remaining residue off the interior walls. Many modern rigs feature a built-in flush system specifically designed for this purpose. If your RV has one, attach your dedicated rinsing hose to the exterior flush inlet on the side of your rig. If you do not have a built-in system, you will need to bring a flexible rinsing wand inside the bathroom. Attach the hose to the wand and feed it directly down the toilet valve. Whichever method you use, ensure the fresh water source is turned on fully to generate enough water pressure to blast away the stubborn paper and waste clinging to the internal plastic walls.
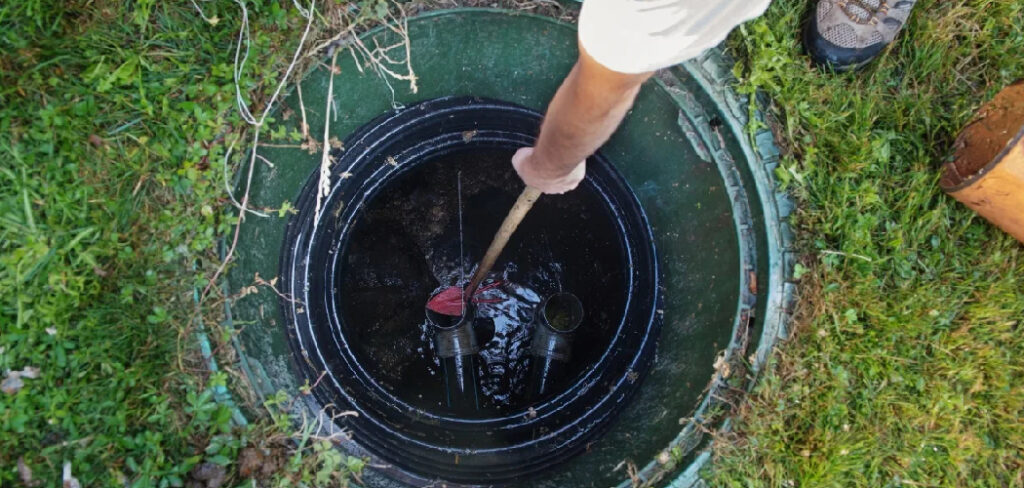
Step 5: Master How to Clean Black Tank on Camper with Water Pressure
This specific phase is where the real magic happens. Let the fresh water spray aggressively inside the container for several minutes while leaving the main exterior drain valve completely open. The high-pressure water streams act like a power washer, knocking down the dreaded poop pyramids and dislodging trapped tissue from the sensitive electronic sensors. You should stand near the clear elbow outside and watch the color of the flowing water carefully. Keep the water running continuously until the liquid turns completely clear and you no longer see any chunks of paper passing through the clear plastic attachment. This visual confirmation is the absolute best way to know that the interior surfaces are completely washed and sanitized.
Step 6: Flush the Gray Water System
Once the dark wastewater system runs entirely clear, turn off the rinsing water source and push the solid waste valve firmly closed. Now, locate the handle for your gray water system, which holds the soapy runoff from your sinks and shower. Pull this valve open and let the soapy liquid rush out through the same sewer hose. This strategic sequence is crucial because the soapy, gray water acts as a secondary cleaner for your ribbed sewer hose. It washes away the gross residue left behind by the solid waste, leaving your exterior hoses much cleaner and safer to handle when it is time to pack up your campsite and hit the highway for your next destination.
Step 7: Add Fresh Treatment and Water
The final phase involves prepping the system for your next trip. Go inside the bathroom and drop a holding tank treatment pod or pour liquid enzyme cleaner directly into the toilet bowl. Press the foot pedal to flush the treatment down into the empty holding area. Immediately add about three to five gallons of fresh water to the system. You must never leave the container completely dry, as the water acts as a barrier to prevent awful smells from escaping into your living space. The treatment chemicals also need this water to activate properly and begin breaking down new waste during your travels. Your system is now perfectly prepped, fresh, and ready for your next big adventure.
Frequently Asked Questions
How Often Should I Empty My Holding Tanks?
You should generally empty your wastewater system when it is about two-thirds to three-quarters full. Emptying it too early prevents gravity from creating enough pressure to pull heavy solids out of the plumbing. For most weekend campers, dumping once at the end of the trip is perfect. Full-time travelers typically need to perform this task every five to seven days depending on usage.
Can I Use Regular Household Bleach For Cleaning?
You should never use regular household bleach or harsh chemical cleaners in your RV plumbing.
- Bleach destroys the vital rubber seals on your dump valves.
- Harsh chemicals kill the beneficial bacteria that break down waste.
- Strong fumes can easily seep into your camper’s living area.
Instead, stick to enzyme-based treatments specifically designed for recreational vehicles to protect your plumbing infrastructure.
What Kind Of Toilet Paper Is Safe To Use?
To prevent stubborn clogs, you must use toilet paper that dissolves rapidly in water. You do not necessarily have to buy expensive RV-specific brands, but you should choose single-ply or quick-dissolving septic-safe options. You can easily test your favorite brand by placing a few sheets in a jar of water, shaking it, and seeing if it breaks apart completely within a few minutes.
Why Do My Sensors Still Read Full After Dumping?
False sensor readings are incredibly common and usually caused by wet toilet paper or solid debris clinging directly to the electronic probes inside the container. To fix this frustrating issue, you need to flush the system repeatedly with a high-pressure wand. Alternatively, you can fill the system with water, add a specialized sensor cleaning solution, and drive around to agitate the liquid before draining it.
Is It Okay To Leave The Dump Valve Open At A Campsite?
You must never leave your solid waste valve open while connected to a campsite sewer. If you leave it open, the liquid drains away immediately while the solid waste piles up, creating a massive clog that is incredibly difficult to remove. Always keep the valve closed until the system is mostly full, then dump it all at once to ensure a powerful, cleansing flush.
Conclusion
Maintaining your RV plumbing does not have to be an intimidating or disgusting chore. By gathering the right tools, following a logical sequence, and taking advantage of high-pressure water, you can keep your system completely odor-free and functioning perfectly. Remembering to use the right toilet paper and keeping enough water in the system will prevent the vast majority of common clogs and sensor malfunctions. Now that you understand exactly how to clean black tank on camper, you can tackle this essential maintenance task with complete confidence. Do not let the fear of a messy dump station ruin your camping experience. Put on your gloves, follow these simple steps, and get back to enjoying the beautiful outdoors.
About Caleb
Caleb Merritt is a Virginia-based outdoor writer and gear analyst who has spent over a decade sleeping on the ground, crossing mountain passes, and obsessively shaving grams off his pack weight. He holds a Bachelor of Science in Environmental Science from James Madison University, where he also served as president of the university’s outdoor recreation club. After graduating, he spent three years as a wilderness educator with a backcountry youth program in the Shenandoah Valley — teaching Leave No Trace ethics, backcountry navigation, and campcraft — before moving into full-time writing in 2018.
His work focuses on one core belief: the best gear is the gear you understand. Whether he’s doing a side-by-side weight comparison of ultralight shelters or writing a beginner’s guide to building a sub-20-lb base weight kit, Caleb writes with the same directness you’d expect from a trusted trail partner. He has logged more than 4,000 miles across iconic routes including the John Muir Trail, the Wind River Range, Vermont’s Long Trail, and the Collegiate Peaks Loop in Colorado.
Areas of Expertise
- Ultralight backpacking systems and base weight optimization
- Tent, tarp, and shelter testing across three-season and shoulder-season conditions
- Sleeping bag and quilt temperature rating verification
- Backpacking nutrition, meal planning, and calorie-per-ounce analysis
- Leave No Trace principles and wilderness ethics
- Campfire safety, bear country protocols, and water treatment methods
- Gear care, repair, and long-term durability assessment
Education
James Madison University — B.S. in Environmental Science, 2015
During his time at JMU, Caleb served as President of the Outdoor Recreation Club, where he planned and led more than 30 backcountry trips annually across the Blue Ridge Mountains and Appalachian Trail corridor. The role sharpened his ability to assess gear performance under real conditions, manage group safety in remote environments, and develop the kind of practical trail knowledge that no classroom can teach.
Professional Experience
Gear Writer & Senior Contributor — [campeox.com]
Produces in-depth gear reviews, buyer’s guides, and how-to content across backpacking, camping, and ultralight hiking categories. Tests all gear in real field conditions before publishing recommendations.
Wilderness Educator & Trip Leader — Shenandoah Backcountry Youth Program — 2015–2018 Led multi-day backcountry expeditions for teens and young adults throughout Shenandoah National Park and George Washington National Forest. Taught LNT principles, orienteering, first aid awareness, and campcraft fundamentals.
Outdoor Recreation Club President — James Madison University — 2013–2015 Organized and led university-sponsored hiking, backpacking, and camping trips in the Blue Ridge Mountains and Appalachian Trail corridor. Managed club budget, safety protocols, and trip logistics for a membership of 120+ students.
Editorial Standards
Every piece of gear Caleb recommends has been personally tested in the field — not just unboxed and described. His review process includes a minimum of two overnight trips per shelter, a full-season evaluation for sleep systems, and side-by-side comparisons wherever possible. He does not accept payment for positive reviews. Affiliate relationships, where they exist, are always disclosed in accordance with FTC guidelines.
All factual claims about gear specifications, trail distances, and safety recommendations are cross-referenced against manufacturer data sheets and established sources such as the Leave No Trace Center for Outdoor Ethics and the American Hiking Society before publication.


