Getting your own winter gear sets you up for countless successful days on the mountain. New riders often feel intimidated when their fresh equipment arrives in separate boxes. You might look at the hardware and wonder if you need a professional technician to put it all together. Thankfully, setting up your deck is an entirely manageable project that requires minimal mechanical experience.
Learning exactly how to install bindings on snowboard gives you total control over your riding experience. You will gain a much deeper understanding of your equipment and how minor adjustments impact your comfort. The process takes less than an hour and guarantees your setup matches your unique body mechanics perfectly. This expert guide walks you through every single phase to ensure your gear is safe, secure, and ready for the slopes.
Why Learning This Skill Matters for Beginners
Understanding your equipment builds a foundation of confidence before you ever touch the snow. When you handle the installation yourself, you learn precisely how the mounting system holds everything together. This mechanical familiarity becomes incredibly valuable when you spend long days outdoors in changing weather conditions.
Campers and outdoor enthusiasts often find themselves far away from convenient repair shops. If a screw vibrates loose during a backcountry run, knowing how to secure your gear keeps you safe. You can make quick stance adjustments in the parking lot or tweak your strap angles between resort runs. Taking ownership of your setup transforms you from a dependent beginner into a self-reliant snowboarder. You save money on shop fees while developing a deeper connection to your primary mode of winter transportation.
Tools and Materials You’ll Need
Gathering the right supplies beforehand prevents frustration and keeps the installation process smooth. You likely already have everything required sitting in a basic toolbox. Prepare a clean, flat surface with plenty of lighting before you begin unpacking your gear.
- Your snowboard deck
- Two snowboard bindings (left and right)
- Mounting discs and hardware (included with your bindings)
- A number three Phillips head screwdriver (a #2 works, but a #3 prevents stripping)
- A measuring tape
- Your snowboard boots
- A multi-tool or pocket tool (optional item for convenient mountain-side adjustments)
10 Step-by-Step Guide on How to Install Bindings on Snowboard
Step 1 – Determine Your Stance Direction
Before attaching any hardware, you must figure out which foot will lead as you ride down the mountain. Snowboarders use two distinct stances based on their natural balance and dominance. A “regular” stance means your left foot points downhill, while a “goofy” stance puts your right foot in the front position.
If you feel unsure about your stance, try sliding across a smooth hardwood floor in your socks. The foot you naturally extend forward is almost always your leading foot for winter sports. You can also have a friend gently push you from behind to see which foot you use to catch your balance. Figuring this out early prevents you from having to unscrew and reverse everything later.
Step 2 – Find Your Preferred Stance Width
Your stance width heavily influences your stability and turning ability on the snow. A good rule of thumb places your feet slightly wider than shoulder-width apart. This natural positioning gives you enough leverage to press into the edges without straining your knees.
Grab your measuring tape and measure the distance from the center of your left kneecap to your right kneecap. You can match this measurement to the reference points marked around the insert holes on your snowboard. Most modern boards feature a “reference stance” stamped directly onto the top sheet to guide beginners. You can use these factory recommendations as a reliable starting point for your first few trips to the mountain.
Step 3 – Position the Baseplates
Now that you know your direction and width, place the empty bindings over the inserts. Make sure the buckles face outward toward the edges of the board. The higher part of the binding, known as the highback, should align with the heel edge of the snowboard.
Take a moment to center the bindings across the width of the board. You want an equal amount of space extending past the toe edge and the heel edge. If your boots hang too far over the front, your toes will drag in the snow and cause sudden crashes. Centering everything properly ensures your weight distributes evenly across the entire running length of the board. Knowing how to install bindings on snowboard with perfect centering drastically improves your balance.
Step 4 – Align the Binding Angles
Binding angles dictate the direction your knees point while you ride. You adjust these angles using the numbered notches found on the mounting discs. Beginners usually benefit from a “duck stance,” where both toes angle slightly outward away from the center of the board.
Set your front binding to an angle of positive 15 degrees. Point your back binding backward to an angle of negative 9 or negative 12 degrees. This mild duck stance feels highly natural and reduces pressure on your joints as you bend your knees. You simply rotate the mounting disc until the small arrow lines up with the correct degree marking on the baseplate.
Step 5 – Insert the Mounting Discs
Take the mounting discs and drop them into the center cutout of the baseplates. Line up the slots on the discs with the threaded insert holes on your snowboard. Depending on your brand of equipment, you will see either a four-hole pattern, a three-hole pattern, or a channel system.
Look straight down through the disc to ensure the metal threads are visible beneath the slots. You want the teeth of the mounting disc to lock firmly into the grooves of the binding base. Give the entire setup a slight wiggle to confirm the angles have not shifted out of place. Everything should feel stable and seated securely before you introduce the metal hardware.
Step 6 – Thread the Screws by Hand
Grab the metal screws and their accompanying washers provided by the manufacturer. Drop one screw through the mounting disc and straight into a threaded hole on the board. Do not reach for your screwdriver just yet, as power tools or forceful turning can ruin the threads.
Use your fingers to gently turn each screw clockwise until you feel it catch the metal threading inside the board. Hand-threading guarantees you do not cross-thread the hardware, which can permanently damage your deck. Get all four screws started on the front binding, then move to the back binding. Once every screw turns smoothly by hand, you are ready to secure them firmly.
Step 7 – Tighten the Screws in a Star Pattern
Pick up your number three Phillips head screwdriver for the final tightening phase. Press down firmly into the head of the screw to maintain a solid grip and prevent stripping the metal. Tighten the screws using a star pattern rather than moving in a simple circle.
Turn the top-left screw a few times, then move diagonally to the bottom-right screw. Next, tighten the top-right screw before finishing with the bottom-left screw. This star technique pulls the mounting disc down evenly across the baseplate. Snug them down tightly until the bindings cannot shift, but avoid overtightening to the point where you dent the top sheet.
Step 8 – Check the Highback Alignment
The highback supports your calves and provides the leverage needed to turn on your heel edge. For optimal performance, the highbacks should sit parallel to the heel edge of your snowboard. Most standard bindings feature two small screws at the base of the highback for easy rotation.
Loosen these screws slightly and twist the highback until it aligns with the metal edge of the board. Retighten the screws securely so the plastic does not shift while riding. Aligning the highbacks directs your energy straight into the metal edge rather than pushing diagonally across the board. This small adjustment makes initiating turns feel drastically easier and far more responsive.
Step 9 – Adjust the Toe and Ankle Straps
Straps keep your boots firmly anchored to the baseplate and prevent your heel from lifting. Before you step into the gear, you need to center the padded portion of the straps over your foot. A poorly adjusted strap creates painful pressure points that can ruin a great day on the snow.
Look for the toolless adjustment levers located on the inside of the ankle and toe straps. Lengthen or shorten the ladders until the padded section sits perfectly in the middle of your boot. You want the ratchets to engage smoothly without running out of plastic teeth before feeling tight. Take your time dialing this in, as comfortable feet are crucial for riding from first chair to last call.
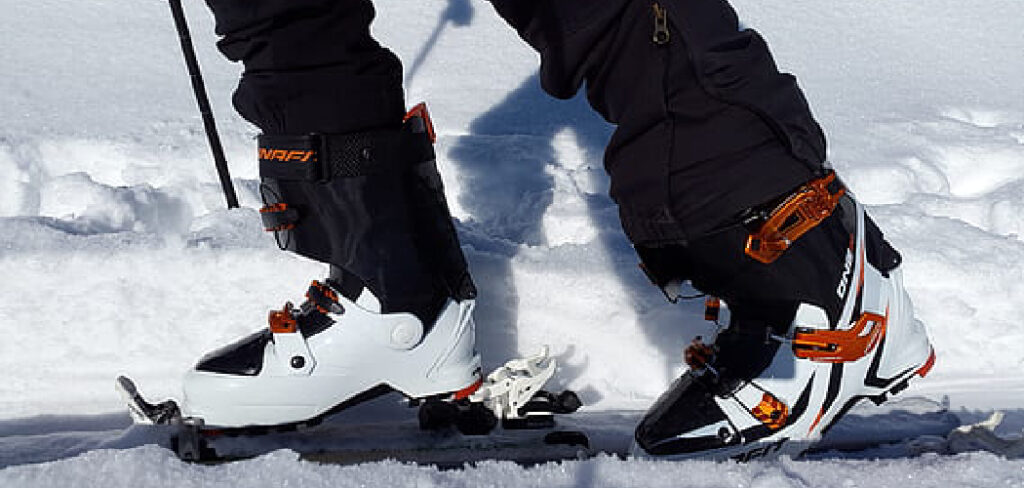
Step 10 – Test Your Boots in the Bindings
The final step involves a practical test to ensure everything fits seamlessly. Place your snowboard on a carpeted floor to protect the base from scratches. Put on your snowboard boots, lace them up tightly, and step onto the board.
Slide your feet all the way back into the heel cups and ratchet down the straps. The straps should crank down snugly without pinching your feet. Lean forward and backward to test the responsiveness and ensure the bindings do not lift away from the board. If everything feels locked in and comfortable, your installation is complete and ready for winter action.
Common Mistakes When Mounting Bindings
Skipping the initial stance measurement often leaves beginners struggling to maintain their balance. Many new riders mistakenly bolt their gear onto the outermost holes, resulting in a stance that resembles a gymnast doing the splits. This extreme width prevents you from bending your knees comfortably and completely destroys your ability to initiate smooth turns. Always rely on the manufacturer’s reference markers or your actual knee-to-knee measurement to find a sustainable, comfortable width.
Using the wrong size screwdriver is another incredibly common error that ruins perfectly good hardware. A standard number two Phillips driver often slips out of snowboard screws under heavy torque. This slipping quickly strips the metal head, making it impossible to tighten or remove the screw later. You must use a snug-fitting number three driver and apply downward pressure while turning to keep the screw heads intact.
Failing to center the boots across the width of the board leads to frustrating crashes on the slopes. If your bindings sit too far forward, your boot toes will drag through the snow during toe-side turns and flip you over. Taking the time to center the baseplate ensures your edges engage the snow cleanly without any boot interference.
Expert Tips for a Better Ride
Always carry a compact multi-tool in your jacket pocket during your first few days on a new setup. As you ride, the vibrations from the snow can cause freshly installed screws to loosen slightly. Taking five minutes to check and retighten your hardware during a lunch break prevents unexpected equipment failures.
Play around with your binding angles as you progress in your riding ability. The initial fifteen-degree and negative twelve-degree duck stance works perfectly for learning the basics. However, as you begin riding faster or exploring the terrain park, you might prefer a slightly different alignment. Do not feel permanently locked into your first stance. Small, incremental tweaks to your angles or stance width can drastically reduce leg fatigue and improve your carving technique.
Frequently Asked Questions
Do I need to use threadlocker on my snowboard screws?
You generally do not need liquid threadlocker for standard snowboard hardware. Most modern mounting screws come pre-coated with a dry blue locking compound from the factory. This factory coating provides plenty of friction to keep the screws firmly in place while still allowing you to remove them later. Adding liquid threadlocker can freeze the screws permanently into your deck.
How tight should my mounting screws be?
Mounting screws should be tightened until they feel firmly snug and the baseplate cannot shift at all. You want to apply strong manual pressure using a hand screwdriver. Avoid using power drills or impact drivers, as these tools easily overtighten the hardware. Overtightening can pull the metal inserts right through the core of your deck.
Can I put any brand of binding on any brand of snowboard?
Most brands use universal mounting systems, but there are a few notable exceptions to watch out for. Traditional snowboards use a standard four-hole pattern that accepts nearly all bindings on the market. However, boards manufactured by Burton often feature a unique channel system. You must ensure your binding discs are compatible with the specific insert pattern on your deck.
Why do my feet hurt after setting up my board?
Foot pain usually stems from poorly adjusted ankle straps or an excessively wide stance. If the padded section of your strap sits too high or too low, it creates intense pressure points across your instep. A stance that forces your legs too wide places severe strain on your knee and ankle joints. Readjusting your strap length and narrowing your stance usually resolves this discomfort.
How often should I take my bindings off my board?
You should remove your hardware at the end of every winter season before placing your gear in storage. Leaving everything bolted down for months creates continuous tension on the wooden core of the snowboard. Removing the bindings also allows you to clean out dirt and prevents the metal inserts from rusting. Reinstalling them fresh each season keeps your setup safe and reliable.
Conclusion
Taking the time to assemble your own winter gear builds confidence and deepens your understanding of the sport. The process demands nothing more than a screwdriver, a tape measure, and a bit of patience. By carefully measuring your stance, setting your angles, and securing the hardware in a star pattern, you guarantee a safe setup. Knowing exactly how to install bindings on snowboard means you never have to wait in line at a repair shop again.
You hold the power to adjust your ride anytime you feel discomfort on the mountain. As you log more days on the snow, do not hesitate to experiment with different widths and angles to find your perfect fit. Grab your tools, clear off a space on your floor, and get your equipment dialed in today. Your next great adventure on the slopes starts with a perfectly tuned board.
About Caleb
Caleb Merritt is a Virginia-based outdoor writer and gear analyst who has spent over a decade sleeping on the ground, crossing mountain passes, and obsessively shaving grams off his pack weight. He holds a Bachelor of Science in Environmental Science from James Madison University, where he also served as president of the university’s outdoor recreation club. After graduating, he spent three years as a wilderness educator with a backcountry youth program in the Shenandoah Valley — teaching Leave No Trace ethics, backcountry navigation, and campcraft — before moving into full-time writing in 2018.
His work focuses on one core belief: the best gear is the gear you understand. Whether he’s doing a side-by-side weight comparison of ultralight shelters or writing a beginner’s guide to building a sub-20-lb base weight kit, Caleb writes with the same directness you’d expect from a trusted trail partner. He has logged more than 4,000 miles across iconic routes including the John Muir Trail, the Wind River Range, Vermont’s Long Trail, and the Collegiate Peaks Loop in Colorado.
Areas of Expertise
- Ultralight backpacking systems and base weight optimization
- Tent, tarp, and shelter testing across three-season and shoulder-season conditions
- Sleeping bag and quilt temperature rating verification
- Backpacking nutrition, meal planning, and calorie-per-ounce analysis
- Leave No Trace principles and wilderness ethics
- Campfire safety, bear country protocols, and water treatment methods
- Gear care, repair, and long-term durability assessment
Education
James Madison University — B.S. in Environmental Science, 2015
During his time at JMU, Caleb served as President of the Outdoor Recreation Club, where he planned and led more than 30 backcountry trips annually across the Blue Ridge Mountains and Appalachian Trail corridor. The role sharpened his ability to assess gear performance under real conditions, manage group safety in remote environments, and develop the kind of practical trail knowledge that no classroom can teach.
Professional Experience
Gear Writer & Senior Contributor — [campeox.com]
Produces in-depth gear reviews, buyer’s guides, and how-to content across backpacking, camping, and ultralight hiking categories. Tests all gear in real field conditions before publishing recommendations.
Wilderness Educator & Trip Leader — Shenandoah Backcountry Youth Program — 2015–2018 Led multi-day backcountry expeditions for teens and young adults throughout Shenandoah National Park and George Washington National Forest. Taught LNT principles, orienteering, first aid awareness, and campcraft fundamentals.
Outdoor Recreation Club President — James Madison University — 2013–2015 Organized and led university-sponsored hiking, backpacking, and camping trips in the Blue Ridge Mountains and Appalachian Trail corridor. Managed club budget, safety protocols, and trip logistics for a membership of 120+ students.
Editorial Standards
Every piece of gear Caleb recommends has been personally tested in the field — not just unboxed and described. His review process includes a minimum of two overnight trips per shelter, a full-season evaluation for sleep systems, and side-by-side comparisons wherever possible. He does not accept payment for positive reviews. Affiliate relationships, where they exist, are always disclosed in accordance with FTC guidelines.
All factual claims about gear specifications, trail distances, and safety recommendations are cross-referenced against manufacturer data sheets and established sources such as the Leave No Trace Center for Outdoor Ethics and the American Hiking Society before publication.