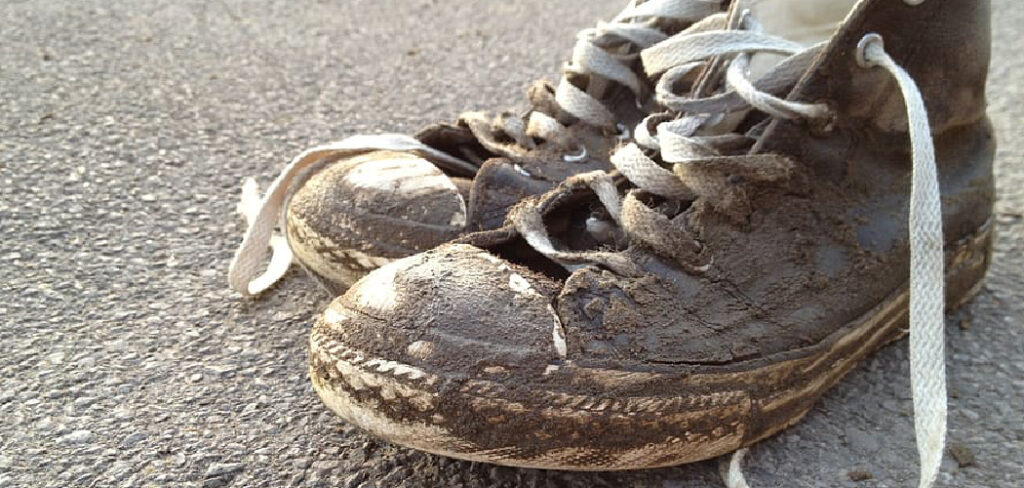
Returning home after a fantastic hike often leaves you with a messy problem on your feet. Thick layers of dirt and grime can quickly ruin your favorite footwear if you ignore them. Knowing exactly how to clean mud off shoes will save you money and keep your gear looking fresh for your next adventure.
Many beginners struggle with the right technique, usually scrubbing too hard or using the wrong liquids. This causes fabrics to tear and leather to crack before its time. We created this expert beginner-friendly guide to show you the best practices for restoring your messy footwear. You will learn the exact methods, tools, and tricks to bring your favorite hiking boots or running sneakers back to life. This comprehensive guide serves as your ultimate resource for safely removing stubborn dirt and protecting your footwear.
Why Cleaning Your Footwear Matters
Leaving thick sludge on your hiking boots does much more than make them look terrible. When dirt dries, it pulls vital moisture out of fabrics, synthetics, and natural leather. This rapid drying process causes the materials to crack, split, and deteriorate much faster than they should. For campers and outdoor beginners, replacing expensive gear every season is frustrating and completely avoidable.
Clean footwear also performs better on the trail. Clogged treads lose their grip, increasing your chances of slipping on wet rocks or steep hills. By maintaining your gear properly, you ensure the soles maintain their traction and keep you safe. Regular maintenance also prevents harmful bacteria and foul odors from taking over your favorite pair. Taking a few minutes to care for your footwear guarantees they will support you through countless future outdoor trips.
Tools and Materials
Gathering the right supplies before you begin makes the entire process smooth and stress-free. You do not need expensive commercial products to get great results. Most of these essential items are likely sitting in your home right now. Having everything within reach stops you from scrambling mid-task while your hands are covered in grime.
Here are the essential items you need:
- A soft-bristled brush or an old toothbrush
- A stiff-bristled brush for tough rubber soles
- Mild liquid dish soap or specialized footwear cleaner
- A small bowl of warm water
- Several clean microfiber cloths or soft cotton rags
- Old newspapers to stuff inside the footwear
- Wooden toothpicks or cotton swabs for small crevices
- A plastic shoe tree (optional, but incredibly helpful for maintaining shape)
8 Step-by-Step Guide on How to Clean Mud Off Shoes
Step 1 – Let the Mud Dry Completely
Your instinct might scream at you to wipe the wet sludge off immediately, but you must resist that urge. Wiping wet dirt pushes the fine particles deeper into the breathable mesh and fabric fibers. This causes permanent stains that are almost impossible to remove later. Instead, place your wet footwear in a well-ventilated area away from direct sunlight or heavy heat sources.
Wait patiently until the crust turns completely dry and crumbly to the touch. You will know it is ready when the color lightens and the dirt feels like hard clay. Placing them near a fan can safely speed up this drying process without warping the materials. Understanding this crucial first rule is the foundation of learning how to clean mud off shoes without causing accidental damage. Once the exterior is entirely dry, you are ready to tackle the thickest layers with ease.
Step 2 – Knock Off the Loose Dirt
Once everything is bone dry, take your footwear outside to a patio or an open garage. Hold one in each hand and firmly smack the soles together several times. You will immediately hear the satisfying crackle as large chunks of dried dirt break free and fall to the ground. Doing this outside prevents a massive sweeping chore inside your clean house.
Hit the heels, the toes, and the sides together to dislodge as much loose debris as possible. You can also tap the rubber soles against a brick wall or a wooden step for extra force. This physical shaking removes the heaviest layers, making the actual washing stage much more manageable. Do not worry if a fine layer of dust remains attached to the fabric. You have successfully eliminated the bulky crust, preparing the surface for careful brushing.
Step 3 – Brush the Uppers Gently
Now grab your dry, soft-bristled brush or an old toothbrush for the delicate upper materials. Start at the top near the laces and work your way down using short, quick, flicking motions. You want to lift the remaining dry dust out of the fabric threads rather than pressing it downward. Always brush in one consistent direction to push the dirt off the edges.
Pay close attention to the breathable mesh panels and the stitching lines where fine dust loves to hide. If you encounter a stubborn dry patch, apply slightly more pressure, but remain gentle to avoid fraying the synthetic fibers. This dry brushing step reveals the true condition of the fabric beneath the mess. By removing this top layer of dust, your soapy water will not turn into a dirty paste during the wet washing phase.
Step 4 – Scrub the Rubber Soles
The rubber outsoles require a much more aggressive approach than the soft upper fabrics. Switch to your stiff-bristled brush and attack the deep grooves and traction patterns on the bottom. Scrub vigorously back and forth to break loose the compacted stones, pine needles, and hardened clay trapped in the tread. This part of the shoe is designed to take a beating, so you do not need to hold back.
If large clumps remain wedged in the narrow gaps, grab a wooden toothpick or a small flathead screwdriver. Carefully dig out the debris hiding deep within the traction lugs. Clearing these channels is vital for restoring the grip and stability you rely on during outdoor hikes. A clean sole also stops you from tracking yard debris into your car or across your living room floor.
Step 5 – Prepare the Cleaning Solution
With the dry dirt removed, it is time to create your soapy washing mixture. Fill a small bowl with warm water and add just a few drops of mild liquid dish soap. Stir the water gently with your soft brush until a light layer of suds forms on the surface. You only need a weak soapy mixture; too much soap leaves a sticky residue that attracts future dust.
Avoid using harsh household detergents, bleach, or heavy degreasers on your outdoor gear. These aggressive chemicals strip the natural oils from leather and degrade the protective coatings on modern synthetics. A simple, gentle dish soap provides exactly the right amount of lifting power to break down organic stains safely. Keep your bowl nearby and lay down a clean towel to catch any drips during the next active washing phase.
Step 6 – Wash the Upper Materials
Dip your soft-bristled brush lightly into the soapy water, shaking off the excess moisture before touching the fabric. You want the brush damp, not soaking wet, to prevent saturating the inner padding. Work in small circular motions across the surface, gently working the soapy lather into the stained areas. Mastering how to clean mud off shoes requires this patient, section-by-section approach rather than a flooded, hasty scrub.
Focus heavily on the toe box, the heel counter, and the tongue where stains tend to set the deepest. As the soap lifts the grime, the foam will turn brown. Immediately wipe away this dirty foam with a clean microfiber cloth before it has a chance to settle back into the fibers. Rinse your brush frequently in the bowl to ensure you are always applying clean foam to the next section.
Step 7 – Rinse and Wipe Down
Once you have scrubbed the entire upper section, you must remove all lingering soap from the materials. Take a fresh, clean microfiber cloth and dampen it lightly with pure, warm water. Press the damp cloth firmly against the fabric and wipe away any remaining suds or loosened dirt particles. You may need to rinse the cloth several times under a running faucet to keep it clean.
Never submerge the footwear in a bucket of water or hold them directly under a heavy running tap. Flooding the interior ruins the supportive glue and takes days to dry completely, inviting terrible odors. Simply wiping the exterior with a damp towel is enough to lift away the remaining soap residue. Run your fingers over the fabric; if it feels sticky or slick, wipe it down one more time until it feels naturally clean.
Step 8 – Dry and Reshape
The final drying process is just as critical as the washing phase for maintaining long-term comfort. Take several sheets of old newspaper, crumple them up, and stuff them tightly into the toe box and heel. This paper absorbs the internal moisture quickly while helping the soft materials retain their proper structural shape. If you have a plastic shoe tree, insert it now to prevent the toe from creasing as it dries.
Place the footwear in a cool, dry room with plenty of circulating air. Never put them in a mechanical clothes dryer, on top of a radiator, or out in direct baking sunlight. Extreme heat melts the structural glues and shrinks leather irreparably. Leave them alone for at least twenty-four hours, checking the newspaper halfway through and replacing it if it feels completely damp.
Common Mistakes
One of the most frequent errors beginners make is throwing their dirty footwear straight into the washing machine. The violent spinning action damages the delicate internal cushioning and can easily break the agitator inside your appliance. The hot water and harsh laundry detergents also weaken the glues holding the sole to the upper fabric. Always stick to careful hand washing to protect both your gear and your home appliances.
Another major mistake is using direct heat to speed up the annoying drying process. Placing damp leather or synthetics next to a campfire, a blazing space heater, or using a hair dryer causes catastrophic damage. The materials will warp, shrink, and become brittle, ruining the fit and comfort completely. Patience is your best friend; always let them air dry naturally in a shaded, well-ventilated room.
Finally, many people forget to remove the laces and the internal insoles before washing. Leaving the laces in blocks your brush from reaching the dirty tongue and traps grit in the eyelets. Leaving the insoles inside traps moisture in the footbed, which creates a perfect breeding ground for foul-smelling bacteria. Always separate these components and wash them individually for a truly comprehensive clean.
Expert Tips
To make your next cleaning session even easier, apply a high-quality waterproofing spray once the fabric is completely dry. This protective barrier stops wet dirt from penetrating deep into the fibers on your future hikes. Ensure you choose a spray specifically designed for the exact material you are treating, whether it is suede, leather, or synthetic mesh. Apply two light coats rather than one heavy, soaking coat for the best results.
Additionally, keep a dedicated stiff brush in the trunk of your car for post-hike maintenance. Brushing off the heaviest clumps at the trailhead saves you from bringing the mess home in the first place. Treat your gear like an investment. Spending ten minutes on maintenance after a weekend trip prevents the deep, permanent stains that require hours of intense scrubbing to fix.
Frequently Asked Questions
Can I use a wire brush to clean the rubber soles?
You should avoid using metal wire brushes even on durable rubber outsoles. The sharp metal bristles can easily scratch the rubber, tear into the foam midsole, and accidentally snag the upper fabric. Stick to a stiff nylon brush or an old toothbrush. Nylon bristles are strong enough to remove compacted dirt without causing permanent scratches or structural damage.
Should I use hot or cold water for washing?
Warm water is the most effective temperature for breaking down dirt and grease safely. Boiling hot water can melt the industrial glues that hold the sole attached to the main body. Freezing cold water is simply ineffective at dissolving hardened dirt and activating the dish soap. Stick to lukewarm water that feels comfortable on your bare hands.
How do I clean the removable insoles?
Take the insoles out and scrub them in the sink using the same mild dish soap and warm water mixture. Use a soft brush to gently lift the sweat and dirt from the surface fabric. Rinse them carefully under a light stream of water and press them between two dry towels to squeeze out excess moisture. Let them air dry completely before putting them back.
What should I do if my footwear smells bad after drying?
Odors usually happen when moisture gets trapped inside the toe box during the drying phase. To fix this, sprinkle a generous handful of standard baking soda directly into the dry interior. Shake it around so it covers the footbed and leave it sitting overnight to absorb the lingering smells. Dump the baking soda out in the morning before wearing them.
Is it safe to use bleach on white soles?
Pure bleach is too harsh and will cause white rubber or foam soles to turn yellow over time. It also weakens the rubber compounds, making them brittle and prone to cracking. Instead, create a thick paste using baking soda and water, apply it to the white soles, and scrub gently. This naturally brightens the white material without using aggressive, damaging chemicals.
Conclusion
Taking care of your outdoor gear does not have to be a frustrating or time-consuming chore. By following this simple routine, you can protect your investment and keep your feet comfortable on every trail. Letting the dirt dry completely, using the right brushes, and avoiding harsh heat are the simple secrets to success. Understanding how to clean mud off shoes ensures you never have to throw away a perfectly good pair of hiking boots again.
Now that you know the exact steps, it is time to rescue those dirty boots sitting in your garage. Grab an old toothbrush, mix up some warm soapy water, and bring your favorite gear back to life today. Your footwear works hard to protect your feet on rugged terrain, so spend a few minutes protecting them in return. Happy hiking, and enjoy stepping out onto the trail with fresh, reliable gear.
About Caleb
Caleb Merritt is a Virginia-based outdoor writer and gear analyst who has spent over a decade sleeping on the ground, crossing mountain passes, and obsessively shaving grams off his pack weight. He holds a Bachelor of Science in Environmental Science from James Madison University, where he also served as president of the university’s outdoor recreation club. After graduating, he spent three years as a wilderness educator with a backcountry youth program in the Shenandoah Valley — teaching Leave No Trace ethics, backcountry navigation, and campcraft — before moving into full-time writing in 2018.
His work focuses on one core belief: the best gear is the gear you understand. Whether he’s doing a side-by-side weight comparison of ultralight shelters or writing a beginner’s guide to building a sub-20-lb base weight kit, Caleb writes with the same directness you’d expect from a trusted trail partner. He has logged more than 4,000 miles across iconic routes including the John Muir Trail, the Wind River Range, Vermont’s Long Trail, and the Collegiate Peaks Loop in Colorado.
Areas of Expertise
- Ultralight backpacking systems and base weight optimization
- Tent, tarp, and shelter testing across three-season and shoulder-season conditions
- Sleeping bag and quilt temperature rating verification
- Backpacking nutrition, meal planning, and calorie-per-ounce analysis
- Leave No Trace principles and wilderness ethics
- Campfire safety, bear country protocols, and water treatment methods
- Gear care, repair, and long-term durability assessment
Education
James Madison University — B.S. in Environmental Science, 2015
During his time at JMU, Caleb served as President of the Outdoor Recreation Club, where he planned and led more than 30 backcountry trips annually across the Blue Ridge Mountains and Appalachian Trail corridor. The role sharpened his ability to assess gear performance under real conditions, manage group safety in remote environments, and develop the kind of practical trail knowledge that no classroom can teach.
Professional Experience
Gear Writer & Senior Contributor — [campeox.com]
Produces in-depth gear reviews, buyer’s guides, and how-to content across backpacking, camping, and ultralight hiking categories. Tests all gear in real field conditions before publishing recommendations.
Wilderness Educator & Trip Leader — Shenandoah Backcountry Youth Program — 2015–2018 Led multi-day backcountry expeditions for teens and young adults throughout Shenandoah National Park and George Washington National Forest. Taught LNT principles, orienteering, first aid awareness, and campcraft fundamentals.
Outdoor Recreation Club President — James Madison University — 2013–2015 Organized and led university-sponsored hiking, backpacking, and camping trips in the Blue Ridge Mountains and Appalachian Trail corridor. Managed club budget, safety protocols, and trip logistics for a membership of 120+ students.
Editorial Standards
Every piece of gear Caleb recommends has been personally tested in the field — not just unboxed and described. His review process includes a minimum of two overnight trips per shelter, a full-season evaluation for sleep systems, and side-by-side comparisons wherever possible. He does not accept payment for positive reviews. Affiliate relationships, where they exist, are always disclosed in accordance with FTC guidelines.
All factual claims about gear specifications, trail distances, and safety recommendations are cross-referenced against manufacturer data sheets and established sources such as the Leave No Trace Center for Outdoor Ethics and the American Hiking Society before publication.