

Creating your own swimwear feels like magic. Most people rely on store-bought options that never fit quite right. You can break free from those limits by taking control of your wardrobe. If you want to know how to make swimsuits, you are in the right place. This skill gives you the power to choose your favorite colors, prints, and cuts.
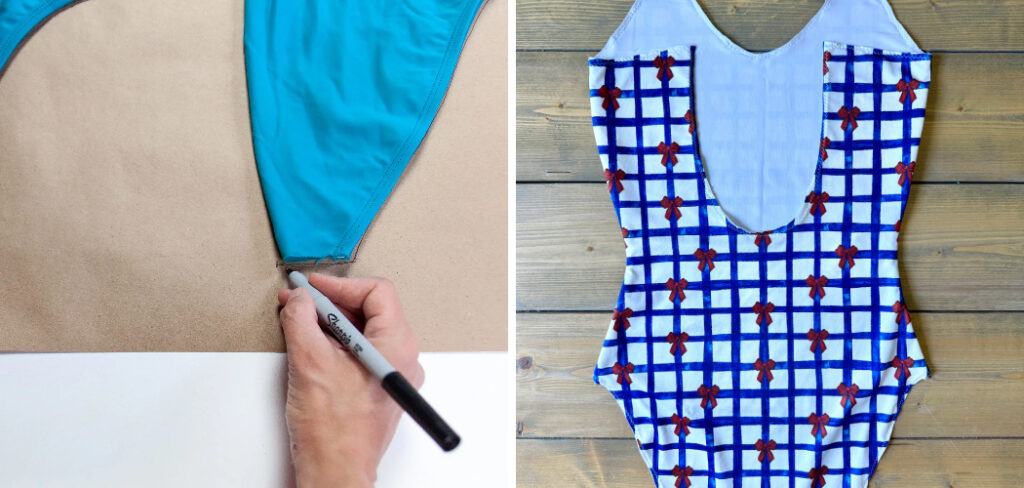
You will never have to compromise on comfort or style again. Sewing stretch fabrics might seem scary at first glance. However, with the right techniques, anyone can master this rewarding craft. We will walk you through everything you need to know. This guide provides a complete, beginner-friendly roadmap to crafting custom swimwear from scratch.
Why You Should Craft Your Own Swimwear
Learning this skill helps campers and outdoor beginners tackle their adventures with confidence. When you spend time around lakes or beaches, you need gear that stays secure during active movement. Store-bought options often slip, ride up, or wear out quickly from saltwater and chlorine. Sewing your own pieces means you can select durable, high-quality athletic fabrics built for heavy outdoor use. You get to reinforce the seams for kayaking, swimming, or hiking near waterfalls. Custom swimwear provides the exact coverage you need for long days in the sun. Plus, you save money over time while building a sustainable, personalized outdoor wardrobe.
Tools and Materials You Need
Gathering the proper supplies sets you up for absolute success. Working with stretch fabrics requires a few specific items you might not already have in your sewing box. You need these core components before you start cutting:
- Four-way stretch swimsuit fabric (nylon-spandex or polyester-spandex blend).
- High-quality swimwear lining for coverage and support.
- Braided cotton or rubber swimwear elastic.
- Polyester thread, which stretches better than cotton thread.
- Stretch needles or ballpoint needles for your sewing machine.
- Fabric scissors or a sharp rotary cutter.
- Sewing pins or fabric clips to hold slippery layers together.
- A reliable sewing machine with a zigzag stitch setting.
- A walking foot attachment to feed stretchy layers evenly (optional for convenience).
8 Step-by-Step Guide on How to Make Swimsuits
Step 1 – Select Your Pattern and Fabric
Choosing a beginner-friendly pattern guarantees a smoother sewing experience. Look for simple designs with minimal seams, like a basic one-piece or a classic bikini. Once you secure a pattern, focus on picking the right material.
Swimwear requires fabric with at least fifty percent stretch in both directions. Test the stretch by pulling a small section against a ruler. You want it to snap back to its original shape immediately.
Wash and dry your material before cutting to prevent shrinking later on. This preparation phase determines how well your final garment will fit and perform. Take your time comparing textures and weights until you find the perfect match.
Step 2 – Cut the Fabric Pieces
Lay your material flat on a large table or cutting mat. Make sure the fabric edges do not hang off the table, as the weight will stretch the fibers. Pin your pattern pieces carefully, paying close attention to the direction of maximum stretch.
The greatest stretch must wrap around your body horizontally for a proper fit. Use a sharp rotary cutter or specialized fabric scissors to trace the pattern lines. Keep your cuts smooth and continuous to avoid jagged edges on your spandex.
Cut the exact same shapes from your lining material. Staying precise during this phase makes the assembly process significantly easier.
Step 3 – Adjust Your Sewing Machine Settings
Standard straight stitches will pop when you stretch your garment over your body. You must configure your machine to handle flexible materials. Switch to a stretch needle or a ballpoint needle right away.
These needles push between the fabric fibers instead of piercing and breaking them. Set your machine to a narrow zigzag stitch or a lightning bolt stretch stitch. Test your settings on a scrap piece of your spandex first.
Pull the sewn scrap firmly to ensure the thread stretches without snapping. Adjust the tension dial if the stitches look uneven or puckered. Proper machine setup eliminates endless frustration down the line.
Step 4 – Pin and Sew the Main Seams
Place your main fabric and lining pieces together with the right sides facing each other. Use plenty of fabric clips or ballpoint pins to secure the slippery layers. As you figure out how to make swimsuits, you will notice that pinning every inch keeps the spandex from sliding around under the presser foot.
Sew along the side seams and the crotch seam using your chosen stretch stitch. Maintain a consistent seam allowance, usually about a quarter of an inch. Guide the fabric gently under the needle without pulling or stretching it from the back.
Let the feed dogs do the heavy lifting to prevent warped seams. Pressing your seams flat with your fingers helps the garment take shape nicely.
Step 5 – Attach the Swimwear Elastic
Elastic provides the necessary structure to keep your garment secure in the water. Measure your elastic against the leg, neck, and arm openings, cutting it slightly shorter than the fabric edge. Divide both the elastic and the fabric opening into equal quarters and mark them with pins.
Match the pins to distribute the tension evenly around the curve. Stitch the elastic directly to the wrong side of the seam allowance using a wide zigzag stitch. Pull the elastic gently to match the fabric length as you sew.
Do not stretch the spandex itself, only the elastic. This technique creates a snug, professional finish that hugs your body.
Step 6 – Fold and Topstitch the Edges
Once you secure the elastic, you must hide it for a clean aesthetic. Fold the elasticized edge inward toward the wrong side of the garment. Pin or clip the fold tightly to keep the elastic completely enclosed.
Use a twin needle or a regular zigzag stitch to topstitch from the right side of the fabric. Sew close to the raw inner edge to trap the elastic flat against the lining. Keep your speed slow and steady to maintain a straight line around the curves.
This step requires patience but drastically improves the overall look. A neat topstitch prevents the lining from rolling outward while you swim.
Step 7 – Add Straps and Closures
Straps keep everything lifted and supported during active beach days. Cut long strips of spandex, fold them in half right sides together, and sew the long edge. Use a loop turner or a safety pin to pull the tubes right side out.
Thread elastic through the tubes if you need extra support for the shoulders or back. Attach these finished straps to the designated marks on your bodice pattern. Secure them with a tight bartack stitch or a dense zigzag stitch for maximum strength.
If your design requires a back clasp, sew the hardware loops firmly to the back bands. Check the strap length on your body before doing the final stitch.
Step 8 – Fit and Refine the Final Garment
Try on your creation carefully to assess the fit and comfort. Move around, stretch, and bend to ensure nothing digs in or slips out of place. Mastering how to make swimsuits requires paying close attention to these final adjustments.
If the leg holes feel too loose, you might need to tighten the elastic slightly. Trim any loose threads and check your seams for weak spots. Wash the finished piece in cool water to remove any fabric chalk or markings.
Hang it up to dry away from direct sunlight. You now have a custom piece ready for the beach or the pool.
Common Mistakes When Sewing Swimwear
Beginners often stumble by using regular cotton thread instead of polyester. Cotton thread snaps easily when pulled, causing seams to burst the moment you put the garment on. Always stick to high-quality polyester thread to ensure your seams stretch with the spandex.
Another frequent error involves skipping the lining layer to save time. Unlined swimwear turns completely sheer when wet and lacks the structure needed for adequate support. You must always use a dedicated swimwear lining for the front and back panels.
Many novices also make the mistake of pulling the fabric through the sewing machine. Yanking the material causes wavy, stretched-out seams that refuse to lay flat against the skin. You must allow the machine’s feed dogs to guide the fabric naturally while you simply steer.
Finally, using a standard universal needle will ruin your project before it begins. Standard needles pierce and break the delicate spandex fibers, creating tiny holes that run like pantyhose. You need a ballpoint or stretch needle to slip between the fibers safely. Avoiding these specific missteps guarantees a much more enjoyable and successful crafting process.
Expert Tips for a Professional Finish
Taking your skills to the next level requires a few industry secrets. Always baste your slippery layers together with a long, temporary straight stitch before sewing the final seam. Basting holds the lining and main fabric perfectly in place, preventing annoying shifts under the presser foot. You can simply pull the basting thread out once the permanent zigzag stitch is complete.
Additionally, consider utilizing wooly nylon thread in your bobbin. Wooly nylon expands and fluffs up, providing incredible stretch and a remarkably soft feel against your skin. Pressing your seams with an iron on a low synthetic setting also works wonders. A light press flattens bulky edges and gives the garment a crisp, retail-ready appearance. Just be cautious never to melt the synthetic fibers with high heat.
Read More: How to Make a Hiking Stick
Frequently Asked Questions
What is the best fabric for swimwear?
The ideal material is a blend of nylon and spandex, often called tricot. Nylon offers incredible durability, smooth texture, and colorfastness in harsh pool chemicals. You should look for fabrics containing at least eighteen to twenty percent spandex. This specific blend guarantees excellent four-way stretch, meaning it pulls horizontally and vertically to hug your curves comfortably.
Can I sew spandex without a serger?
You absolutely do not need a serger to create beautiful stretch garments. A standard home sewing machine works perfectly fine if it has a zigzag stitch or a lightning bolt stitch. These specific stitch patterns allow the thread to stretch back and forth with the material. Just remember to pair your zigzag setting with a proper stretch needle.
How do I stop my fabric from curling?
Spandex notoriously rolls at the raw edges the moment you cut it. You can prevent this annoying curling by spraying the edges lightly with a temporary fabric stabilizer. Pinning the pieces together immediately after cutting also keeps the edges flat. Using numerous sewing clips along the seam line tames the curls right before feeding the fabric into the machine.
Why do my seams look wavy and distorted?
Wavy seams happen when the fabric stretches while passing under the presser foot. You might be pulling the material from the back of the machine. Alternatively, your presser foot pressure might be too high for the delicate spandex. Installing a walking foot attachment easily solves this problem by pulling the top and bottom layers evenly at the exact same speed.
What kind of elastic should I use?
You must use elastic designed specifically for water and chlorine exposure. Standard craft elastic degrades, crumbles, and loses its stretch after a few swims. Look for braided cotton swimwear elastic or clear rubber elastic. Both options resist harsh pool chemicals, withstand intense saltwater environments, and maintain their snappy recovery after repeated uses.
Conclusion
Crafting custom garments transforms the way you experience summer adventures. You no longer have to settle for uncomfortable fits, generic styles, or fabrics that wear out after a single season. Building this skill allows you to design pieces that celebrate your unique body shape and personal aesthetic. We hope this guide on how to make swimsuits inspires you to turn on your sewing machine and experiment with vibrant spandex.
Take the process one step at a time, practicing your stretch stitches on scrap fabric before diving in. Mistakes will happen, but every error teaches you something valuable about garment construction. Gather your tools, select a bold pattern, and start cutting your materials with confidence.
Soon enough, you will be diving into the waves wearing a beautiful, durable piece created entirely by your own hands. Your handmade wardrobe is about to become your favorite topic of conversation at the beach. Embrace the creative journey and enjoy the incredible satisfaction of wearing your own functional art.

About Caleb
Caleb Merritt is a Virginia-based outdoor writer and gear analyst who has spent over a decade sleeping on the ground, crossing mountain passes, and obsessively shaving grams off his pack weight. He holds a Bachelor of Science in Environmental Science from James Madison University, where he also served as president of the university’s outdoor recreation club. After graduating, he spent three years as a wilderness educator with a backcountry youth program in the Shenandoah Valley — teaching Leave No Trace ethics, backcountry navigation, and campcraft — before moving into full-time writing in 2018.
His work focuses on one core belief: the best gear is the gear you understand. Whether he’s doing a side-by-side weight comparison of ultralight shelters or writing a beginner’s guide to building a sub-20-lb base weight kit, Caleb writes with the same directness you’d expect from a trusted trail partner. He has logged more than 4,000 miles across iconic routes including the John Muir Trail, the Wind River Range, Vermont’s Long Trail, and the Collegiate Peaks Loop in Colorado.
Areas of Expertise
- Ultralight backpacking systems and base weight optimization
- Tent, tarp, and shelter testing across three-season and shoulder-season conditions
- Sleeping bag and quilt temperature rating verification
- Backpacking nutrition, meal planning, and calorie-per-ounce analysis
- Leave No Trace principles and wilderness ethics
- Campfire safety, bear country protocols, and water treatment methods
- Gear care, repair, and long-term durability assessment
Education
James Madison University — B.S. in Environmental Science, 2015
During his time at JMU, Caleb served as President of the Outdoor Recreation Club, where he planned and led more than 30 backcountry trips annually across the Blue Ridge Mountains and Appalachian Trail corridor. The role sharpened his ability to assess gear performance under real conditions, manage group safety in remote environments, and develop the kind of practical trail knowledge that no classroom can teach.
Professional Experience
Gear Writer & Senior Contributor — [campeox.com]
Produces in-depth gear reviews, buyer’s guides, and how-to content across backpacking, camping, and ultralight hiking categories. Tests all gear in real field conditions before publishing recommendations.
Wilderness Educator & Trip Leader — Shenandoah Backcountry Youth Program — 2015–2018 Led multi-day backcountry expeditions for teens and young adults throughout Shenandoah National Park and George Washington National Forest. Taught LNT principles, orienteering, first aid awareness, and campcraft fundamentals.
Outdoor Recreation Club President — James Madison University — 2013–2015 Organized and led university-sponsored hiking, backpacking, and camping trips in the Blue Ridge Mountains and Appalachian Trail corridor. Managed club budget, safety protocols, and trip logistics for a membership of 120+ students.
Editorial Standards
Every piece of gear Caleb recommends has been personally tested in the field — not just unboxed and described. His review process includes a minimum of two overnight trips per shelter, a full-season evaluation for sleep systems, and side-by-side comparisons wherever possible. He does not accept payment for positive reviews. Affiliate relationships, where they exist, are always disclosed in accordance with FTC guidelines.
All factual claims about gear specifications, trail distances, and safety recommendations are cross-referenced against manufacturer data sheets and established sources such as the Leave No Trace Center for Outdoor Ethics and the American Hiking Society before publication.




