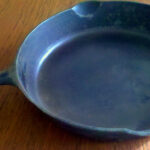
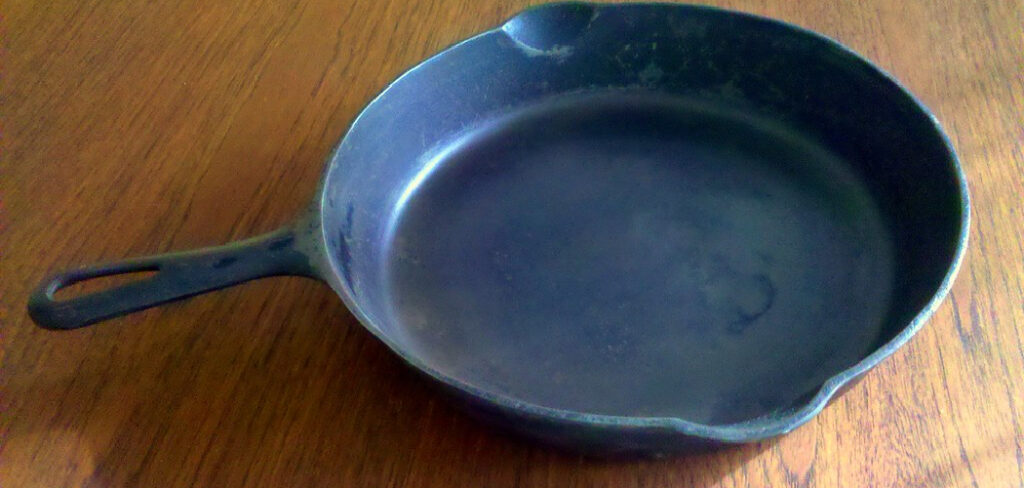
Do you have a rusty, forgotten skillet sitting in your garage or basement? You might think that flaky, orange crust means the end of its cooking days. The truth is, these durable skillets can last for generations with just a little elbow grease. Restoring antique cookware is much easier than you might expect.
You do not need a degree in metallurgy or expensive power tools to bring your favorite skillet back to life. With a few simple household items, you can transform that rusty relic into a slick, non-stick cooking powerhouse. If you are wondering how to refurbish cast iron pans, you are in the perfect place. This guide will walk you through every simple step needed to rescue, restore, and re-season your skillet for a lifetime of delicious meals.
Why Rescuing Old Cast Iron Matters for Outdoor Beginners
Learning this valuable skill unlocks a whole new world for campers and outdoor enthusiasts. When you head into the woods, you need gear that can withstand open flames, hot coals, and rough handling. Modern aluminum cookware often warps or melts over a roaring campfire. Heavy-duty skillets distribute heat evenly, making them perfect for searing freshly caught fish or baking cobbler under the stars.
By rescuing vintage cookware, outdoor beginners save money while securing a nearly indestructible piece of camping gear. A properly restored skillet creates a natural non-stick surface that wipes clean with ease, which is a massive advantage when washing dishes at a campsite. Taking the time to revive these classic kitchen tools gives you reliable performance on every single adventure.
Tools and Materials You’ll Need
Before you start scrubbing away decades of grime, you need to gather a few essential supplies. You probably have most of these items hiding in your kitchen cabinets right now. Having everything within reach makes the restoration process smooth and stress-free.
- White vinegar (for soaking rust)
- Steel wool or a stiff wire brush (for heavy scrubbing)
- Mild liquid dish soap
- Heavy-duty trash bags (for chemical soaking)
- Paper towels or clean microfiber cloths
- High smoke-point cooking oil (like grapeseed, canola, or vegetable oil)
- Heavy-duty aluminum foil (to protect your oven)
- Thick oven mitts
- A plastic scraper pan cleaner (optional, but incredibly helpful for lifting stubborn baked-on crusts)
9 Step-by-Step Guide on How to Refurbish Cast Iron Pans
Step 1 – Assess the Damage and Prepare Your Work Space
Before you dive into the dirty work, you must figure out exactly what your skillet needs. Take a close look at the cooking surface under a bright light. You will usually find either bright orange surface rust, thick black crusts of old food, or a combination of both. Light surface rust only takes a few minutes to remove, while thick, tar-like grease requires a bit more patience.
Set up your workspace in a well-ventilated area, like an open garage or a backyard patio. This process can get incredibly messy, so laying down old newspapers or working over a large utility sink saves you from a massive cleanup later. Once you identify the problem areas, you can tackle the grime confidently.
Step 2 – Strip the Old Flaky Seasoning
If your skillet suffers from thick layers of rancid, sticky grease, you need to strip it down to the bare metal. You cannot simply season over old, flaking carbon deposits. Place your dirty skillet inside a heavy-duty trash bag. Spray the entire surface generously with a heavy-duty oven cleaner that contains lye.
The strong chemical smell can be overwhelming, so always wear heavy rubber gloves and a protective mask during this stage. Tie the trash bag tightly to trap the fumes and let it sit in a warm spot for a few days. The harsh chemicals break down decades of baked-on food, turning that solid crust into a soft, muddy sludge. Once the old layers dissolve, you are ready to reveal the original metal.
Step 3 – Scrub Away the Stubborn Rust
Now that the old seasoning is gone, you can target the reddish-brown rust clinging to the metal. If you want to know how to refurbish cast iron pans properly, managing rust is your biggest priority. Create a soaking bath using equal parts plain white vinegar and water. Submerge your skillet completely and let it soak for no longer than one hour. Leaving it in the acidic mixture too long can actually dissolve the good metal underneath.
Pull the skillet out of the bath and grab your steel wool. Scrub the surface vigorously using small, tight circles. You will see the orange rust lift away, mixing with the water to form a dark, gritty paste. Keep scrubbing until you see dull, silver-gray bare iron shining through.
Step 4 – Wash and Rinse Thoroughly
Your skillet is finally free of ancient grease and stubborn rust, but it is covered in chemical residue and metallic dust. You must wash the bare metal completely before moving forward. Take the skillet to your sink and run hot water over the entire surface. Squeeze a generous amount of standard liquid dish soap directly onto the bare iron.
Scrub every inch of the pan with a clean sponge or a stiff nylon brush. This is the only time you should ever use harsh scrubbing pads on your cookware. Pay special attention to the handle and the outside edges where dirt loves to hide. Rinse the skillet until the water runs completely clear, ensuring no soapy film remains on the surface.
Step 5 – Dry the Pan Completely
Bare iron behaves like a sponge when exposed to moisture, and flash rust can form in a matter of minutes. You must dry the skillet immediately after the final rinse to prevent a brand-new layer of orange oxidation. Grab a clean cotton towel or heavy paper towels and aggressively wipe away all visible water droplets.
Do not let the skillet air dry on a rack. Instead, place the towel-dried skillet directly onto your stovetop over medium-low heat. Let it sit on the burner for about five to ten minutes. The gentle heat forces any microscopic water trapped in the porous metal to evaporate into thin air. Watch closely as the metal turns completely matte and dry.
Step 6 – Apply the First Layer of Oil
Seasoning is the magical process that protects your skillet from future rust while creating a slick, non-stick cooking surface. You need a cooking oil with a high smoke point, such as grapeseed or canola oil. Pour a tiny drop of oil onto a clean paper towel or a lint-free cotton cloth.
Rub the oil thoroughly over the entire skillet, covering the inside, outside, handle, and bottom. The metal will instantly look dark, rich, and glossy. Now, take a fresh, dry paper towel and wipe all the oil off. You want the surface to look completely dry, as if you made a mistake and wiped it all away. Leaving too much oil on the pan will result in a sticky, uneven mess later.
Step 7 – Bake the Pan in the Oven
Heat transforms that microscopic layer of liquid oil into a hard, protective plastic-like shell through a process called polymerization. Preheat your kitchen oven to 450 degrees Fahrenheit. Place a large sheet of heavy-duty aluminum foil on the very bottom rack to catch any accidental drips.
Carefully place your oiled skillet upside down on the middle rack. Baking the skillet upside down ensures that no excess oil pools in the corners of the cooking surface. Leave the skillet in the hot oven for exactly one hour. You might notice a slightly smoky, nutty smell filling your kitchen. This aroma simply means the oil is breaking down and bonding securely to the bare metal.
Step 8 – Repeat the Oil and Bake Process
A single layer of seasoning provides basic rust protection, but it will not give you that famous non-stick finish. For the best possible results, you must repeat the oiling and heating cycle multiple times. After the first hour of baking, turn off the oven and let the skillet cool just enough so you can handle it with thick oven mitts.
While the metal is still warm, carefully rub another ultra-thin layer of oil over the entire surface. Wipe away the excess just like before. Place the upside-down skillet back into the 450-degree oven for another hour. If you are learning how to refurbish cast iron pans, remember that patience during this repetition is the secret to a flawless finish.
Step 9 – Cool and Store Safely
Most professionals recommend repeating the seasoning process three to four times for optimal performance. Once you finish your final baking cycle, simply turn off your oven. Leave the oven door closed and allow the skillet to cool down naturally inside.
Dropping the temperature slowly prevents the dense metal from warping or cracking due to sudden thermal shock. When the skillet is completely cool to the touch, pull it out and admire your hard work. The surface should look jet black, smooth, and slightly shiny without feeling sticky. Store your fully restored skillet in a dry cabinet away from excess humidity. You can place a dry paper towel inside the pan to absorb any ambient moisture while it waits.
Common Mistakes When Restoring Vintage Cookware
Restoring old cookware feels incredibly rewarding, but beginners often fall into a few frustrating traps. The most common mistake is using power tools, like wire wheels or sanders, to remove rust. Power tools scrape away the original factory finish, leaving the surface too smooth to hold a new layer of seasoning. You should always rely on manual scrubbing with steel wool or chemical baths to protect the integrity of the metal.
Another major error involves soaking the skillet in vinegar for several days. While a diluted vinegar bath removes surface rust safely, leaving bare iron in acid too long eats away the good metal. Your skillet will develop deep, unrepairable pits if left unattended. Always limit your vinegar soaks to just one hour at a time.
Finally, many first-timers apply way too much oil during the seasoning phase. If you pour a thick puddle of oil into the pan before baking, it will not bond correctly. Instead of a slick, black surface, you will end up with a sticky, gummy mess that chips easily. You must wipe away as much oil as humanly possible before the pan ever goes into a hot oven.
Expert Tips
Achieving a gorgeous, jet-black finish requires a bit of finesse. Experts always recommend warming the bare iron slightly before applying your very first layer of oil. When the metal is warm, its microscopic pores open up, allowing the oil to penetrate much deeper into the surface. This deep penetration creates a much stronger bond during the baking phase.
You should also pay close attention to your choice of fat. Avoid using butter, bacon grease, or unrefined olive oil for your initial seasoning layers. These fats contain water, proteins, and low smoke points that burn up rather than polymerize. Stick to neutral, high smoke-point oils like grapeseed or refined canola oil. Finally, the best way to maintain your fresh finish is simply to use the skillet frequently. Frying bacon or sautéing onions adds micro-layers of natural seasoning every single time you cook.
Frequently Asked Questions
Can I ruin my skillet during the restoration process?
It is extremely difficult to completely ruin heavy iron cookware. Unless the metal has severe structural cracks or holes rusted completely through the bottom, you can almost always save it. Scrubbing too hard or removing the seasoning just resets the pan to bare metal. You simply start the process over. As long as you avoid dropping the heavy pan on a hard floor, it will survive.
Why does my newly seasoned pan feel sticky?
A sticky or tacky surface happens when you leave too much oil on the pan before baking it in the oven. The excess oil pools together and fails to polymerize completely. You can easily fix this by placing the sticky pan back into a 450-degree oven for another hour. Next time, make sure you wipe the pan completely dry before heating it.
Can I put my restored skillet in the dishwasher?
You should never put seasoned cookware inside a dishwasher under any circumstances. The harsh, abrasive detergents and prolonged exposure to scalding water will strip away all your hard work. The dishwasher environment instantly ruins the delicate layer of polymerized oil and causes massive rust breakouts. Always wash your skillet by hand using warm water and a gentle sponge.
Do I need to re-season the pan after every use?
You do not need to perform a full oven-bake seasoning after cooking a normal meal. Once you have built up a solid base layer of seasoning, simple maintenance is enough. Just wash the pan, dry it thoroughly on the stovetop, and rub a tiny drop of oil over the warm surface. This quick maintenance routine keeps the iron protected and ready for action.
How can I tell if my pan is fully seasoned?
A fully seasoned surface will look dark, smooth, and slightly glossy. It should feel completely dry to the touch, with no sticky or greasy residue left behind on your fingers. The ultimate test is cooking an egg or sliding a spatula under a pancake. If the food releases easily without tearing or sticking to the metal, your seasoning layer is successful.
Conclusion
Bringing an old, neglected piece of cookware back to its former glory is a truly satisfying weekend project. You now have all the knowledge required to strip away years of forgotten grime and build a resilient, non-stick surface from scratch. Remember to take your time during the scrubbing phase, never soak the metal in acid for too long, and always wipe away excess oil before baking.
If you have a rusty skillet waiting in the garage, do not throw it away. With just a little bit of patience, you can transform that crusty metal into your favorite kitchen companion. The skills you learned here will ensure your cookware lasts long enough to pass down to the next generation. Now that you understand how to refurbish cast iron pans, you are ready to tackle any antique shop find. Grab your steel wool, put on your gloves, and start restoring your beautiful, heavy-duty skillet today.
About Caleb
Caleb Merritt is a Virginia-based outdoor writer and gear analyst who has spent over a decade sleeping on the ground, crossing mountain passes, and obsessively shaving grams off his pack weight. He holds a Bachelor of Science in Environmental Science from James Madison University, where he also served as president of the university’s outdoor recreation club. After graduating, he spent three years as a wilderness educator with a backcountry youth program in the Shenandoah Valley — teaching Leave No Trace ethics, backcountry navigation, and campcraft — before moving into full-time writing in 2018.
His work focuses on one core belief: the best gear is the gear you understand. Whether he’s doing a side-by-side weight comparison of ultralight shelters or writing a beginner’s guide to building a sub-20-lb base weight kit, Caleb writes with the same directness you’d expect from a trusted trail partner. He has logged more than 4,000 miles across iconic routes including the John Muir Trail, the Wind River Range, Vermont’s Long Trail, and the Collegiate Peaks Loop in Colorado.
Areas of Expertise
- Ultralight backpacking systems and base weight optimization
- Tent, tarp, and shelter testing across three-season and shoulder-season conditions
- Sleeping bag and quilt temperature rating verification
- Backpacking nutrition, meal planning, and calorie-per-ounce analysis
- Leave No Trace principles and wilderness ethics
- Campfire safety, bear country protocols, and water treatment methods
- Gear care, repair, and long-term durability assessment
Education
James Madison University — B.S. in Environmental Science, 2015
During his time at JMU, Caleb served as President of the Outdoor Recreation Club, where he planned and led more than 30 backcountry trips annually across the Blue Ridge Mountains and Appalachian Trail corridor. The role sharpened his ability to assess gear performance under real conditions, manage group safety in remote environments, and develop the kind of practical trail knowledge that no classroom can teach.
Professional Experience
Gear Writer & Senior Contributor — [campeox.com]
Produces in-depth gear reviews, buyer’s guides, and how-to content across backpacking, camping, and ultralight hiking categories. Tests all gear in real field conditions before publishing recommendations.
Wilderness Educator & Trip Leader — Shenandoah Backcountry Youth Program — 2015–2018 Led multi-day backcountry expeditions for teens and young adults throughout Shenandoah National Park and George Washington National Forest. Taught LNT principles, orienteering, first aid awareness, and campcraft fundamentals.
Outdoor Recreation Club President — James Madison University — 2013–2015 Organized and led university-sponsored hiking, backpacking, and camping trips in the Blue Ridge Mountains and Appalachian Trail corridor. Managed club budget, safety protocols, and trip logistics for a membership of 120+ students.
Editorial Standards
Every piece of gear Caleb recommends has been personally tested in the field — not just unboxed and described. His review process includes a minimum of two overnight trips per shelter, a full-season evaluation for sleep systems, and side-by-side comparisons wherever possible. He does not accept payment for positive reviews. Affiliate relationships, where they exist, are always disclosed in accordance with FTC guidelines.
All factual claims about gear specifications, trail distances, and safety recommendations are cross-referenced against manufacturer data sheets and established sources such as the Leave No Trace Center for Outdoor Ethics and the American Hiking Society before publication.