

Stepping into the great outdoors feels much more rewarding when you can see nature up close. Whether you plan to watch birds, hike rugged trails, or gaze at the stars, a good pair of optics will completely change your experience. However, walking into an outdoor gear shop or browsing online stores can feel incredibly overwhelming. You will see endless walls of glass, confusing numbers, and complex technical jargon.
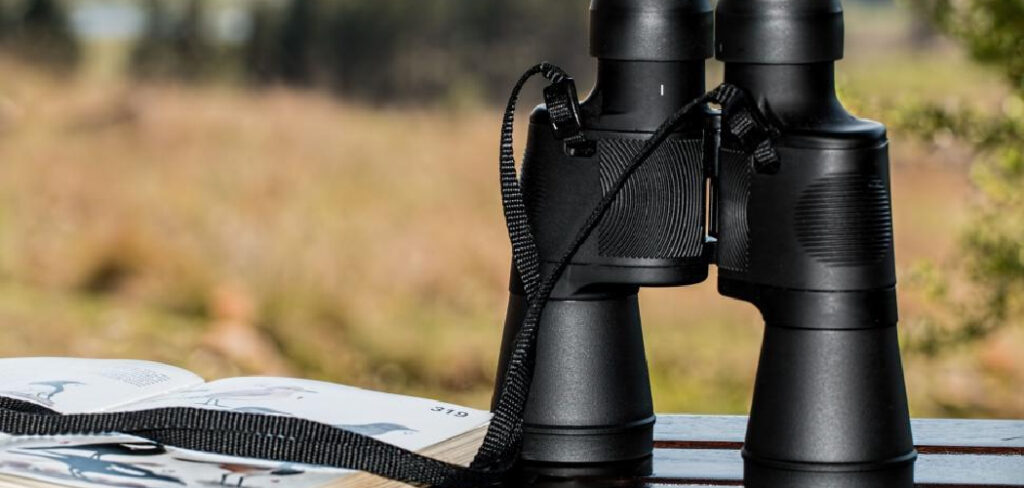
You do not need an advanced degree in optics to make a smart choice. Figuring out how to select binoculars simply requires understanding a few basic concepts. Once you grasp what the numbers mean and how they apply to your specific hobby, the process becomes surprisingly easy. This expert guide will walk you through exactly what you need to know to find the perfect optics for your next adventure.
Why Learning How to Select Binoculars Matters
Picking up any random pair of optics off a store shelf usually leads to frustration in the field. A heavy pair will make your neck ache on long hikes, while a low-quality lens will leave you squinting at blurry shapes. Understanding this skill helps campers and outdoor beginners save money and avoid buyer’s remorse.
When you know what you are looking for, you can match the gear directly to your environment. Birdwatchers need fast focus and bright images to catch sudden movements in the trees. Hunters require rugged, waterproof frames that handle rough weather. Stargazers need large lenses to capture faint light in the dark sky. Mastering this selection process ensures you get the exact features you need to enjoy your time outside comfortably and clearly.
Tools and Materials You’ll Need
Before you start shopping, you should gather a few basic items to help you test and evaluate different models effectively. Having these tools ready will make your decision-making process much smoother.
- A clear understanding of your budget limits
- A notebook and pen to write down specific model numbers and prices
- Your prescription eyeglasses or sunglasses, if you wear them outdoors
- A standard neck strap to test the carrying comfort
- A micro-fiber cleaning cloth to check the lenses for factory dust
- Optional: A basic tripod adapter to test stabilization on larger models
These simple items ensure you evaluate each pair realistically. Trying them on with your actual glasses and preferred strap gives you a true sense of how they will feel during a long day on the trail.
7 Step-by-Step Guide on How to Select Binoculars
Step 1 – Determine Your Primary Activity
Your specific hobby dictates the size, weight, and power of the optics you need. Understanding how to select binoculars starts with defining exactly where and how you plan to use them. If you plan to backpack for multiple days, you want compact, lightweight models that slide easily into a pocket.
Birding requires moderate magnification and a wide field of view to track fast-moving targets across the canopy. Marine use requires highly waterproof, lower-magnification models to compensate for a rocking boat. Make a firm decision about your primary activity right now. Do not try to buy one giant pair to do everything, as a jack-of-all-trades model often feels too heavy for casual hikes and too weak for serious astronomy.
Step 2 – Understand Magnification Numbers
Every pair features two numbers separated by an “x,” such as 8×42 or 10×50. The first number represents the magnification power. An 8x magnification means the object will appear eight times closer than it does to your naked eye.
While massive magnification sounds exciting, it comes with significant drawbacks for beginners. Higher power magnifies the tiny, natural shakes in your hands, making the image jittery and difficult to watch. An 8x or 10x magnification works perfectly for almost all beginner outdoor activities. These powers offer a stable image and keep the frame light enough to hold steady for long periods.
Step 3 – Check the Objective Lens Size
The second number in that sequence represents the objective lens diameter in millimeters. In an 8×42 model, the objective lenses at the front are 42 millimeters wide. These front lenses gather light, meaning larger lenses create brighter images.
If you frequently hike in dense, shadowed woods or observe wildlife at dawn and dusk, you need larger objective lenses to capture more ambient light. However, bigger glass significantly increases the overall weight of the frame. A 42mm lens offers an excellent balance between light-gathering capability and comfortable carrying weight. Compact models usually feature 25mm to 28mm lenses, which work great for bright, sunny days but struggle in low-light conditions.
Step 4 – Evaluate the Field of View
The field of view tells you how wide an area you can see when looking through the eyepieces. Manufacturers usually measure this in feet at a distance of 1,000 yards. A wider field of view makes it much easier to find and track moving subjects like birds or sports players.
Higher magnification inherently narrows your field of view. If you buy a 12x pair, you will see a very small, specific area, making it frustrating to locate an animal hiding in the brush. For most beginners, choosing an 8x magnification provides a comfortably wide field of view. This wider angle gives you spatial awareness and helps you quickly center your target in the glass.
Step 5 – Inspect the Lens Coatings
Manufacturers apply special chemical coatings to the glass to reduce glare and improve light transmission. Uncoated glass actually reflects a lot of light away, resulting in dark and washed-out images. You want to look for models described as “fully multi-coated.”
Fully multi-coated means all air-to-glass surfaces have multiple layers of anti-reflective treatments. This specification drastically improves color accuracy, contrast, and brightness. When you look through fully multi-coated lenses, the colors of bird feathers and tree leaves will look vibrant and crisp. Avoid models that simply say “coated,” as this usually means only a single, cheap layer was applied to the very front lens.
Step 6 – Test the Eye Relief
Eye relief measures the distance you can hold the eyepieces from your eyes while still seeing the entire image. This measurement matters immensely if you wear prescription glasses or sunglasses. Glasses push the eyepieces away from your face, which can cut off the edges of the picture.
Look for models offering at least 15 millimeters of eye relief if you wear glasses. Most modern optics feature adjustable eyecups that twist up and down. If you wear glasses, you twist the cups all the way down. If you do not wear glasses, you twist them up to create the perfect distance between the glass and your pupil.
Step 7 – Assess Weight and Ergonomics
Hold the frame in your hands for several minutes to see how it feels. Your journey of how to select binoculars ends with finding a physical frame that matches your body comfortably. The barrels should fit naturally into your palms, and your index finger should rest easily on the focus wheel.
Pay close attention to the overall weight. A model weighing over 30 ounces will quickly fatigue your arms and strain your neck if hung on a standard strap. Try adjusting the focus wheel back and forth. It should turn smoothly with a buttery resistance, allowing you to fine-tune the sharpness without jerking the frame out of alignment.
Common Mistakes When Buying Binoculars
Many beginners immediately reach for the highest magnification they can afford, assuming more power equals a better product. This massive mistake usually results in buyers taking home a 15x or 20x model. Without a tripod, human hands simply cannot hold that much magnification steady. The resulting image shakes violently with every heartbeat, causing severe eye strain and motion sickness. You will have a much better time sticking to an 8x or 10x magnification for handheld use.
Another frequent error involves ignoring the physical weight and bulk of the unit. Shoppers often test heavy, giant lenses inside a store for thirty seconds and think they feel fine. Three hours into a steep mountain hike, that heavy frame becomes a miserable burden swinging against your chest. You must buy gear that matches your physical stamina and your carrying capacity.
Finally, beginners often neglect to check the weatherproofing specifications. Outdoor environments feature sudden rainstorms, high humidity, and dusty trails. Buying a cheap, unsealed pair means water and dirt will eventually creep inside the chassis. Once moisture gets inside, the glass fogs up internally, effectively ruining the unit. Always prioritize models explicitly labeled as waterproof and fog-proof. These are sealed with O-rings and purged with nitrogen or argon gas to prevent internal moisture buildup.
Expert Tips
Spend time mastering the diopter adjustment before taking your new gear into the field. Almost everyone has slightly different vision in their left and right eyes. The diopter is usually a small adjustment ring located under the right eyepiece. It allows you to focus each barrel independently to match your specific eyesight. First, cover the right lens and use the center wheel to focus the left eye perfectly. Then, cover the left lens and use the diopter ring to focus the right eye.
Invest in an aftermarket, padded shoulder harness instead of using the cheap neck strap included in the box. A harness distributes the weight across your upper back and shoulders rather than pulling down on your delicate neck muscles. This small upgrade makes carrying your gear comfortable for hours. Keep your lens caps on when you are not actively looking through the glass. This simple habit prevents scratches from stray branches and keeps blowing dust off your pristine glass.
Frequently Asked Questions
What does the diopter adjustment actually do?
The diopter ring compensates for the visual differences between your left and right eyes. Since most people do not have perfectly identical vision in both eyes, looking through standard glass can feel slightly blurry. Setting the diopter allows you to calibrate the right eyepiece to your right eye’s specific needs. Once set, you only need to use the main center focus wheel.
Do I need to buy a tripod for my gear?
You generally do not need a tripod if your magnification is 10x or lower. The human body can hold these magnifications steady enough for clear, comfortable viewing. However, if you purchase a 12x, 15x, or higher magnification for astronomy or long-distance hunting, a tripod becomes absolutely mandatory to eliminate hand shake and stabilize the heavy frame.
How do I clean dirty lenses without scratching them?
You should never wipe dry lenses with your shirt or a paper towel, as this grinds microscopic dirt into the glass. First, use a soft bristle brush or compressed air to blow away loose dust and sand. Then, lightly moisten a dedicated microfiber optical cloth with lens cleaning solution. Gently wipe the glass in a circular motion starting from the center.
Are roof prism or porro prism designs better?
Roof prism models feature straight barrels, making them more compact, streamlined, and easier to waterproof. They tend to be more durable but generally cost more to manufacture. Porro prism models have an angled, wider shape. While bulkier, porro prisms often provide slightly better depth perception and offer excellent optical quality at a lower price point for beginners.
Can I use my outdoor optics for stargazing?
Yes, you can absolutely use standard outdoor optics to view the night sky. While a telescope offers more power, a good pair of 8×42 or 10×50 optics will reveal thousands of stars invisible to the naked eye. They work wonderfully for viewing the craters on the moon, spotting the moons of Jupiter, and finding wide star clusters like the Pleiades.
Conclusion
Finding the right optics does not have to be a stressful or overly technical chore. By focusing on your primary outdoor activity, you can quickly narrow down the countless options on the market. Remember that balancing magnification with objective lens size will give you the brightest, most stable image possible. Bigger is not always better when it comes to handheld glass.
Take your time testing the grip, weight, and eye relief before making a final decision. You want a tool that feels like a natural extension of your hands and eyes. Now that you know how to select binoculars, you can confidently invest in gear that will last for decades. Grab your new optics, head out to your favorite trail, and get ready to experience nature in a vivid, breathtaking new way.

About Caleb
Caleb Merritt is a Virginia-based outdoor writer and gear analyst who has spent over a decade sleeping on the ground, crossing mountain passes, and obsessively shaving grams off his pack weight. He holds a Bachelor of Science in Environmental Science from James Madison University, where he also served as president of the university’s outdoor recreation club. After graduating, he spent three years as a wilderness educator with a backcountry youth program in the Shenandoah Valley — teaching Leave No Trace ethics, backcountry navigation, and campcraft — before moving into full-time writing in 2018.
His work focuses on one core belief: the best gear is the gear you understand. Whether he’s doing a side-by-side weight comparison of ultralight shelters or writing a beginner’s guide to building a sub-20-lb base weight kit, Caleb writes with the same directness you’d expect from a trusted trail partner. He has logged more than 4,000 miles across iconic routes including the John Muir Trail, the Wind River Range, Vermont’s Long Trail, and the Collegiate Peaks Loop in Colorado.
Areas of Expertise
- Ultralight backpacking systems and base weight optimization
- Tent, tarp, and shelter testing across three-season and shoulder-season conditions
- Sleeping bag and quilt temperature rating verification
- Backpacking nutrition, meal planning, and calorie-per-ounce analysis
- Leave No Trace principles and wilderness ethics
- Campfire safety, bear country protocols, and water treatment methods
- Gear care, repair, and long-term durability assessment
Education
James Madison University — B.S. in Environmental Science, 2015
During his time at JMU, Caleb served as President of the Outdoor Recreation Club, where he planned and led more than 30 backcountry trips annually across the Blue Ridge Mountains and Appalachian Trail corridor. The role sharpened his ability to assess gear performance under real conditions, manage group safety in remote environments, and develop the kind of practical trail knowledge that no classroom can teach.
Professional Experience
Gear Writer & Senior Contributor — [campeox.com]
Produces in-depth gear reviews, buyer’s guides, and how-to content across backpacking, camping, and ultralight hiking categories. Tests all gear in real field conditions before publishing recommendations.
Wilderness Educator & Trip Leader — Shenandoah Backcountry Youth Program — 2015–2018 Led multi-day backcountry expeditions for teens and young adults throughout Shenandoah National Park and George Washington National Forest. Taught LNT principles, orienteering, first aid awareness, and campcraft fundamentals.
Outdoor Recreation Club President — James Madison University — 2013–2015 Organized and led university-sponsored hiking, backpacking, and camping trips in the Blue Ridge Mountains and Appalachian Trail corridor. Managed club budget, safety protocols, and trip logistics for a membership of 120+ students.
Editorial Standards
Every piece of gear Caleb recommends has been personally tested in the field — not just unboxed and described. His review process includes a minimum of two overnight trips per shelter, a full-season evaluation for sleep systems, and side-by-side comparisons wherever possible. He does not accept payment for positive reviews. Affiliate relationships, where they exist, are always disclosed in accordance with FTC guidelines.
All factual claims about gear specifications, trail distances, and safety recommendations are cross-referenced against manufacturer data sheets and established sources such as the Leave No Trace Center for Outdoor Ethics and the American Hiking Society before publication.




