

Bringing a new boat home is exciting, but figuring out where to put it can feel a little overwhelming. If you want your vessel to last for years of camping trips and weekend adventures, you need a solid storage plan. Leaving your boat sitting on the damp ground or exposed to harsh sunlight can warp the hull, fade the bright colors, and ruin the materials.
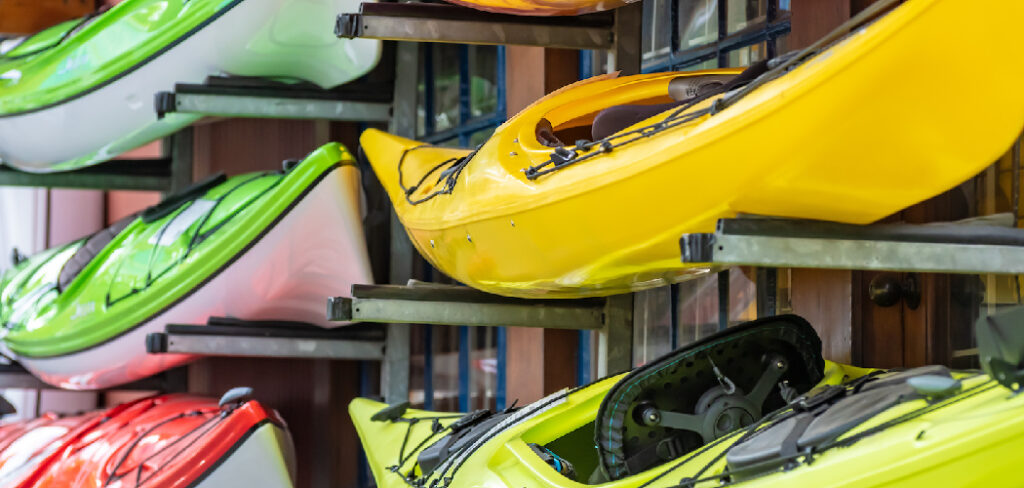
That is exactly why understanding how to store a kayak properly is so important for any beginner. Whether you have a spacious garage, a small apartment, or just a spot in your backyard, you can keep your gear safe and ready for the water. We will walk you through everything you need to know to protect your investment. Let us dive into the best ways to keep your boat in perfect shape during the off-season.
Why Proper Kayak Storage Matters
You might wonder if tossing a tarp over your boat at the campsite is enough. Unfortunately, kayaks are surprisingly sensitive to their environment when they are not in the water. Extreme heat causes plastic hulls to soften and deform, while freezing temperatures can make composite materials brittle. Moisture trapped inside closed compartments often leads to severe mold and mildew growth.
By taking the time to set up a dedicated storage space, you prevent structural damage that ruins the way your boat tracks in the water. Good storage habits also keep unwanted pests from turning your comfortable cockpit into a winter nest. Protecting your boat means you will spend less time doing costly repairs and more time enjoying beautiful lakes and calm rivers on your next travel adventure.
7 Step-by-Step Guide on How to Store a Kayak
Step 1: Clean Your Boat Thoroughly
Before you even think about putting your gear away for the season, you need to give it a proper wash. Dirt, salt, and grime break down the materials over time. Start by rinsing the entire hull with fresh water from a garden hose. Use a mild soap and a soft sponge to gently scrub away any stubborn algae or mud buildup.
Rinse it completely and make sure no soap residue remains on the surface. After washing, you must dry the boat entirely. Wipe down the exterior with a clean towel and leave the hatch open so the interior airs out. Storing a damp boat invites nasty mold and strange smells, so take your time making sure every single crevice is completely bone dry.
Step 2: Distribute the Weight Evenly
When a boat sits in one place for months, gravity becomes its biggest enemy. If you rest the entire weight of the vessel on one small spot, the hull will eventually dent or warp. To prevent this annoying damage, you must balance the load correctly. Never rest a boat directly on its nose or tail for long periods.
Instead, lay it on its side, as the sides are usually the strongest structural parts of the design. If you decide to hang it from the ceiling or wall, position the padded straps about one-third of the way from the front and back. This specific placement ensures the heavy center section is fully supported, keeping your vessel perfectly straight and ready for your next trip.
Step 3: Pick the Perfect Location
Finding the right spot is crucial for keeping your equipment safe from harm. The ideal environment is somewhere cool, dry, and dark. A climate-controlled garage, a dry basement, or a weatherproof shed are all excellent options. If you must leave it outside, look for a heavily shaded area underneath a sturdy roof or a thick tree canopy.
You want to avoid placing it right next to large windows where sunlight can magnify and bake the plastic. It is also smart to keep it away from direct heat sources like furnaces or water heaters. By choosing a sheltered spot, you create a safe haven that protects the sensitive hull from intense temperature swings and unexpected rough weather.
Step 4: Guard Against Sun Damage
Ultraviolet rays are incredibly damaging to plastics, fiberglass, and inflatable materials. Prolonged sun exposure fades those vibrant colors and slowly breaks down the structural integrity of the hull, making it brittle and prone to cracking. If you keep your gear outdoors, you absolutely must use a UV-resistant cover.
Drape a high-quality, breathable cover over the entire vessel to block out the harsh light. Avoid using standard blue hardware store tarps if possible, because they trap heat and moisture underneath. If a basic tarp is your only option, pitch it like a tent above the boat rather than wrapping it tightly. Leaving a gap allows fresh air to circulate, which keeps the boat cool while still blocking the dangerous sunlight.
Step 5: Secure the Boat Safely
Once you find a great spot, you need to make sure the boat stays exactly where you put it. If you build a wall rack or ceiling hoist, always anchor the mounting hardware directly into solid wooden wall studs. Drywall anchors simply cannot hold the heavy weight and will eventually rip out, causing a dangerous crash.
Use wide, soft webbing straps to hold the vessel firmly against the rack. Tighten the straps just enough to keep the boat from shifting, but do not crank them down too hard. Overtightening puts immense pressure on the plastic and causes permanent deformation. Understanding how to store a kayak securely means finding that perfect balance between keeping it firmly in place and letting the hull rest naturally.
Step 6: Protect Against Pests and Rodents
Small animals love turning a cozy, dry cockpit into a winter home. Mice, squirrels, and spiders often climb inside to escape the freezing cold, and they can chew right through your expensive foam seats and deck rigging. To stop these unwanted guests, you should seal off all the major entry points. Purchase a sturdy cockpit cover and snap it tightly over the rim.
If you do not have a fitted cover, you can create a makeshift barrier using a breathable mesh fabric and a bungee cord. Double-check that all the storage hatches are securely fastened. Taking a few minutes to block these openings ensures you will not find any furry surprises waiting for you when spring finally arrives.
Step 7: Check on Your Equipment Periodically
Your job is not completely done just because the boat is safely tucked away. It is always a smart idea to check on your gear a few times during the off-season. Walk by your storage area once a month and inspect the setup. Make sure the straps have not loosened and the boat has not shifted out of alignment.
Look for any signs of water pooling inside the cover or pests trying to chew their way in. If you notice any dust building up, give it a quick wipe down. These short, regular inspections help you catch small problems before they turn into expensive repairs, ensuring your favorite vessel remains in pristine condition all year long.
Frequently Asked Questions (FAQ)
Can I Store My Kayak Standing Up?
Standing your boat vertically on its end is generally not recommended for long-term storage. The entire weight of the vessel presses down on the very tip, which easily bends and warps the plastic. If you absolutely must stand it up due to limited space, place a thick foam pad underneath the stern. Also, make sure to secure the top firmly to a wall so it cannot accidentally tip over and crack.
Is It Safe To Keep A Kayak Outside In Winter?
You can keep your boat outdoors during winter, but it requires extra preparation to avoid freezing damage.
- Remove all moisture from the interior compartments.
- Keep the hull elevated entirely off the freezing ground.
- Cover it with a heavy-duty, breathable, and waterproof cover.
- Brush off heavy snowfall regularly to prevent excess weight from pressing down and warping the delicate hull structure.
Should I Leave My Inflatable Kayak Inflated?
You should slightly deflate an inflatable boat if you plan to keep it inflated during the off-season. Changes in temperature cause the air inside the chambers to expand and contract. Leaving it fully pumped up in a warm room can blow out the seams. Ideally, you should clean it, dry it completely, roll it up loosely, and place it in a dry bag for maximum protection.
How Do I Prevent Mold Inside The Hatches?
The best way to stop mold is by ensuring the interior is completely dry before sealing it.
- Wipe the inside with a dry towel.
- Leave the hatch covers off for a few days in a well-ventilated area.
- Place moisture-absorbing silica gel packets inside the compartments.
- Leave the covers slightly cracked open during storage to allow constant airflow.
What Are The Best Types Of Storage Racks?
The best rack depends entirely on your available space and the weight of your vessel. Wall-mounted J-cradles are excellent because they hold the hull on its side, which is the strongest part. Free-standing racks work great if you have a large garage and multiple boats. Ceiling hoist systems are fantastic for saving floor space, provided you install them securely into sturdy wooden ceiling joists.
Conclusion
Taking care of your equipment guarantees that it will always be ready for your next exciting outdoor adventure. We covered a lot of ground today, from thoroughly cleaning the hull to finding the perfect shaded spot in your garage. Remember that balancing the weight, using a breathable cover, and checking the straps periodically are simple steps that prevent serious damage.
Knowing exactly how to store a kayak gives you peace of mind during those long winter months when you cannot get out on the water. Do not let your beautiful boat sit unprotected in the backyard this season. Take action this weekend, set up a proper resting spot, and you will greatly extend the life of your gear for many camping trips to come.

About Caleb
Caleb Merritt is a Virginia-based outdoor writer and gear analyst who has spent over a decade sleeping on the ground, crossing mountain passes, and obsessively shaving grams off his pack weight. He holds a Bachelor of Science in Environmental Science from James Madison University, where he also served as president of the university’s outdoor recreation club. After graduating, he spent three years as a wilderness educator with a backcountry youth program in the Shenandoah Valley — teaching Leave No Trace ethics, backcountry navigation, and campcraft — before moving into full-time writing in 2018.
His work focuses on one core belief: the best gear is the gear you understand. Whether he’s doing a side-by-side weight comparison of ultralight shelters or writing a beginner’s guide to building a sub-20-lb base weight kit, Caleb writes with the same directness you’d expect from a trusted trail partner. He has logged more than 4,000 miles across iconic routes including the John Muir Trail, the Wind River Range, Vermont’s Long Trail, and the Collegiate Peaks Loop in Colorado.
Areas of Expertise
- Ultralight backpacking systems and base weight optimization
- Tent, tarp, and shelter testing across three-season and shoulder-season conditions
- Sleeping bag and quilt temperature rating verification
- Backpacking nutrition, meal planning, and calorie-per-ounce analysis
- Leave No Trace principles and wilderness ethics
- Campfire safety, bear country protocols, and water treatment methods
- Gear care, repair, and long-term durability assessment
Education
James Madison University — B.S. in Environmental Science, 2015
During his time at JMU, Caleb served as President of the Outdoor Recreation Club, where he planned and led more than 30 backcountry trips annually across the Blue Ridge Mountains and Appalachian Trail corridor. The role sharpened his ability to assess gear performance under real conditions, manage group safety in remote environments, and develop the kind of practical trail knowledge that no classroom can teach.
Professional Experience
Gear Writer & Senior Contributor — [campeox.com]
Produces in-depth gear reviews, buyer’s guides, and how-to content across backpacking, camping, and ultralight hiking categories. Tests all gear in real field conditions before publishing recommendations.
Wilderness Educator & Trip Leader — Shenandoah Backcountry Youth Program — 2015–2018 Led multi-day backcountry expeditions for teens and young adults throughout Shenandoah National Park and George Washington National Forest. Taught LNT principles, orienteering, first aid awareness, and campcraft fundamentals.
Outdoor Recreation Club President — James Madison University — 2013–2015 Organized and led university-sponsored hiking, backpacking, and camping trips in the Blue Ridge Mountains and Appalachian Trail corridor. Managed club budget, safety protocols, and trip logistics for a membership of 120+ students.
Editorial Standards
Every piece of gear Caleb recommends has been personally tested in the field — not just unboxed and described. His review process includes a minimum of two overnight trips per shelter, a full-season evaluation for sleep systems, and side-by-side comparisons wherever possible. He does not accept payment for positive reviews. Affiliate relationships, where they exist, are always disclosed in accordance with FTC guidelines.
All factual claims about gear specifications, trail distances, and safety recommendations are cross-referenced against manufacturer data sheets and established sources such as the Leave No Trace Center for Outdoor Ethics and the American Hiking Society before publication.




