

After a fantastic weekend around the campfire, packing up your gear often feels like a chore. You might feel tempted to toss everything into the garage and walk away until your next trip. However, taking a few extra minutes to properly maintain and pack away your outdoor seating makes a massive difference in how long your gear lasts. If you want to know exactly how to store camping chairs, you are in the right place.
This guide breaks down the entire process from start to finish. We will walk through cleaning off the campfire ash, drying out the morning dew, and finding the perfect spot in your home or garage to keep your gear safe. By following these simple methods, you protect your investment and ensure your favorite seat is always ready for the next adventure. Let us dive right into keeping your outdoor gear in prime condition.
Why Storing Camping Chairs Properly Matters
Throwing your outdoor seating carelessly into a damp shed invites a host of frustrating problems. Moisture, dirt, and extreme temperatures can quickly ruin even the most expensive outdoor gear. Learning the right way to pack away your equipment helps prevent mold growth, rust on the metal frames, and fabric deterioration from trapped dirt or sun exposure.
When you establish a solid routine for putting your gear away, you extend the lifespan of your equipment significantly. This saves you money since you will not need to buy replacements every single season. Furthermore, a well-organized garage or closet means you can grab your gear at a moment’s notice. You eliminate the frantic search for a clean, unbroken seat when your friends invite you on a spontaneous weekend getaway. Good habits give you peace of mind and better outdoor experiences.
Tools and Materials You’ll Need
Before you start cleaning and organizing your gear, gather a few basic supplies. You probably already have most of these items sitting around your house. Having everything within arm’s reach makes the process smooth and quick.
- A soft-bristled scrub brush for lifting loose dirt and dried mud
- Mild dish soap or a dedicated outdoor fabric cleaner
- A bucket of warm water to mix your cleaning solution
- Microfiber towels or clean cotton rags for wiping down the frames
- A dry towel for soaking up excess moisture after washing
- A small vacuum with a brush attachment to pull crumbs out of crevices
- Optional: Silicone-based lubricant spray for squeaky hinges and joints
10 Step-by-Step Guide on How To Store Camping Chairs
Step 1 – Shake Out Dirt and Debris
Before you introduce any water to your gear, you need to remove the loose top layer of dirt, leaves, and crumbs. Take your gear out to the driveway or into the yard and open it up fully. Give it a vigorous shake to dislodge any loose pine needles or cracker crumbs from the seat.
Next, grab your soft-bristled brush and gently sweep away any dried mud clinging to the fabric or legs. Pay special attention to the seams where the seat meets the backrest, as dirt loves to hide in those tight spaces. If you have a hand vacuum, run it along the cup holders and side pockets. Getting rid of dry dirt first prevents you from accidentally turning dust into deep-set mud when you wash the fabric.
Step 2 – Wipe Down the Metal Frames
The metal legs and joints of your outdoor seating take a beating from rough terrain, sand, and muddy campsite puddles. Grab a damp microfiber towel and wipe down all the metal components thoroughly. Work your way from the top joints down to the feet, removing any dust or grime that accumulated during your trip.
If you spot any stubborn sap or sticky residue, apply a tiny drop of dish soap to your towel and rub the area gently. Clean frames are essential because trapped dirt can grind into the hinges over time, causing them to stiffen or fail entirely. Taking the time to wipe down the structural parts ensures the folding mechanism remains smooth. Dry the metal off completely with a fresh towel to prevent any potential rust.
Step 3 – Spot Clean the Fabric Seat
With the frames looking good, shift your attention to the fabric seating area. Mix a few drops of mild dish soap into your bucket of warm water. Dip your soft brush or a clean sponge into the soapy water, shaking off the excess so you do not saturate the material.
Gently scrub any visible stains, like spilled drinks, mustard drips, or muddy paw prints. Work in small circular motions to lift the stain without fraying the synthetic nylon or polyester fibers. Avoid using harsh chemical cleaners or bleach, as these can strip away the protective water-resistant coatings applied by the manufacturer. Once the stains vanish, use a clean, damp cloth to wipe away any soapy residue left behind on the fabric.
Step 4 – Dry Everything Completely
This step stands as the single most critical part of learning how to store camping chairs effectively. If you pack away a damp piece of outdoor gear, you are almost guaranteed to find mold and mildew the next time you open it.
Leave your seating fully unfolded and place it in a shaded, well-ventilated area outside. Let the breeze and fresh air pull all the moisture out of the fabric and the hinges. Avoid leaving the gear in direct, baking sunlight for hours, as heavy UV rays can fade the colors and weaken the synthetic fibers over time. Give the gear at least a few hours to dry completely. Touch the seams and the bottom of the cup holders to ensure absolutely no dampness remains before moving on.
Step 5 – Inspect for Damage and Wear
While you wait for the fabric to finish drying, take a few moments to perform a quick health check on your equipment. Look closely at the stitching along the edges of the seat and the backrest. If you spot any loose threads, make a note to patch them up before your next trip.
Check the metal frame for any bends, dents, or deep scratches that might compromise the structural integrity. Test the hinges by folding and unfolding the frame a few times. If you hear loud squeaks or feel heavy resistance, apply a small burst of silicone-based lubricant to the metal joints. Wiping away the excess spray keeps the area clean. Fixing minor issues now prevents major failures when you are miles away from home.
Step 6 – Collapse and Secure the Frame
Once you verify that every inch of the fabric and metal is bone dry, it is time to collapse the structure. Fold the frame inward according to the manufacturer’s design. Move slowly and ensure the fabric folds neatly without pinching in the metal hinges.
If your gear features a built-in compression strap or a Velcro tie, wrap it snugly around the collapsed bundle. This keeps the legs tightly bound together, making it much easier to slide the unit into its protective sleeve. Tying the frame securely also prevents the legs from springing open and snagging on other items in your garage. A tight, neat bundle is the foundation of excellent organization and helps maximize your available storage space.
Step 7 – Pack into the Carrying Bag
Most outdoor seating comes with a cylindrical nylon carrying bag. Slide the collapsed, secured frame into this bag, starting with the feet first. Pushing the heavy feet into the bottom of the bag prevents the upper fabric from getting snagged on the drawstring opening.
If the bag has a shoulder strap, make sure it sits on the outside and doesn’t get tangled inside the pouch. Pull the drawstring tight and secure the toggle. The carrying bag serves as a vital dust cover during the off-season, protecting your clean gear from cobwebs, garage dust, and accidental scuffs. If you lost your original bag, consider wrapping the collapsed frame in an old heavy-duty trash bag or a spare canvas sack to keep it clean.
Step 8 – Choose a Dry, Climate-Controlled Spot
Where you place your packed gear matters just as much as how you cleaned it. The ideal environment for your outdoor equipment is a cool, dry, and relatively climate-controlled space. A hall closet, a dry basement shelf, or an insulated garage cabinet works perfectly.
Avoid leaning your gear against damp basement walls or leaving it on the bare concrete floor where moisture can seep up into the carrying bag. Extreme temperature fluctuations can degrade both the fabric and the plastic components over the winter months. By keeping your gear inside a stable environment, you shield it from freezing temperatures and high humidity. This simple choice drastically extends the life and reliability of your favorite campfire seat.
Step 9 – Store Vertically or Hang Safely
To save floor space and keep your gear organized, think vertically. You can stand the packed bags upright in the corner of a closet or use a tall bin to corral multiple pieces together. Storing them upright prevents heavy items from crushing the fragile metal frames.
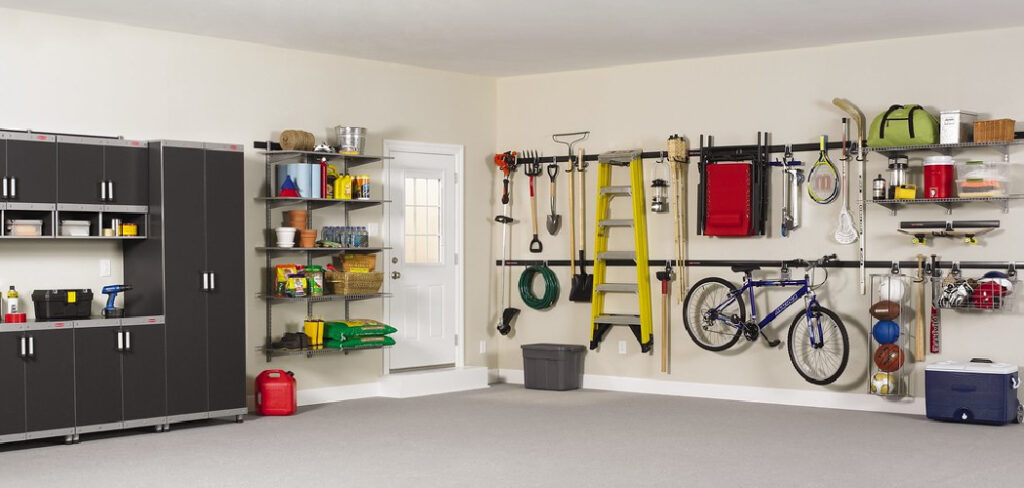
If you want to free up even more floor space, consider installing heavy-duty hooks on your garage wall. Hang the bags by their sturdy shoulder straps or reinforced drawstring loops. Keep the hooks high enough so the bags do not drag on the floor, but low enough that you can easily grab them without straining. Wall storage keeps your equipment visible, organized, and protected from accidental impacts from cars or lawnmowers.
Step 10 – Rotate and Check Periodically
Even when packed away perfectly, it pays to check on your gear during long periods of inactivity. Every few months during the off-season, pull the bags out and inspect them. You are simply looking to ensure no moisture or pests have compromised your storage area.
Take a quick sniff near the bag opening to check for any musty smells indicating hidden dampness. If you notice any signs of mice or insects in your garage, verify that your gear bags remain untouched. Catching a storage issue early allows you to clean the gear again before permanent damage sets in. This routine maintenance takes only a few minutes but provides total confidence that your equipment will be flawless for spring camping.
Common Mistakes When Storing Outdoor Gear
The most frequent error beginners make is packing their equipment while it remains wet or damp. Even a tiny amount of moisture trapped inside the carrying bag creates a perfect breeding ground for mold and mildew. Once mildew sets into the synthetic fabric, it produces a foul odor that is incredibly difficult to remove and degrades the material’s strength.
Another widespread mistake involves leaving the gear out in the sun or rain for weeks after returning home. Prolonged exposure to ultraviolet rays breaks down the fabric fibers, causing them to become brittle and tear easily under your weight. Rain introduces rust to the metal hinges, making the folding mechanism stiff and prone to snapping.
Finally, stacking heavy boxes or heavy tools on top of collapsed gear in the garage causes severe structural damage. The hollow metal tubes used for the legs bend easily under sustained pressure. Once the frame bends, it will never fold or unfold smoothly again. Treating your outdoor seating with the same care as your indoor furniture prevents these costly and frustrating mistakes.
Expert Tips
To get the absolute most out of your outdoor seating, consider applying a UV-protectant fabric spray at the start of every season. This simple coating acts like sunscreen for your gear, preventing color fading and maintaining the material’s structural integrity against the harsh summer sun.
Additionally, always sweep away any accumulated sand or grit from the leg joints before packing up at the beach or campsite. Sand acts like sandpaper inside the hinges, grinding away the metal and causing premature failure. Keeping a designated small whisk broom in your car makes this process effortless. Treat the zippers on any built-in cooler pockets with a little beeswax to prevent them from corroding or sticking during winter storage.
Frequently Asked Questions
Can I leave my gear in the trunk of my car year-round?
Leaving your equipment in your vehicle permanently is not a great idea. Car trunks experience extreme temperature changes, becoming baking ovens in the summer and freezers in the winter. These harsh fluctuations cause the plastic joints to become brittle and weaken the fabric over time. It is much better to bring them inside to a stable environment.
How do I get rid of a musty smell if my gear got packed wet?
If your equipment smells like mildew, mix a solution of equal parts water and white vinegar. Lightly spray the affected fabric and let it sit in the fresh air and sunshine for a few hours. The vinegar neutralizes the mold spores, while the fresh air clears out the remaining odors. Wash with mild soap afterward.
Is it safe to machine wash the fabric seat?
You should never place the seat material in a washing machine. The aggressive spinning and agitation can tear the heavy-duty seams and ruin the water-resistant coating. Hand washing with a soft brush and mild soapy water provides plenty of cleaning power without risking catastrophic damage to the fabric.
What should I do if my carrying bag gets lost or torn?
If your original bag disappears or breaks, you can easily use alternatives. Heavy-duty canvas laundry bags or large duffel bags work wonderfully as replacements. The main goal is to protect the folded frame from dust and prevent the legs from springing open, so any durable sack that covers the length of the frame will succeed.
How often do I need to lubricate the folding hinges?
Applying a silicone-based spray once a year usually provides plenty of protection for standard use. The best time to do this is right before you pack the gear away for winter. However, if you frequently camp in very sandy environments or near saltwater, you might want to apply a small amount mid-season to ensure smooth operation.
Conclusion
Taking proper care of your outdoor gear ensures you will always have a comfortable, reliable place to rest around the campfire. The effort required to clean and pack your equipment is minimal compared to the cost and frustration of replacing damaged gear every spring. By cleaning off the debris, drying the fabric thoroughly, and choosing a smart spot in your garage, you set yourself up for camping success.
Remember that moisture and poor handling remain the biggest enemies of your equipment. Creating a post-trip routine helps you tackle these tasks quickly while the campfire memories are still fresh. Knowing how to store camping chairs gives you confidence that your investment is protected from the elements, pests, and accidental damage. Grab your cleaning supplies, wipe down those frames, and pack your gear away perfectly so it is ready for your next beautiful weekend in nature.

About Caleb
Caleb Merritt is a Virginia-based outdoor writer and gear analyst who has spent over a decade sleeping on the ground, crossing mountain passes, and obsessively shaving grams off his pack weight. He holds a Bachelor of Science in Environmental Science from James Madison University, where he also served as president of the university’s outdoor recreation club. After graduating, he spent three years as a wilderness educator with a backcountry youth program in the Shenandoah Valley — teaching Leave No Trace ethics, backcountry navigation, and campcraft — before moving into full-time writing in 2018.
His work focuses on one core belief: the best gear is the gear you understand. Whether he’s doing a side-by-side weight comparison of ultralight shelters or writing a beginner’s guide to building a sub-20-lb base weight kit, Caleb writes with the same directness you’d expect from a trusted trail partner. He has logged more than 4,000 miles across iconic routes including the John Muir Trail, the Wind River Range, Vermont’s Long Trail, and the Collegiate Peaks Loop in Colorado.
Areas of Expertise
- Ultralight backpacking systems and base weight optimization
- Tent, tarp, and shelter testing across three-season and shoulder-season conditions
- Sleeping bag and quilt temperature rating verification
- Backpacking nutrition, meal planning, and calorie-per-ounce analysis
- Leave No Trace principles and wilderness ethics
- Campfire safety, bear country protocols, and water treatment methods
- Gear care, repair, and long-term durability assessment
Education
James Madison University — B.S. in Environmental Science, 2015
During his time at JMU, Caleb served as President of the Outdoor Recreation Club, where he planned and led more than 30 backcountry trips annually across the Blue Ridge Mountains and Appalachian Trail corridor. The role sharpened his ability to assess gear performance under real conditions, manage group safety in remote environments, and develop the kind of practical trail knowledge that no classroom can teach.
Professional Experience
Gear Writer & Senior Contributor — [campeox.com]
Produces in-depth gear reviews, buyer’s guides, and how-to content across backpacking, camping, and ultralight hiking categories. Tests all gear in real field conditions before publishing recommendations.
Wilderness Educator & Trip Leader — Shenandoah Backcountry Youth Program — 2015–2018 Led multi-day backcountry expeditions for teens and young adults throughout Shenandoah National Park and George Washington National Forest. Taught LNT principles, orienteering, first aid awareness, and campcraft fundamentals.
Outdoor Recreation Club President — James Madison University — 2013–2015 Organized and led university-sponsored hiking, backpacking, and camping trips in the Blue Ridge Mountains and Appalachian Trail corridor. Managed club budget, safety protocols, and trip logistics for a membership of 120+ students.
Editorial Standards
Every piece of gear Caleb recommends has been personally tested in the field — not just unboxed and described. His review process includes a minimum of two overnight trips per shelter, a full-season evaluation for sleep systems, and side-by-side comparisons wherever possible. He does not accept payment for positive reviews. Affiliate relationships, where they exist, are always disclosed in accordance with FTC guidelines.
All factual claims about gear specifications, trail distances, and safety recommendations are cross-referenced against manufacturer data sheets and established sources such as the Leave No Trace Center for Outdoor Ethics and the American Hiking Society before publication.




