

Welcome to your next great outdoor adventure. Taking your bicycle to new trails or distant scenic routes opens up a completely new level of exploration. However, getting your gear safely from your home to the trailhead requires a bit of knowledge and the right equipment. If you feel intimidated by the straps, hitches, and metal frames attached to your car, you are completely normal. Many beginners look at these contraptions and wonder where to even begin.
We created this comprehensive guide exactly for this reason. We will walk you through exactly how to use a bike rack so you can focus on the ride ahead instead of worrying about your bicycle falling off on the highway. By following these clear instructions, you will gain the confidence to mount, secure, and transport your gear safely every single time.
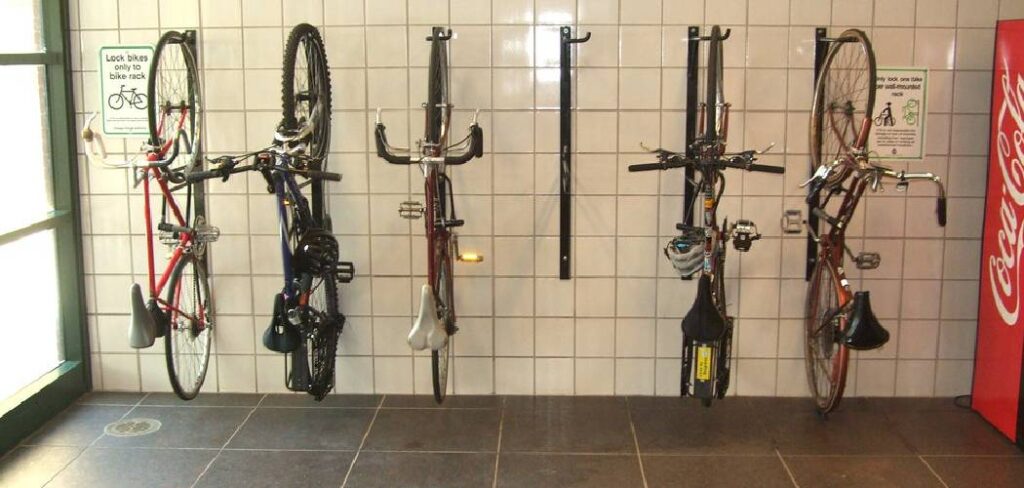
Why Learning How to Use a Bike Rack is Essential for Adventurers
Transporting bicycles inside a vehicle often leads to scratched interiors, bent bike frames, and a massive loss of passenger space. Stuffing a dirty, greasy bicycle into the back seat or trunk rarely ends well for the car or the bike. Mastering the art of external transport changes your travel experience entirely. When you secure your equipment to the outside of your car, you free up interior space for friends, family, and extra camping gear.
Furthermore, proper usage guarantees safety on the road. A poorly secured load presents a severe hazard to you and everyone driving behind you. Bicycles flying off vehicles cause major accidents and completely destroy expensive sports equipment. Taking the time to understand the mechanics of your specific carrier ensures that your expensive gear stays firmly attached to your car, regardless of highway speeds or bumpy dirt roads. You also avoid costly traffic tickets, as law enforcement officers regularly pull over drivers with unsafe loads.
Tools and Materials You’ll Need
Before you start attaching anything to your vehicle, gather everything required for a smooth installation. Having these items on hand prevents frustration and ensures a secure fit.
- Your vehicle’s manual
- The bike rack assembly manual
- A clean microfiber cloth
- Measuring tape
- Bungee cords or extra tie-down straps
- A padlock or cable lock
- A stepping stool for taller vehicles
Step-by-Step Guide on How to Use a Bike Rack
Getting the process right from the very beginning saves you time and protects your equipment. Knowing how to use a bike rack correctly involves a specific sequence of actions. Follow these steps carefully to guarantee a secure setup for your vehicle and your bicycles.
Step 1 – Choose the Right Rack for Your Vehicle
Vehicle compatibility dictates everything. Hitch mounts slide directly into a receiver on the back of your car, providing excellent stability and easy loading. Roof carriers keep your bicycles out of the way but require you to lift heavy gear over your head. Trunk-mounted carriers strap onto the back of sedans and hatchbacks, offering an affordable option that requires no permanent vehicle modifications. Evaluate your vehicle type and your physical ability to lift heavy objects before making a decision.
Step 2 – Install the Bike Rack Securely
Attach the empty carrier to your vehicle before attempting to load anything. For hitch versions, slide the main tube into the receiver and insert the locking pin. Tighten the anti-rattle mechanism to prevent swaying. For trunk versions, wipe down your car’s paint to prevent scratches, then hook the straps to the designated panel gaps. Tighten every single strap evenly. Grab the main frame and shake it vigorously. The car should move, but the carrier should remain perfectly rigid against the vehicle.
Step 3 – Prepare Your Bike for Transport
Remove any loose accessories from your bicycle. Water bottles, tire pumps, saddlebags, and clip-on lights will fly off at highway speeds. Store these items securely inside your car. If you have a particularly heavy electric bicycle, remove the battery and place it in your trunk to reduce the overall weight on the carrier.
Step 4 – Lift and Position the Bike
Approach your vehicle carefully. Lift the bicycle by the frame, keeping it close to your body to protect your back. For roof carriers, you might need a step stool to reach the trays. For rear carriers, place the heaviest bicycle closest to the vehicle bumper. Alternate the direction of the handlebars for each subsequent bicycle to prevent them from tangling together. Make sure the frame rests squarely in the cradles or wheel trays.
Step 5 – Fasten the Straps and Clamps
Now that you have the bicycle positioned, you need to lock it down. Knowing how to use a bike rack effectively means mastering the fastening systems. Pull the rubber or plastic straps tightly over the top tube of the frame. If your carrier uses wheel ratchets, slide them down firmly against the tires. Apply enough pressure to compress the tire slightly. Never let metal parts of the carrier rub directly against the metal frame of your bicycle, as the friction will destroy your paint job.
Step 6 – Double-Check the Stability
Stand back and inspect your work. Grab the bicycle frame and give it a firm shake. The bicycle should feel like a solid extension of the car. If you notice any wobbling or sliding, tighten the straps further. Use extra bungee cords to secure the front wheel to the frame so it does not spin freely in the wind and strike your bumper.
Step 7 – Drive Safely and Monitor Your Rack
Driving with external gear requires heightened awareness. Accelerate slowly and leave extra stopping distance between you and the car ahead. Avoid sharp turns and massive potholes. Look through your rearview mirror frequently to monitor the load. If you hear any unusual rattling or scraping noises, pull over safely and inspect the equipment immediately.
Common Mistakes When Using a Bike Rack
Many beginners make completely avoidable errors during their first few trips. The most frequent mistake involves overloading the carrier beyond its stated weight capacity. Always check the manufacturer limits, especially if you transport heavy electric bicycles. Another frequent error is forgetting about overhead clearance. Drivers with roof carriers routinely crash their bicycles into low garage doors, drive-through overhangs, and low-hanging tree branches. Place a sticky note on your dashboard to remind yourself about your increased vehicle height. Finally, drivers often cover their license plates or taillights. Blocking your vehicle’s lights or plates creates a dangerous situation and easily leads to traffic fines.
Expert Tips
Experienced cyclists employ several tricks to make transportation easier and safer. Always lock your bicycles to the carrier using a heavy-duty cable lock, even for short stops at gas stations or restaurants. Thieves target unsecured sporting goods in parking lots constantly. Additionally, wipe down your carrier after a rainy or snowy drive. Road salt and moisture cause metal components to rust and fabric straps to degrade rapidly. If you use a trunk-mounted carrier, clean your car’s bumper and trunk lid thoroughly before installation. Trapped dirt acts like sandpaper between the mounting pads and your car’s clear coat.
Frequently Asked Questions
Beginners always have lingering questions about transporting their gear safely. We gathered the most common inquiries to help put your mind at ease before your first trip.
Can I go through a car wash with a bike rack?
You must absolutely remove the carrier before entering any automated car wash. The massive spinning brushes will easily get tangled in the metal arms and straps. This will destroy the carrier, damage your vehicle, and completely break the car wash machinery.
Will a trunk rack damage my car?
Trunk carriers can damage your paint if installed incorrectly. You must clean the car surface perfectly before attaching the pads. You must also ensure the straps remain incredibly tight during the entire journey. Loose straps allow the pads to shift and rub against the paint.
How fast can I drive with bicycles on the back?
Most manufacturers recommend staying under 65 miles per hour. High speeds create massive aerodynamic drag on the bicycles, putting severe stress on the straps and the carrier frame. Keep your speed reasonable and stick to the slow lane.
Can I leave the empty rack on my car permanently?
While you technically can leave hitch and roof models installed, weather exposure will degrade the plastic and rubber parts over time. Removing the empty carrier improves your gas mileage and extends the lifespan of the equipment significantly.
Do I need special adapters for different bike frames?
Step-through frames, full-suspension mountain bikes, and children’s bicycles often require a top tube adapter. This metal bar attaches from the seat post to the handlebar stem, creating an artificial straight line that allows the bicycle to hang properly on standard mast-style carriers.
Conclusion
Transporting your bicycle does not have to be a stressful or overly complicated experience. By following the detailed steps outlined above, you can safely explore new trails and scenic pathways far from your neighborhood. Understanding how to use a bike rack gives you the freedom to travel securely and confidently. Take your time during the first few installations, double-check your straps, and always prioritize safety on the road. Now grab your helmet, load up your vehicle, and enjoy your next great outdoor adventure.
About Caleb
Caleb Merritt is a Virginia-based outdoor writer and gear analyst who has spent over a decade sleeping on the ground, crossing mountain passes, and obsessively shaving grams off his pack weight. He holds a Bachelor of Science in Environmental Science from James Madison University, where he also served as president of the university’s outdoor recreation club. After graduating, he spent three years as a wilderness educator with a backcountry youth program in the Shenandoah Valley — teaching Leave No Trace ethics, backcountry navigation, and campcraft — before moving into full-time writing in 2018.
His work focuses on one core belief: the best gear is the gear you understand. Whether he’s doing a side-by-side weight comparison of ultralight shelters or writing a beginner’s guide to building a sub-20-lb base weight kit, Caleb writes with the same directness you’d expect from a trusted trail partner. He has logged more than 4,000 miles across iconic routes including the John Muir Trail, the Wind River Range, Vermont’s Long Trail, and the Collegiate Peaks Loop in Colorado.
Areas of Expertise
- Ultralight backpacking systems and base weight optimization
- Tent, tarp, and shelter testing across three-season and shoulder-season conditions
- Sleeping bag and quilt temperature rating verification
- Backpacking nutrition, meal planning, and calorie-per-ounce analysis
- Leave No Trace principles and wilderness ethics
- Campfire safety, bear country protocols, and water treatment methods
- Gear care, repair, and long-term durability assessment
Education
James Madison University — B.S. in Environmental Science, 2015
During his time at JMU, Caleb served as President of the Outdoor Recreation Club, where he planned and led more than 30 backcountry trips annually across the Blue Ridge Mountains and Appalachian Trail corridor. The role sharpened his ability to assess gear performance under real conditions, manage group safety in remote environments, and develop the kind of practical trail knowledge that no classroom can teach.
Professional Experience
Gear Writer & Senior Contributor — [campeox.com]
Produces in-depth gear reviews, buyer’s guides, and how-to content across backpacking, camping, and ultralight hiking categories. Tests all gear in real field conditions before publishing recommendations.
Wilderness Educator & Trip Leader — Shenandoah Backcountry Youth Program — 2015–2018 Led multi-day backcountry expeditions for teens and young adults throughout Shenandoah National Park and George Washington National Forest. Taught LNT principles, orienteering, first aid awareness, and campcraft fundamentals.
Outdoor Recreation Club President — James Madison University — 2013–2015 Organized and led university-sponsored hiking, backpacking, and camping trips in the Blue Ridge Mountains and Appalachian Trail corridor. Managed club budget, safety protocols, and trip logistics for a membership of 120+ students.
Editorial Standards
Every piece of gear Caleb recommends has been personally tested in the field — not just unboxed and described. His review process includes a minimum of two overnight trips per shelter, a full-season evaluation for sleep systems, and side-by-side comparisons wherever possible. He does not accept payment for positive reviews. Affiliate relationships, where they exist, are always disclosed in accordance with FTC guidelines.
All factual claims about gear specifications, trail distances, and safety recommendations are cross-referenced against manufacturer data sheets and established sources such as the Leave No Trace Center for Outdoor Ethics and the American Hiking Society before publication.


