

Picture this: you are settling in for a cozy night under the stars, only to wake up to a steady drip of cold water splashing onto your sleeping bag. Nothing ruins a great camping trip faster than a leaky shelter. Fortunately, you do not have to accept defeat when the forecast calls for unexpected rain.
Knowing how to waterproof a tent is a crucial skill for any outdoor enthusiast, whether you are preparing for your very first weekend getaway or restoring a trusty piece of gear you have owned for years. In this guide, we will walk you through everything you need to know to keep the elements out. We cover the necessary supplies, preparation work, and application techniques to ensure your next adventure stays completely dry and comfortable. Let’s get started.
Why Waterproofing Your Tent Matters
Factory sealants degrade over time due to constant ultraviolet exposure, embedded dirt, and general wear and tear. Even the highest-quality outdoor gear requires regular maintenance to perform at its absolute best. Taking the time to apply protective coatings extends the lifespan of your expensive equipment and saves you money in the long run. More importantly, maintaining a reliable barrier against moisture ensures your personal safety and comfort in unpredictable weather.
A damp environment inside your shelter can quickly lead to dangerous drops in body temperature, completely ruining your experience in the backcountry. By treating your gear proactively, you also prevent mold and mildew from taking hold deep within the synthetic fabric. You gain ultimate peace of mind knowing your shelter can withstand heavy downpours, allowing you to focus purely on enjoying the beauty of nature.
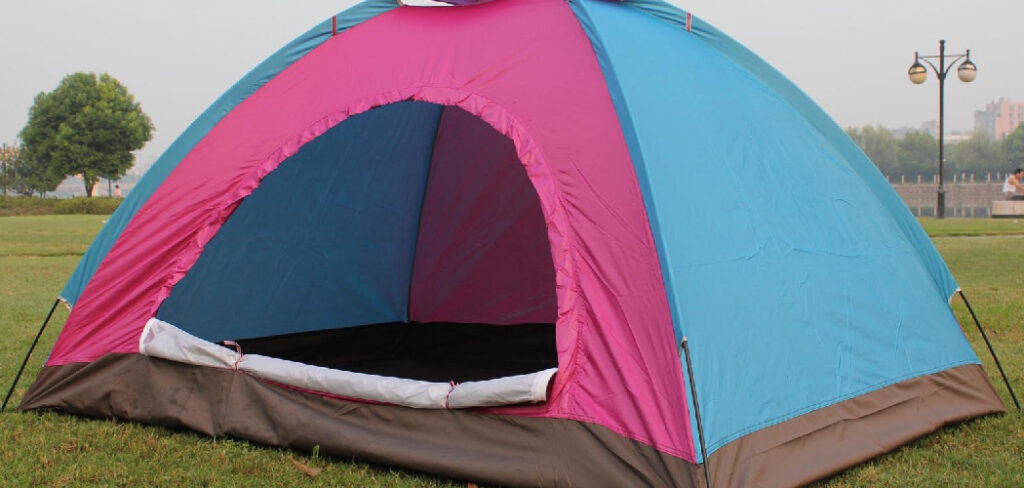
8 Step-by-Step Guide on How to Waterproof a Tent
Step 1: Gather Your Cleaning and Sealing Supplies
Before you begin this maintenance project, you must gather all the necessary supplies to ensure a smooth and continuous process. You will need a gentle, non-detergent soap specifically formulated for outdoor fabrics to avoid stripping any remaining factory treatments. Additionally, pick up a high-quality seam sealer designed specifically for your fabric type, whether it is silicone-treated nylon or standard polyurethane. A durable water repellent spray is also required for treating the outer rainfly. Grab a soft sponge, a bucket for mixing your cleaning solution, and a few microfiber towels to help absorb excess moisture later. Having everything within reach prevents frustrating interruptions once you start working.
Step 2: Choose the Right Location for the Project
Selecting an ideal workspace is essential for achieving the best possible results. You need a dry, shaded, and well-ventilated outdoor area with plenty of flat space to pitch your shelter. Avoid working under direct, harsh sunlight, as intense heat can cause your protective chemicals to dry too quickly and unevenly. A shaded backyard or a spacious, open garage works perfectly for this task. Make sure the ground is clear of sharp sticks, rocks, or debris that could accidentally puncture the delicate floor fabric while you move around. Setting up in a clean environment guarantees that fresh dirt will not blow onto your wet sealants.
Step 3: Wash the Fabric Thoroughly
Applying protective coatings over dirty fabric traps grime and prevents the sealants from bonding correctly. Set up your shelter completely, just as you would at a campsite. Mix your non-detergent soap with cool water in a large bucket. Dip your soft sponge into the soapy water and gently scrub the entire exterior, paying special attention to heavily soiled areas near the base and doors. Never scrub aggressively, as this can damage the woven fibers. Once you have cleaned all the surfaces, use a garden hose on a gentle setting to rinse away every trace of soap residue.
Step 4: Inspect the Seams for Peeling Tape
The seams are typically the first areas to fail during a rainstorm, making them your primary focus during inspection. Walk around your fully pitched shelter and carefully examine both the inside and outside stitching. Look closely for sections where the clear factory seam tape has started to dry out, flake off, or peel away from the fabric. If you find loose tape, gently peel away only the sections that are already failing, leaving the fully bonded tape intact. Removing the compromised material creates a smooth, clean surface, which is absolutely necessary for your new liquid sealant to adhere properly.
Step 5: Apply the Seam Sealer Carefully
When figuring out how to waterproof a tent perfectly, mastering the seam sealing process is arguably the most critical step you will take. Take your chosen tube of liquid seam sealer and gently apply a thin, continuous line directly over the exposed stitching on the inside of the fabric. Use the small brush applicator that typically comes with the product to spread the liquid evenly, ensuring it penetrates deeply into the needle holes. Work methodically from one side to the other so you do not accidentally miss any crucial joints. Allow the sealed seams to dry completely before touching them.
Step 6: Refresh the Polyurethane Coating on the Floor
The floor takes an incredible amount of abuse from rocky ground and constant foot traffic, eventually wearing down its protective barrier. If you notice the floor fabric peeling or feeling sticky, it is time to apply a fresh polyurethane coating. Lay the floor completely flat and use a sponge to apply a thin, even layer of the specialized tent floor sealant across the entire interior surface. Work the liquid thoroughly into the fabric, overlapping your strokes slightly to avoid missing any hidden spots. Leave the doors wide open to guarantee maximum airflow while the floor dries completely.
Step 7: Treat the Rainfly with a Durable Water Repellent
The rainfly serves as your primary shield against heavy precipitation, so it requires a robust exterior treatment. While the fabric is still slightly damp from washing, grab your durable water repellent spray bottle. Hold the nozzle a few inches away from the fabric and spray a generous, even coating across the entire outer surface of the rainfly. Take a clean, damp microfiber cloth and gently wipe the freshly sprayed areas to ensure the liquid distributes uniformly across the synthetic fibers. Pay extra attention to the broad, flat areas where rain tends to pool during heavy storms.
Step 8: Perform a Final Inspection and Water Test
After letting all the applied treatments cure for at least twenty-four hours in a dry, well-ventilated space, you should verify your hard work. Grab your garden hose and simulate a moderate rainstorm by spraying water continuously over the fully assembled shelter. The water should immediately bead up and roll effortlessly off the rainfly and side walls. Climb inside and run your hands along the interior seams and floor to check for any hidden dampness. If everything remains completely dry to the touch, your maintenance project is a success, and your gear is officially ready for the backcountry.
Frequently Asked Questions (FAQ)
How often should I treat my camping gear?
You should ideally inspect and treat your camping shelter at least once every season if you camp regularly. If you only take your gear out a few times a year, a thorough treatment every two to three years is usually sufficient. Always reapply treatments immediately if you notice water no longer beading up on the rainfly during your trips.
Can I use a washing machine to clean the fabric?
You should absolutely never place your camping shelter inside a household washing machine or dryer. The aggressive agitators and intense tumbling action will stretch the fabric, destroy the delicate mesh panels, and completely strip away any remaining factory protective coatings. Hand washing with a soft sponge and specialized soap is the only safe method for cleaning outdoor gear.
What is the difference between seam sealer and DWR spray?
Seam sealer is a thick liquid adhesive designed specifically to plug the tiny holes created by sewing needles along the fabric joints. Durable water repellent, on the other hand, is a lighter chemical spray applied to the broad exterior surfaces to make water bead up and roll away.
- Seam sealers prevent leaks at stitched joints.
- DWR prevents the main fabric panels from absorbing water.
Does applying these treatments change the color of the fabric?
High-quality modern sealants and repellent sprays dry completely clear and will not permanently alter the color of your gear. You might notice the fabric looking slightly darker while the liquid is initially wet, but it will return to its original appearance once fully cured. Always follow the manufacturer instructions closely to ensure a perfectly transparent finish.
How long does the drying process take?
The total curing time largely depends on your local climate, humidity levels, and the specific chemical products you applied. Generally, you should leave your shelter pitched in a shaded, well-ventilated area for at least twenty-four hours. Never pack your gear away until every treated surface feels completely dry and smooth to the touch to prevent mold growth.
Conclusion
Taking the time to maintain your outdoor gear ensures you stay comfortable, warm, and safe regardless of what the weather decides to do. By carefully cleaning the fabric, resealing the delicate seams, restoring the floor coating, and applying a fresh layer of durable water repellent to the rainfly, you can easily add years of life to your favorite shelter.
Do not wait for a miserable, soggy night in the woods to realize your equipment needs attention. Gather your supplies this weekend, clear out a spot in your yard, and try applying these simple techniques yourself. Now that you understand exactly how to waterproof a tent, you can confidently pack your bags and look forward to your next adventure, knowing you are perfectly prepared for any storm that rolls your way.
About Caleb
Caleb Merritt is a Virginia-based outdoor writer and gear analyst who has spent over a decade sleeping on the ground, crossing mountain passes, and obsessively shaving grams off his pack weight. He holds a Bachelor of Science in Environmental Science from James Madison University, where he also served as president of the university’s outdoor recreation club. After graduating, he spent three years as a wilderness educator with a backcountry youth program in the Shenandoah Valley — teaching Leave No Trace ethics, backcountry navigation, and campcraft — before moving into full-time writing in 2018.
His work focuses on one core belief: the best gear is the gear you understand. Whether he’s doing a side-by-side weight comparison of ultralight shelters or writing a beginner’s guide to building a sub-20-lb base weight kit, Caleb writes with the same directness you’d expect from a trusted trail partner. He has logged more than 4,000 miles across iconic routes including the John Muir Trail, the Wind River Range, Vermont’s Long Trail, and the Collegiate Peaks Loop in Colorado.
Areas of Expertise
- Ultralight backpacking systems and base weight optimization
- Tent, tarp, and shelter testing across three-season and shoulder-season conditions
- Sleeping bag and quilt temperature rating verification
- Backpacking nutrition, meal planning, and calorie-per-ounce analysis
- Leave No Trace principles and wilderness ethics
- Campfire safety, bear country protocols, and water treatment methods
- Gear care, repair, and long-term durability assessment
Education
James Madison University — B.S. in Environmental Science, 2015
During his time at JMU, Caleb served as President of the Outdoor Recreation Club, where he planned and led more than 30 backcountry trips annually across the Blue Ridge Mountains and Appalachian Trail corridor. The role sharpened his ability to assess gear performance under real conditions, manage group safety in remote environments, and develop the kind of practical trail knowledge that no classroom can teach.
Professional Experience
Gear Writer & Senior Contributor — [campeox.com]
Produces in-depth gear reviews, buyer’s guides, and how-to content across backpacking, camping, and ultralight hiking categories. Tests all gear in real field conditions before publishing recommendations.
Wilderness Educator & Trip Leader — Shenandoah Backcountry Youth Program — 2015–2018 Led multi-day backcountry expeditions for teens and young adults throughout Shenandoah National Park and George Washington National Forest. Taught LNT principles, orienteering, first aid awareness, and campcraft fundamentals.
Outdoor Recreation Club President — James Madison University — 2013–2015 Organized and led university-sponsored hiking, backpacking, and camping trips in the Blue Ridge Mountains and Appalachian Trail corridor. Managed club budget, safety protocols, and trip logistics for a membership of 120+ students.
Editorial Standards
Every piece of gear Caleb recommends has been personally tested in the field — not just unboxed and described. His review process includes a minimum of two overnight trips per shelter, a full-season evaluation for sleep systems, and side-by-side comparisons wherever possible. He does not accept payment for positive reviews. Affiliate relationships, where they exist, are always disclosed in accordance with FTC guidelines.
All factual claims about gear specifications, trail distances, and safety recommendations are cross-referenced against manufacturer data sheets and established sources such as the Leave No Trace Center for Outdoor Ethics and the American Hiking Society before publication.


