Grabbing a pair of binos for your next camping trip is exciting, but seeing a blurry double image can quickly ruin the fun. You might think holding them up to your eyes is all it takes. However, proper adjustment is the secret to unlocking crystal-clear views of distant wildlife and breathtaking landscapes. If you are a beginner looking to enhance your outdoor adventures, mastering your optics is essential.
Learning how to use binoculars correctly transforms a frustrating experience into an immersive journey. We will walk you through everything from adjusting the eyecups to fine-tuning the focus. By the end of this guide, you will know exactly how to dial in your settings for perfect vision. Grab your gear, head outside, and let us get started on this simple yet rewarding process.
Why You Should Bring Binoculars on Your Next Camping Trip
Packing the right gear defines your camping experience. A quality pair of optics opens up a completely new perspective on the natural world around you. Instead of just staring at a distant, unidentifiable speck in the trees, you can observe a rare bird’s vibrant feathers or track deer moving silently through the brush.
They pull the horizon closer, making every hike and campsite observation far more engaging. Beyond wildlife watching, they are highly practical for scouting trails, finding landmarks, or choosing a safe path across a rocky ridge. They also add magic to stargazing nights away from city lights. When you know how to operate them smoothly, they become an extension of your own eyes, turning an ordinary weekend in the woods into a highly memorable adventure.
Step-by-Step Guide on How to Use Binoculars
Step 1: Understand Your Eye Relief and Adjust the Eyecups
Before you even lift the device to your face, you need to understand eye relief. This refers to the optimal distance between your eyes and the lenses to see the full field of view. Start by adjusting the eyecups, which twist up or fold down depending on your specific model. If you wear glasses, you must keep the eyecups fully retracted or folded down to compensate for the extra space your frames create.
If you do not wear glasses, twist the eyecups all the way up. Extending them ensures your eyes rest at the perfect distance from the glass. Setting the eyecups correctly prevents annoying black shadows from creeping into the edges of your vision, giving you a comfortable and immersive viewing experience right from the start.
Step 2: Set the Proper Hinge Width for Your Eyes
Every person has a unique distance between their pupils, known as interpupillary distance. Because of this, you cannot simply borrow a pair of optics and expect them to fit your face perfectly. To fix this, grasp both barrels firmly and look through the lenses at a bright, distant object. Slowly pivot the center hinge, pushing the barrels closer together or pulling them further apart.
Keep adjusting the angle until the two separate circles merge into a single, perfectly round picture. If you see overlapping edges or a figure-eight shape, the barrels are not aligned with your eyes yet. Getting this width right is crucial because it ensures both eyes receive a clear image simultaneously, reducing severe eye strain during long camping trips and extended wildlife watching sessions.
Step 3: Locate the Diopter Adjustment Ring
Most people have slight differences in vision between their left and right eyes. The diopter adjustment compensates for this difference, allowing you to achieve a sharp focus in both eyes simultaneously. Before adjusting anything, you need to find the diopter ring. Look closely at your device; the ring is typically located right underneath the right eyepiece. It usually features small markings, including a plus sign, a minus sign, and a zero in the center.
On some specific models, this adjustment might be integrated directly into the central focus wheel, requiring you to pull the wheel up to unlock it. Finding and understanding this specific component is the absolute key to preventing headaches and ensuring you get the crispest, most highly detailed view of the wilderness possible.
Step 4: Focus Your Left Eye First
Now that you have located the diopter, it is time to isolate your vision. Start by picking a stationary object about thirty to fifty feet away, such as a sharp tree branch or a distinct rock formation. Keep both eyes open to avoid straining your facial muscles, but use your hand or a lens cover to completely block the right objective lens. With your right side covered, look exclusively through the left eyepiece.
Slowly turn the main central focusing wheel located between the two barrels. Keep rotating it gently back and forth until the object you selected becomes incredibly sharp and crystal clear. This step ensures that your left eye is perfectly calibrated to the main focal plane before you even worry about matching your right eye.
Step 5: Adjust the Diopter for Your Right Eye
Once your left eye has a brilliantly clear view, leave the central focus wheel completely alone. Do not touch it. Now, move your hand or the lens cover over to block the left objective lens, allowing you to see only through the right side. Look at the exact same tree branch or rock you focused on in the previous step. Next, turn the diopter adjustment ring located on the right eyepiece.
Rotate it carefully toward the plus or minus symbols until the target snaps into perfect focus for your right eye. Take your time with this delicate adjustment. Once the image is perfectly sharp, take note of where the indicator lines up on the scale. Your optics are now custom-tailored to your unique personal vision requirements.
Step 6: Test the Combined View
You have calibrated the left side and fine-tuned the right side. Remove all lens covers and drop your hands away from the front of the barrels. Look through both eyepieces simultaneously at the same distant object you used for calibration. The image should be incredibly crisp, clear, and perfectly unified without any blurring or ghosting. You should feel zero strain on your eyes.
If the picture feels slightly off or causes an immediate headache, you may need to repeat the diopter adjustment process. Once everything looks pristine, you will never need to touch the diopter ring again unless someone else changes the settings or your vision changes. From this point onward, your custom setup is locked in and ready for the trails.
Step 7: Master the Central Focus Wheel in the Field
With the diopter perfectly set, operating your optics becomes incredibly straightforward. Whenever you want to look at a new subject, whether it is a bird flying overhead or a distant mountain peak, you only need to use the central focus wheel. Simply bring the device to your eyes and roll the center wheel with your index finger until the new target becomes sharp.
Because you already balanced the internal optical differences between your eyes, the central wheel will now bring both sides into focus perfectly at the same time. Practice shifting your focus rapidly between objects that are close to you and those far away. This muscle memory will help you track moving wildlife easily without losing precious seconds fumbling with the controls.
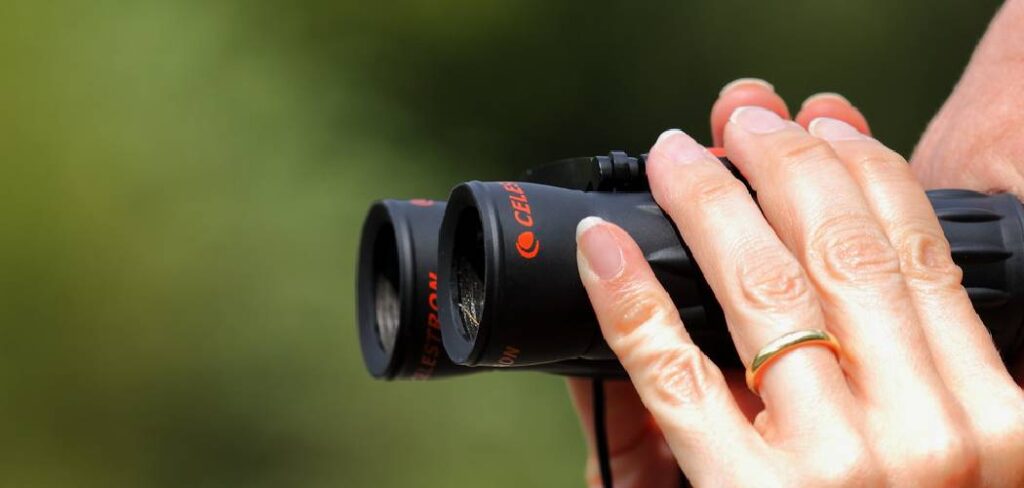
Step 8: Practice Proper Holding Techniques
Even perfectly focused optics are useless if your hands are shaking wildly. Holding your equipment correctly minimizes image jitter and reduces arm fatigue during long observation periods. Grip the barrels firmly with both hands, wrapping your fingers comfortably around the textured rubber armor. Instead of letting your elbows flare out to the sides, tuck them tightly against your chest.
This creates a solid, stable foundation using your body core rather than relying solely on your shoulder muscles. If you are standing, keep your feet shoulder-width apart to maintain good balance. For extended viewing, try sitting down and resting your elbows securely on your knees. Mastering this stable grip ensures that your magnified view remains smooth, allowing you to spot tiny details effortlessly.
Step 9: Learn How to Track Moving Targets
Tracking a moving subject, like a soaring eagle or a running deer, takes a bit of practice and coordination. The biggest mistake beginners make is immediately lowering their head to look through the lenses and then blindly searching the sky. Instead, keep your eyes locked firmly on the animal with your naked eye. Without looking away from the subject, smoothly raise the equipment up to your face.
Because your eyes are already tracking the movement, the subject should appear instantly within your field of view. Once you spot it through the glass, use your index finger to make tiny, continuous adjustments to the central focus wheel as the animal changes distance. This seamless transition keeps you deeply immersed in the action without losing the subject.
Step 10: Clean and Maintain Your Optics
Taking care of your equipment ensures it will last through countless camping trips and outdoor excursions. Dust, dirt, and oily fingerprints easily degrade image quality and can permanently damage delicate optical coatings. Never use your t-shirt or a standard paper towel to wipe the glass, as these materials can cause microscopic scratches. Instead, always use a dedicated lens brush or an air blower to gently remove loose debris first.
Afterward, wipe the surface using a specialized microfiber cleaning cloth and proper lens cleaning solution. Always keep the protective caps securely over the objective lenses and eyepieces when not in use. Storing them safely in a padded carrying case protects them from accidental drops and harsh weather conditions, keeping them ready for your next big adventure.
Read More: How to Clean Binoculars
Frequently Asked Questions
How Do I Know What the Numbers on My Binoculars Mean?
The numbers, such as 8×42 or 10×50, represent the magnification and the objective lens diameter. The first number tells you how many times closer the object appears. The second number is the size of the front lenses in millimeters. Larger objective lenses let in significantly more light, which drastically improves image brightness during dawn and dusk.
Can I Use My Optics While Wearing Prescription Glasses?
Yes, you can absolutely use them while wearing prescription glasses without sacrificing image quality. The secret lies in managing the eye relief distance properly.
- Twist or fold the eyecups down completely.
- Rest the retracted eyecups directly against your eyeglass frames.
- Ensure you can see the entire circular field of view clearly.
Why Am I Seeing a Black Shadow Around the Edges?
Seeing a black ring or a kidney bean-shaped shadow means your eyes are not positioned at the correct distance from the ocular lenses. This is a very common issue for beginners. To resolve this, simply adjust the eyecups. Twist them up if you are not wearing glasses, or retract them if you are. Also, double-check your center hinge width.
What Is the Best Magnification for General Camping and Hiking?
For most outdoor activities, an 8x or 10x magnification is considered the sweet spot. These sizes offer a fantastic balance between a wide field of view and impressive magnifying power.
- 8x models are easier to hold steady and offer better light transmission.
- 10x models pull distant wildlife closer but magnify hand shakiness.
How Do I Fix a Double Image When Looking Through the Lenses?
A double image typically occurs when the interpupillary distance is set incorrectly or the internal prisms have been knocked out of alignment. First, try adjusting the central hinge width until the two viewing circles merge perfectly into one solid picture. If you still see a double image, your equipment might have suffered impact damage and will require professional repair.
Why are my binoculars always blurry no matter what I try?
Blurry images are almost always caused by one of three things: an incorrect diopter setting, a mismatch in interpupillary distance, or simply not using the central focus wheel fully. Start by adjusting the IPD until you see a single round image, then set the diopter for each eye individually as described in the setup steps above. Also check that your lenses are clean — even a thin film of condensation or a fingerprint can dramatically reduce clarity. If images remain blurry after all adjustments, the binoculars may have internal moisture or a misaligned prism, which requires professional servicing rather than a DIY fix.
Can I use binoculars in the rain or near water?
Yes, but it depends on the waterproofing rating of your specific model. Many modern binoculars are fully waterproof and nitrogen-purged, meaning they are sealed against water ingress and will not fog internally even in heavy rain or when submerged briefly. Look for terms like “waterproof,” “fog-proof,” or an IPX rating (IPX7 means submersible up to 1 meter for 30 minutes). Budget models are often only “water-resistant,” which means they handle light rain but should not be submerged. If you frequently camp near rivers, lakes, or in wet climates, investing in a fully waterproof pair is absolutely worth it for long-term reliability and optical performance.
What is the best way to carry binoculars while hiking or camping?
The most comfortable and practical carrying methods depend on your activity. A binocular harness — which distributes weight across both shoulders rather than placing it all on your neck — is ideal for long hikes and prevents the neck strain that comes with a standard strap. For shorter outings, a padded neck strap works perfectly well. Always keep the objective lens caps on and use the tethered rain guard over the eyepieces when not actively viewing. If you are scrambling over rocky terrain, tuck the binoculars under your jacket or use a chest pouch with a secure closure to protect against impact and accidental drops on uneven ground.
Conclusion
Mastering your outdoor gear fundamentally changes the way you experience nature. We covered the essential steps to prepare your optics, starting with adjusting the eyecups and setting the correct barrel width. We also discussed the vital process of calibrating the diopter ring to match your specific vision and locking in that crystal-clear focus. These simple adjustments ensure that every bird, mountain, or star you observe is sharp and beautifully detailed without causing any frustrating eye strain.
Now that you understand how to use binoculars properly, it is time to put these skills into practice. Do not let your equipment sit collecting dust in your camping box. Grab your pair, step outside, and start exploring the hidden details of the wilderness waiting just beyond your normal eyesight. The more you practice tracking moving objects and fine-tuning the central focus wheel, the more natural the entire process will feel. Get out there, embrace the adventure, and discover a breathtaking new perspective on the great outdoors.
About Caleb
Caleb Merritt is a Virginia-based outdoor writer and gear analyst who has spent over a decade sleeping on the ground, crossing mountain passes, and obsessively shaving grams off his pack weight. He holds a Bachelor of Science in Environmental Science from James Madison University, where he also served as president of the university’s outdoor recreation club. After graduating, he spent three years as a wilderness educator with a backcountry youth program in the Shenandoah Valley — teaching Leave No Trace ethics, backcountry navigation, and campcraft — before moving into full-time writing in 2018.
His work focuses on one core belief: the best gear is the gear you understand. Whether he’s doing a side-by-side weight comparison of ultralight shelters or writing a beginner’s guide to building a sub-20-lb base weight kit, Caleb writes with the same directness you’d expect from a trusted trail partner. He has logged more than 4,000 miles across iconic routes including the John Muir Trail, the Wind River Range, Vermont’s Long Trail, and the Collegiate Peaks Loop in Colorado.
Areas of Expertise
- Ultralight backpacking systems and base weight optimization
- Tent, tarp, and shelter testing across three-season and shoulder-season conditions
- Sleeping bag and quilt temperature rating verification
- Backpacking nutrition, meal planning, and calorie-per-ounce analysis
- Leave No Trace principles and wilderness ethics
- Campfire safety, bear country protocols, and water treatment methods
- Gear care, repair, and long-term durability assessment
Education
James Madison University — B.S. in Environmental Science, 2015
During his time at JMU, Caleb served as President of the Outdoor Recreation Club, where he planned and led more than 30 backcountry trips annually across the Blue Ridge Mountains and Appalachian Trail corridor. The role sharpened his ability to assess gear performance under real conditions, manage group safety in remote environments, and develop the kind of practical trail knowledge that no classroom can teach.
Professional Experience
Gear Writer & Senior Contributor — [Your Website Name]
Produces in-depth gear reviews, buyer’s guides, and how-to content across backpacking, camping, and ultralight hiking categories. Tests all gear in real field conditions before publishing recommendations.
Wilderness Educator & Trip Leader — Shenandoah Backcountry Youth Program — 2015–2018 Led multi-day backcountry expeditions for teens and young adults throughout Shenandoah National Park and George Washington National Forest. Taught LNT principles, orienteering, first aid awareness, and campcraft fundamentals.
Outdoor Recreation Club President — James Madison University — 2013–2015 Organized and led university-sponsored hiking, backpacking, and camping trips in the Blue Ridge Mountains and Appalachian Trail corridor. Managed club budget, safety protocols, and trip logistics for a membership of 120+ students.
Editorial Standards
Every piece of gear Caleb recommends has been personally tested in the field — not just unboxed and described. His review process includes a minimum of two overnight trips per shelter, a full-season evaluation for sleep systems, and side-by-side comparisons wherever possible. He does not accept payment for positive reviews. Affiliate relationships, where they exist, are always disclosed in accordance with FTC guidelines.
All factual claims about gear specifications, trail distances, and safety recommendations are cross-referenced against manufacturer data sheets and established sources such as the Leave No Trace Center for Outdoor Ethics and the American Hiking Society before publication.