Imagine standing at a trail junction with no signposts, your phone dead, and fog rolling in. That sinking feeling fades fast when you know how to use a compass for hiking. This simple tool never runs out of battery, never loses signal, and always points you toward safety. It’s one of the oldest navigation aids around, yet it still outperforms modern gadgets when things go wrong.
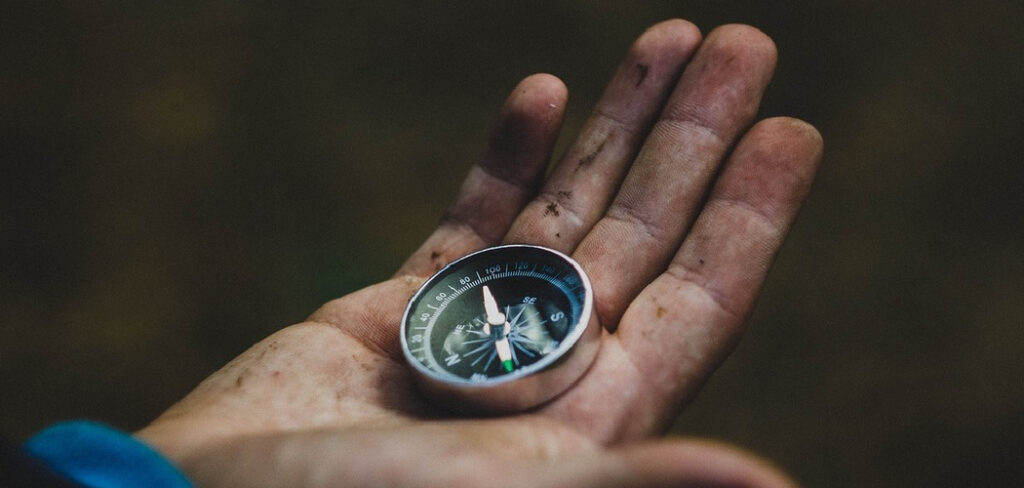
You don’t need to be an expert to get started. With a basic baseplate compass and a little practice, you can find your direction, follow a bearing, and stay confident on any trail. This guide walks you through everything from reading the dial to correcting for declination, so you feel ready before your next hike into the wild.
Why Knowing How to Navigate With a Compass Matters
New hikers often lean entirely on GPS apps, and that works fine until it doesn’t. Batteries die, screens crack, and signal vanishes deep in the backcountry. A compass keeps working no matter what, which makes it a lifesaver when technology fails you.
Learning trail navigation also sharpens your awareness of the landscape. You start reading the terrain, noticing ridgelines, and connecting what you see to what’s on your map. That skill builds real confidence for camping trips and longer treks.
For beginners, this knowledge means freedom. You can explore unmarked routes, push farther from crowded trails, and trust yourself to find the way back. Pairing a compass with map reading turns you from a passive follower into a capable navigator who never feels truly lost.
Tools and Materials You’ll Need
Before your first practice session, gather a few basics. You won’t need much, and most of it fits in a jacket pocket.
Start with a quality baseplate compass. This clear, flat-bottomed model lets you line it up directly on a map, and it includes a rotating bezel and direction-of-travel arrow. Add a topographic map of your hiking area, since a compass alone only shows direction, not the lay of the land.
Bring a pencil for marking bearings and jotting notes on waterproof paper. A small ruler helps you measure distances accurately, though the straight edge of your compass baseplate often does the job just fine.
One optional item makes life easier: a compass with a sighting mirror. It boosts accuracy on long-distance bearings and doubles as a signaling tool in emergencies.
8 Step-by-Step Guide on How to Use a Compass for Hiking
Ready to find your way with confidence? Follow these steps in order, and you’ll build a solid foundation. Knowing how to use a compass for hiking comes down to a handful of clear actions you’ll repeat on every trip.
Step 1 – Learn the Parts of Your Compass
Before you head out, get familiar with the tool in your hand. Hold the baseplate flat and notice the clear plastic body with printed ruler markings along the edge. This is the part you’ll rest on your map.
Turn the rotating bezel, also called the housing, and watch the degree markings spin from 0 to 360. Inside sits the magnetic needle, usually red on one end. That red tip always swings toward magnetic north.
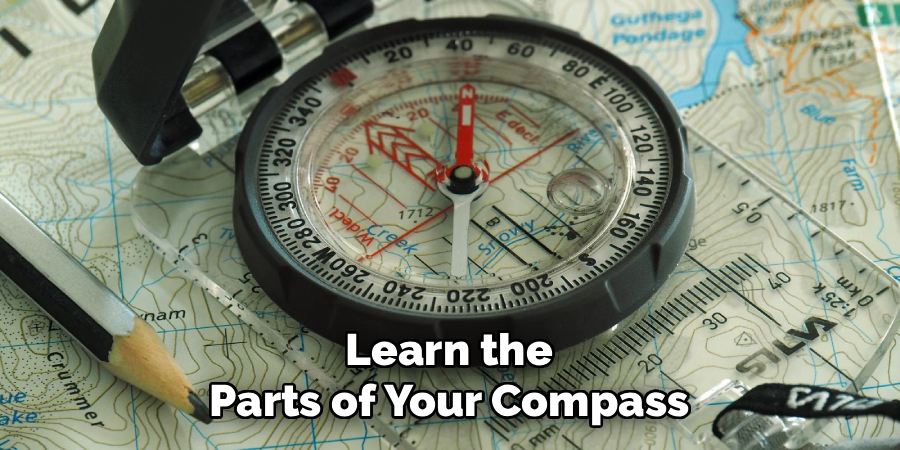
You’ll also spot the direction-of-travel arrow pointing away from the baseplate, plus the orienting arrow etched inside the housing. Spend a few minutes turning the dial and watching the needle settle. Feeling how each piece moves now makes everything that follows click into place.
Step 2 – Find Magnetic North
Start by holding your compass flat in your palm, level with the ground, and away from metal objects. Keys, phones, and even belt buckles can pull the needle off course, so keep them clear.
Watch the red needle swing and settle. It points toward magnetic north, the direction the Earth’s magnetic field pulls it. This is your anchor for everything else.
Notice how the needle wobbles and then steadies, like a tiny arrow finding its home. Give it a second to calm down before you trust the reading.
Practice this in your backyard first. Turn slowly in a circle and watch the needle stay locked on north while the baseplate rotates around it. That steady red tip becomes your reliable friend on the trail.
Step 3 – Set Your Declination
Here’s where many beginners stumble, so slow down. Magnetic north and true north aren’t the same place. The angle between them is called declination, and it changes depending on where you stand on the map.
Check your topographic map’s legend for the local declination value. It might read something like 12 degrees east or 8 degrees west. Getting this right keeps you from drifting far off course over a long hike.
Most quality compasses let you adjust declination with a small screw or a rotating scale. Set it once for your region, and your readings will match your map. Ignoring this step can send you hundreds of yards astray, so treat it as essential, not optional.
Step 4 – Orient Your Map
Lay your topographic map on a flat surface, like a rock or your knee. Place your compass on top with the baseplate edge lined up along the map’s north-south grid lines.
Now rotate the whole map, compass and all, until the magnetic needle sits inside the orienting arrow. Your map now matches the real world around you. The mountains printed on paper line up with the peaks in front of you.
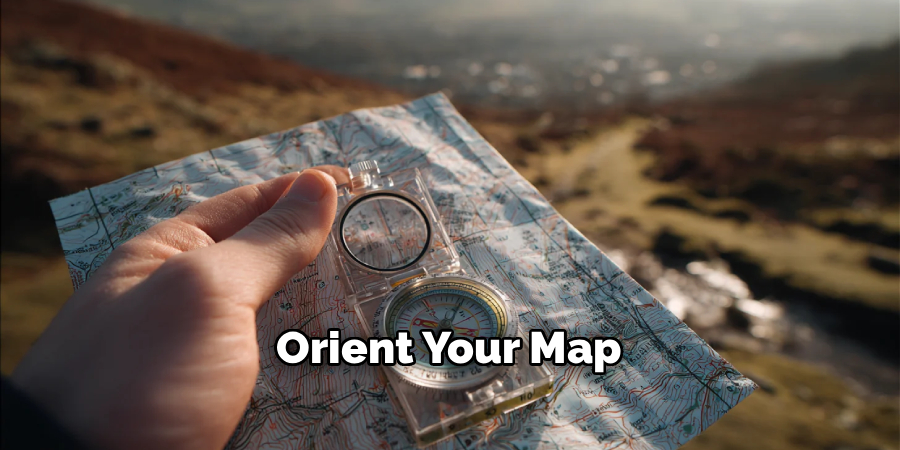
This moment feels almost magical. Suddenly the flat drawing makes sense, and you can see how the trail bends around that ridge to your left. Orienting your map turns confusing squiggles into a clear picture of where you stand and where you’re headed.
Step 5 – Take a Bearing From Your Map
Decide where you want to go, then find that spot on your map. Place the edge of your baseplate so it connects your current location to your destination, with the direction-of-travel arrow pointing the way.
Hold the baseplate steady and rotate the bezel until its orienting lines run parallel with the map’s north-south grid lines. Make sure the orienting arrow points to map north, not south.
Read the number at the index line where the bezel meets the direction-of-travel arrow. That’s your bearing, measured in degrees. Learning how to use a compass for hiking really clicks here, because this single number tells you exactly which way to walk, no matter what the terrain throws at you.
Step 6 – Follow Your Bearing on the Trail
Lift the compass off the map and hold it flat in front of your chest. Keep the direction-of-travel arrow pointing straight ahead, away from your body.
Now turn your whole body, feet and all, until the magnetic needle drops neatly inside the orienting arrow. Guides call this “putting the dog in the doghouse.” Once the red needle sits snug in that outline, you’re facing your bearing.
Pick a distant landmark along that line, like a boulder or a lone tree. Walk toward it without staring at the compass the whole way. When you reach it, check your bearing again and choose the next landmark. This leapfrog method keeps you straight and steady across open ground.
Step 7 – Check Your Progress Regularly
Don’t set a bearing and forget it. Terrain pushes you around, and small drifts add up fast over a few miles. Pause every so often to confirm you’re still on track.
Pull out your map, orient it again, and match visible features to what’s printed. Does that stream crossing line up? Is the ridge where it should be? These checks catch mistakes early, while they’re still easy to fix.
The crunch of gravel underfoot and the shifting view give you natural checkpoints. Trust both your compass and your eyes together. Regular check-ins build a habit that keeps you found, turning navigation from a nervous guessing game into a calm, confident routine.
Step 8 – Practice in Safe Terrain First
Before you rely on these skills in remote country, rehearse close to home. Head to a local park or a familiar trail where getting turned around carries low stakes.
Set small bearings between obvious landmarks and walk them out. Try orienting your map at each stop. Feel the compass warm in your hand as the habit sinks in through repetition.
Mistakes made in a safe spot become valuable lessons instead of emergencies. The more you practice orienteering in low-pressure settings, the faster these steps become second nature. By the time you tackle a wild ridge or a foggy forest, your hands will know exactly what to do without much thinking.
Common Mistakes When Using a Compass on the Trail
Even with a simple tool, beginners slip up in predictable ways. The biggest mistake is ignoring declination entirely. When you skip adjusting for the gap between magnetic north and true north, your bearings drift steadily off course. Over a long hike, that small error can leave you hundreds of yards from where you meant to be, sometimes in genuinely risky terrain.
Another frequent error is holding the compass near metal or electronics. Your phone, a metal water bottle, or even a car nearby tugs the needle away from true magnetic north. Always step clear of metal objects and hold the compass flat and level before you trust the reading.
Many new navigators also forget to keep their map oriented as they move. They set it down once, then follow it upside down or sideways, which scrambles their sense of direction completely. Re-orient your map every time you stop.
Finally, plenty of hikers rely on their compass alone without a topographic map. A bearing tells you direction, but only a map shows terrain, elevation, and hazards. Carry both, practice with them together, and you’ll avoid the confusion that catches so many beginners off guard.
Expert Tips
Want to sharpen your navigation even further? Always take a back bearing before you set off. Note the direction back to your starting point, so you can retrace your steps if the weather turns or the trail vanishes.
Handrails make life easier, too. Follow a natural feature like a river, ridge, or fence line that runs your way, and you’ll need fewer precise bearings. Nature does some of the work for you.
Keep your thumb on your current spot on the map as you walk, a trick called thumbing. It saves you from hunting for your position every time you check. And practice at night with a headlamp. If you can navigate confidently in the dark, daylight feels effortless by comparison.
Frequently Asked Questions
Do I really need a compass if I have a GPS?
Yes, absolutely. GPS devices and phone apps depend on batteries and signal, both of which fail in cold weather, deep canyons, or dense forest. A compass works in any condition without power. Think of it as your reliable backup that never quits. Carrying both gives you the best of modern convenience and time-tested dependability, so you’re never truly stranded.
What is declination and why does it matter?
Declination is the angle between magnetic north, where your needle points, and true north, which your map uses. This gap varies by location and slowly shifts over years. If you ignore it, your bearings drift off course, sometimes badly over long distances. Check your map’s legend for the local value, adjust your compass, and your readings will line up accurately with the terrain.
Can a compass work without a map?
A compass alone tells you direction, but it can’t show you terrain, elevation, or hazards. You can use it to hold a straight line or return to a known direction, which helps in a pinch. For real trail navigation, though, pair it with a topographic map. Together they let you plan routes, track progress, and understand the landscape around you far more completely.
How do I keep my compass accurate?
Keep your compass away from metal objects, magnets, and electronics, since these pull the needle off true. Store it flat and avoid extreme heat, which can damage the housing or trap air bubbles in the fluid. Check it against a known direction now and then. A small bubble is usually harmless, but a badly stuck needle means it’s time for a replacement.
How long does it take to learn compass navigation?
You can grasp the basics in a single afternoon of practice. Finding north, taking a bearing, and following it feels natural within a few tries. Building real confidence takes several outings in varied terrain. Start in a safe local park, repeat the steps often, and add small challenges each time. Within a few weeks of regular practice, the whole process becomes second nature.
Conclusion
A compass turns any hike into a safer, more confident adventure, no matter how remote the trail. Once you understand how to use a compass for hiking, you’ll never panic when your phone dies or the fog rolls in. You can find north, set a bearing, and follow it straight to your destination, trusting a tool that never lets you down.
Start simple. Learn your compass parts, set your declination, orient your map, and practice in a safe park before heading into the backcountry. Take a bearing, follow your landmarks, and check your progress often. Each step builds on the last, and soon the whole routine feels effortless.
The real reward here is freedom. Instead of clinging to marked trails and worrying about dead batteries, you can explore boldly and find your own way home. So grab your baseplate compass, unfold your map, and hit the trail with fresh confidence. The wilderness is waiting, and now you have the skills to navigate it.

About Caleb
Caleb Merritt is a Virginia-based outdoor writer and gear analyst who has spent over a decade sleeping on the ground, crossing mountain passes, and obsessively shaving grams off his pack weight. He holds a Bachelor of Science in Environmental Science from James Madison University, where he also served as president of the university’s outdoor recreation club. After graduating, he spent three years as a wilderness educator with a backcountry youth program in the Shenandoah Valley — teaching Leave No Trace ethics, backcountry navigation, and campcraft — before moving into full-time writing in 2018.
His work focuses on one core belief: the best gear is the gear you understand. Whether he’s doing a side-by-side weight comparison of ultralight shelters or writing a beginner’s guide to building a sub-20-lb base weight kit, Caleb writes with the same directness you’d expect from a trusted trail partner. He has logged more than 4,000 miles across iconic routes including the John Muir Trail, the Wind River Range, Vermont’s Long Trail, and the Collegiate Peaks Loop in Colorado.
Areas of Expertise
- Ultralight backpacking systems and base weight optimization
- Tent, tarp, and shelter testing across three-season and shoulder-season conditions
- Sleeping bag and quilt temperature rating verification
- Backpacking nutrition, meal planning, and calorie-per-ounce analysis
- Leave No Trace principles and wilderness ethics
- Campfire safety, bear country protocols, and water treatment methods
- Gear care, repair, and long-term durability assessment
Education
James Madison University — B.S. in Environmental Science, 2015
During his time at JMU, Caleb served as President of the Outdoor Recreation Club, where he planned and led more than 30 backcountry trips annually across the Blue Ridge Mountains and Appalachian Trail corridor. The role sharpened his ability to assess gear performance under real conditions, manage group safety in remote environments, and develop the kind of practical trail knowledge that no classroom can teach.
Professional Experience
Gear Writer & Senior Contributor — [campeox.com]
Produces in-depth gear reviews, buyer’s guides, and how-to content across backpacking, camping, and ultralight hiking categories. Tests all gear in real field conditions before publishing recommendations.
Wilderness Educator & Trip Leader — Shenandoah Backcountry Youth Program — 2015–2018 Led multi-day backcountry expeditions for teens and young adults throughout Shenandoah National Park and George Washington National Forest. Taught LNT principles, orienteering, first aid awareness, and campcraft fundamentals.
Outdoor Recreation Club President — James Madison University — 2013–2015 Organized and led university-sponsored hiking, backpacking, and camping trips in the Blue Ridge Mountains and Appalachian Trail corridor. Managed club budget, safety protocols, and trip logistics for a membership of 120+ students.
Editorial Standards
Every piece of gear Caleb recommends has been personally tested in the field — not just unboxed and described. His review process includes a minimum of two overnight trips per shelter, a full-season evaluation for sleep systems, and side-by-side comparisons wherever possible. He does not accept payment for positive reviews. Affiliate relationships, where they exist, are always disclosed in accordance with FTC guidelines.
All factual claims about gear specifications, trail distances, and safety recommendations are cross-referenced against manufacturer data sheets and established sources such as the Leave No Trace Center for Outdoor Ethics and the American Hiking Society before publication.